20/01/2023 11:08:03
Tuner - Radio (RHD) (Remove and Replace)
Correction Code 21220402
Removal
- Remove the HEPA filter. See Filter - HEPA (Remove and Replace).
- Disconnect 12V power. See (refer to procedure).
- Remove the accelerator pedal. See (refer to procedure).
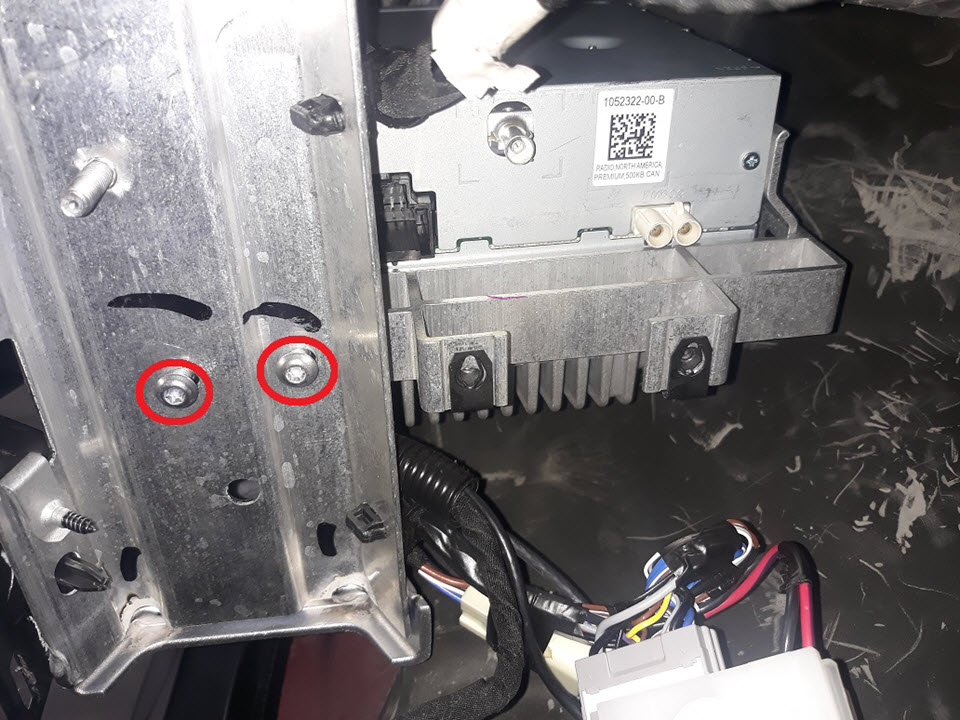
-
Remove the screws (x2) that
attach the OBDII connector to the tuner bracket, and then remove the
connector from the bracket (torque 2.3 Nm).
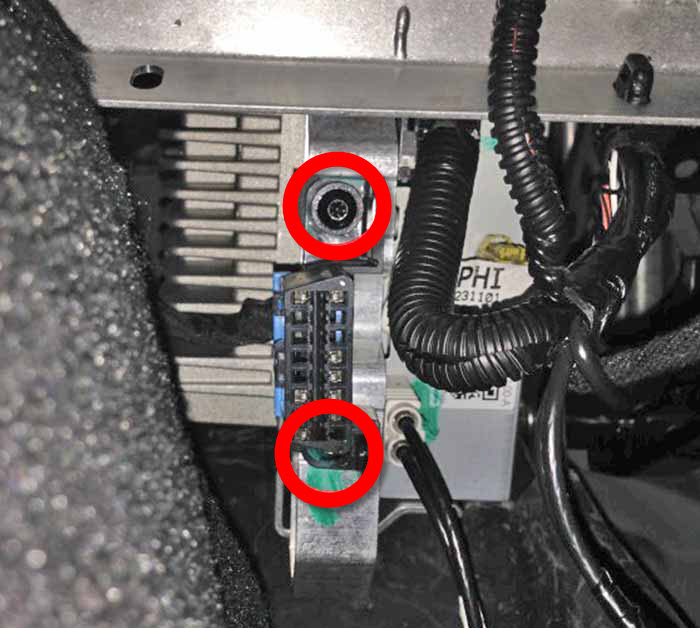
-
Disconnect the electrical harness from the premium amplifier connector, if equipped.
- Remove steering column. See (refer to procedure).
- Remove brake pedal. See (refer to procedure).
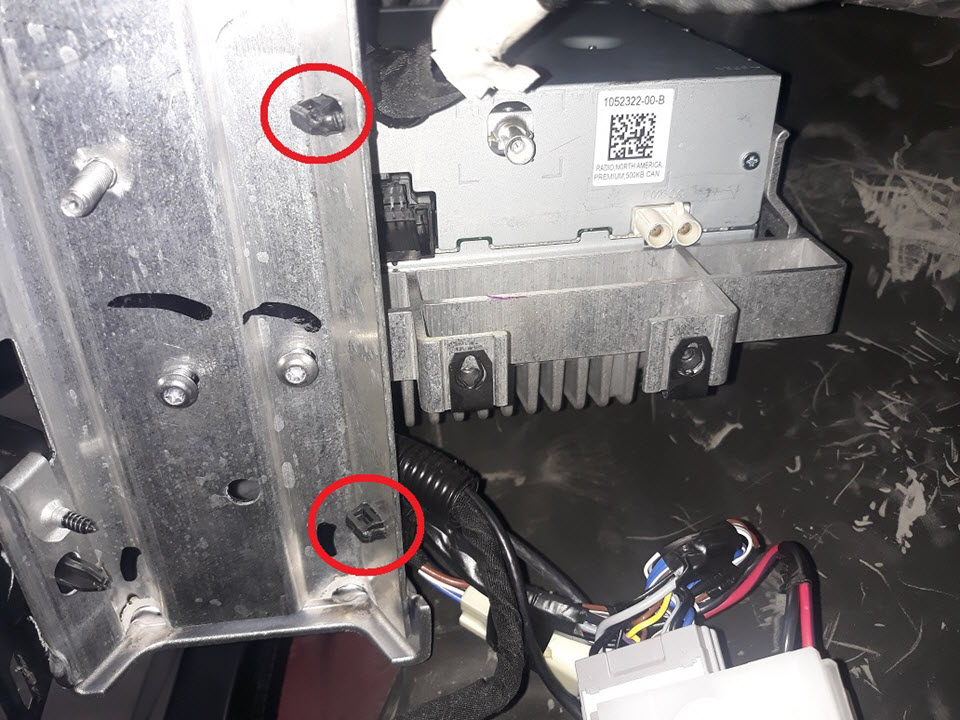
-
Release the clips (x2) that attach the main electrical harness to the bulkhead, and move the harness away from the radio tuner.
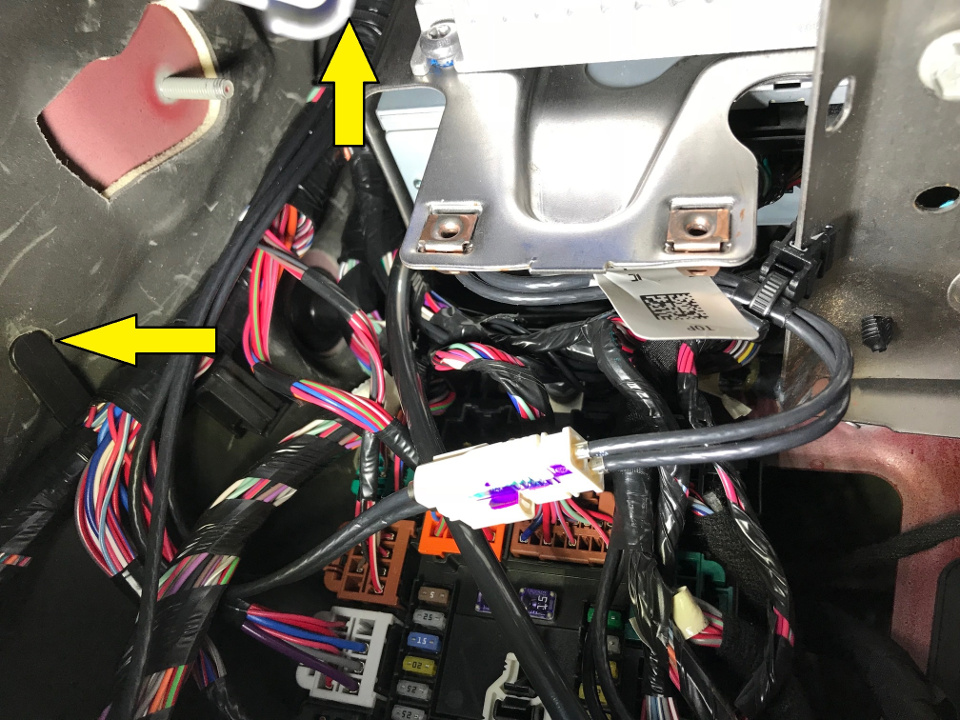
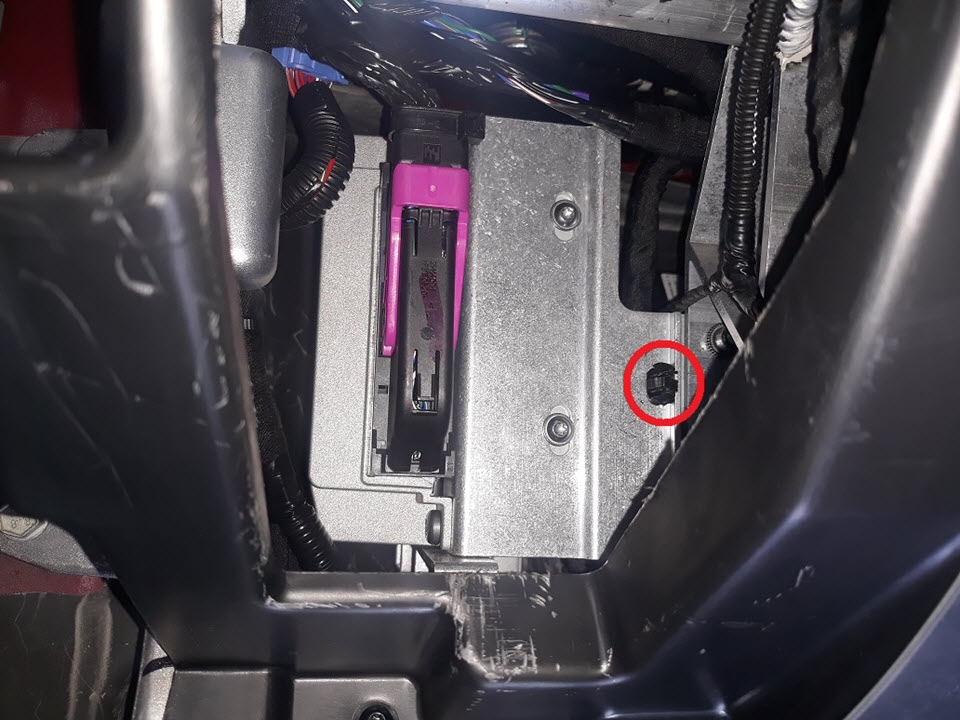
-
Release the edge clip that attaches the front electrical harness to the body, and move the harness away from the radio tuner.
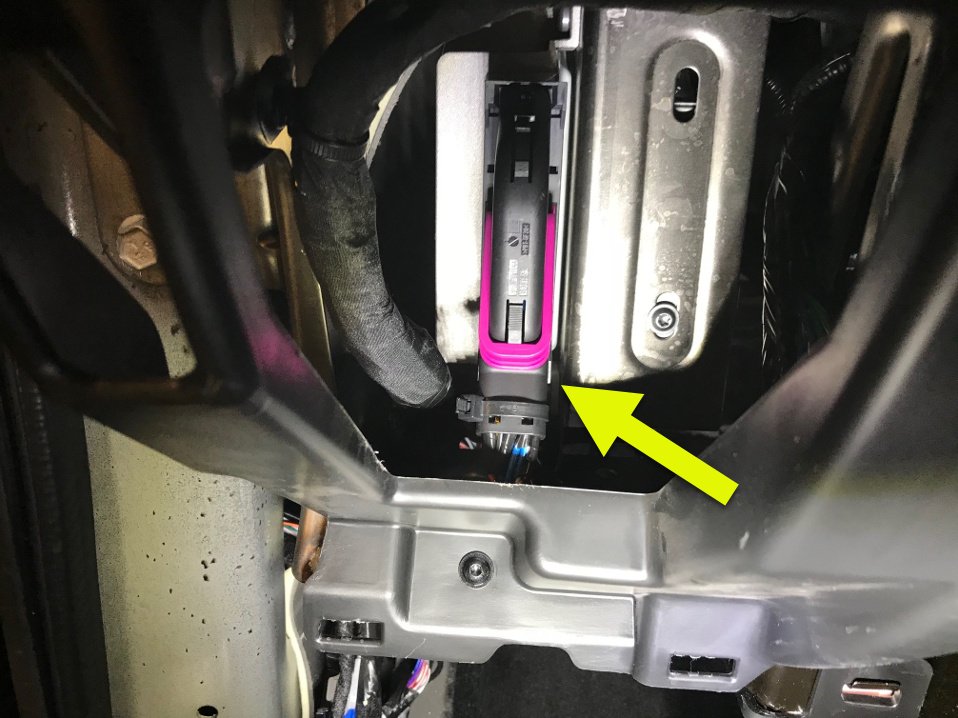
-
Disconnect the electrical connectors from the radio tuner.
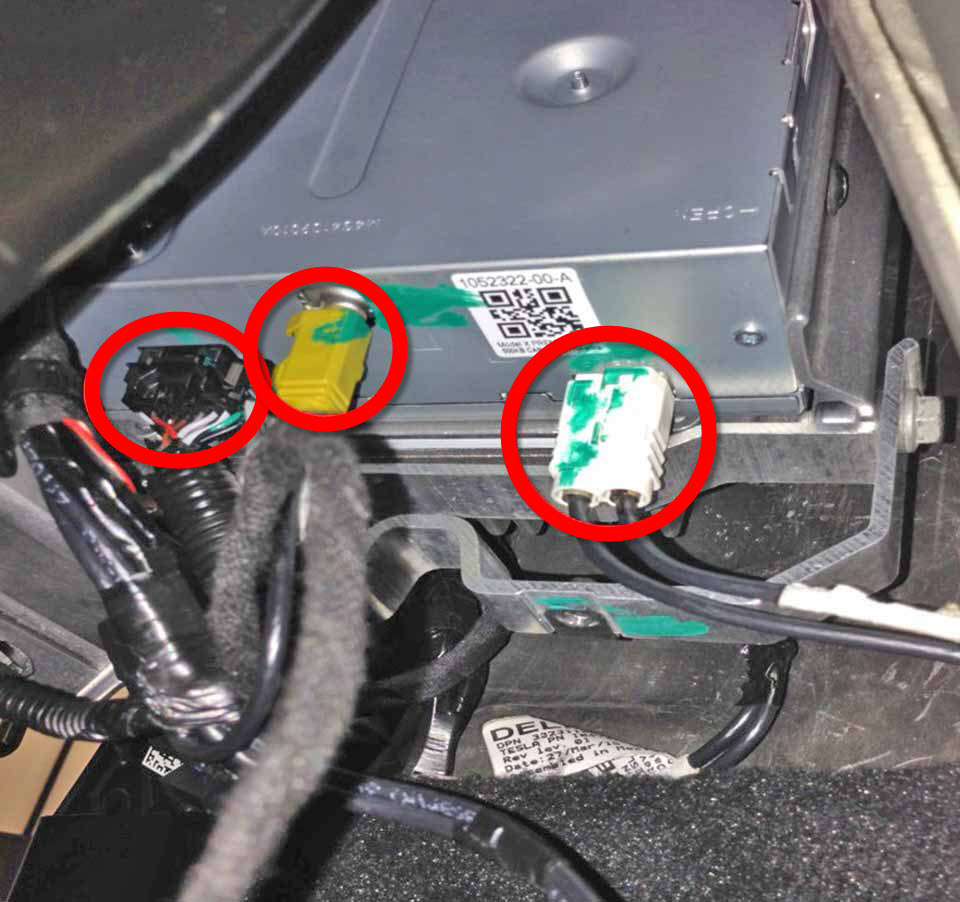
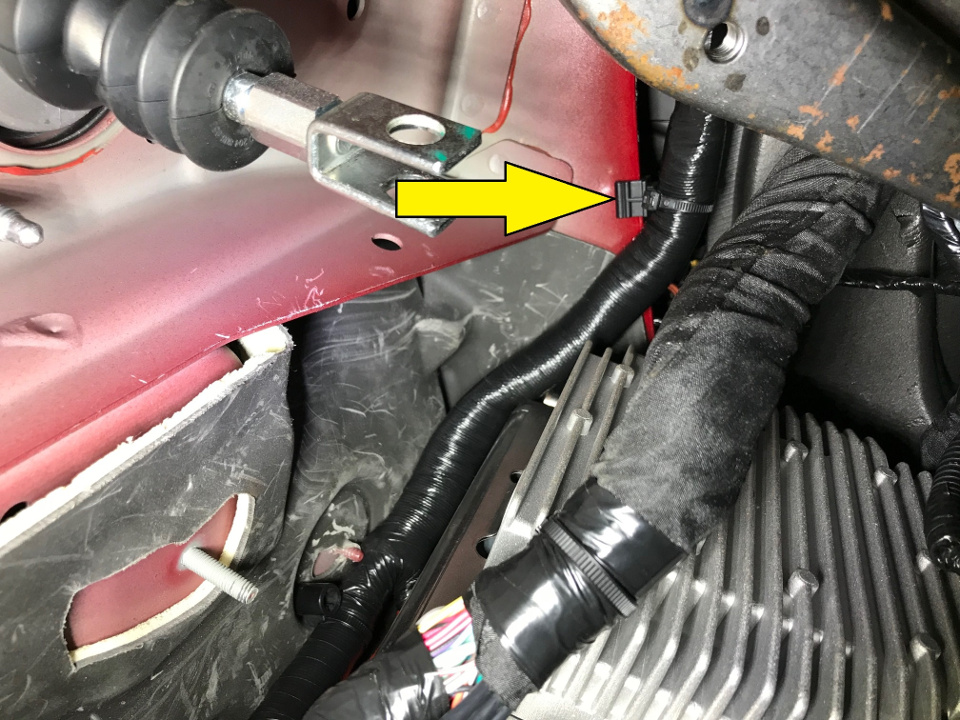
-
Release the fir tree clips (x3) that attach the electrical harness to the vehicle, and then move the electrical harness to the side.
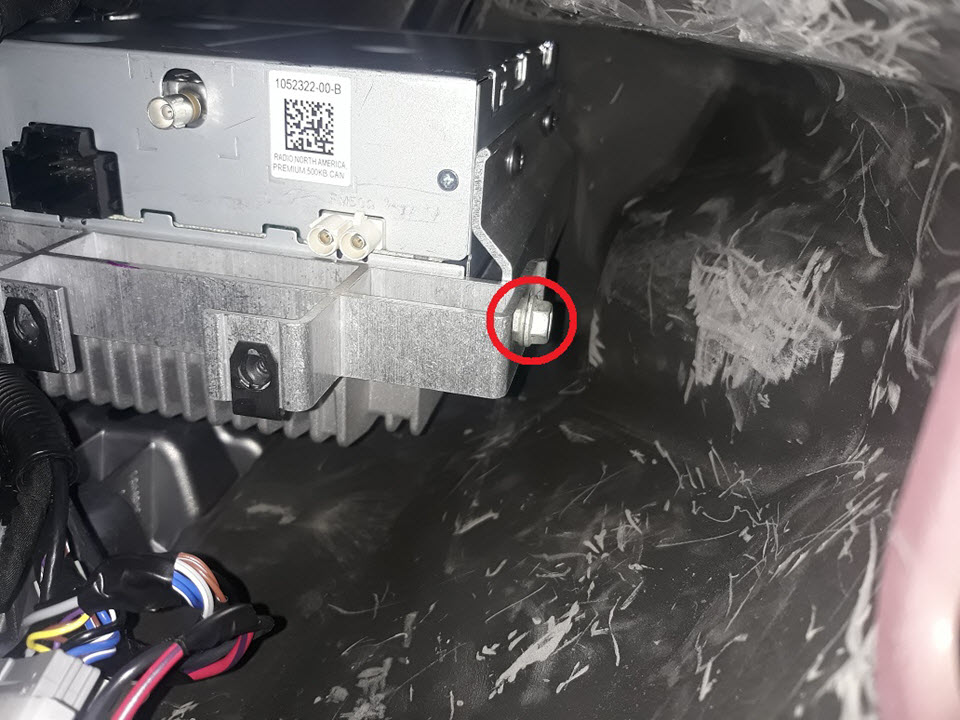
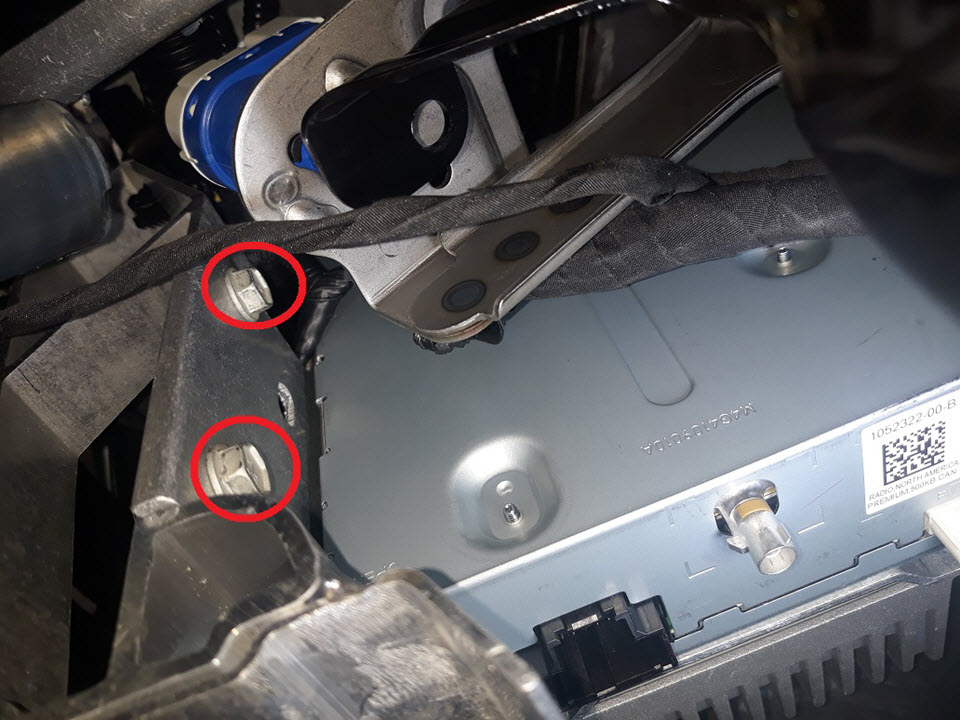
-
Remove the bolt (torque 6
Nm), and then remove and discard the screws (x2) that attach the
amplifier/tuner bracket to the body (torque 9 Nm).
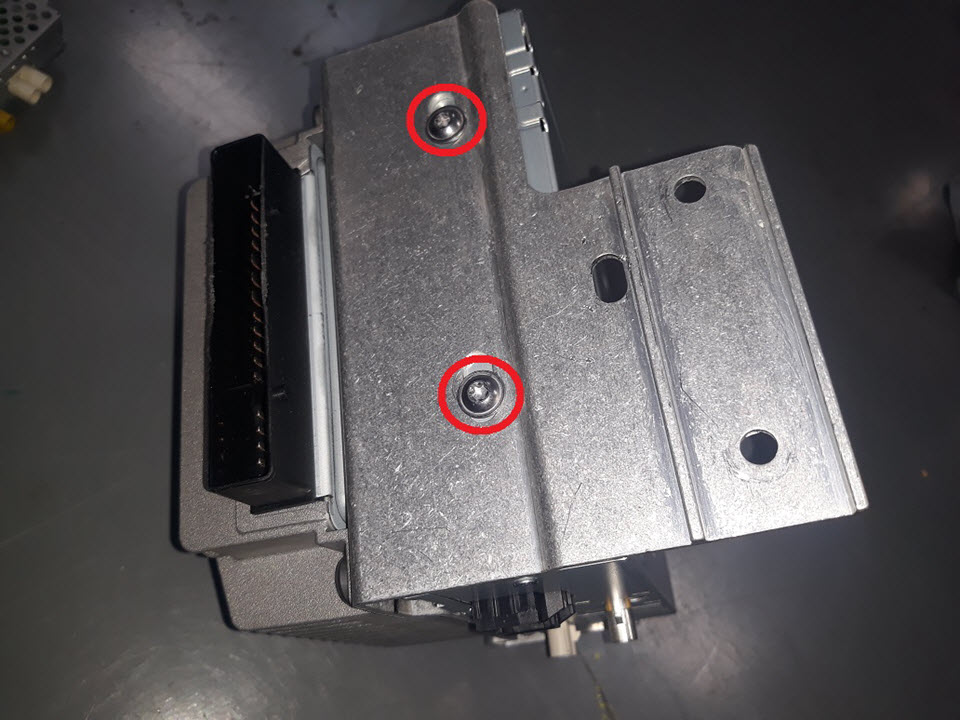
-
Remove the bolts (x2) that
attach the amplifier/tuner bracket (torque 6 Nm).
-
Move the amplifier/tuner bracket assembly out through the bottom of the IP carrier, and then remove the assembly from the vehicle.
CAUTIONBe careful not to pinch or damage any wires.Tip: Rotate the bracket assembly to different angles to ease removal.
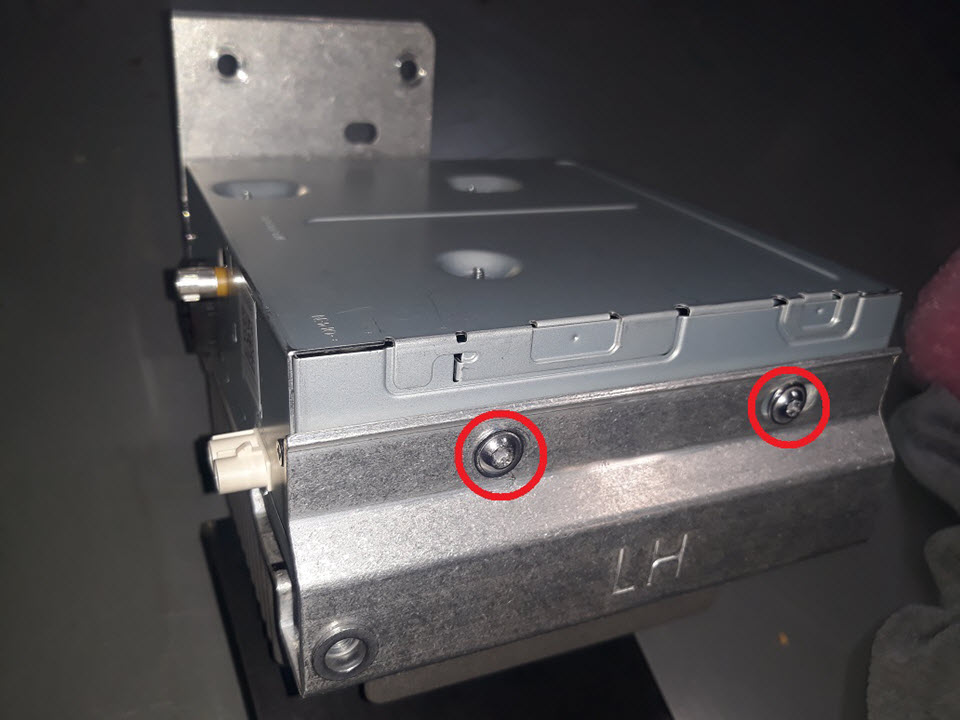
-
Remove and discard the
screws (x4) that attach the radio tuner to the amplifier/tuner bracket
(torque 4 Nm), and then remove the radio tuner from the bracket.


Installation
- Perform a firmware reinstall. See Firmware Reinstall - Touchscreen.
- Verify DAB/Tuner functionality.