05/10/2022 21:39:12
顶篷总成(拆卸和安装)
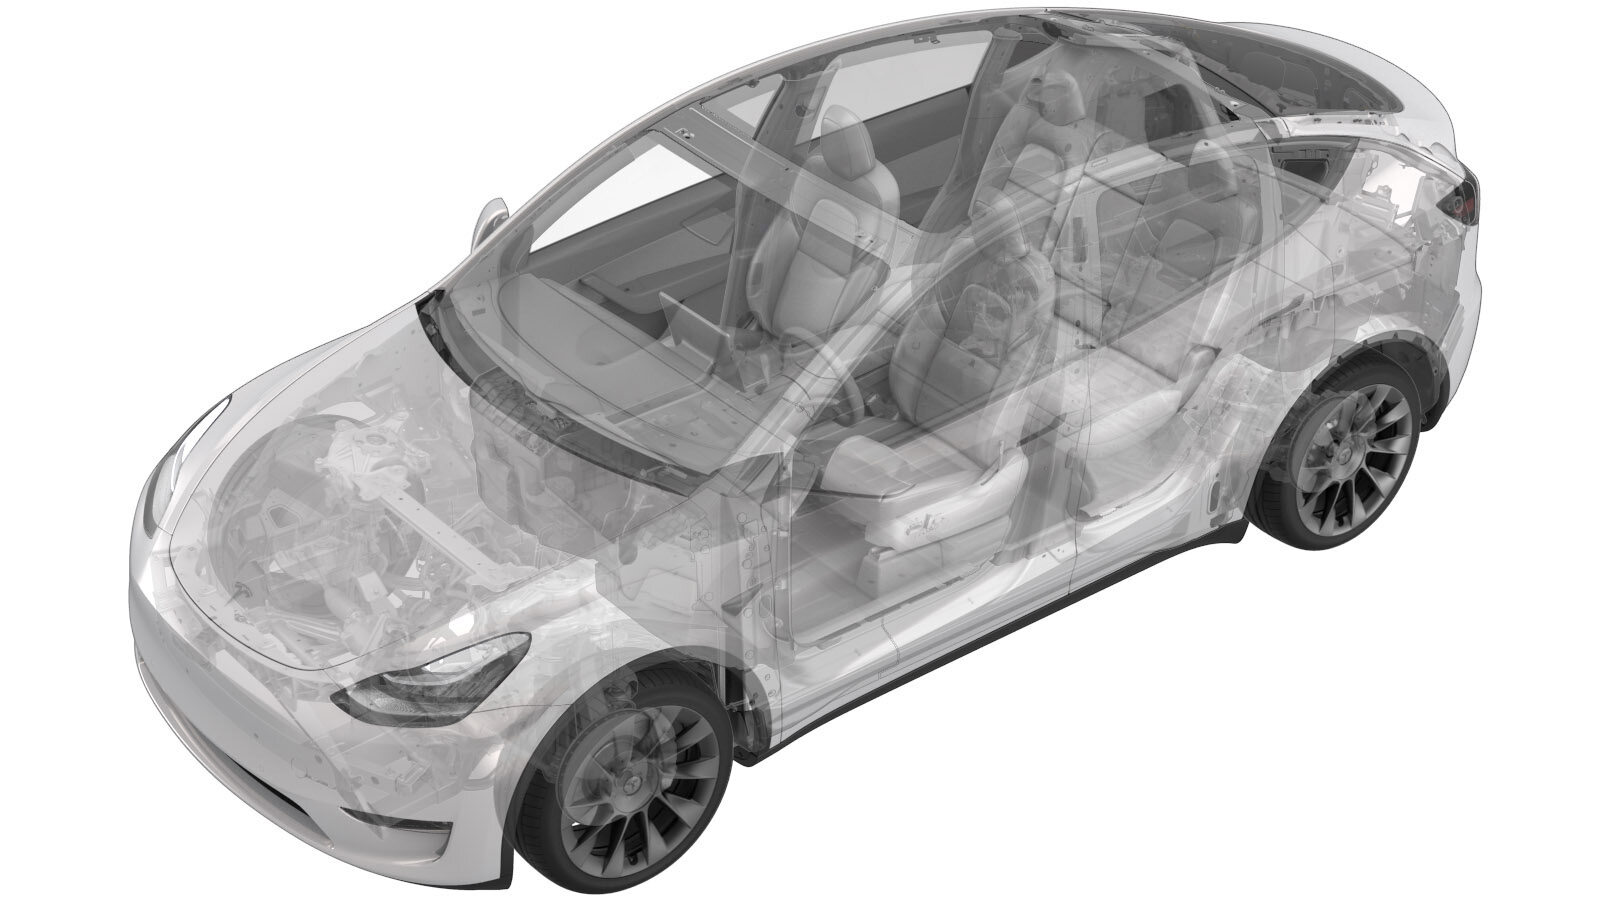 校正代码
15203101 1.26 注意:除非本程序中另有明确规定,否则上述校正代码和 FRT 反映的是执行本程序(包括关联程序)所需的所有工作。除非明确要求,否则请勿堆叠校正代码。注意:请参阅平均维修工时,深入了解 FRT 及其创建方式。要提供有关 FRT 值的反馈,请发送电子邮件至LaborTimeFeedback@tesla.com。注意:请参阅人员保护,确保在执行以下程序时穿戴适当的个人防护装备 (PPE)。
校正代码
15203101 1.26 注意:除非本程序中另有明确规定,否则上述校正代码和 FRT 反映的是执行本程序(包括关联程序)所需的所有工作。除非明确要求,否则请勿堆叠校正代码。注意:请参阅平均维修工时,深入了解 FRT 及其创建方式。要提供有关 FRT 值的反馈,请发送电子邮件至LaborTimeFeedback@tesla.com。注意:请参阅人员保护,确保在执行以下程序时穿戴适当的个人防护装备 (PPE)。
警告
尽管此程序已经过验证,但仍是一个草案。可能没有警告和注意事项。请遵守安全要求,处理或靠近高压系统和部件时,请谨慎操作。请将校正修理内容及反馈发送至ServiceDevelopment@teslamotors.com。
- Open all four doors
- Lower all four windows
- Open liftgate
-
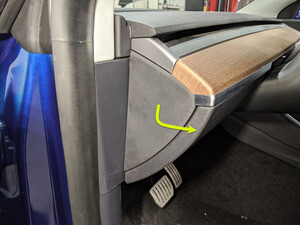
Remove LH IP end cap
注3x clips
-
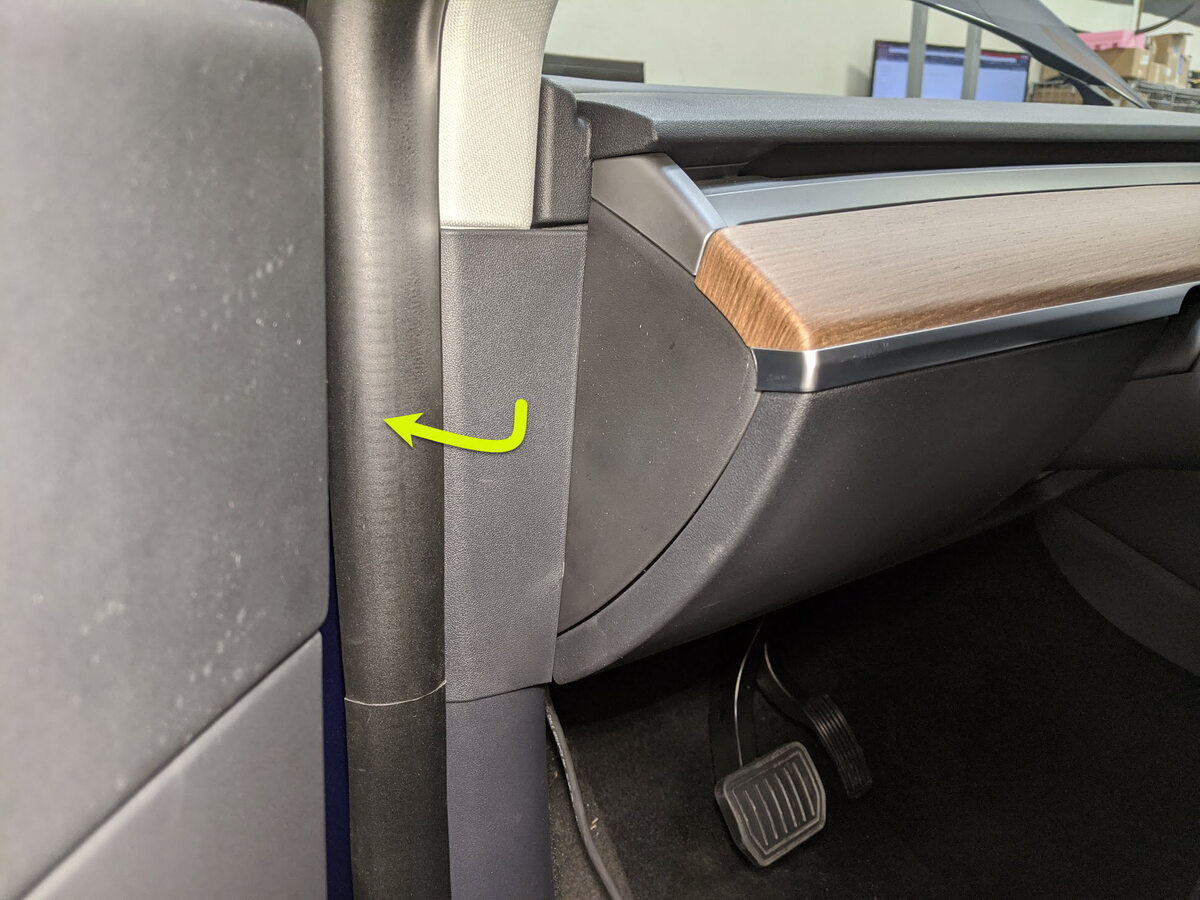
Remove LH mid A-pillar assembly
注1x clip, 1x tab, Release the upper clip then pull mid A-pillar upward to remove
-
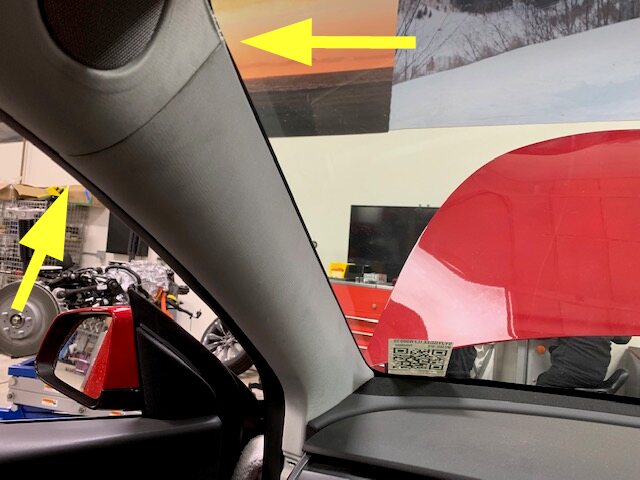
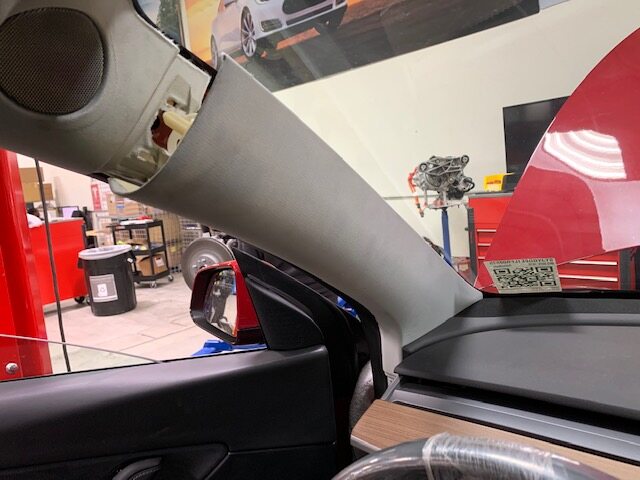
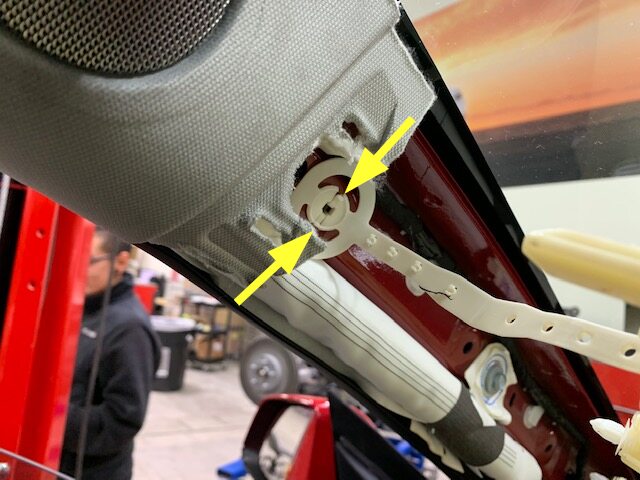
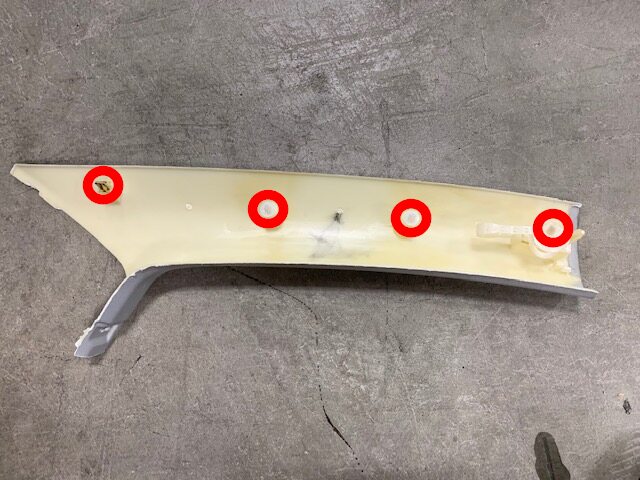
Remove LH upper A-pillar trim
注3x clips, Pull inside of the upper portion of upper A-pillar, Depress 2x tabs to remove tether from body side, Then pull upper A-pillar upward to remove
-
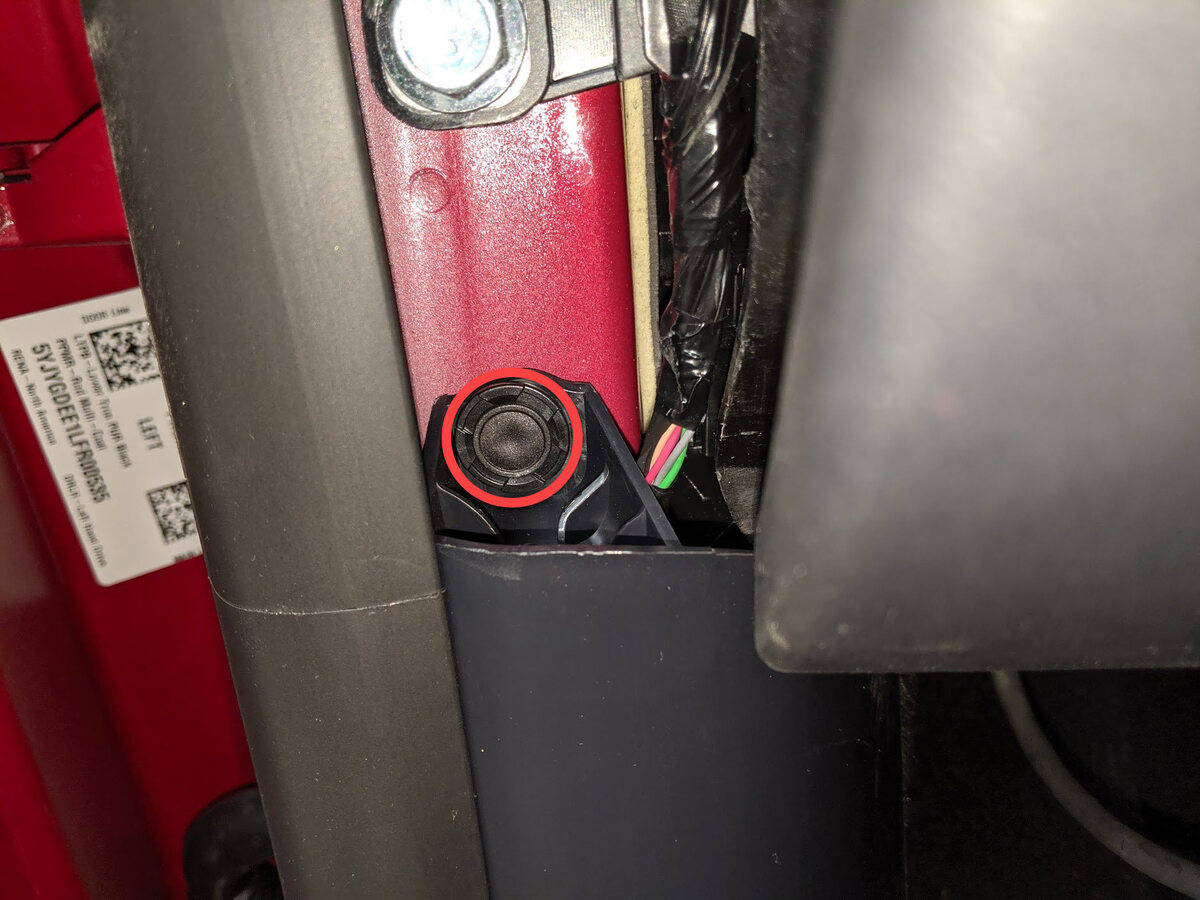
Remove clip securing LH lower A-pillar trim
注1x push clip
-
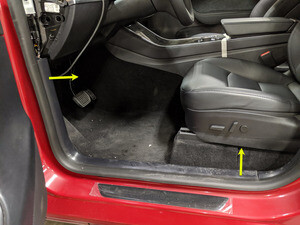
Remove LH lower A-pillar trim
注6x clips, 2 guide tabs, Pull rear of lower A-pillar upward to release clip then pull rearward to release trim panel
-
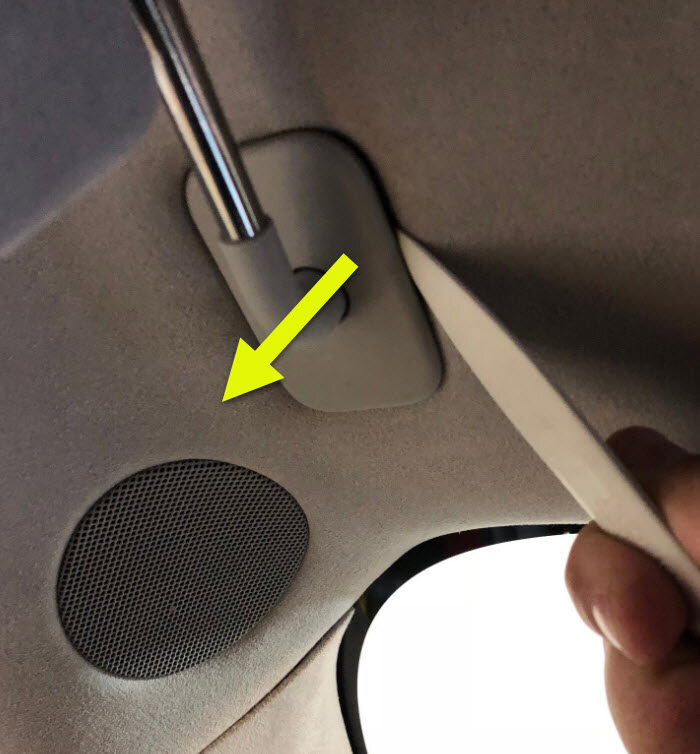
Remove LH sun visor bracket cover
注4x clips, Extending the sun visor may allow for extra working room
-
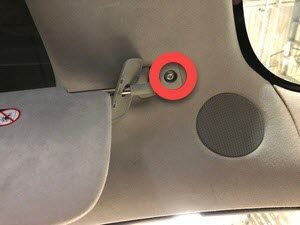
Remove LH sun visor fastener
注1x screw, T25, 3.5 Nm, Extending the sun visor may allow for extra working room
-
Remove LH sun visor from headliner area
注Fold sun visor to the closed and folded down position but do not latch in place
-
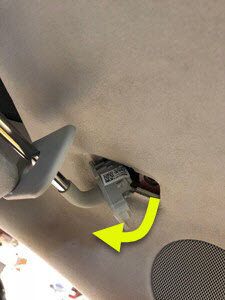
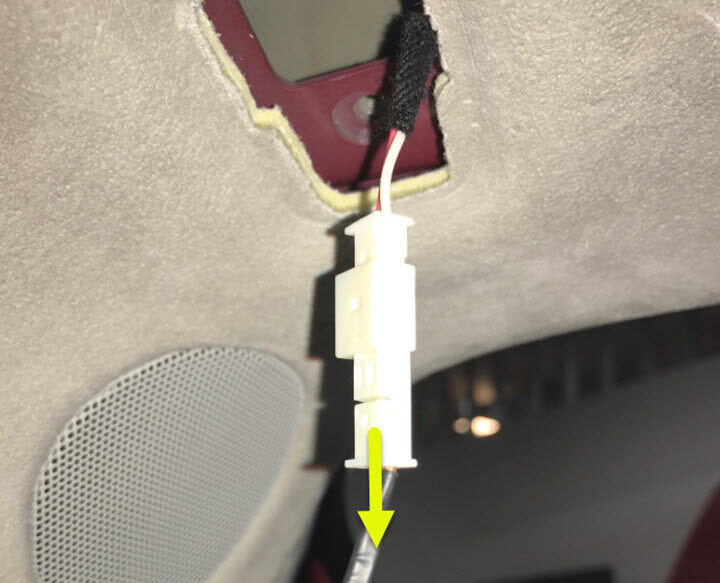
Disconnect LH sun visor connector
注1x connector
- Move LH front seat forward
-
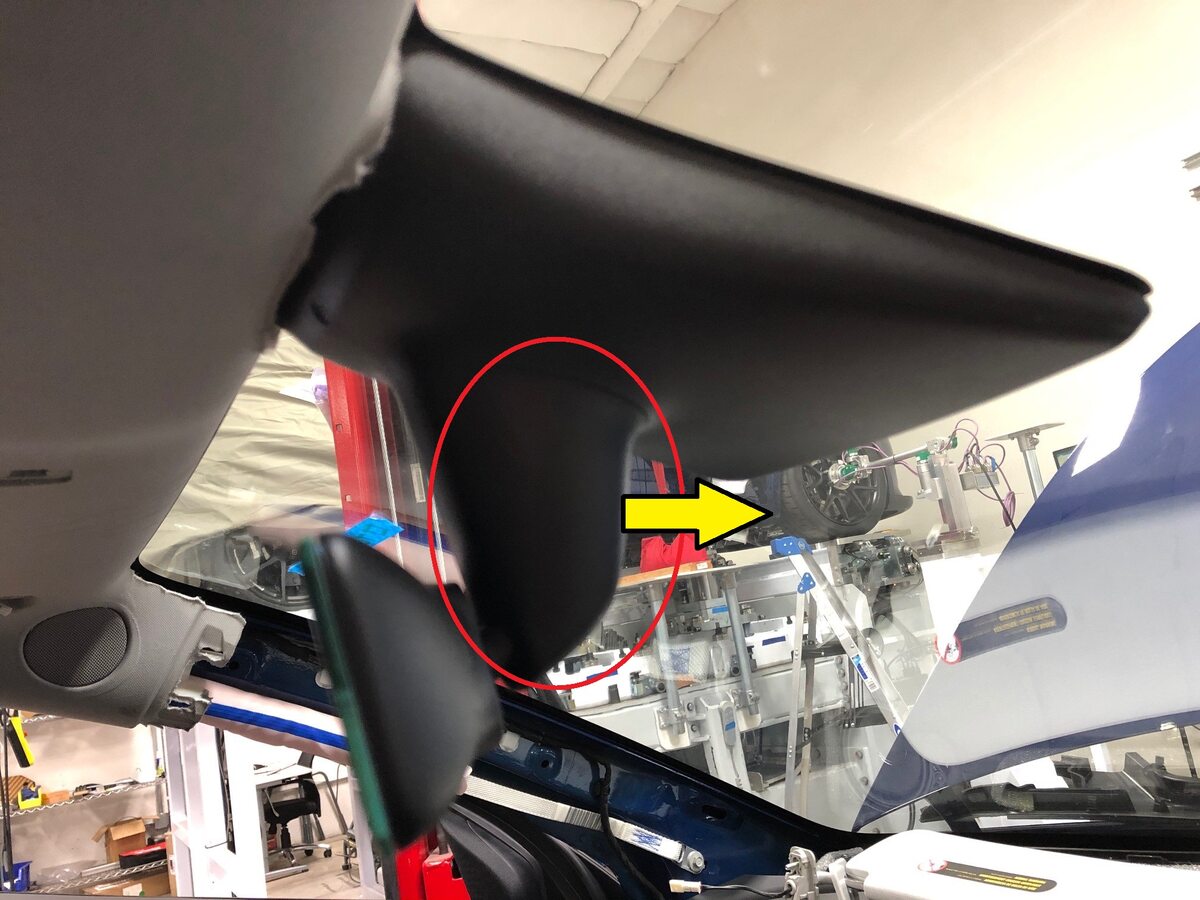
Remove lower quad cam cover
注4x tabs, Press on the side of the cover with a trim tool to release some of the tabs
-
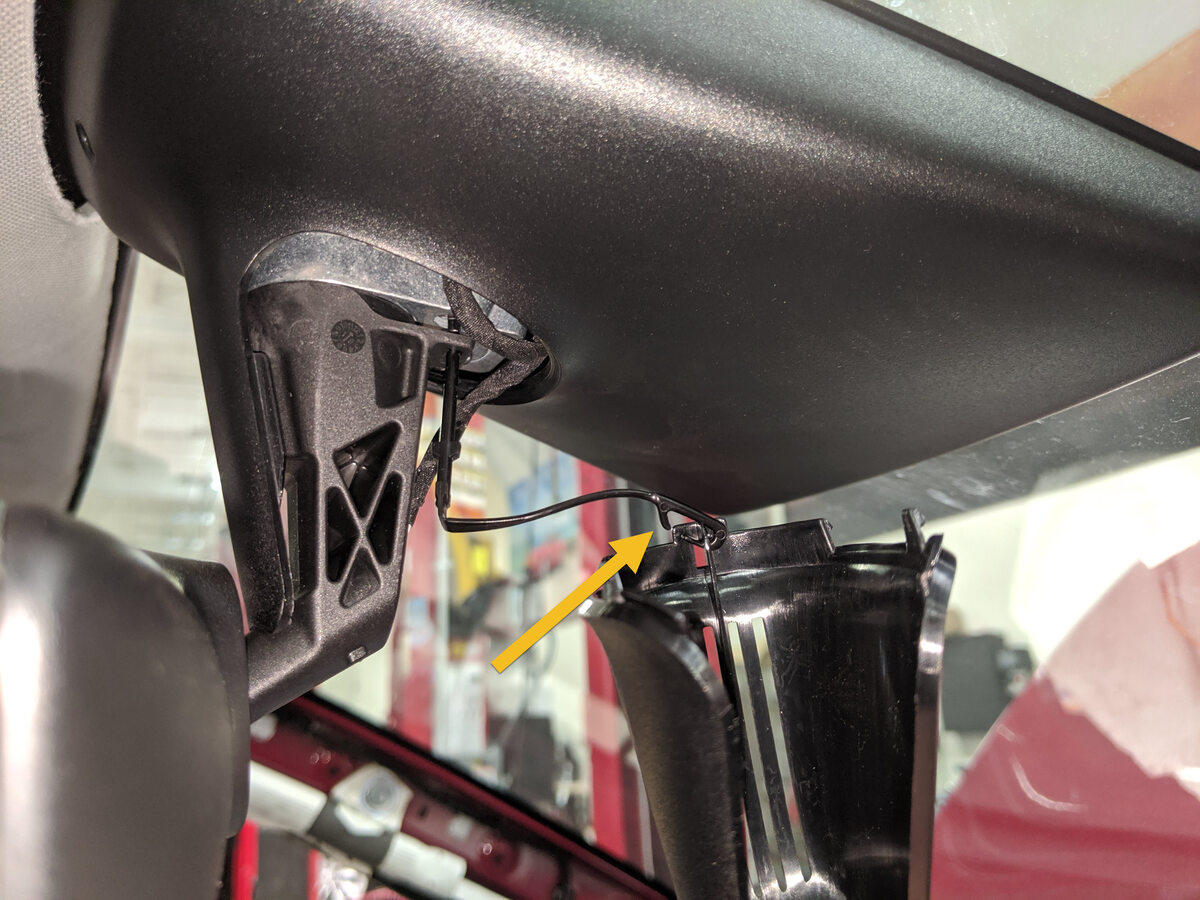
Remove tether from lower quad cam cover
注1x hook, Guide hook through anchor on quad cam cover
-
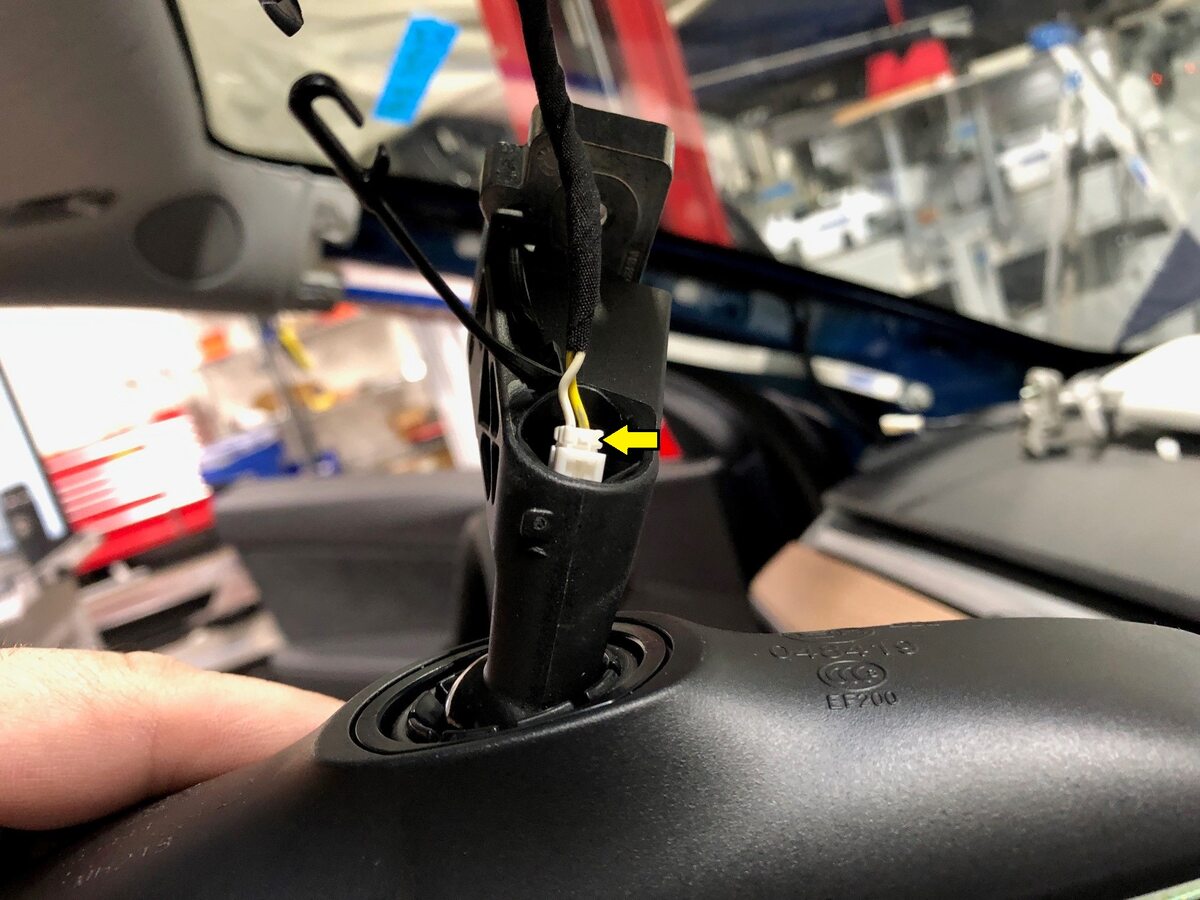
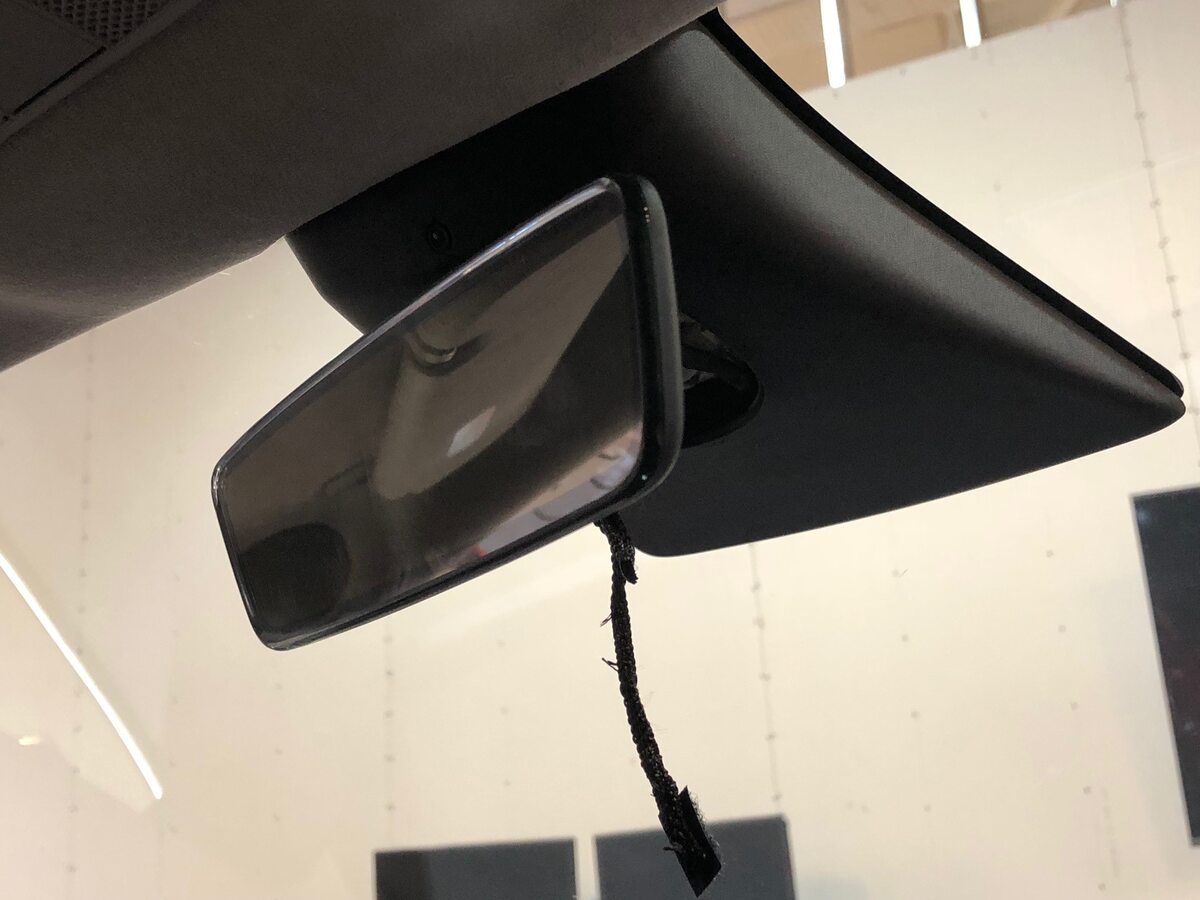
Disconnect rear view mirror connector
注1x connector
-
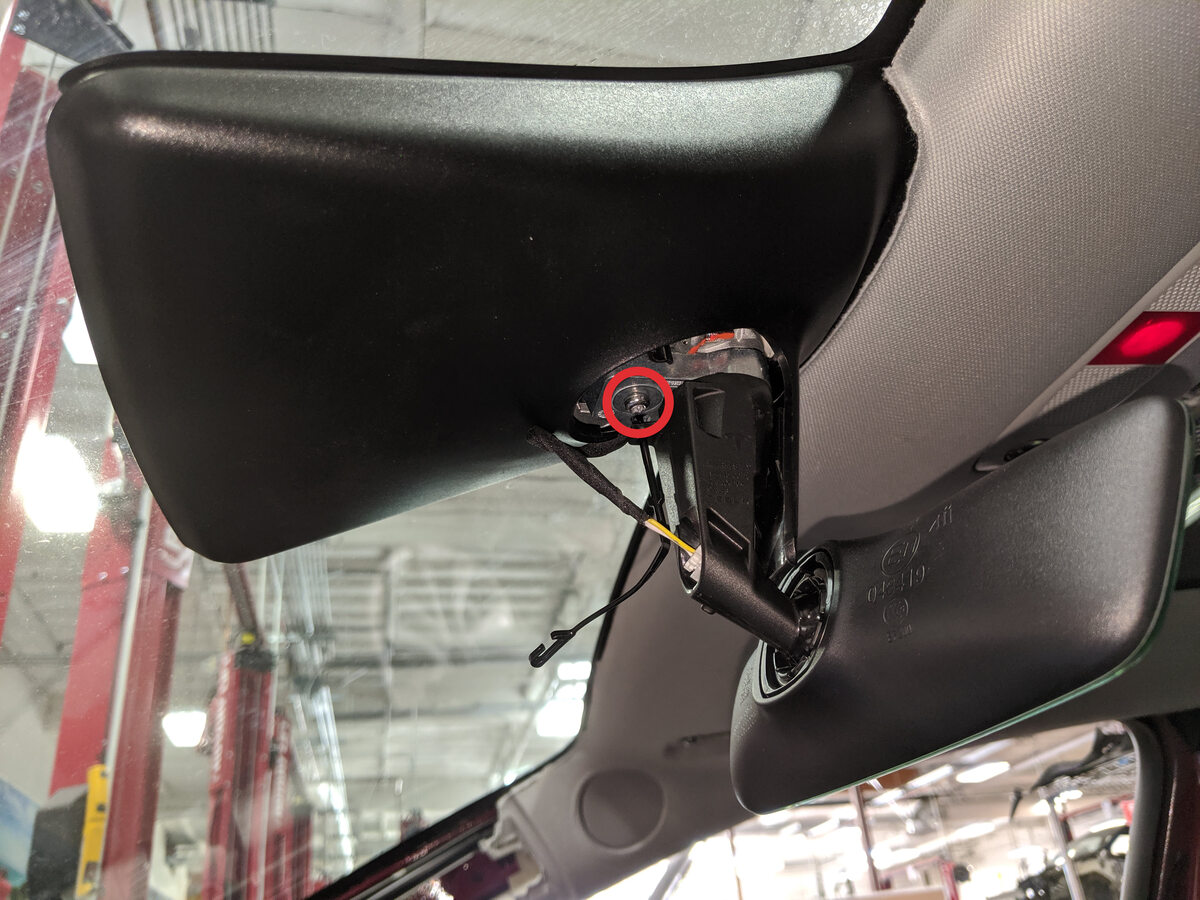
Remove rear view mirror
注1x bolt, T20, 2.5 Nm
-
Remove RH IP end cap
注3x clips
-
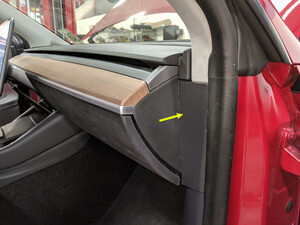
Remove RH mid A-pillar assembly
注1x clip, 1x tab, Release the upper clip then pull mid A-pillar upward to remove
-
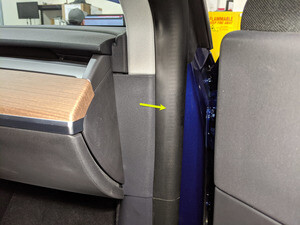
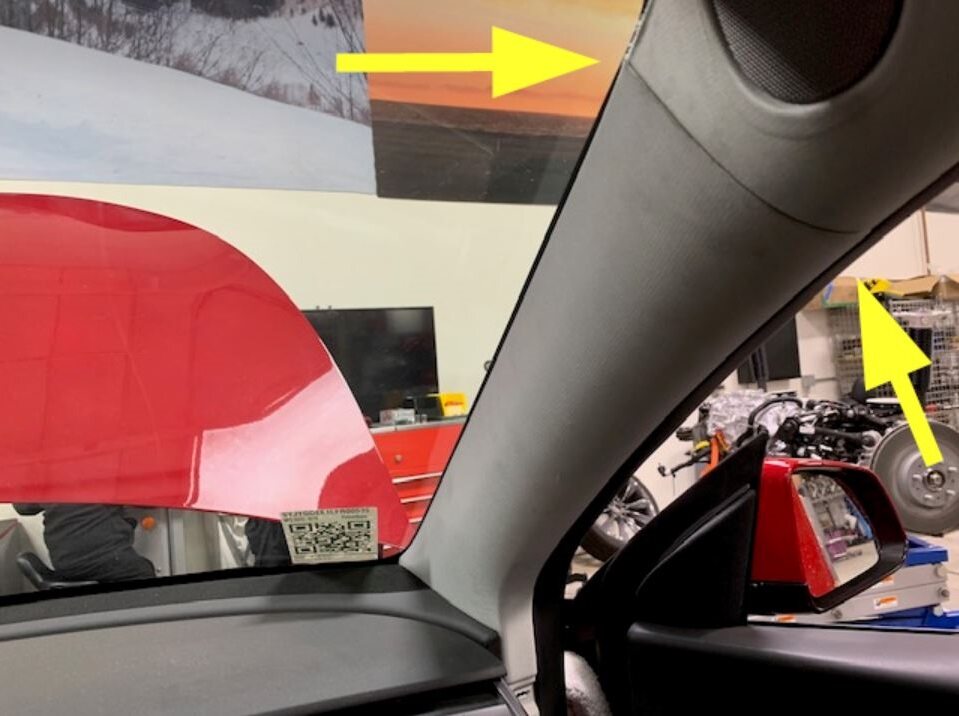
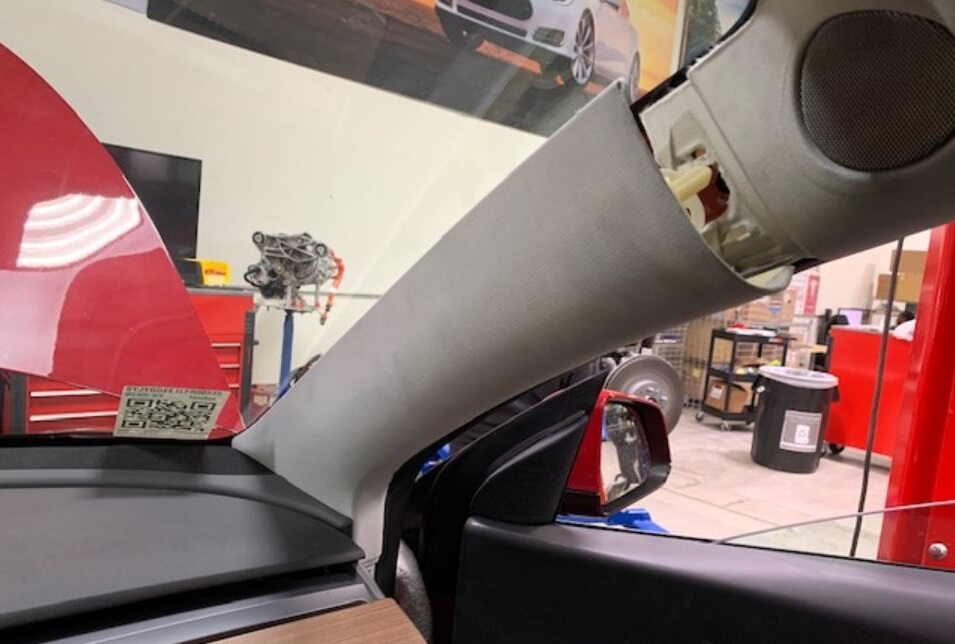
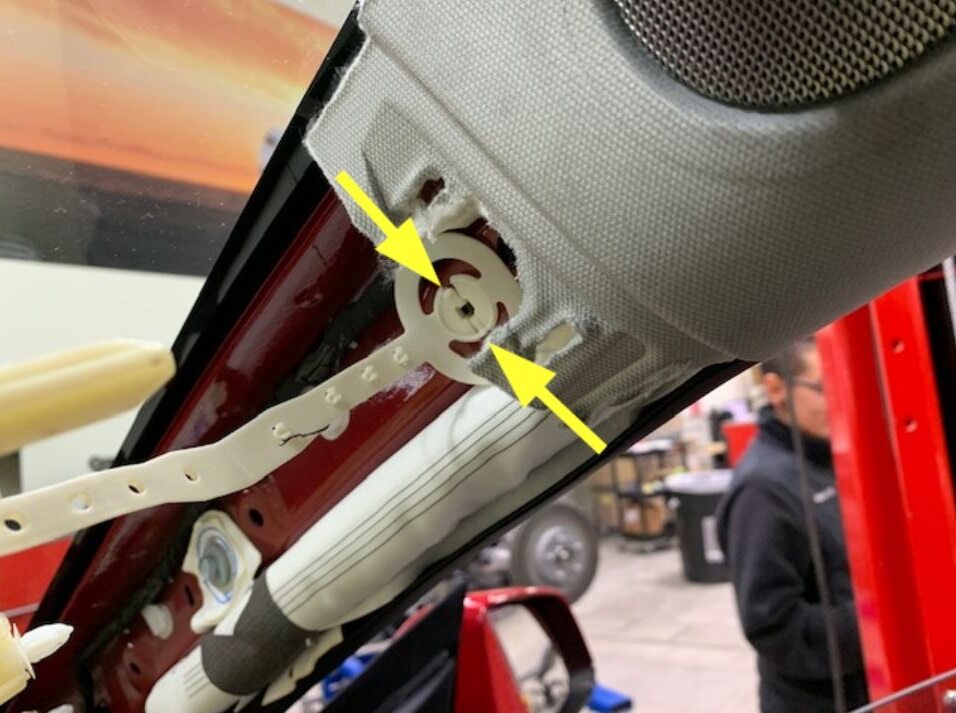
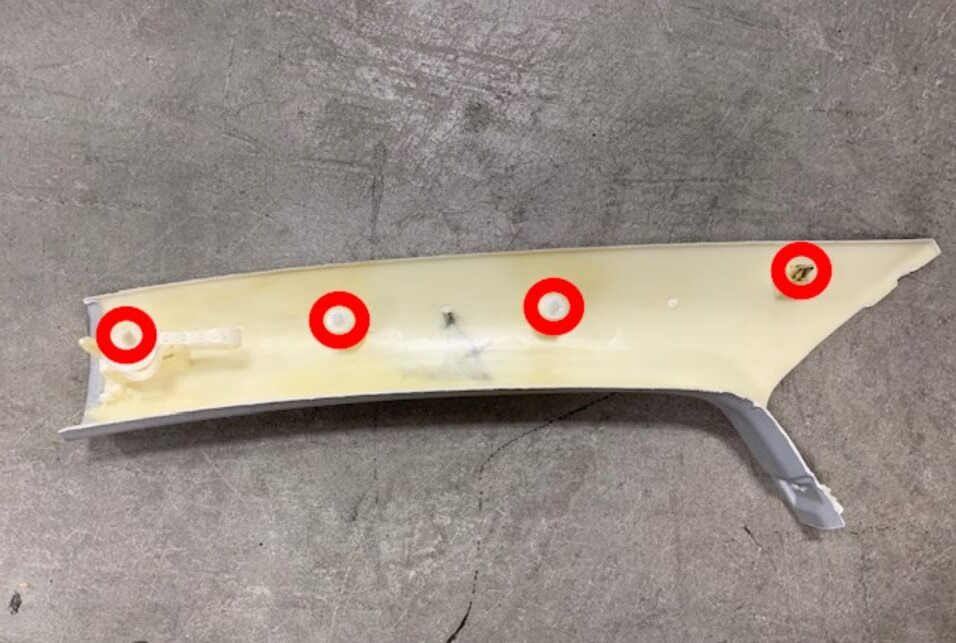
Remove RH upper A-pillar trim
注3x clips, Pull inside of the upper portion of upper A-pillar, Remove 3x tether hooks by twisting and pulling away from housing, Then pull upper A-pillar upward to remove
-
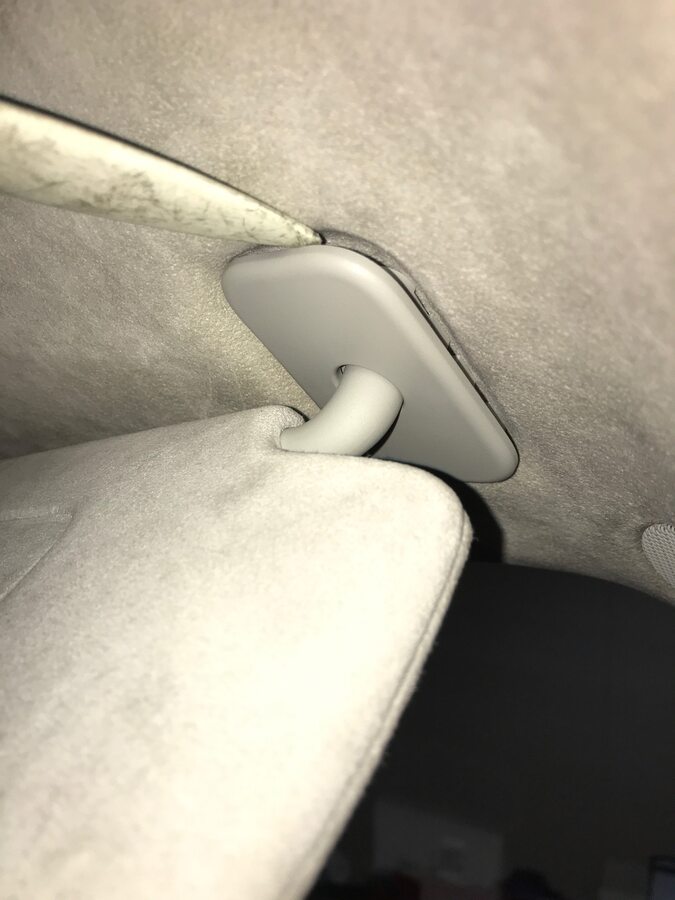
Remove RH sun visor bracket cover
注4x clips, Extending the sun visor may allow for extra working room
-
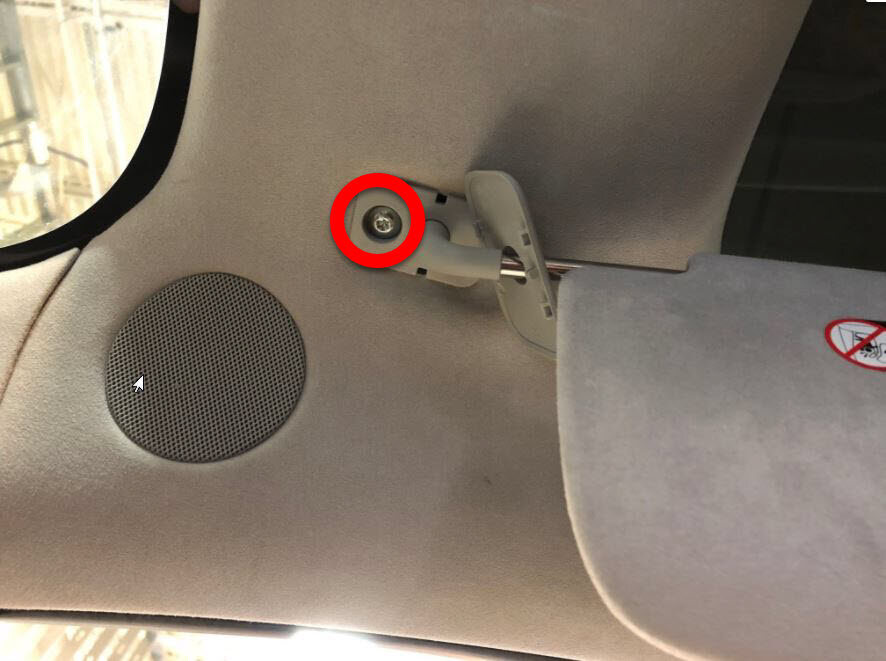
Remove RH sun visor fastener
注1x screw, T25, 3.5 Nm, Extending the sun visor may allow for extra working room
-
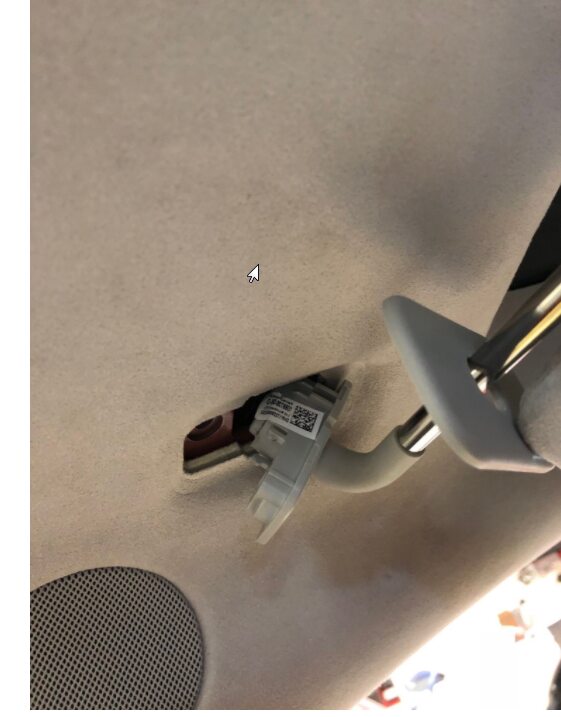
Remove RH sun visor from headliner area
注Fold sun visor to the closed and folded down position but do not latch in place
-
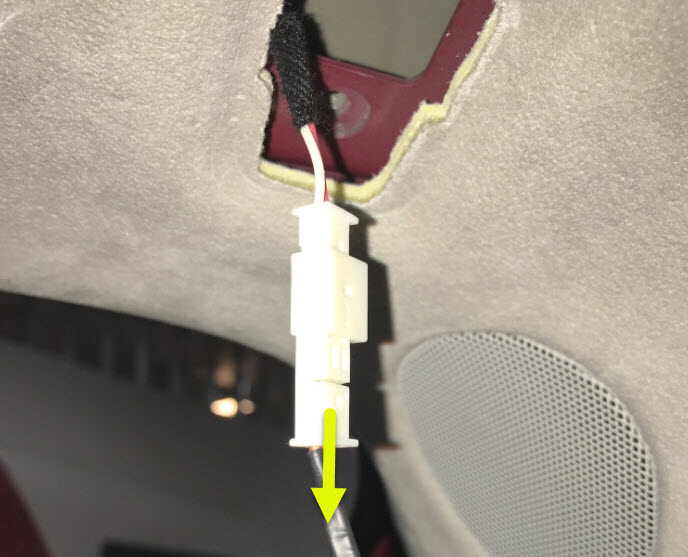
Disconnect RH sun visor connector
注1x connector
- Move RH front seat forward
-
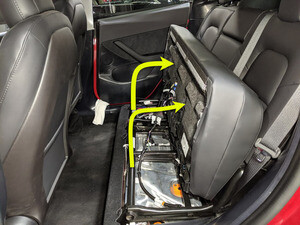
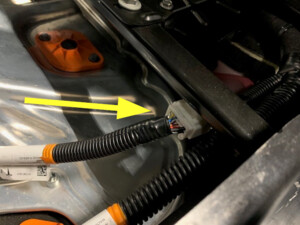
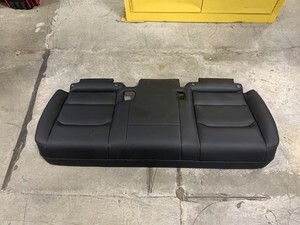
Remove 2nd row seat cushion
注1x connector, Lift front edge of seat cushion upward to release foam from frame
-
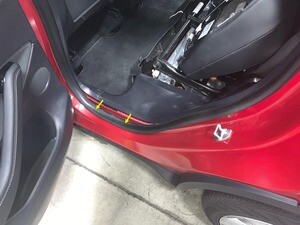
Partially remove LH rear door seal
-
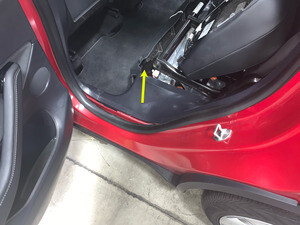
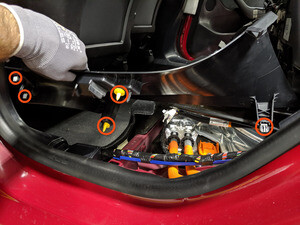
Remove LH rear sill trim
注5x clips, Rear edge is mated with groove in trunk side trim, Release clips at the front of LH rear sill trim working your way back towards rear of sill trim, Trim part may slightly differ, by vehicle build location
-
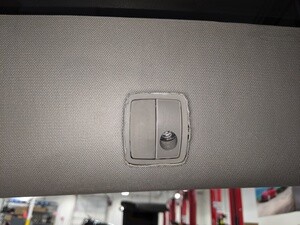
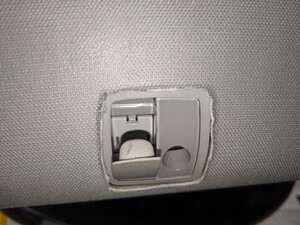
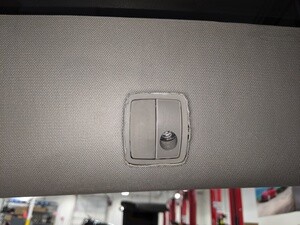
Push open LH coat hook
-
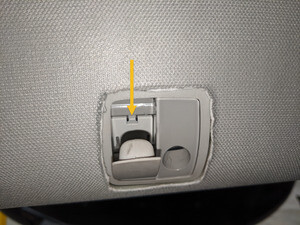
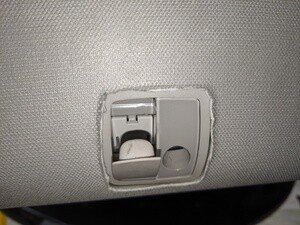
Open LH coat hook screw cover
注1x locking tab
-
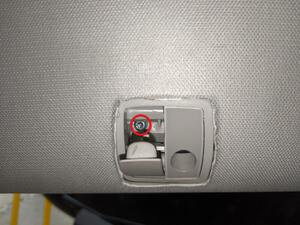
Remove LH coat hook screw
注1x screw, T20, 1.0 Nm
-
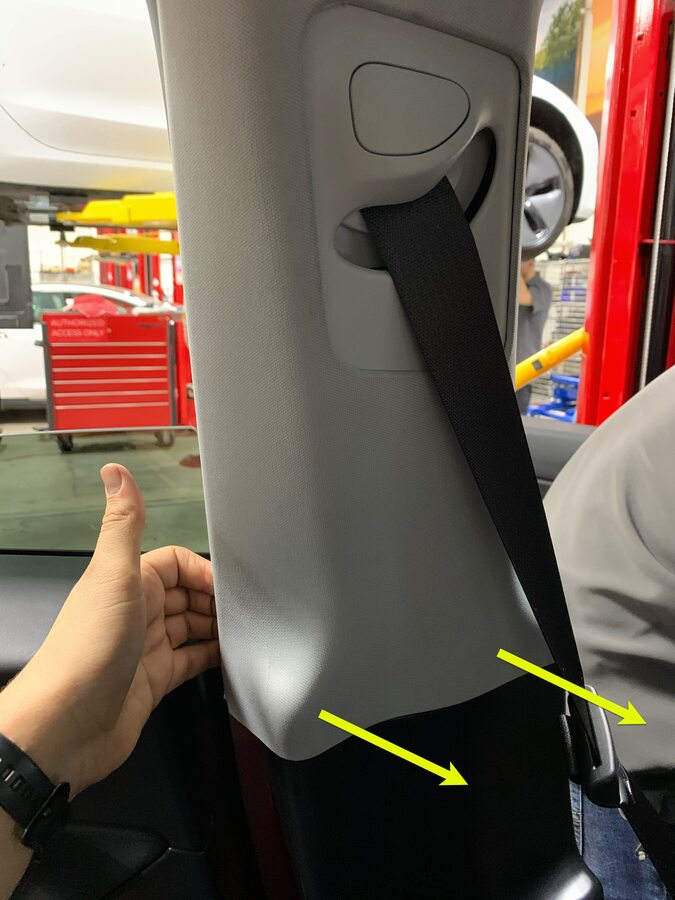
Release LH upper B-pillar assembly and move aside
注4x clips, Pull the bottom of the upper B-pillar toward inside of the vehicle then pull the top to release the remaining clips
-
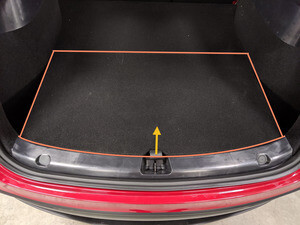
Remove rear load floor
-
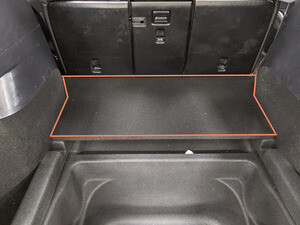
Remove front load floor
-
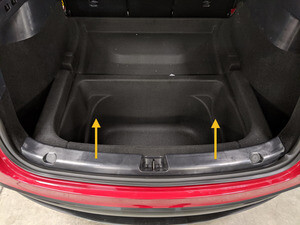
Remove trunk sill trim
注4x clips
-
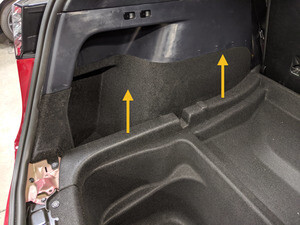
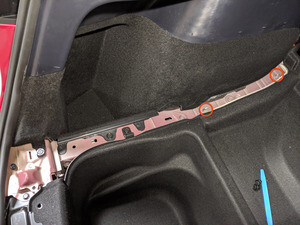
Remove LH load floor bracket
注3x tabs, 2x clips
-
Remove LH trunk pocket bracket
注1x push clip, 5x alignment tabs
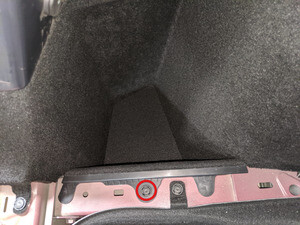
-
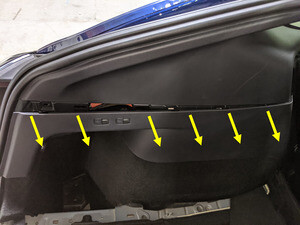
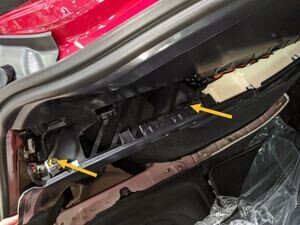
Release top edge of LH trunk side trim and disconnect 12V outlet and trunk switch connectors
注6x clips, 2x connectors, Trim part may slightly differ, by vehicle build location
-
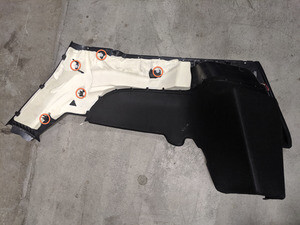
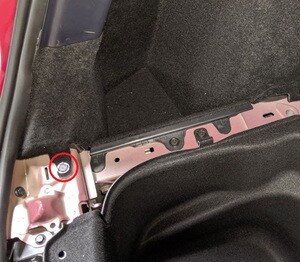
Release remaining clips and remove LH trunk side trim
注1x push clip, 5x clips, Guide front clip stanchions around LH C-pillar
-
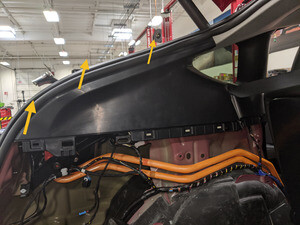
Remove LH upper C-pillar trim
注6x clips, Guide front upper corner groove out from headliner and place trim aside
-
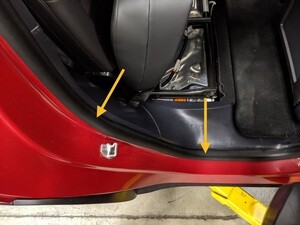
Partially remove RH rear door seal
注Pillar and sill trim have tabs seated underneath seal
-
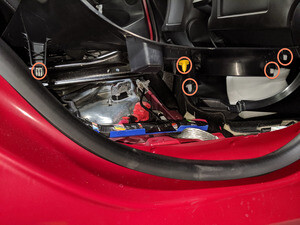
Remove RH rear sill trim
注5x clips, Rear edge is mated with groove in trunk side trim, Release clips at the front of RH rear sill trim working your way back towards rear of sill trim

-
Push open RH coat hook
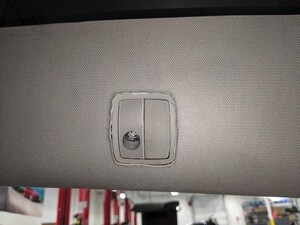
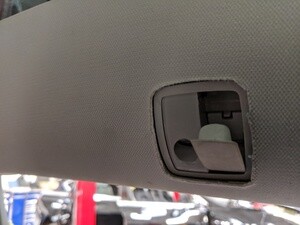
-
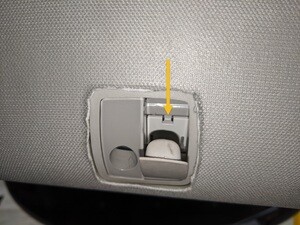
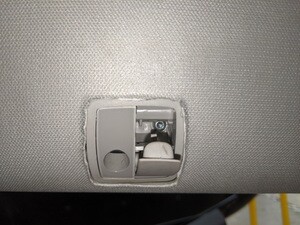
Open RH coat hook screw cover
注1x locking tab
-
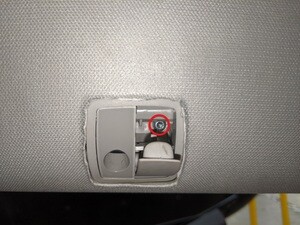
Remove RH coat hook screw
注1x screw, T20, 1.0 Nm
-
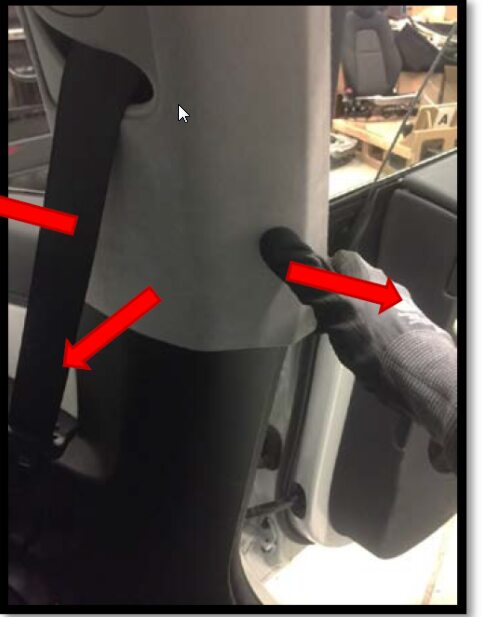
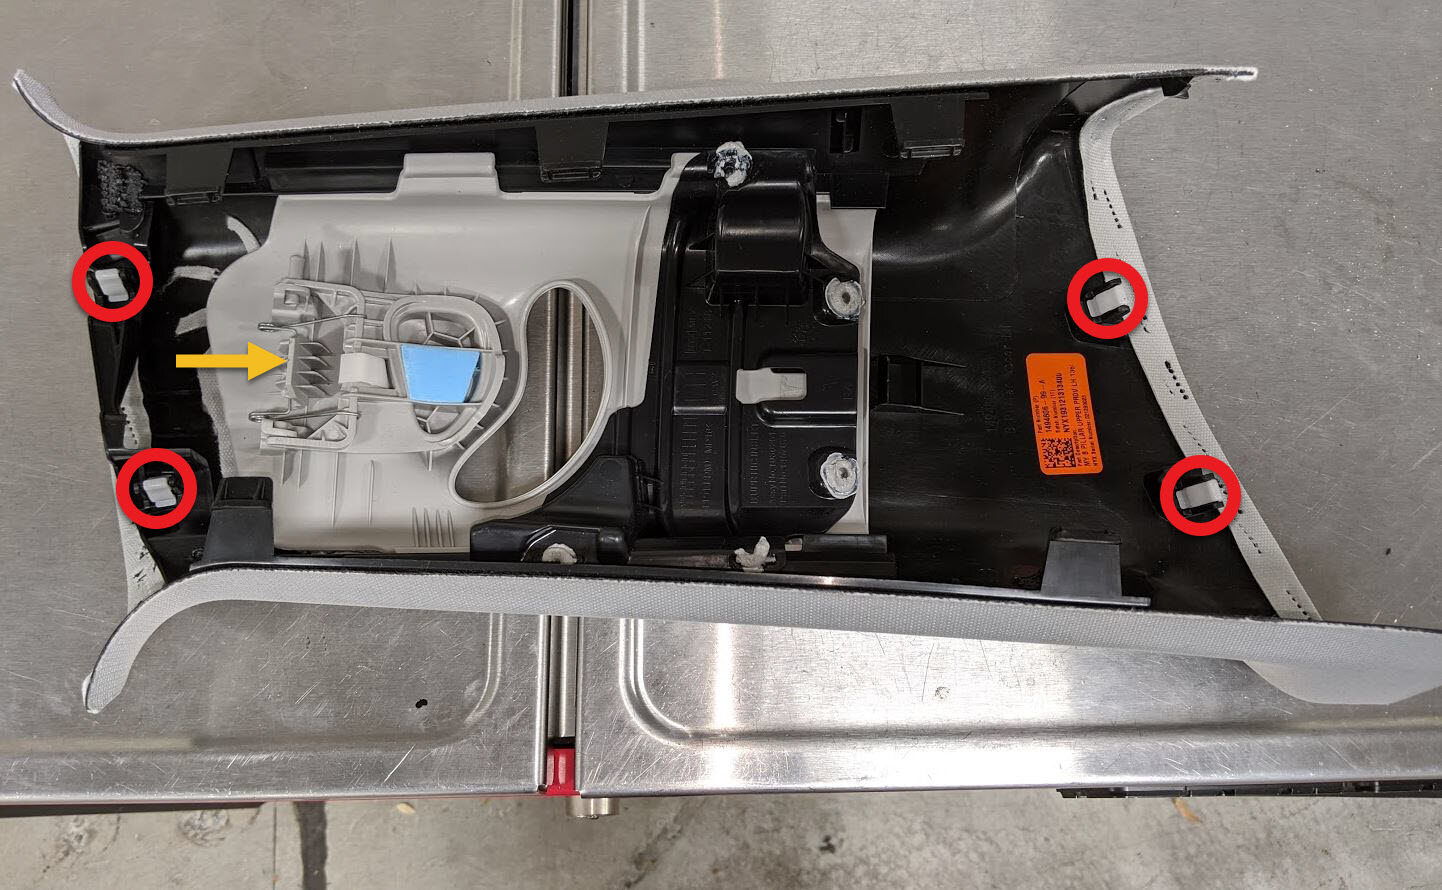
Release clips securing the RH upper B-pillar assembly and move aside
注4x clips, Pull the bottom of the upper B-pillar toward inside of the car, then pull the top to release the remaining clips
-
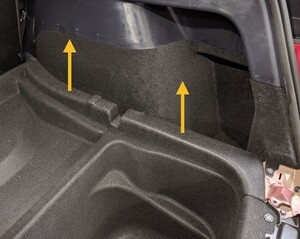
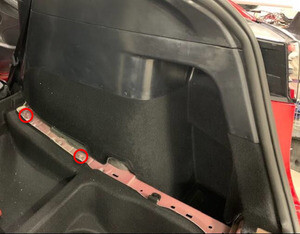
Remove RH load floor bracket
注3x tabs, 2x clips
-
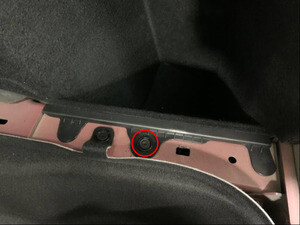
Remove RH trunk pocket bracket
注1x push clip, 5x alignment tabs
-
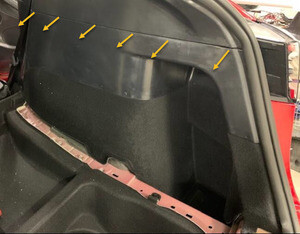
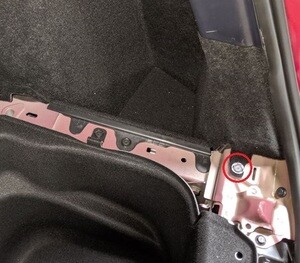
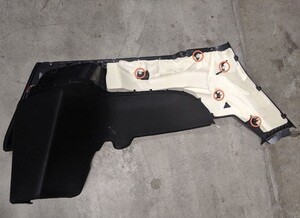
Release clips and remove RH trunk side trim
注1x push clip, 11x clips, Guide front clip stanchions around RH C-pillar
-
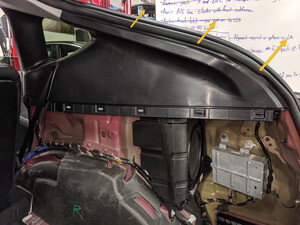
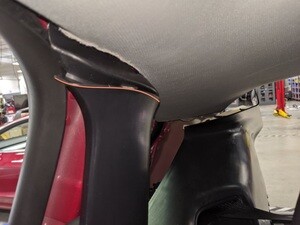
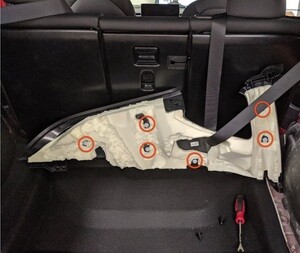
Remove RH upper C-pillar trim
注6x clips, Guide front upper corner groove out from headliner and place trim aside
-
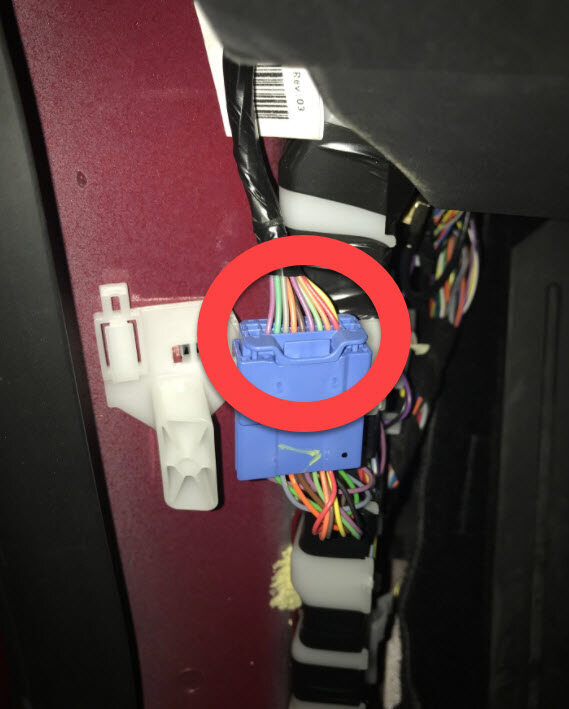
Disconnect headliner harness
注1x connector
-
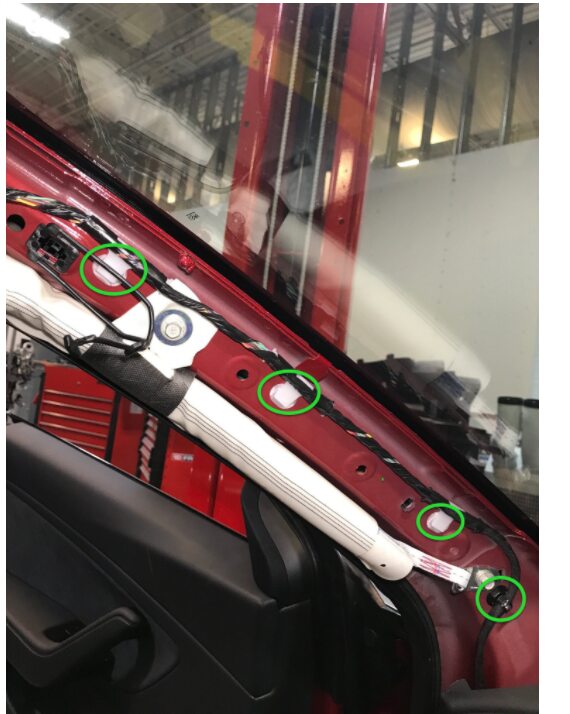
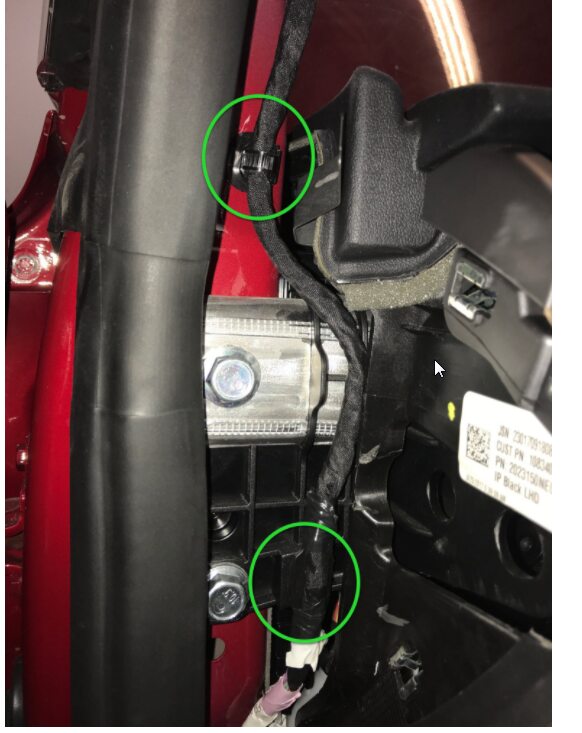
Remove headliner harness clips from LH A-pillar area
注6x clips
-
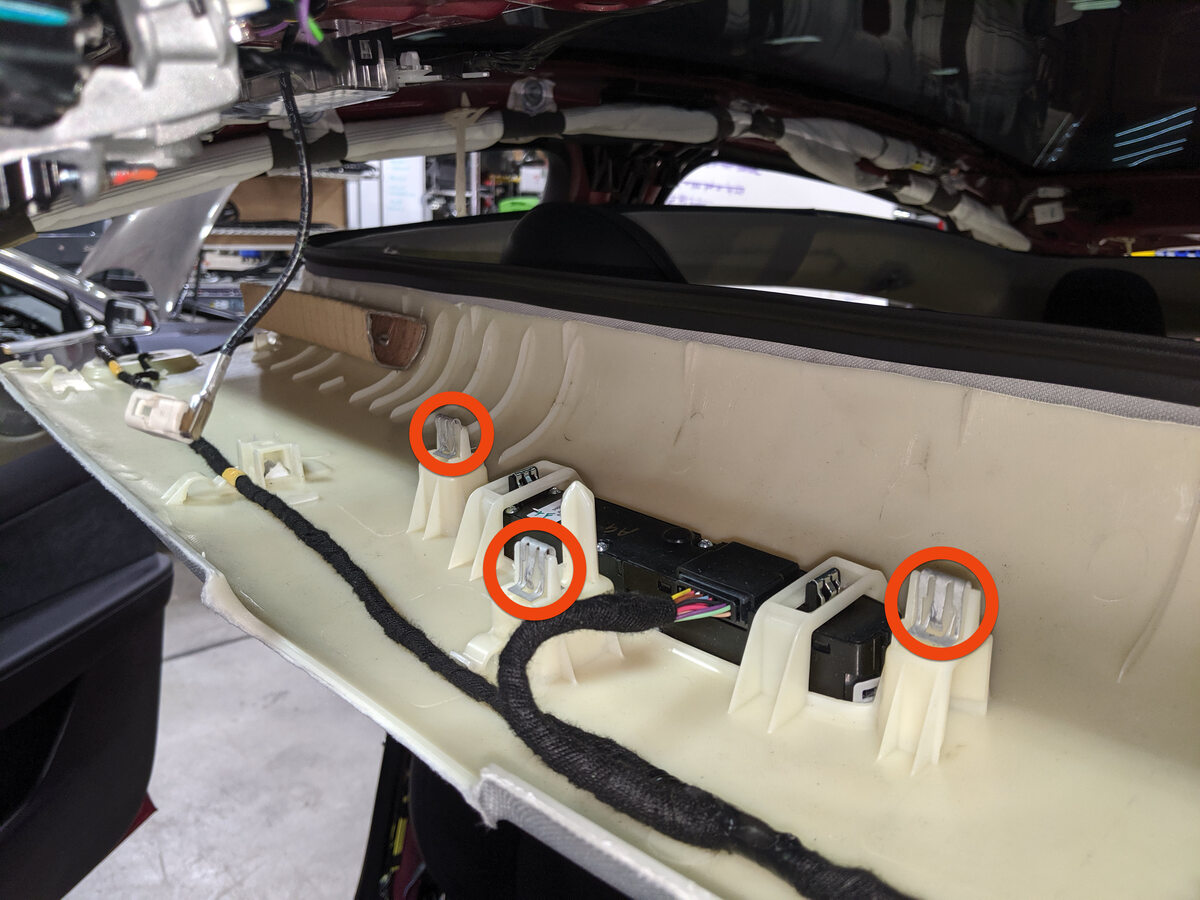
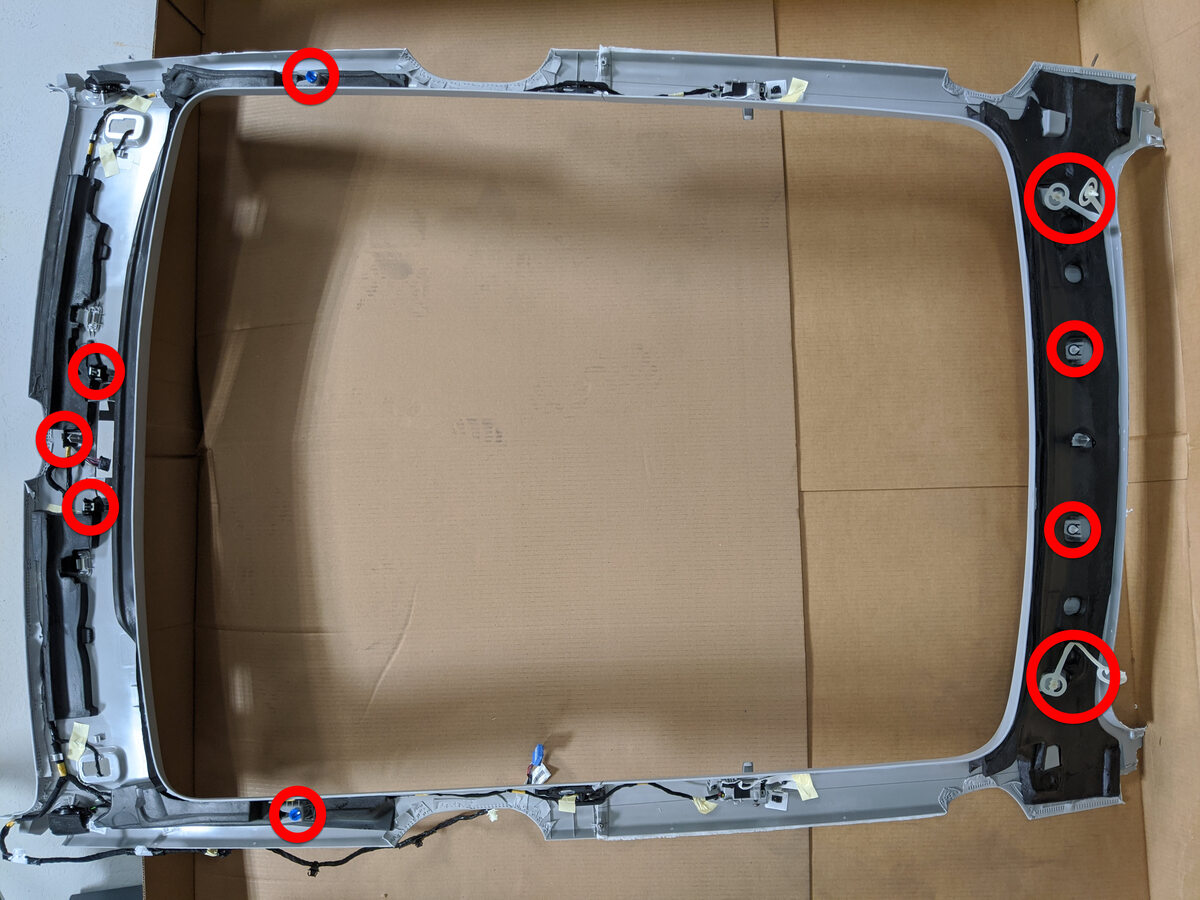
Release headliner from body
注11x clips, Recommend assistance, Headliner will be partially supported by safety tethers at B-pillars and 2x tether clips at rear corners
-
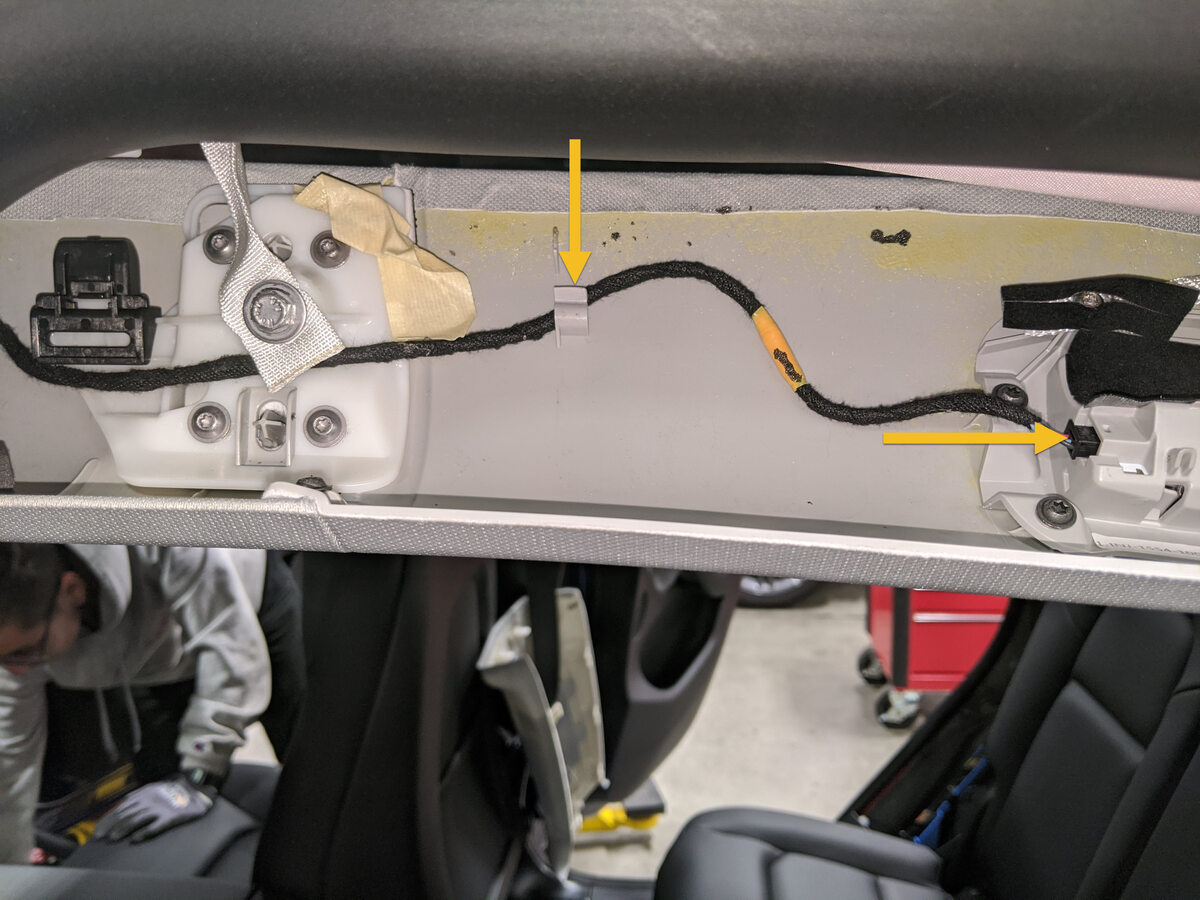
Disconnect LH rear map light and release from rear portion of headliner
注1x connector, 1x harness clip
-
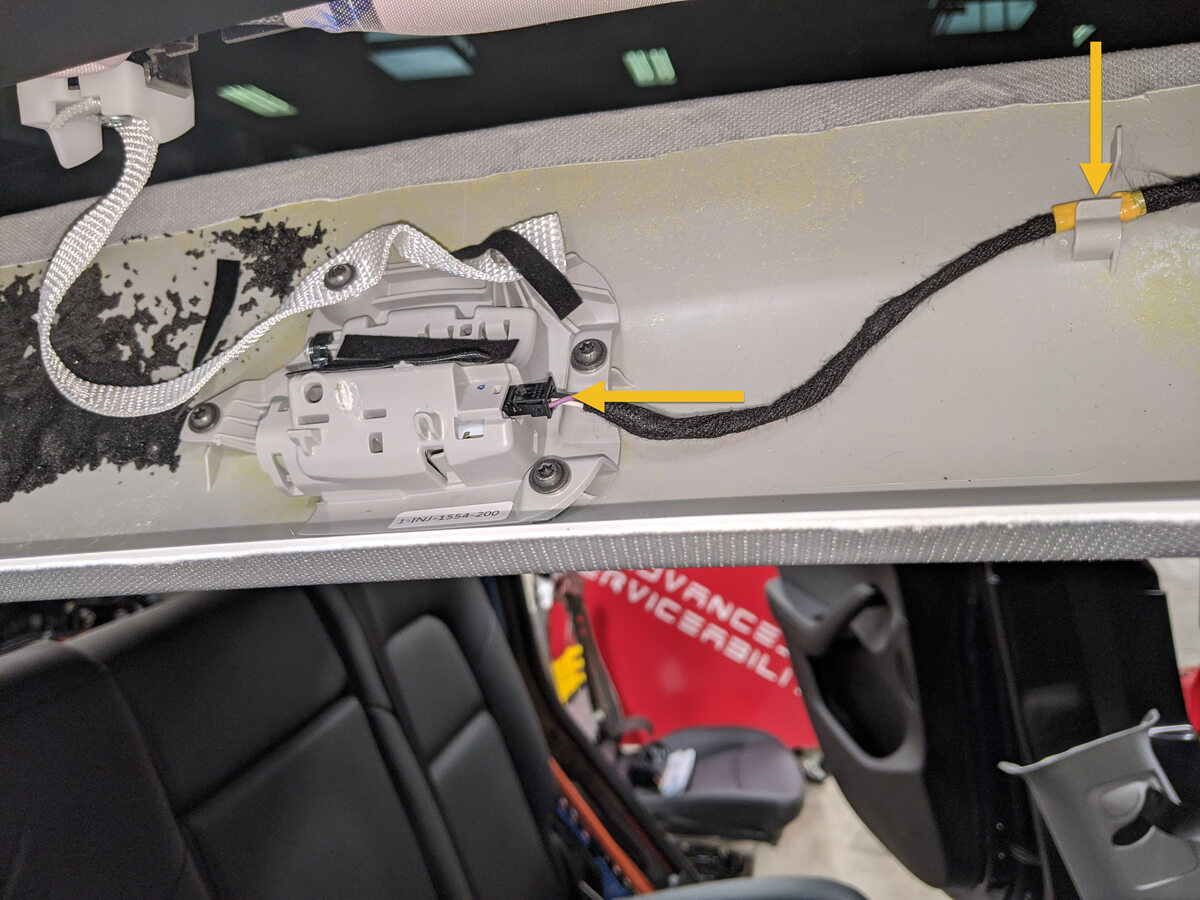
Disconnect RH rear map light and release from rear portion of headliner
注1x connector, 1x harness clip
-
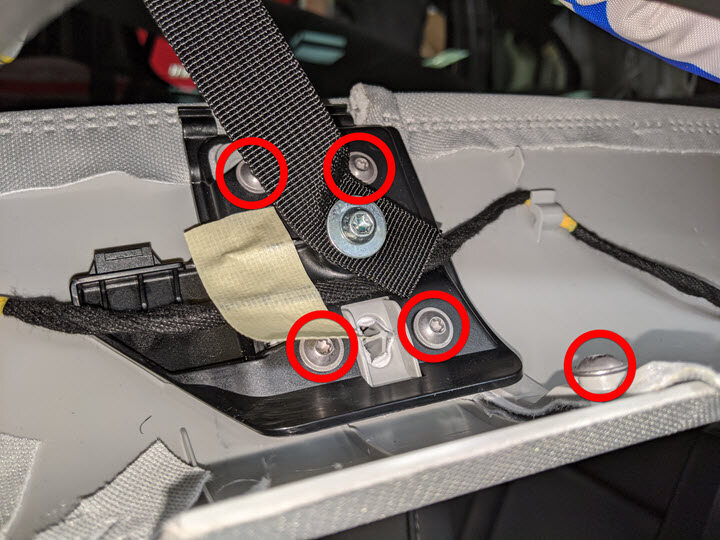
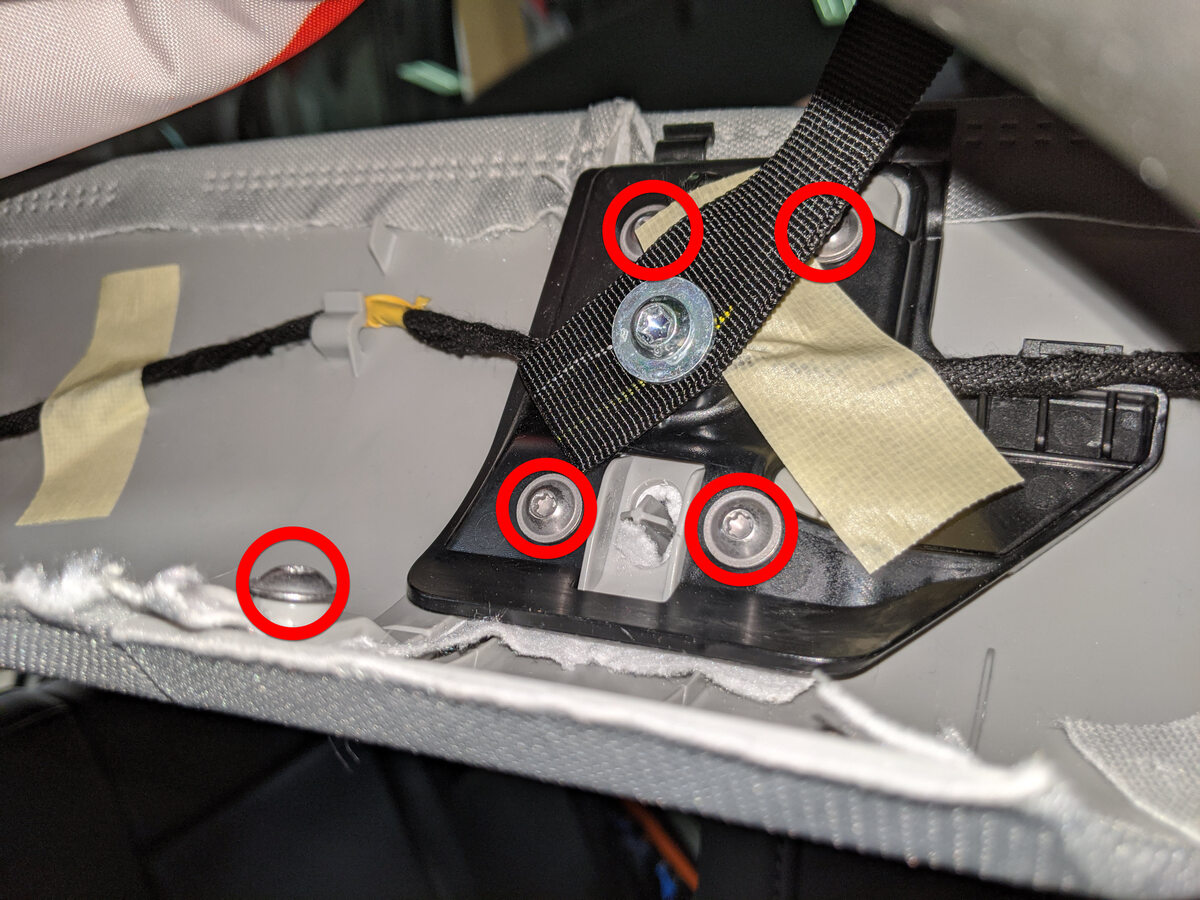
Remove fasteners joining front and rear headliner trim
注10x screws, T20, 1.0 Nm
-
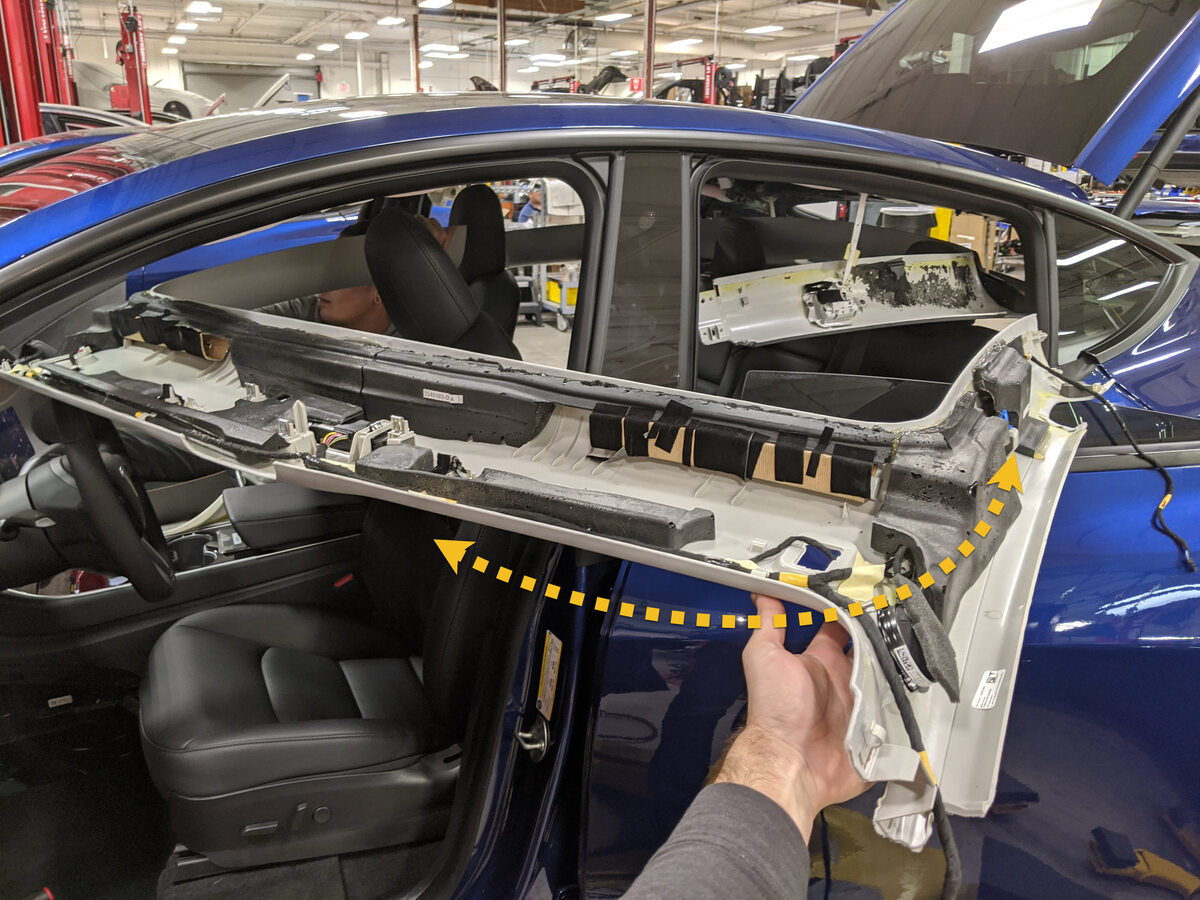
Remove front headliner from vehicle
注Recommend assistance, Remove through front door, Place headliner on clean surface
-
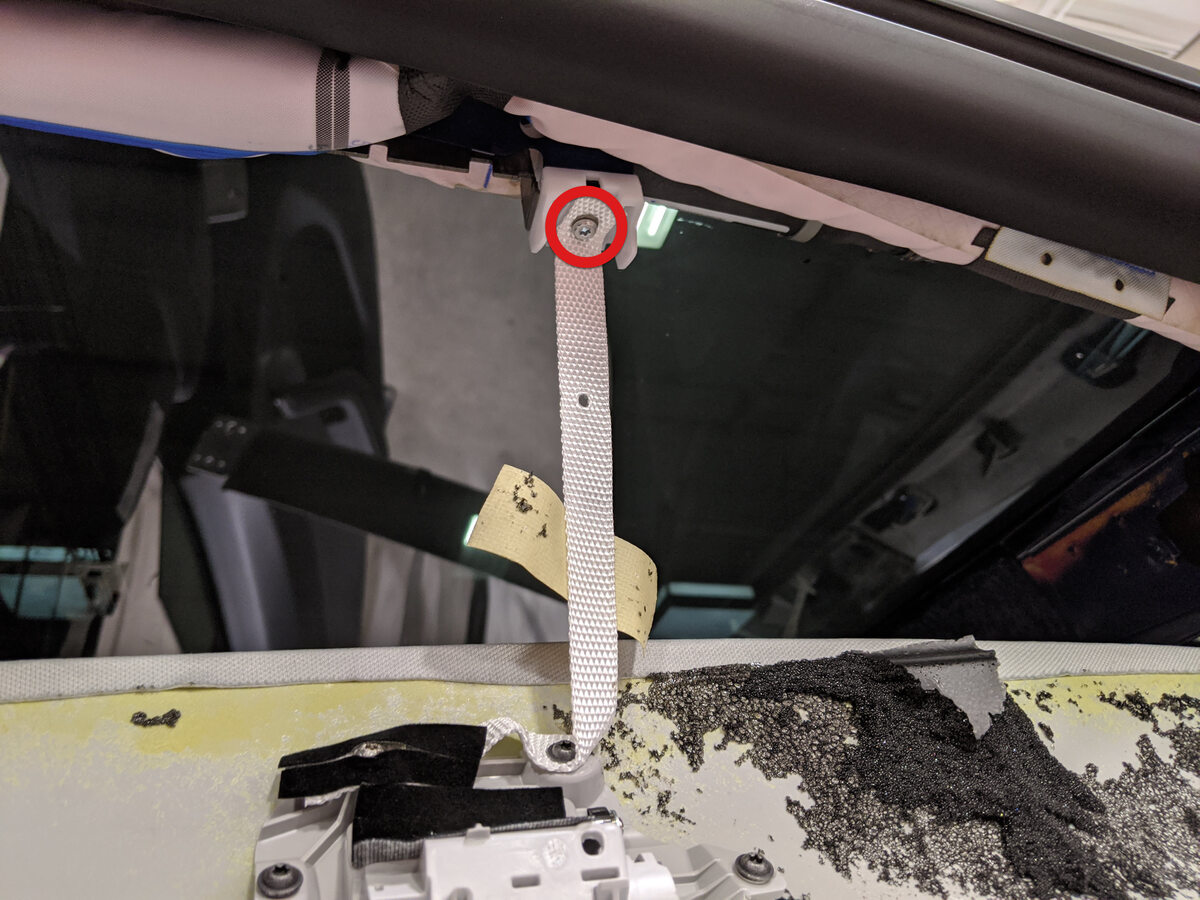
Release LH rear headliner tether from roof clip
注1x screw, T20, 1.5 Nm
-
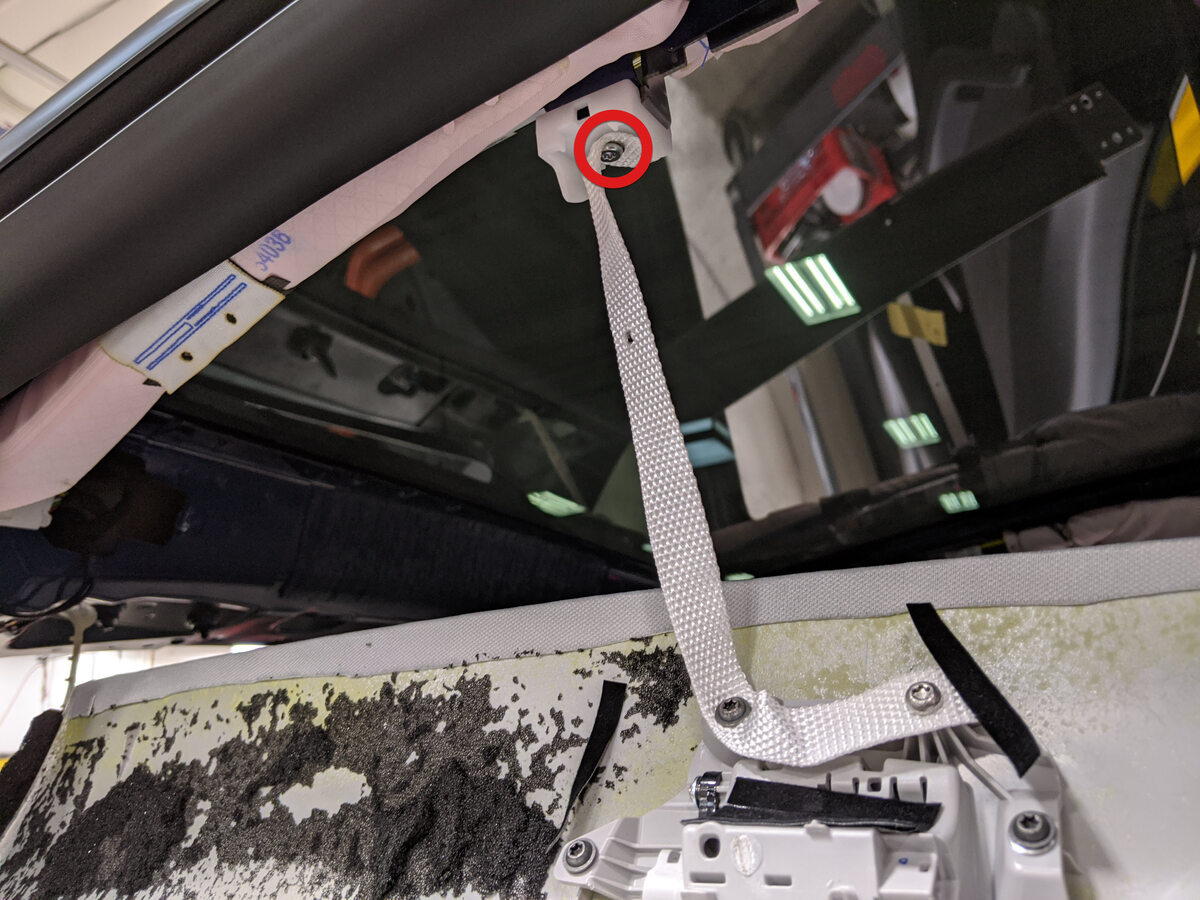
Release RH rear headliner tether from roof clip
注1x screw, T20, 1.5 Nm
-
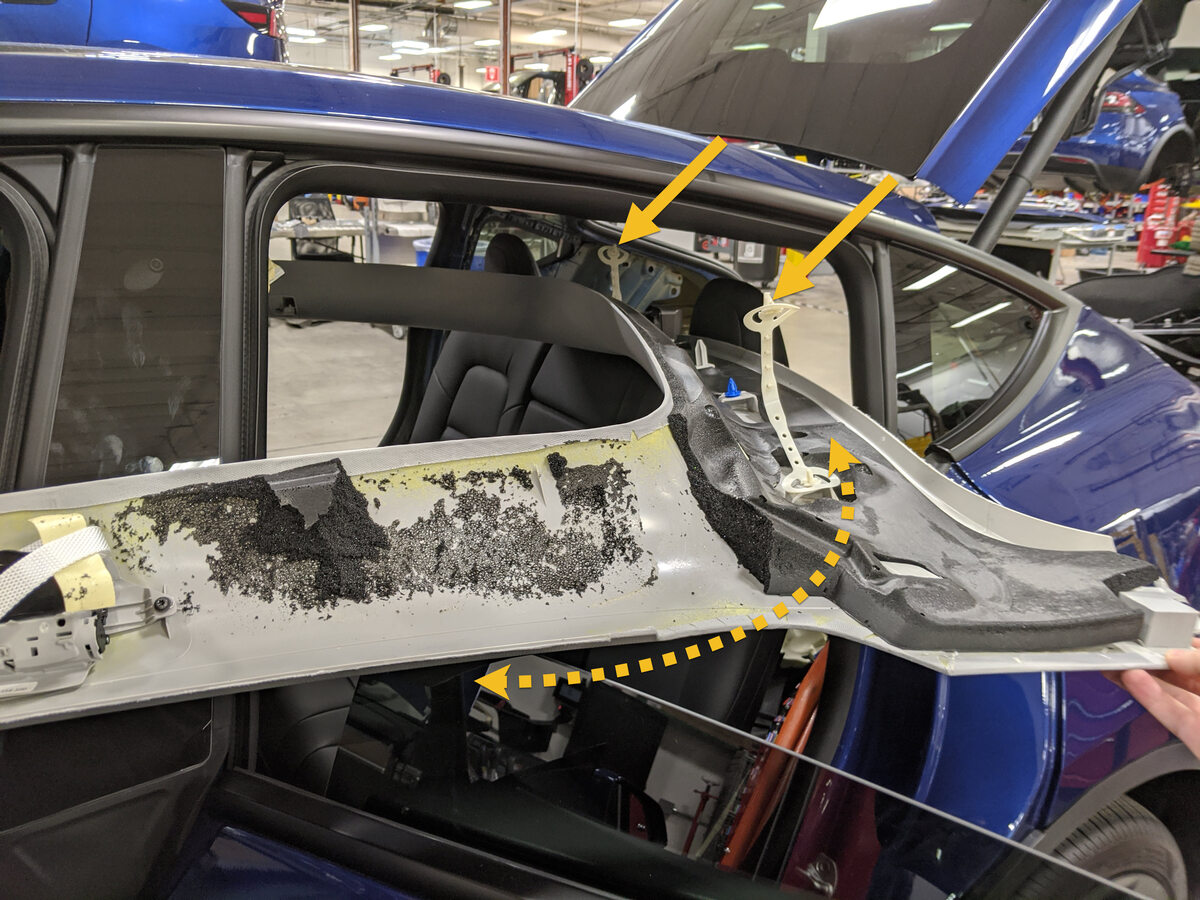
Remove rear headliner from vehicle
注2x tether clips, Recommend assistance, Remove through rear door, Place headliner on clean surface
-
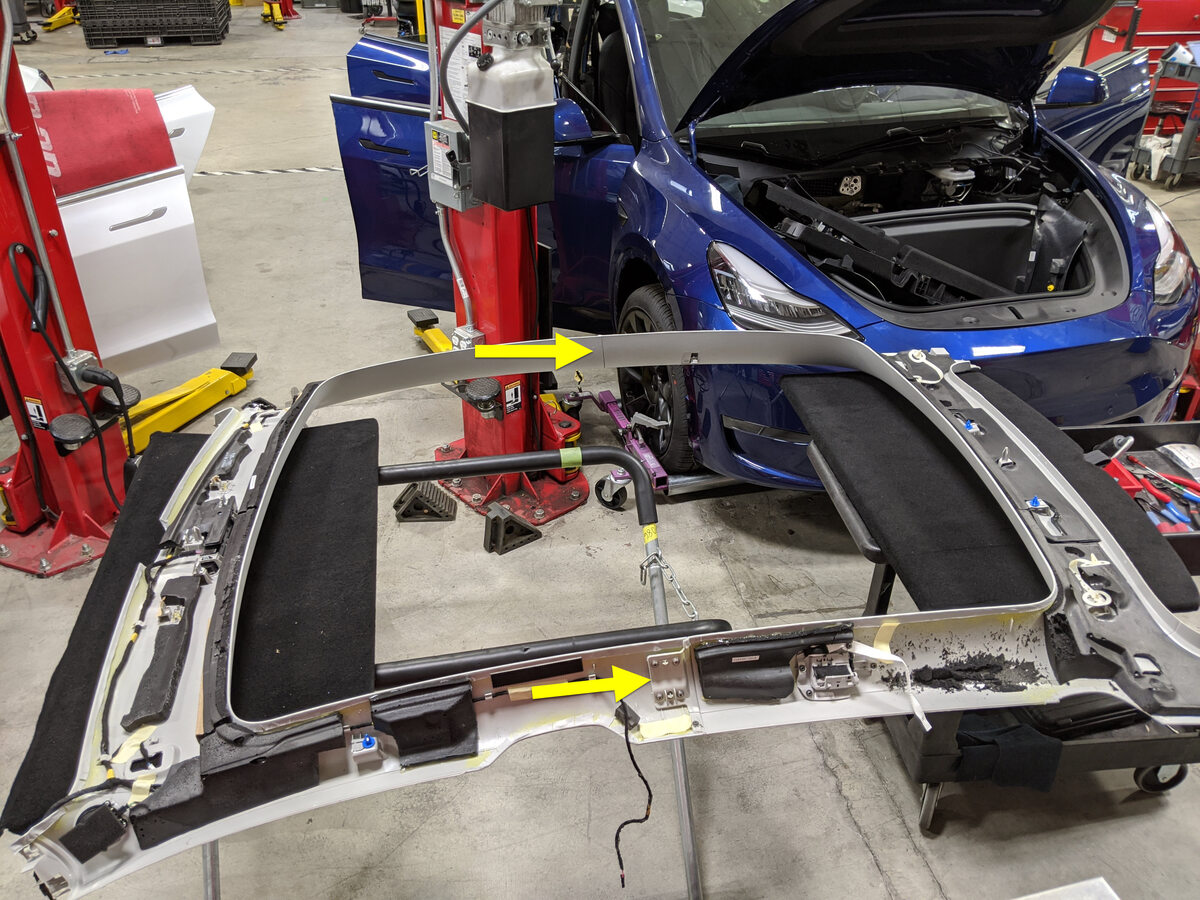
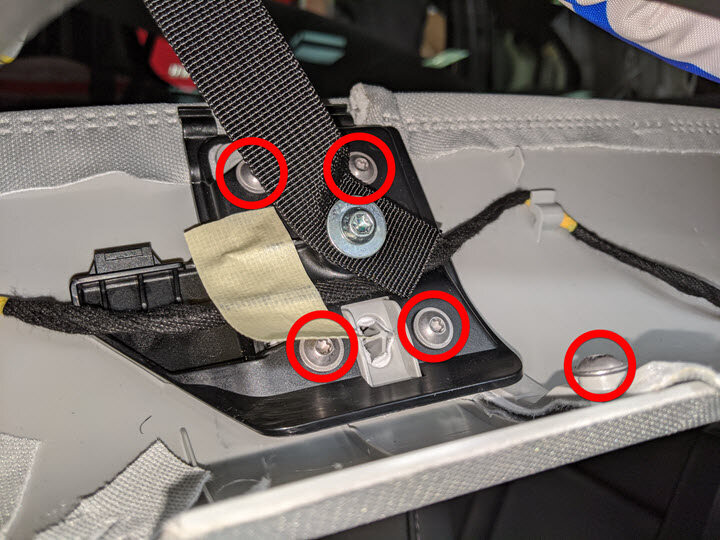
Separate new headliner into front and rear
注10x screws, T20, 1.0 Nm
-
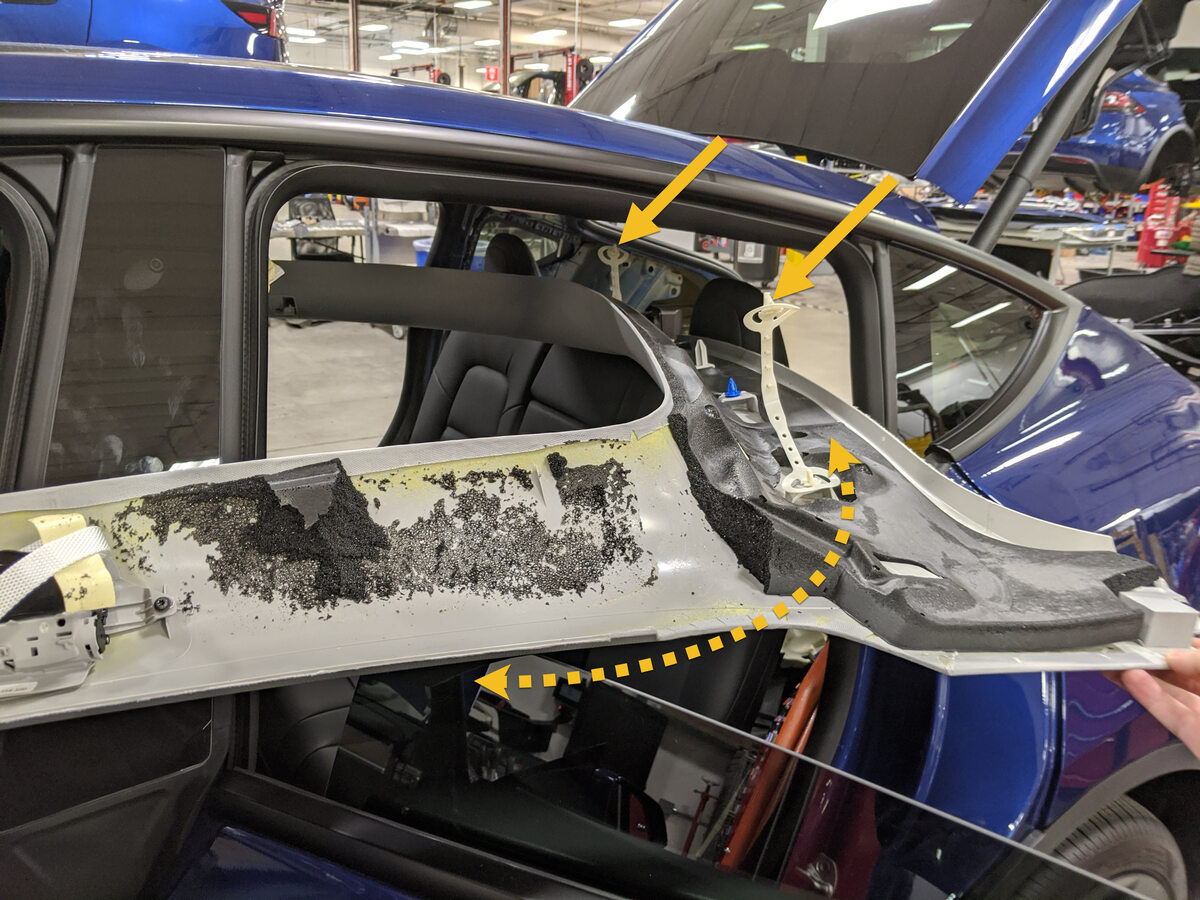
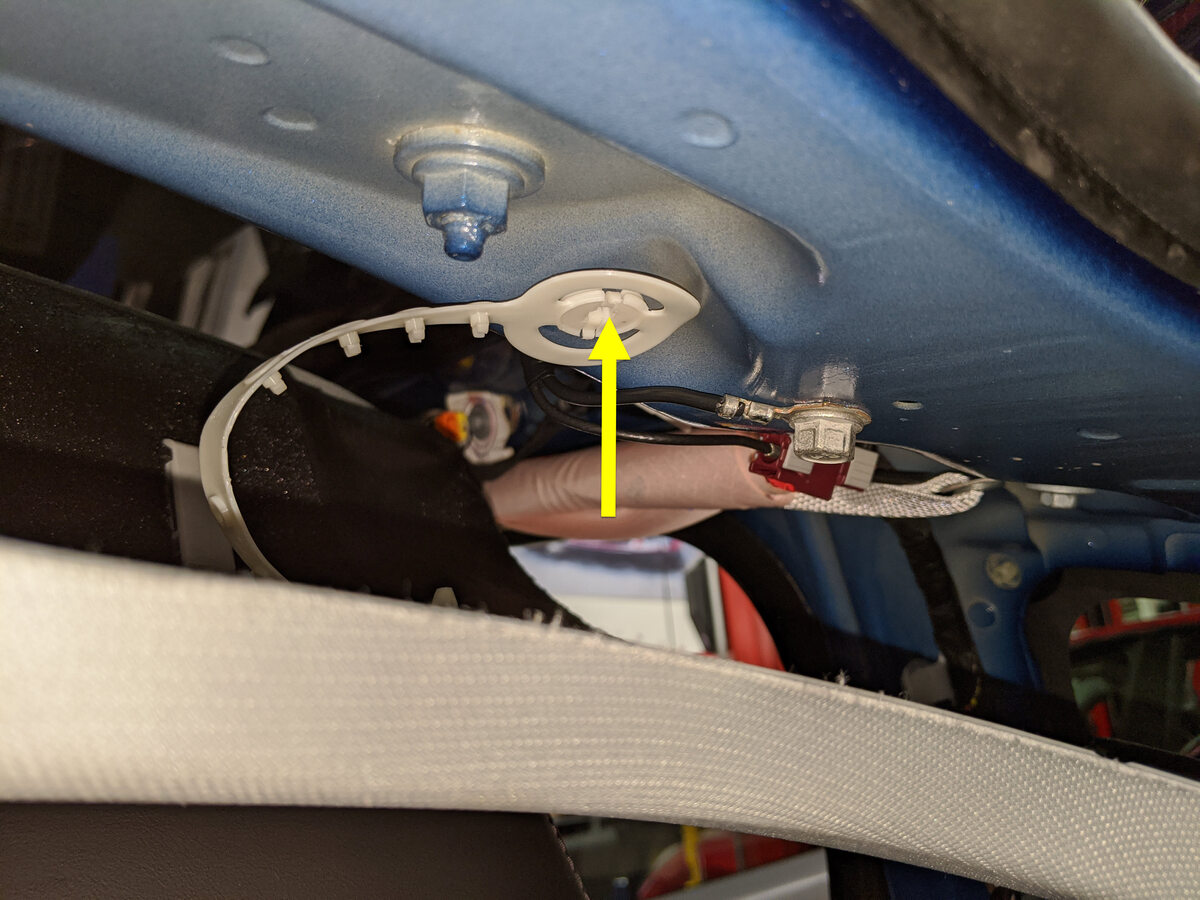
Place rear headliner into vehicle
注2x tether clips, Recommend assistance, Install through rear door
-
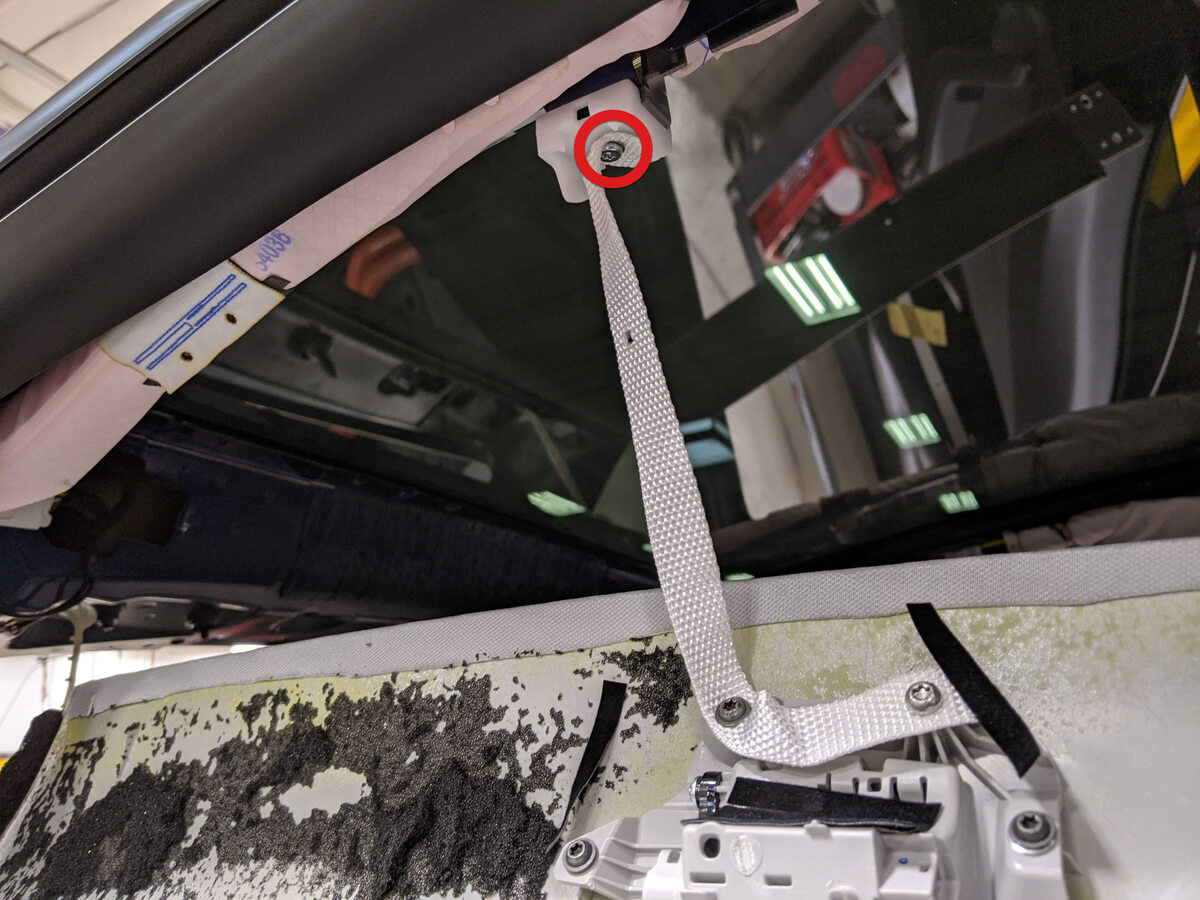
Install RH rear headliner tether to roof clip
注1x screw, T20, 1.5 Nm, Ensure tether is not twisted and is routed toward inside of vehicle
-
Install LH rear headliner tether to roof clip
注1x screw, T20, 1.5 Nm, Ensure tether is not twisted and is routed toward inside of vehicle

-
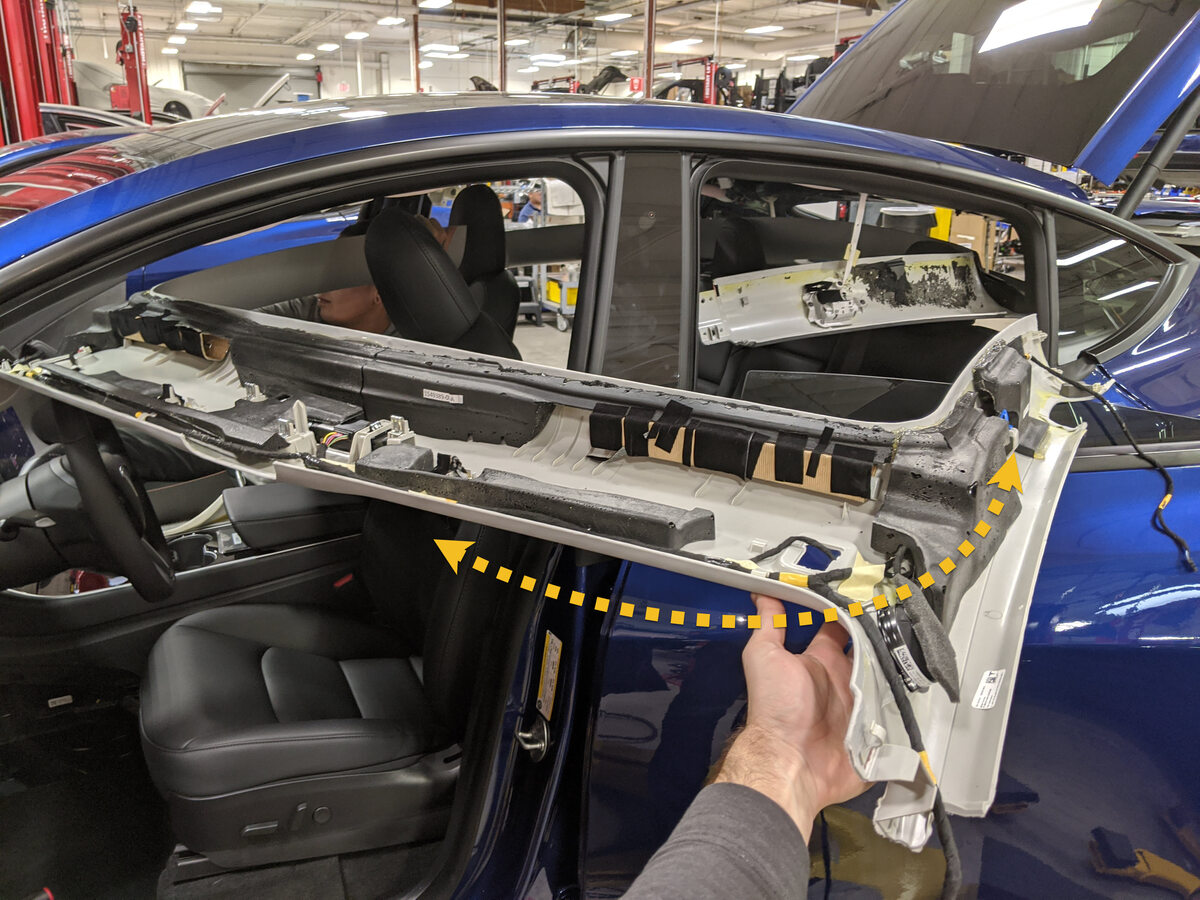
Place front headliner into vehicle
注Recommend assistance, Install through front door
-
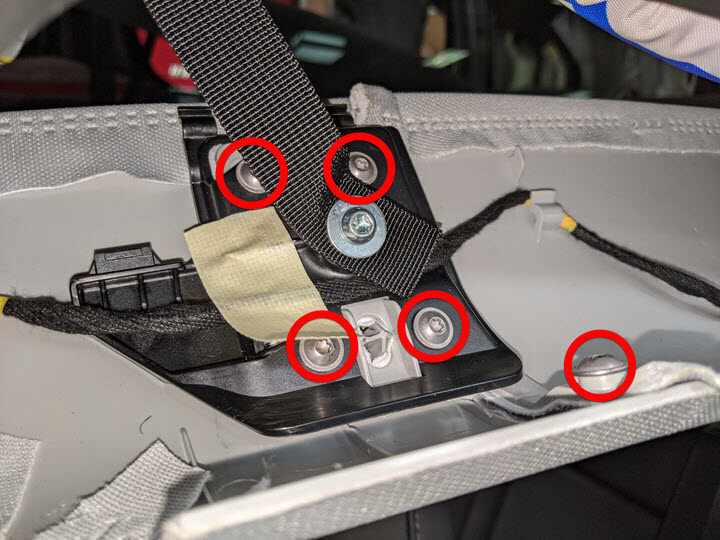
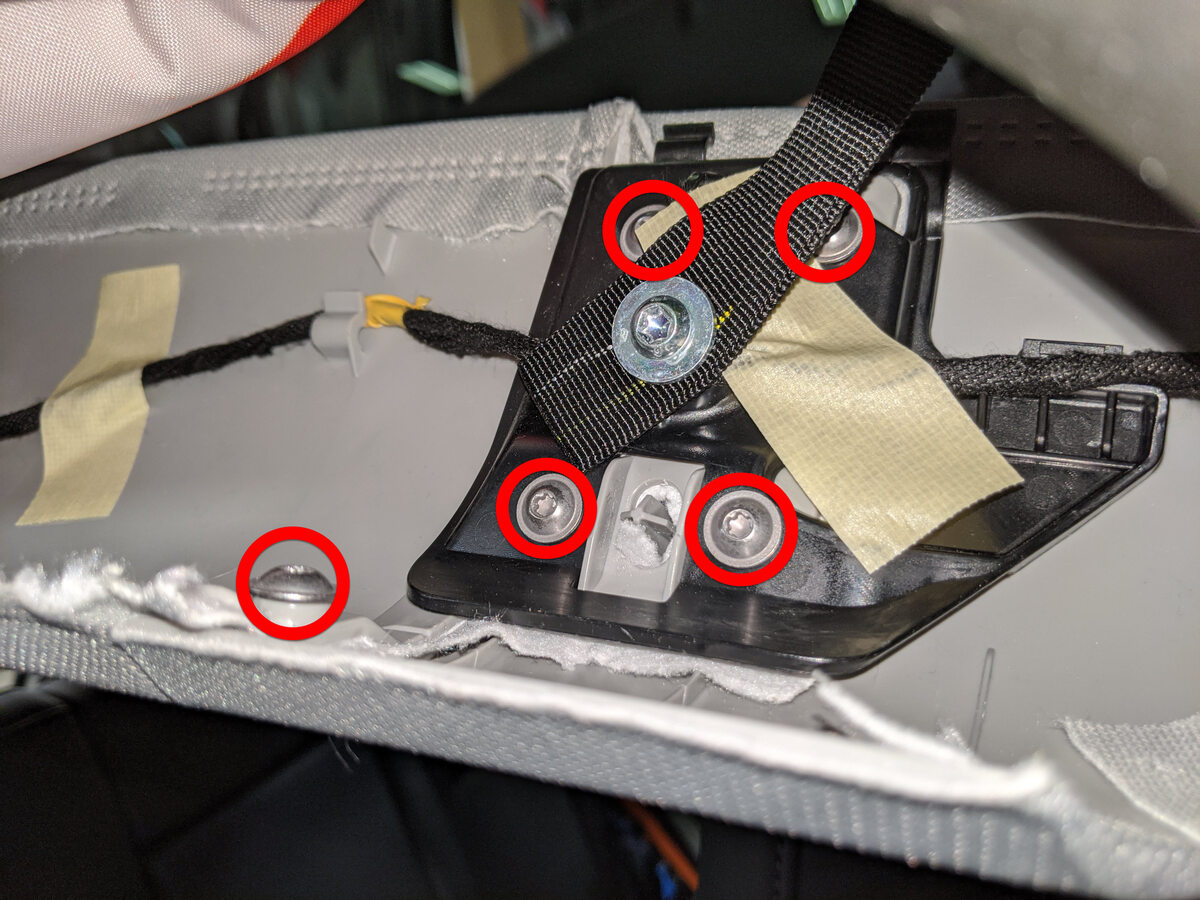
Install fasteners joining front and rear headliner trim
注10x screws, T20, 1.0 Nm, Recommend assistance
-
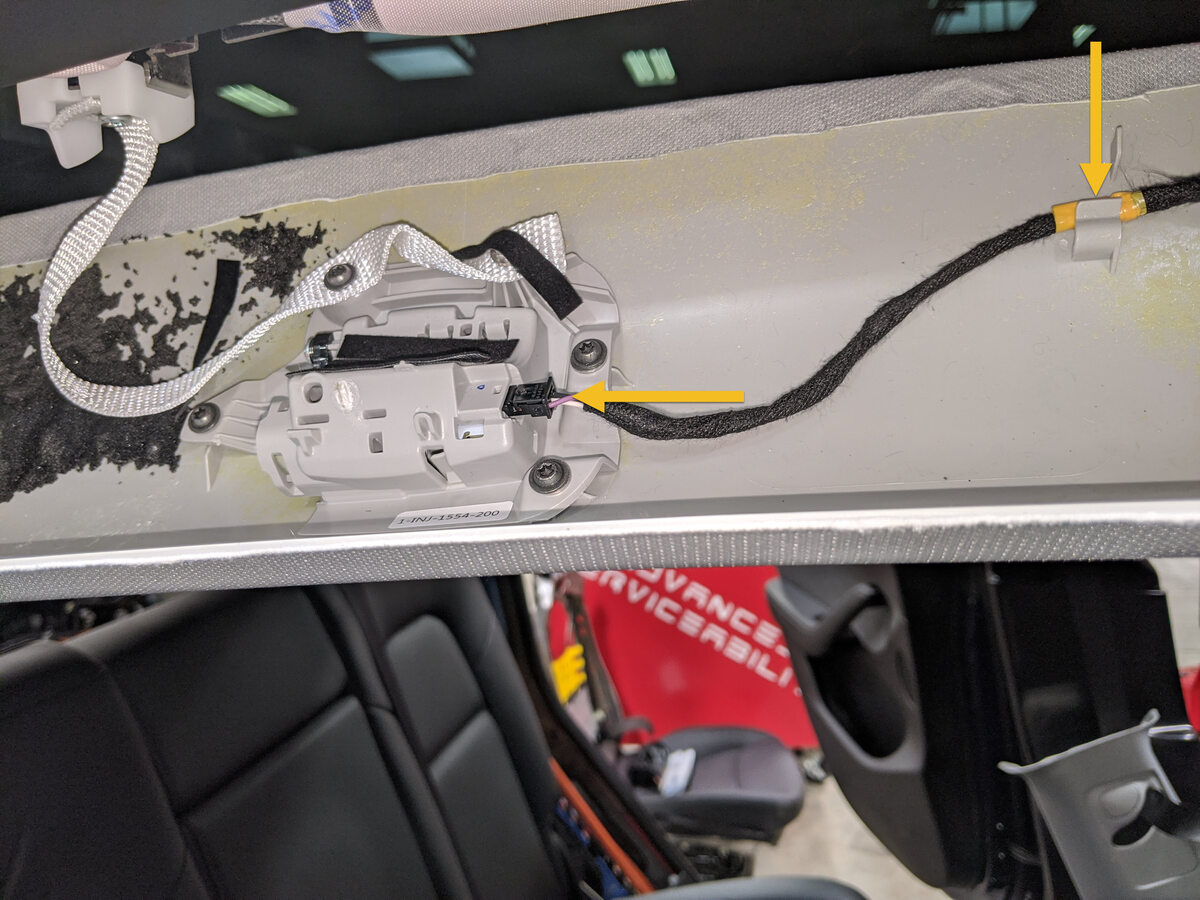
Connect RH rear map light and secure to rear portion of headliner
注1x connector, 1x harness clip
-
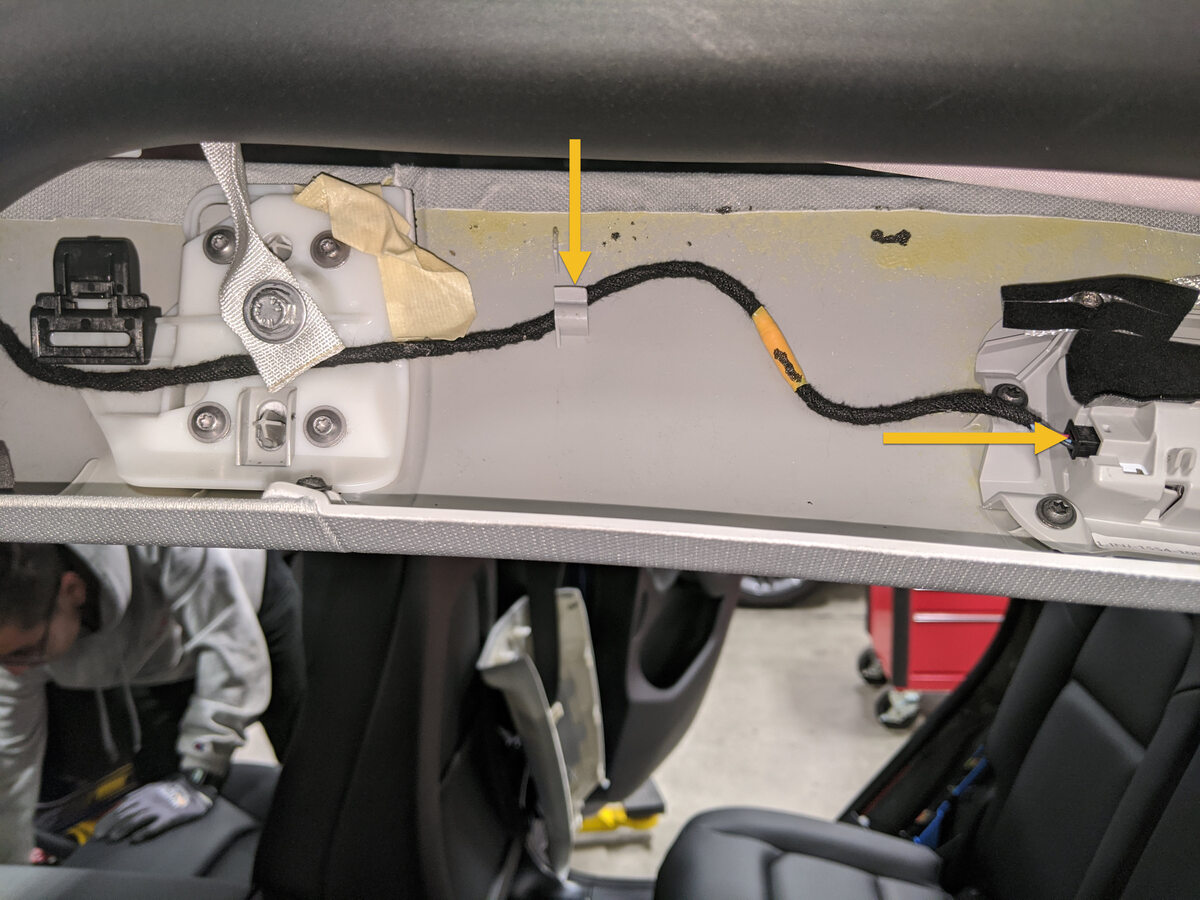
Connect LH rear map light and secure to rear portion of headliner
注1x connector, 1x harness clip
-
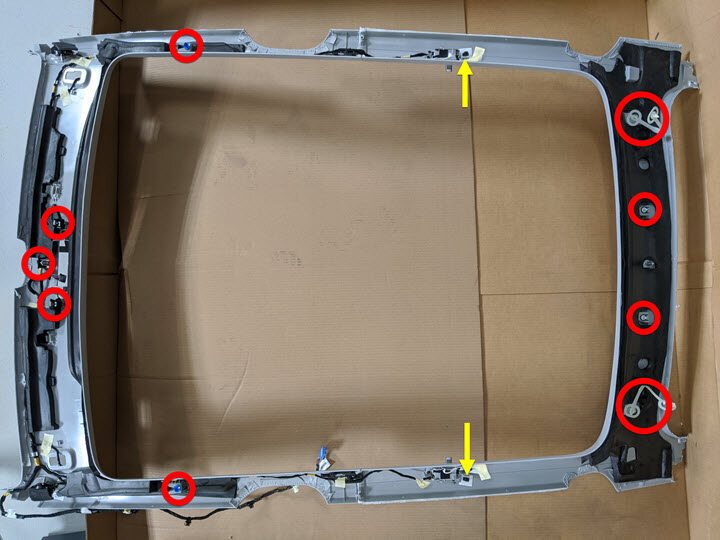
Install headliner to body
注11x clips, Recommend assistance, Seat 2x clips at coat hooks when replacing headliner, Reseat primary seal at doors and liftgate to headliner
-
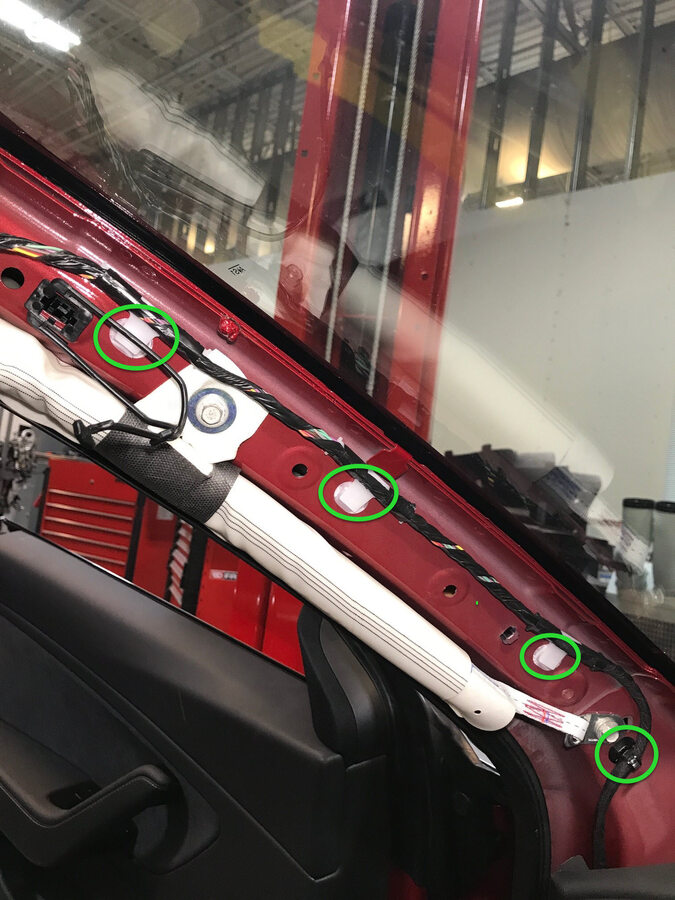
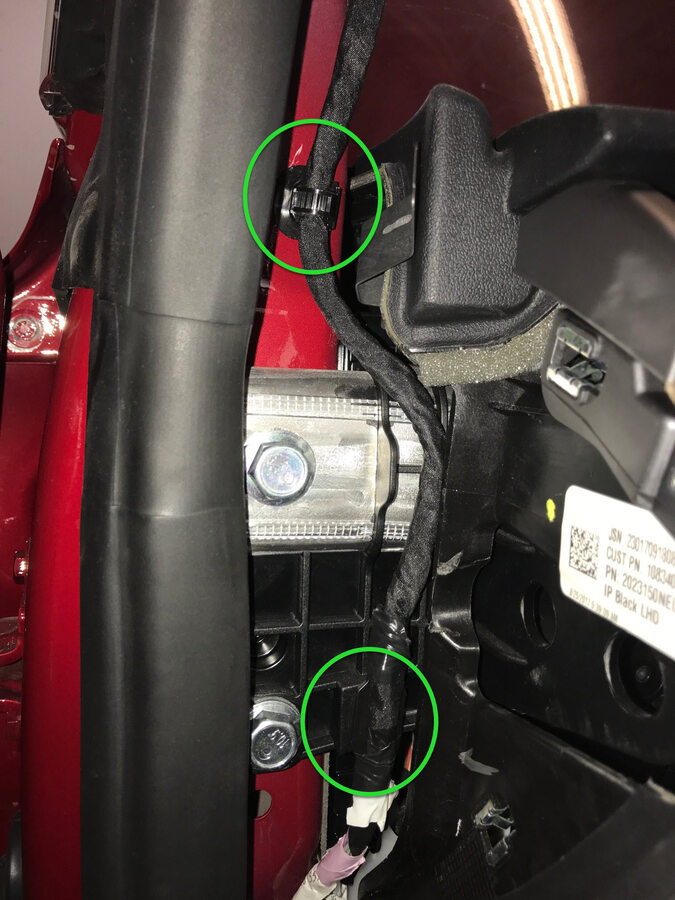
Install headliner harness clips to A-pillar area
注6x clips
-
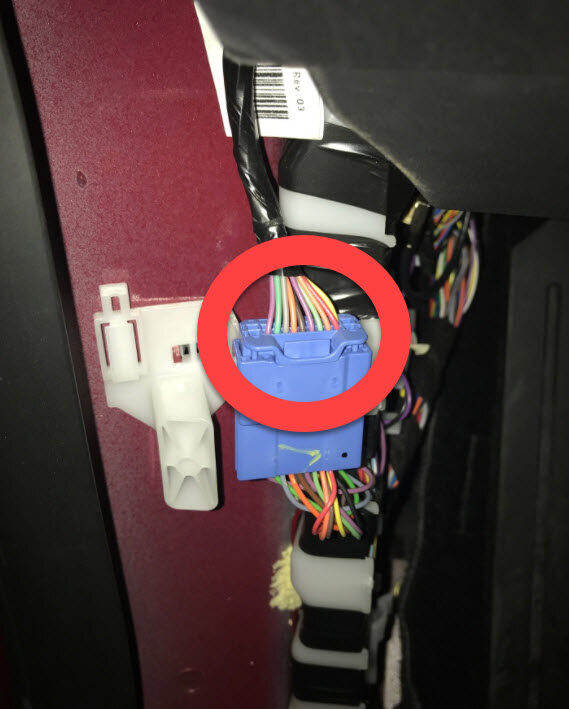
Connect headliner harness
注1x connector
-
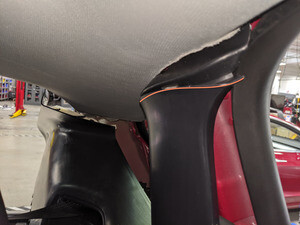
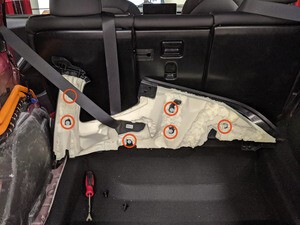
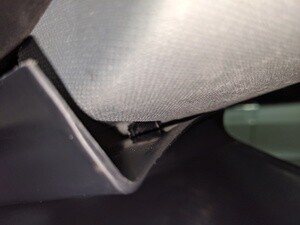
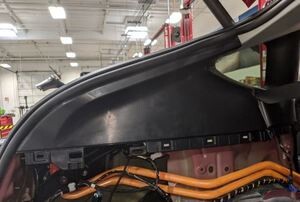
Install LH upper C-pillar trim
注6x clips, Guide front upper corner groove under headliner, Insert guide tab to headliner behind quarter glass, Seat trunk seal to edge of trim
-
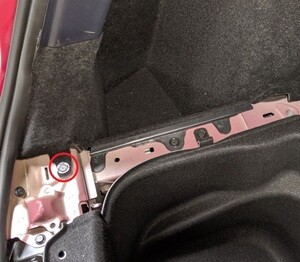
Position LH trunk side trim and install lower clips
注1x push clips, 5x clips, Guide front clip stanchions around LH C-pillar
-
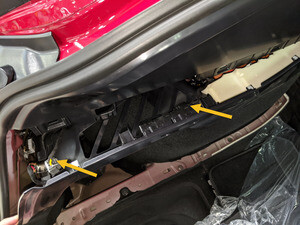
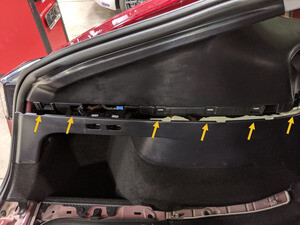
Connect 12V outlet and trunk switch connector and seat top edge of LH trunk side trim
注6x clips, 2x connectors
-
Install LH trunk pocket bracket
注1x push clip, 5x alignment tabs
-
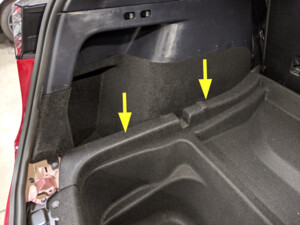
Install LH load floor bracket
注3x tabs, 2x clips
-
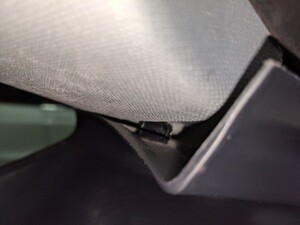
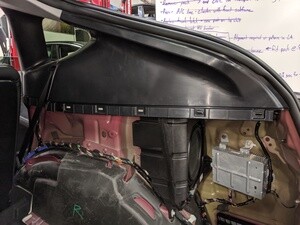
Install RH upper C-pillar trim
注6x clips, Guide front upper corner groove under headliner, Insert guide tab to headliner behind quarterglass, Seat trunk seal to edge of trim
-
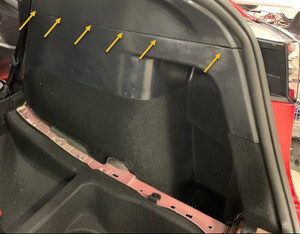
Install RH trunk side trim
注1x push clip, 11x clips, Guide front clip stanchions around RH C-pillar
-
Install RH trunk pocket bracket
注1x push clip, 5x alignment tabs
-
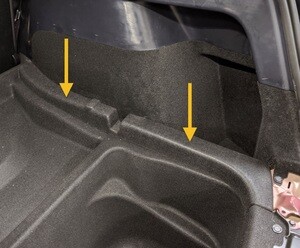
Install RH load floor bracket
注3x tabs, 2x clips
-
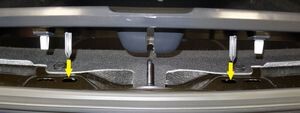
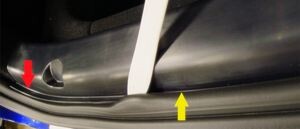
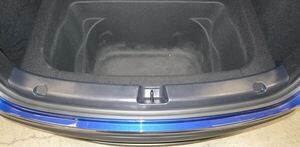
Install trunk sill trim
注4x clips, Seat seal around edge of trim
-
Install front load floor
-
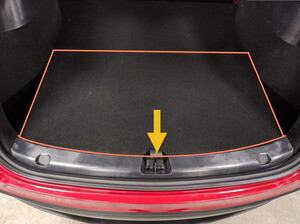
Install rear load floor
-
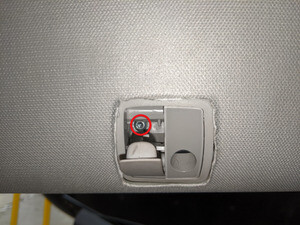
Install LH coat hook screw
注1x screw, T20, 1.0 Nm
-
Close LH coat hook screw cover
注1x locking tab
-
Push LH coat hook closed
-
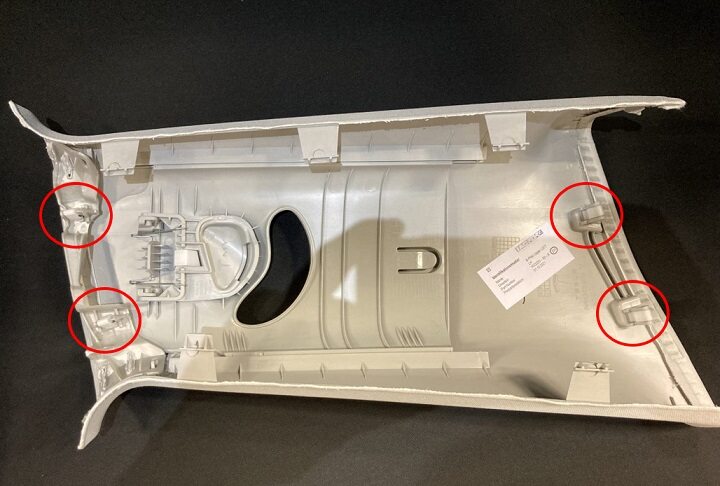
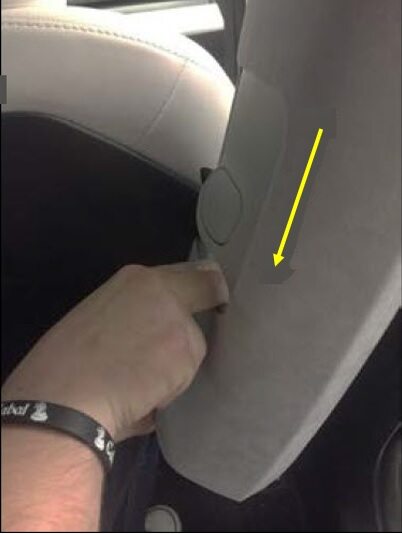
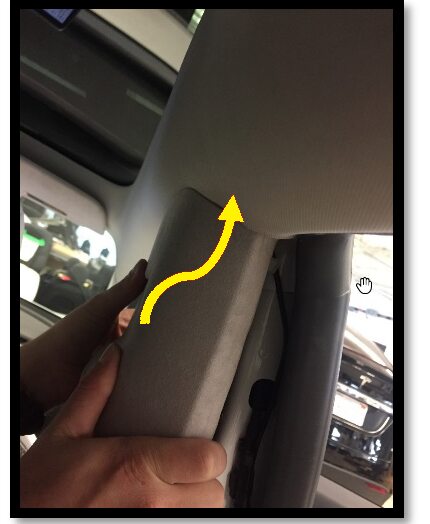
Install the LH upper B-pillar assembly
注4x clips, Lower the seat belt slider to align it with the B-pillar panel, Insert top portion of upper B-pillar under the headliner to align the clips, Press the bottom to fully seat upper B-pillar to lower B-pillar, Make sure the seal correctly overlaps the trim
-
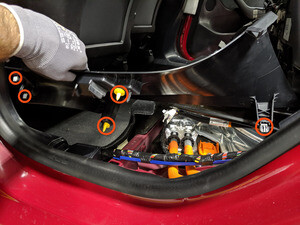
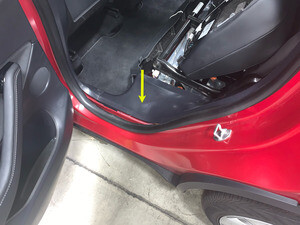
Install LH rear sill trim
注5x clips, Rear edge is mated with groove in trunk side trim, Install rear edge of LH rear sill trim into trunk side trim and work your way forward securing clips, Trim part may slightly differ, by vehicle build location
-
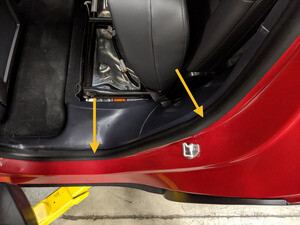
Reseat LH rear door seal
注Seat pillar and sill trim tabs underneath seal
-
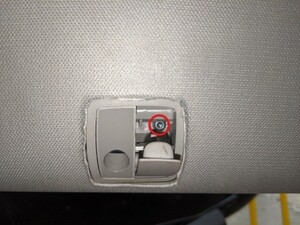
Install RH coat hook screw
注1x screw, T20, 1.0 Nm
-
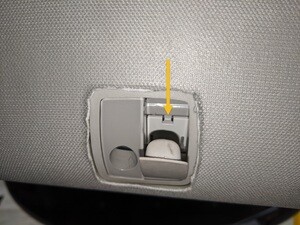
Close RH coat hook screw cover
注1x locking tab
-
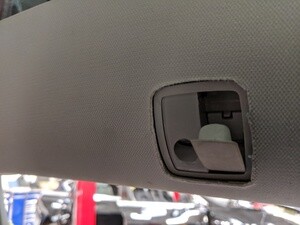
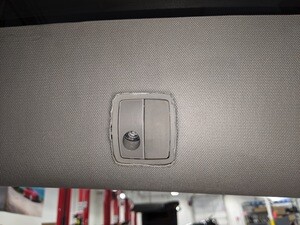
Push RH coat hook closed
-
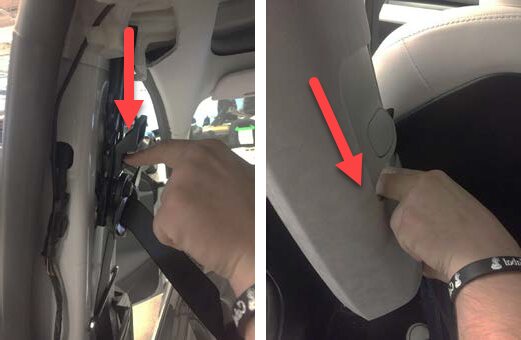
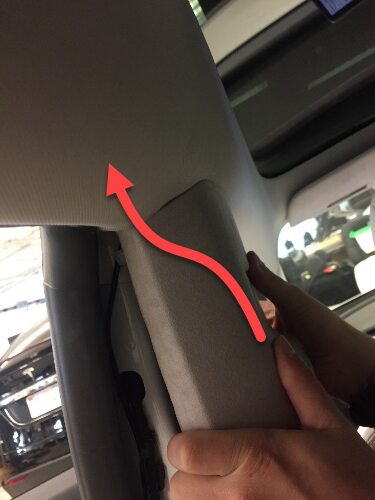
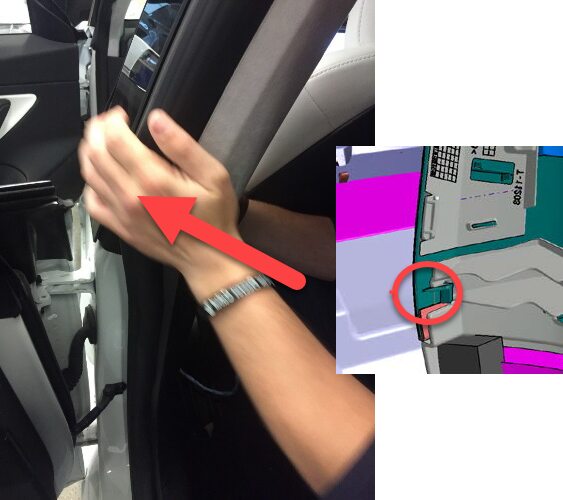
Install the RH upper B-pillar assembly
注4x clips, Lower the seat belt slider to align it with the B-pillar panel, Insert top portion of upper B-pillar under the headliner to align the clips, Press the bottom to fully seat upper B-pillar to lower B-pillar, Make sure the seal correctly overlaps the trim
-
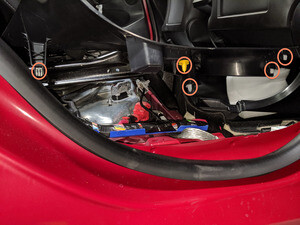
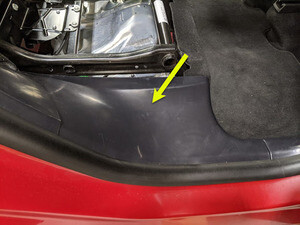
Install RH rear sill trim
注5x clips, Rear edge is mated with groove in trunk side trim, Install rear edge of RH rear sill trim into trunk side trim and work your way forward securing clips
-
Reseat RH rear door seal
注Seat pillar and sill trim tabs underneath seal
-
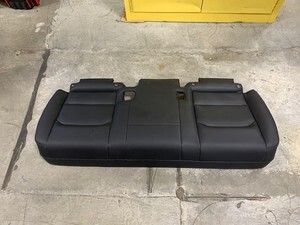
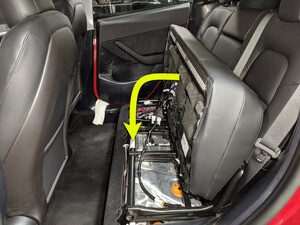
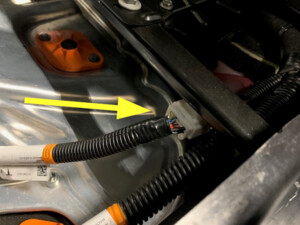
Install 2nd row seat cushion
注1x connector, Slide rear cushion rearward then align foam with seat rail, Make sure cushion is fully seated with push & pull test
- Close liftgate
- Move RH front seat to original position
-
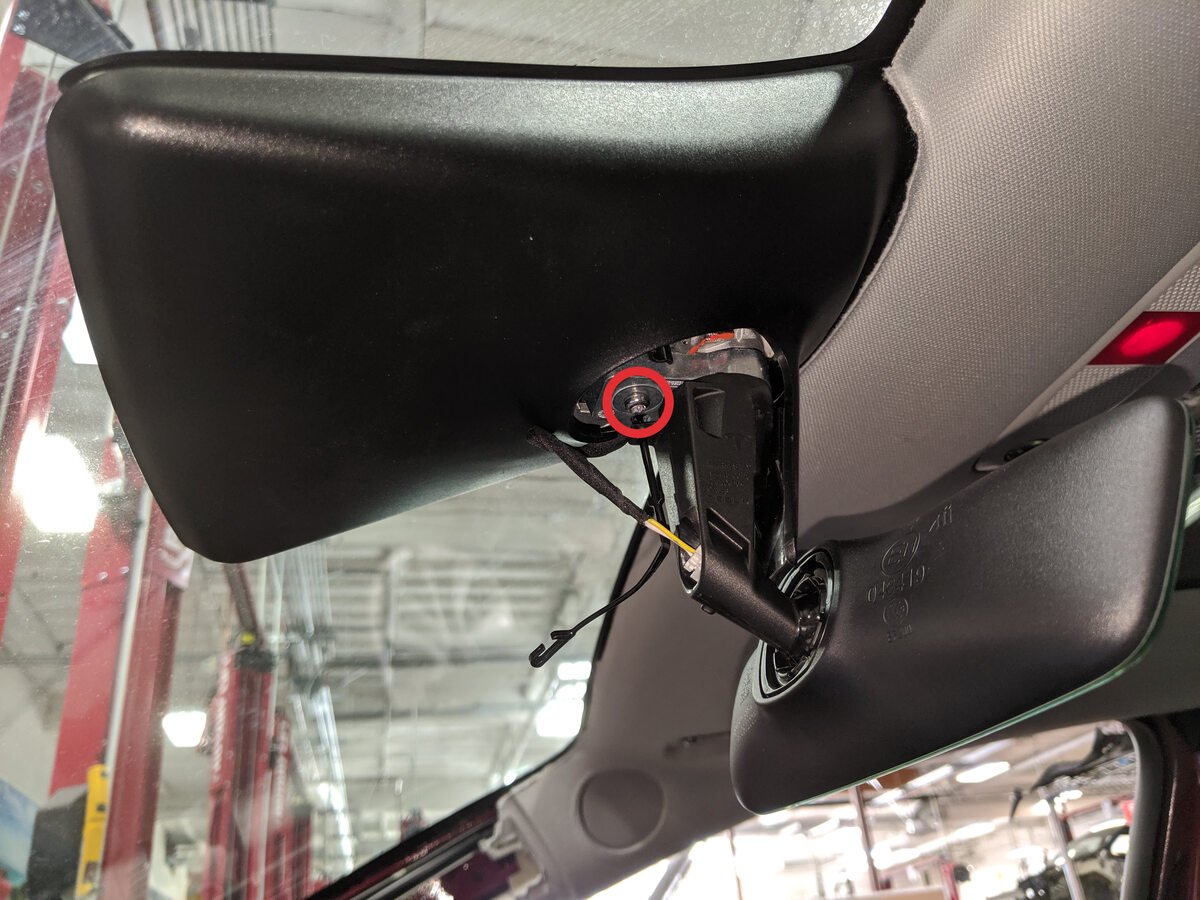
Install rear view mirror
注1x bolt, T20, 2.5 Nm
-
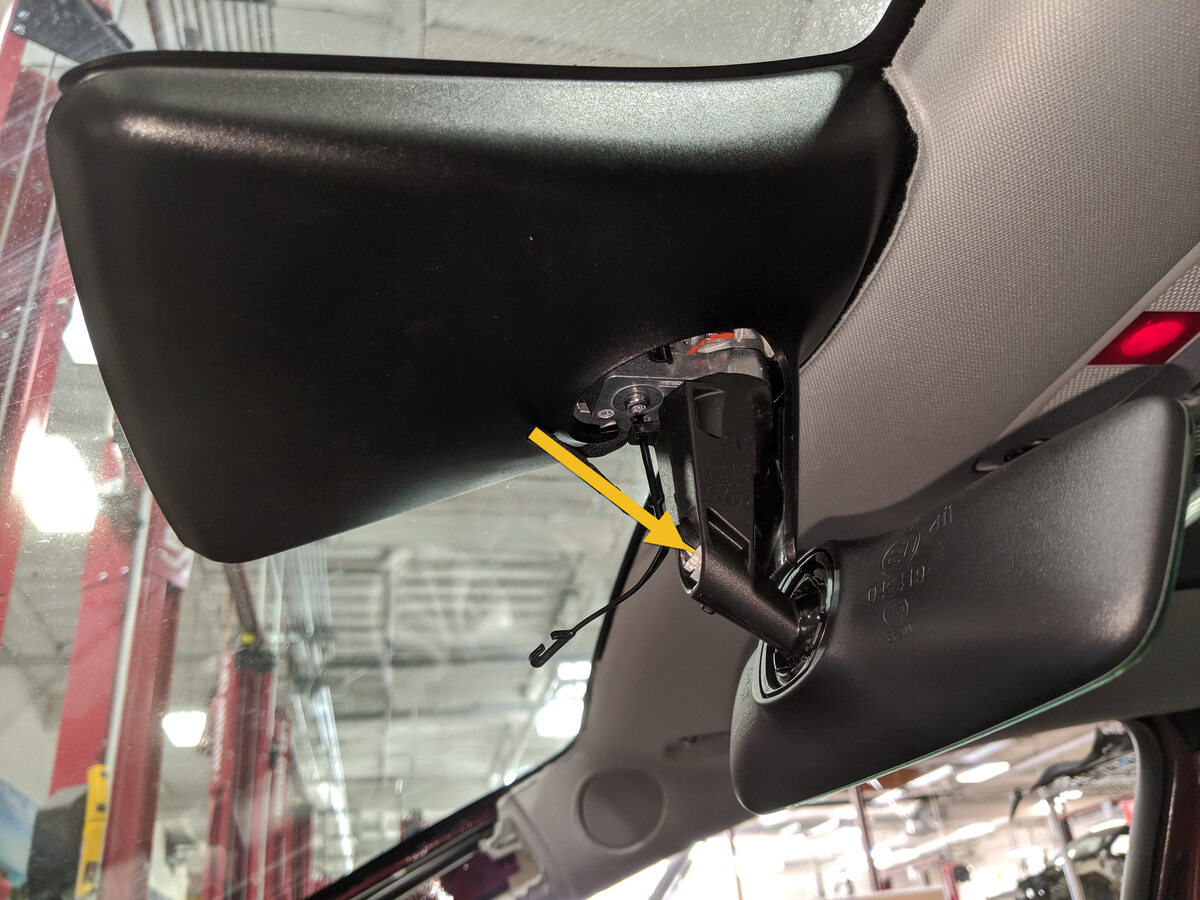
Connect rear view mirror connector
注1x connector
-
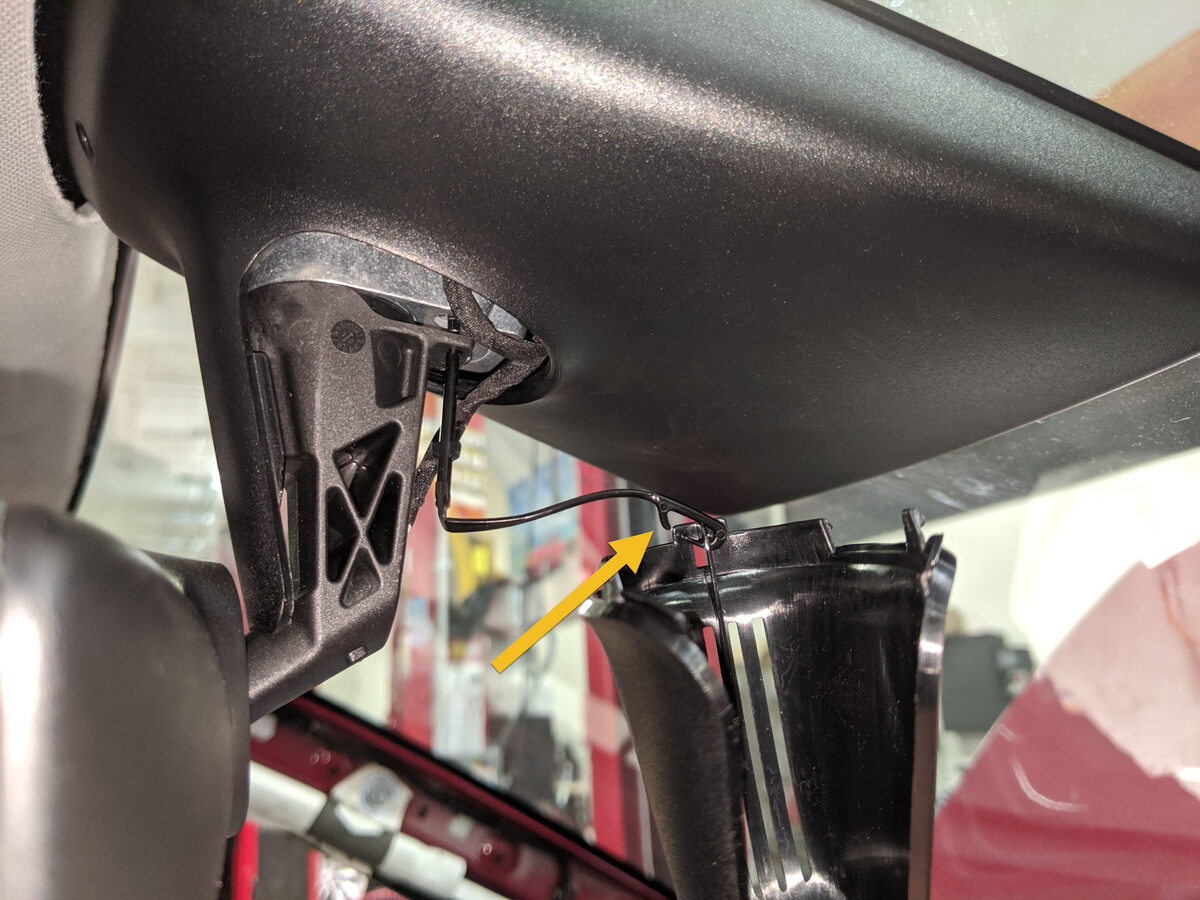
Install tether onto lower quad cam cover
注1x hook, Guide hook through anchor on quad cam cover
-
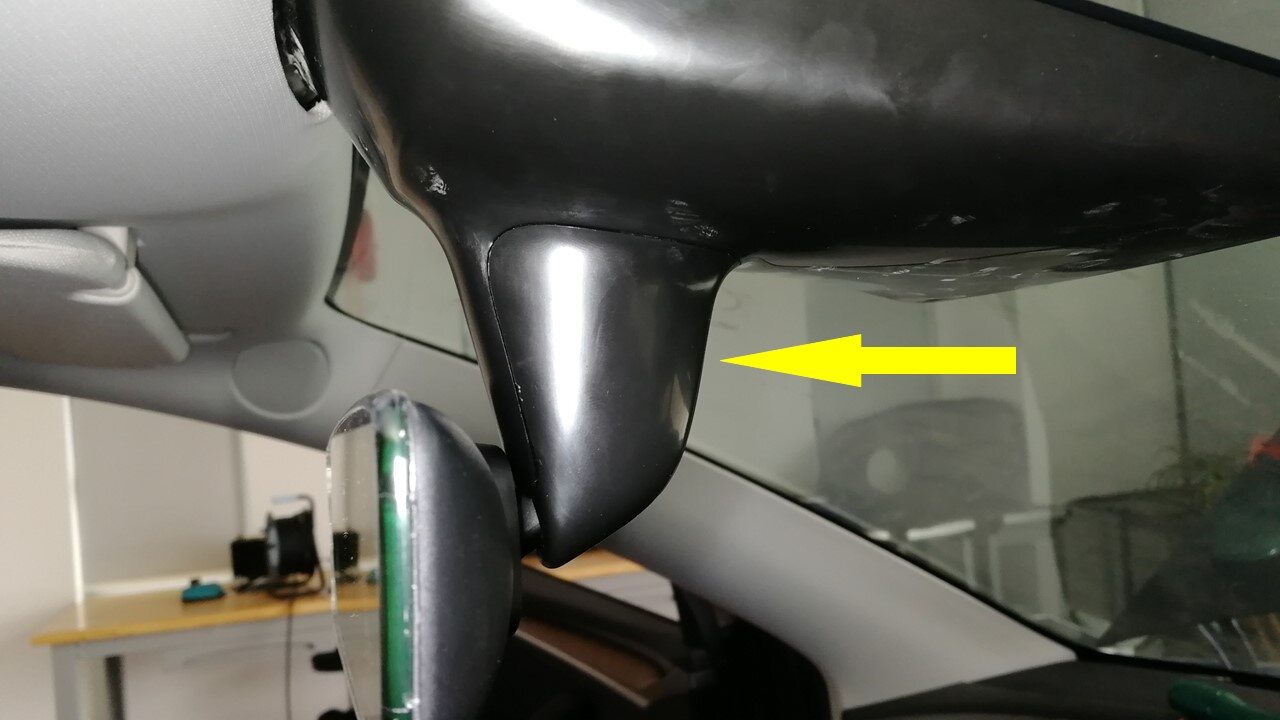
Install quad camera lower cover
注4x tabs, Install the tabs closest to the rearview mirror assembly and push the cover up to secure
-
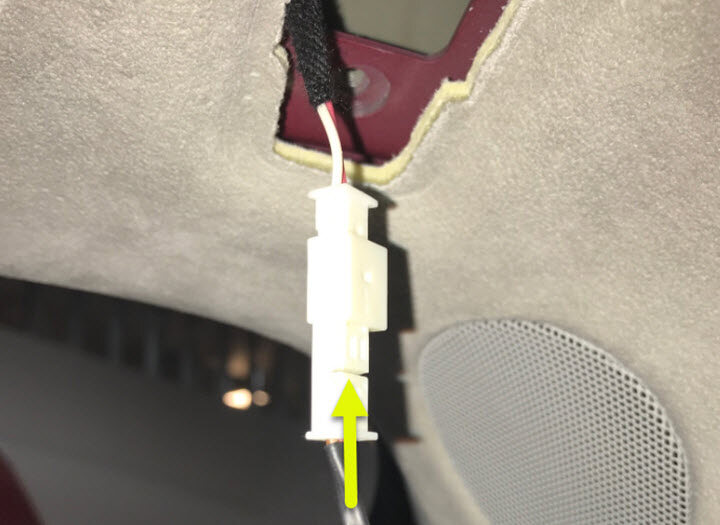
Connect RH sun visor connector
注1x connector
-
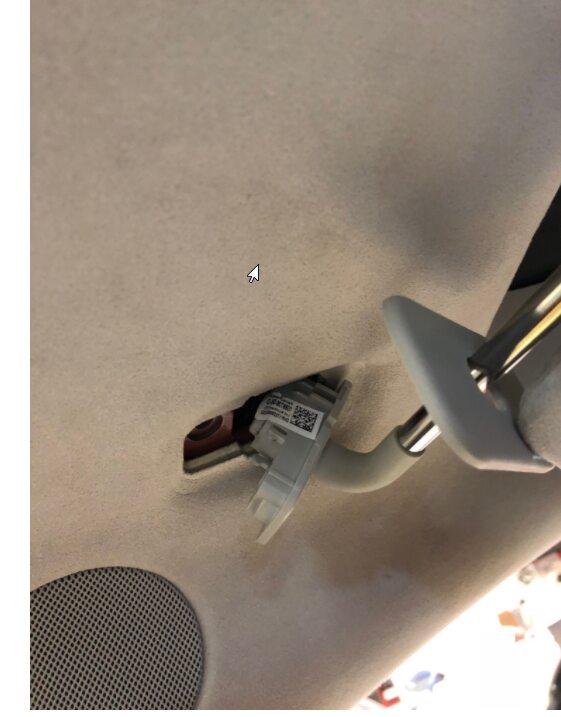
Install RH sun visor into headliner area
注Fold sun visor to the closed and folded down position but do not latch in place
-
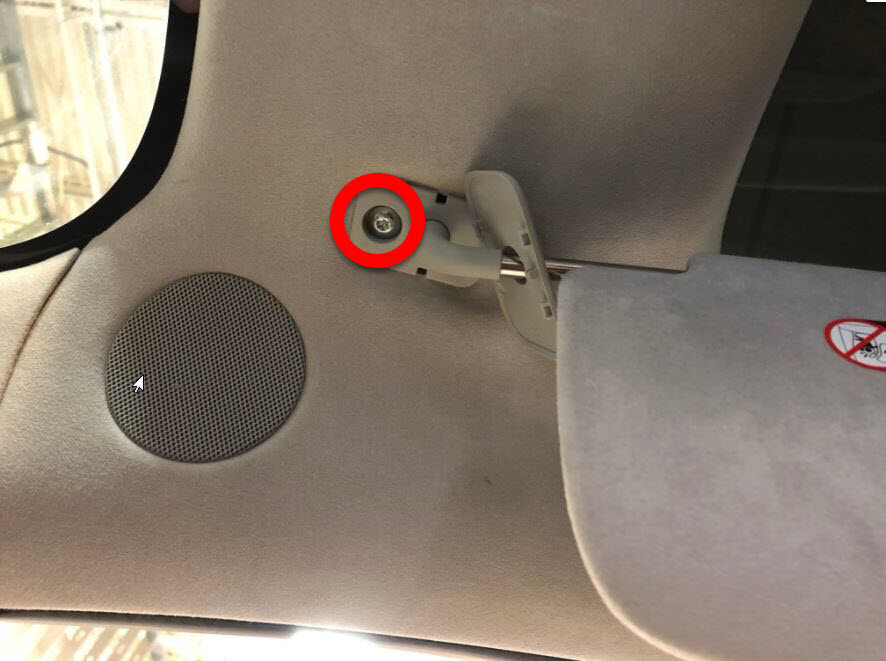
Install RH sun visor fastener
注1x screw, T25, 3.5 Nm
-
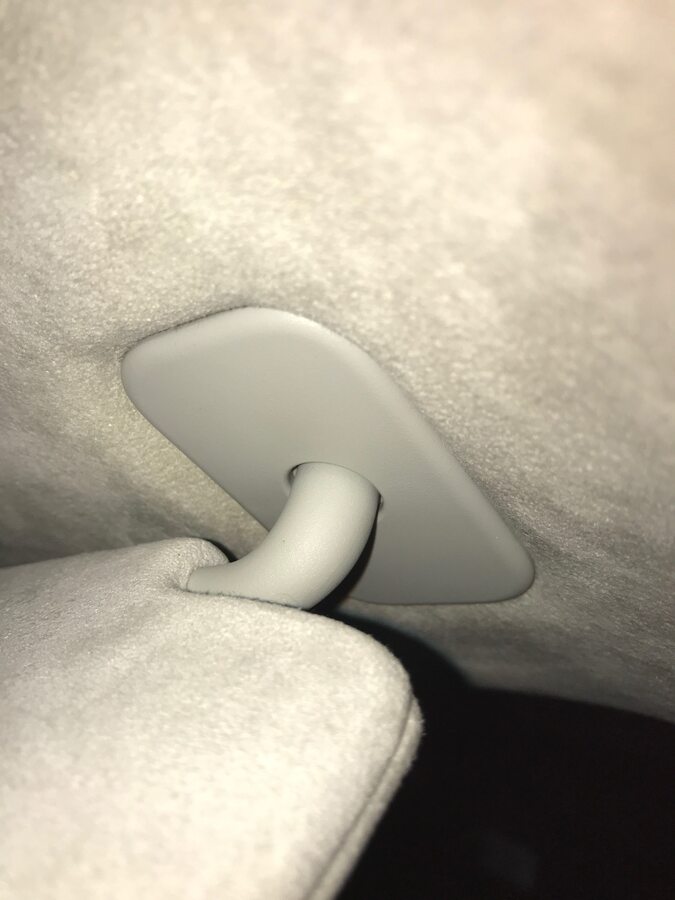
Install RH sun visor bracket cover
注4x clips
-
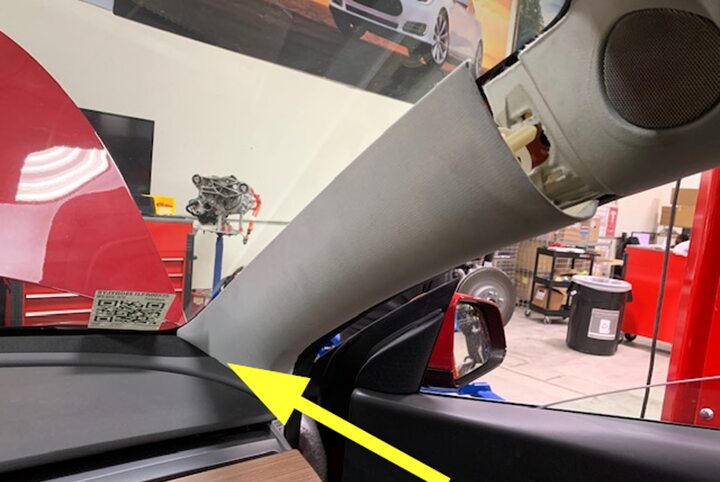
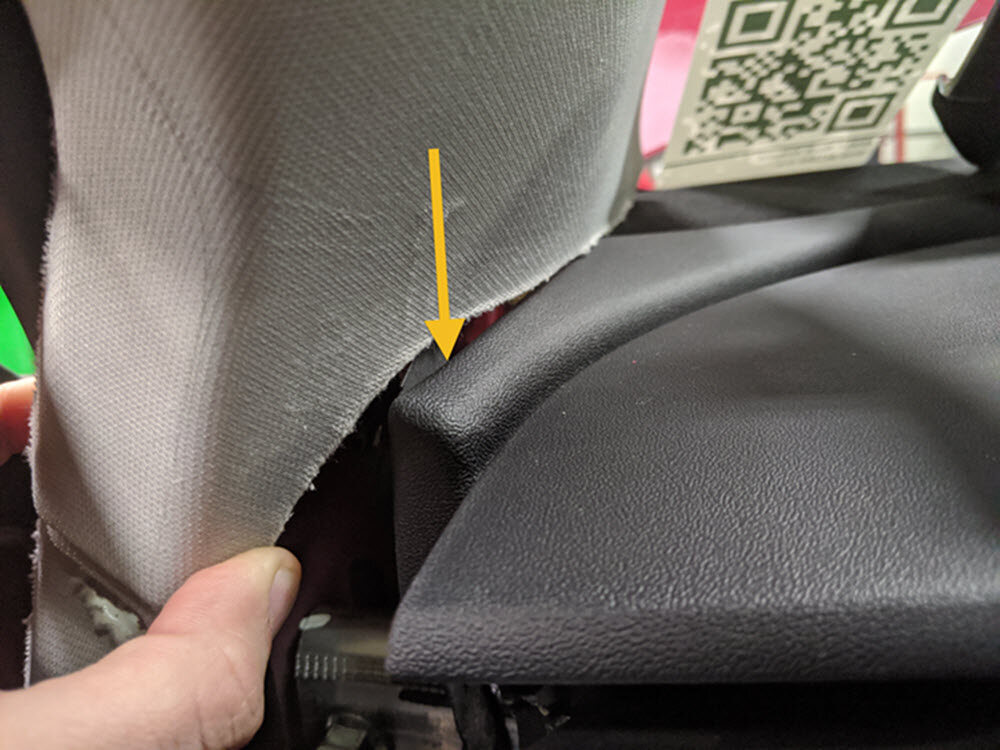
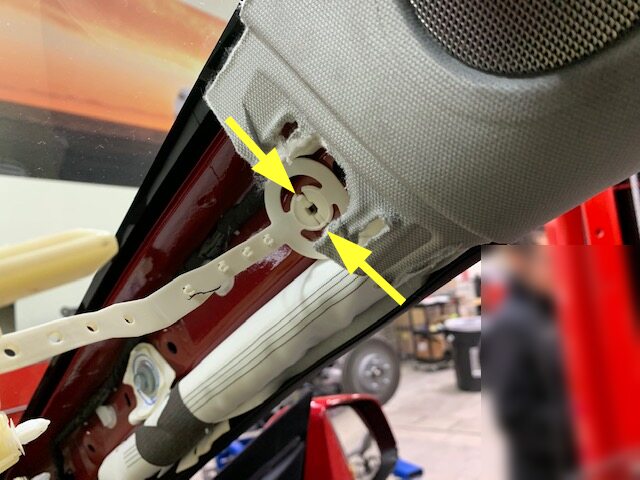
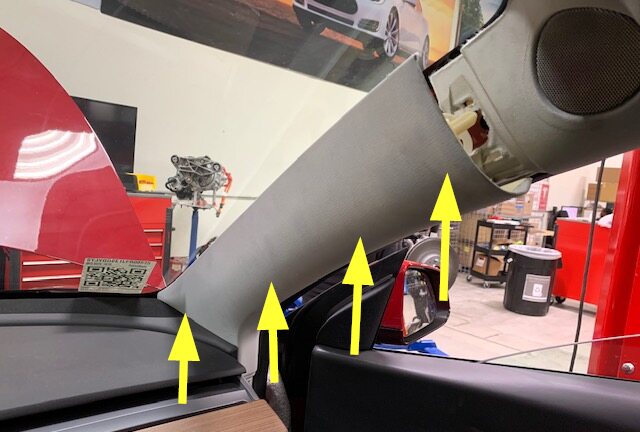
Install RH upper A-pillar trim
注3x clips, 1x tether, Slide bottom of trim along IP and speaker grill, attach tether to body side, Set clips starting at the bottom and work up, Pull seal over trim
-
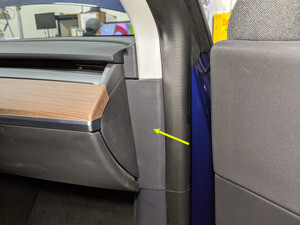
Install RH mid A-pillar assembly
注1x clip, 1x tab, Align the bottom tab then push the top clip to fully seat mid A-pillar, Make sure the seal seat on top of the trim
-
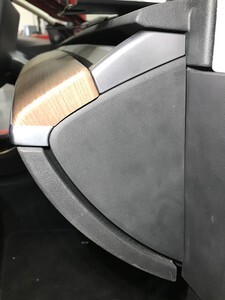
Install RH IP end cap
注3x clips
-
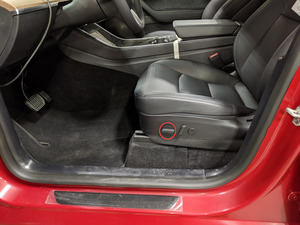
Move LH front seat to original position
-
Connect LH sunvisor connector
注1x connector

-
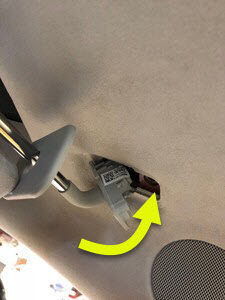
Install LH sun visor into headliner area
注Fold sun visor to the closed and folded down position but do not latch in place
-
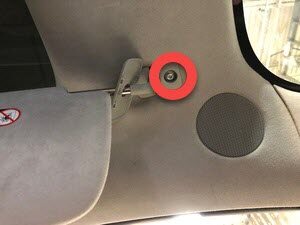
Install LH sun visor fastener
注1x screw, T25, 3.5 Nm
-
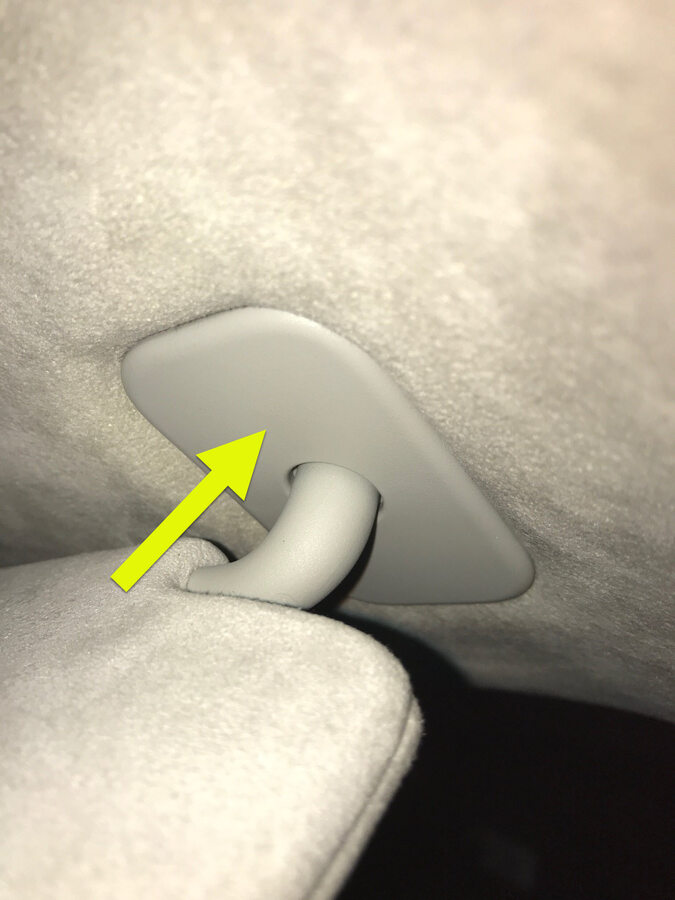
Install LH sun visor bracket cover
注4x clips
-
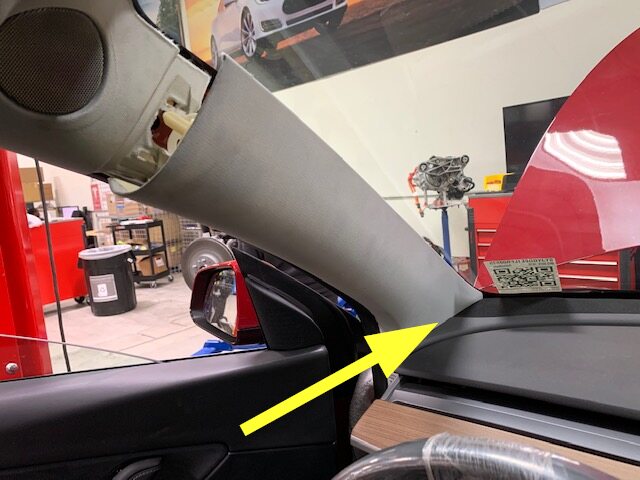
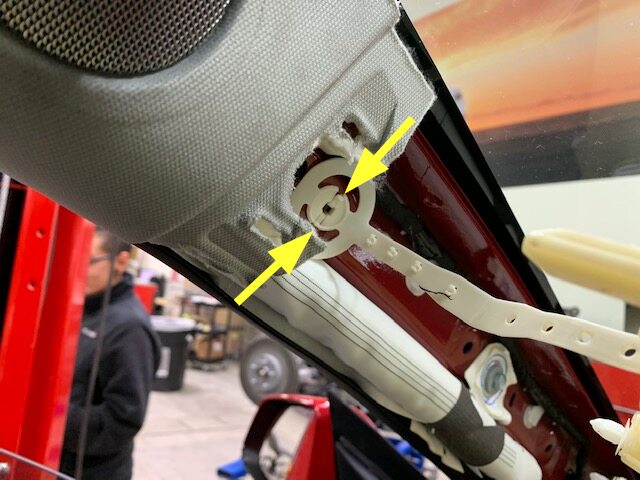
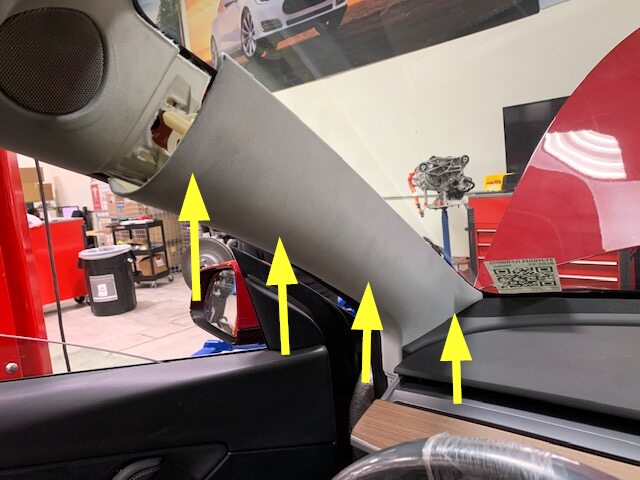
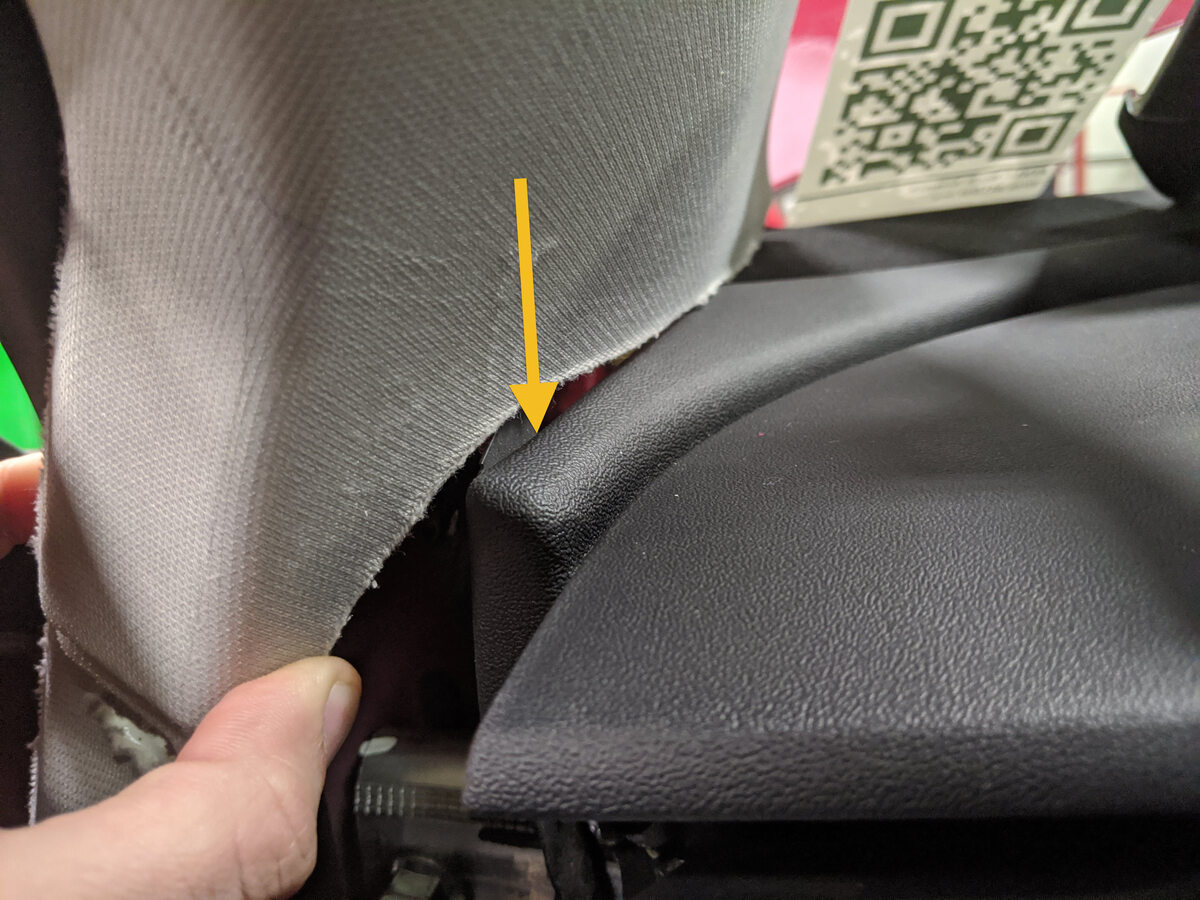
Install LH upper A-pillar trim
注3x clips, 1x tether, Slide bottom of trim along IP and speaker grill, attach tether to body side, Set clips starting at the bottom and work up, Pull seal over trim
-
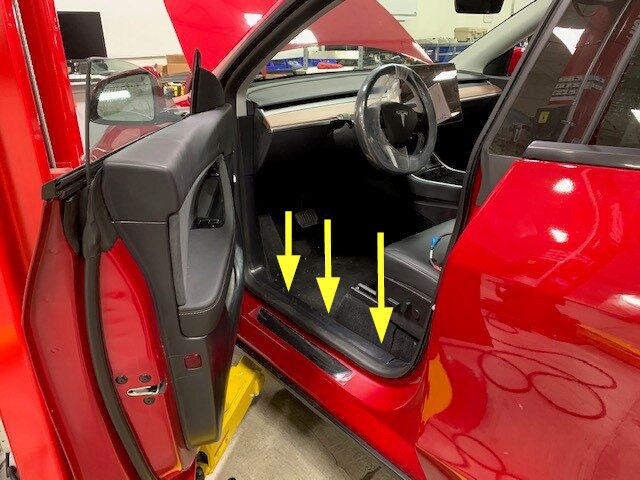
Install LH lower A-pillar trim
注6x clips, 2 locating pins, Align front locating pin first
-
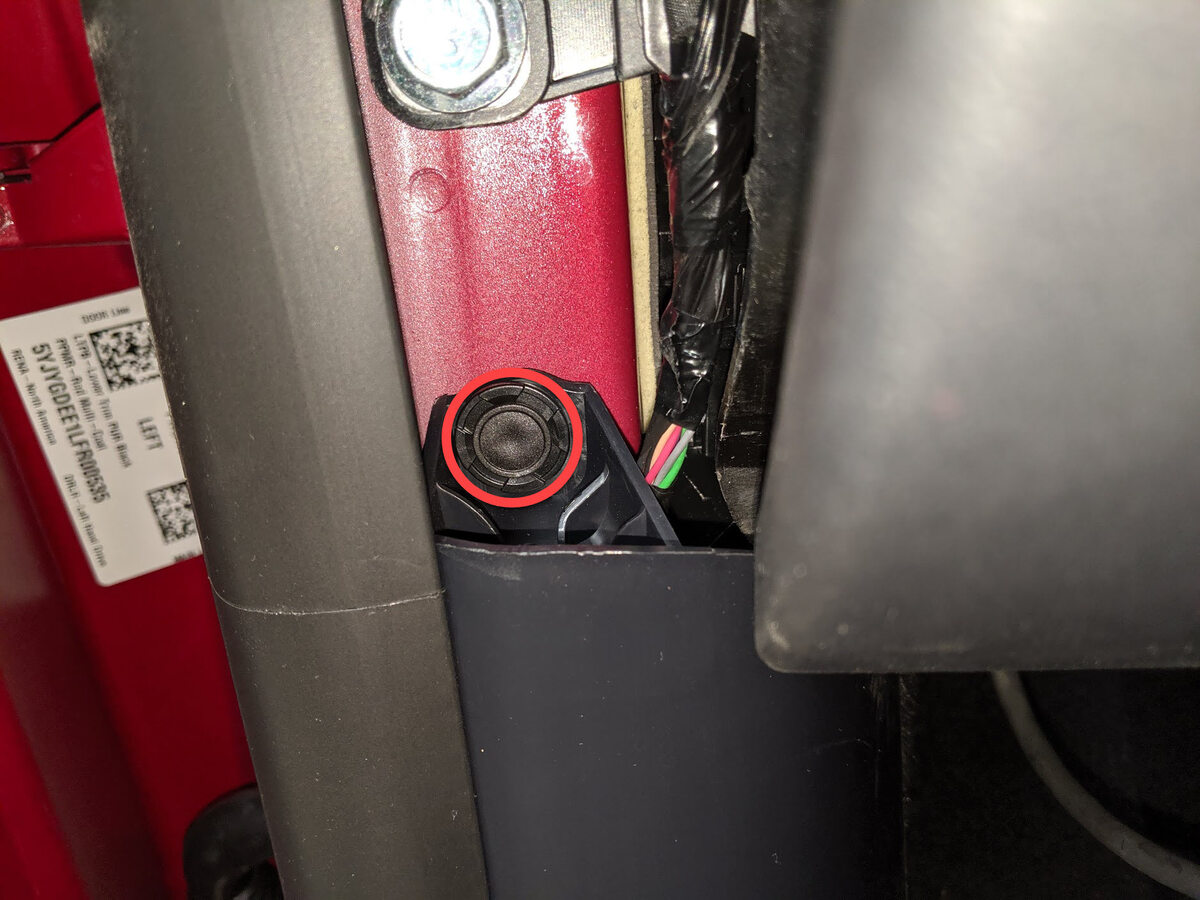
Install clip securing LH lower A-pillar trim
注1x push clip
-
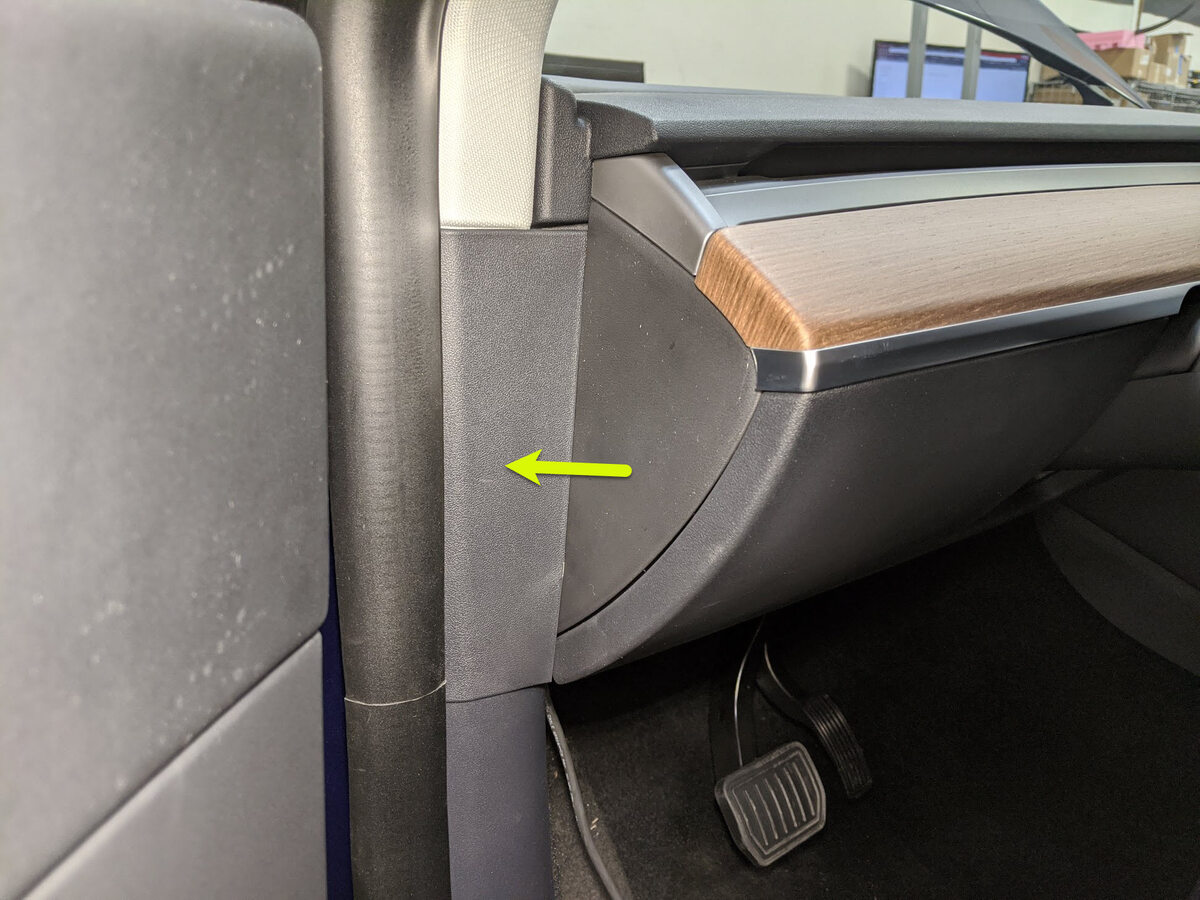
Install LH mid A-pillar assembly
注1x clip, 1x tab, Align the bottom tab then push the top clip to fully seat mid A-pillar, Pull seal over trim
-
Install LH IP end cap
注3x clips
- In Garage, enter the VIN and select the "Firmware" tab
-
Select Part Replacement Deploy tab and select Reinstall
注If new FW package is required, select Deploy tab and click on OTA icon, If there are no firmware packages available there may already be a package staged on the vehicle, If this is the case, skip to step for selecting the clock on the center display
- Select "Jobs" tab and confirm firmware is being staged
-
Select the clock on center display, then select install now to start firmware update
注Tap center display next to software update window until clock runs down to 0. After displayed installation time, Check center display and ensure firmware package was successfully installed
-
Once firmware is complete, refresh "Jobs" tab and verify firmware was successful
注If firmware is not successful, Restart from OTA step to redeploy the firmware package
- Raise all four windows
-
Close all four doors
注If 12V is powered up, Unlatch rear doors before closing


