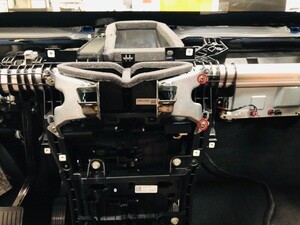
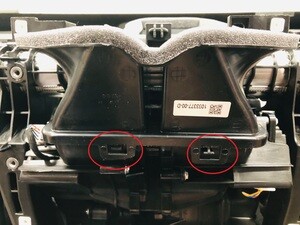
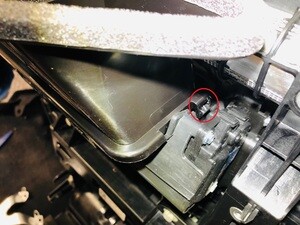
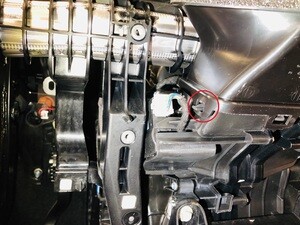
17/06/2024 21:24:09

HVAC 总成(拆卸和更换)

校正代码 18101002 3.30 注意:除非本程序中另有明确规定,否则上述校正代码和 FRT 反映的是执行本程序(包括关联程序)所需的所有工作。除非明确要求,否则请勿堆叠校正代码。注意:请参阅平均维修工时,深入了解 FRT 及其创建方式。要提供有关 FRT 值的反馈,请发送电子邮件至LaborTimeFeedback@tesla.com。注意:请参阅人员保护,确保在执行以下程序时穿戴适当的个人防护装备 (PPE)。

  • 2024 年 2 月 23 日:重组了步骤,以优化安装程序。
  • 2023 年 4 月 5 日:更新了空调机油规格中用于液体和容量的空调机油类型。
Warning IconA warning icon, calling your attention to a possibly risky situation
警告
尽管此程序已经过验证,但仍是一个草案。可能没有警告和注意事项。请遵守安全要求,处理或靠近高压系统和部件时,请谨慎操作。请将校正修理内容及反馈发送至ServiceDevelopment@teslamotors.com。

拆卸

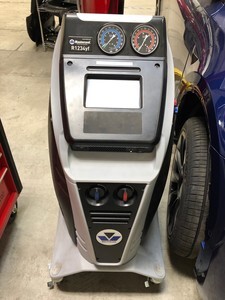
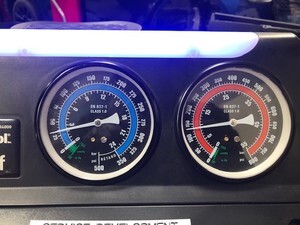
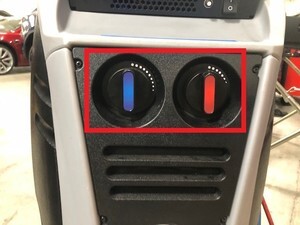
  1. 设置空调机
    Informational PurposesAn informational icon, calling your attention
    注
    仅限维修时间
  2. 打开所有四个车门
    Informational PurposesAn informational icon, calling your attention
    注
    锁定后车门以防断电时意外关闭
  3. 降下所有车窗
  4. 打开暖通空调;关闭空调,然后将鼓风机速度设为 10。将温度设为“高”并运行 10 分钟
    Informational PurposesAn informational icon, calling your attention
    注
    这可以清除驾驶室冷凝器中的大部分机油
  5. 关闭暖通空调并让其保持此状态 1 分钟
    Informational PurposesAn informational icon, calling your attention
    注
    确保压缩机和鼓风机都处于关闭状态,这样驾驶室冷凝器内部的制冷剂才可以返回蓄压器
  6. 重新打开暖通空调;打开空调,将鼓风机速度设为 10 并将温度设为“低”,将暖通空调运行 10 分钟
    Informational PurposesAn informational icon, calling your attention
    注
    这一步可以清除蒸发器中的大部分机油
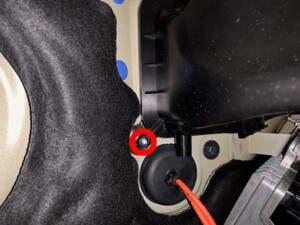
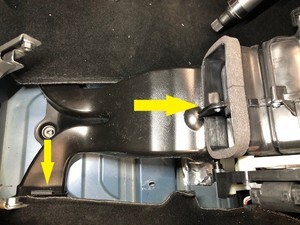
  7. 关闭空调和鼓风机电机
  8. 将左前座椅向前移动
  9. 将 LH 前坐垫升至最高
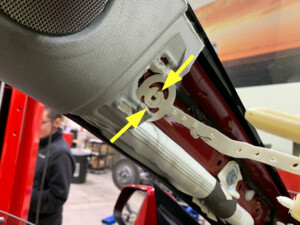
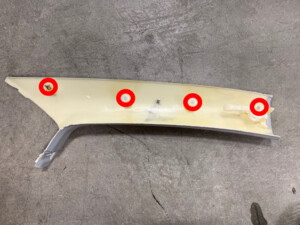
    Informational PurposesAn informational icon, calling your attention
    注
    按需调节座椅靠背,避免触碰顶篷
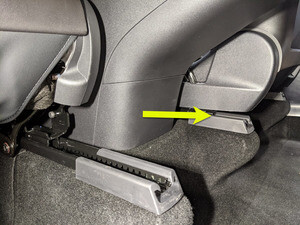
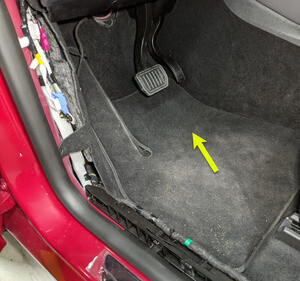
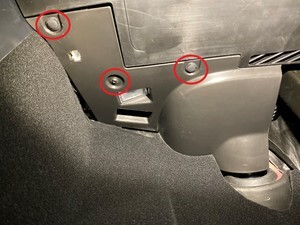
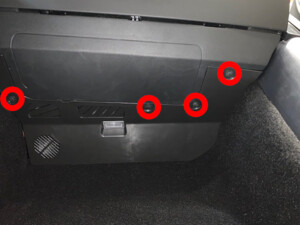
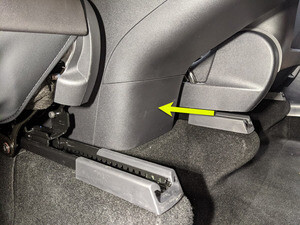
  10. 拆下控制台下部后饰板
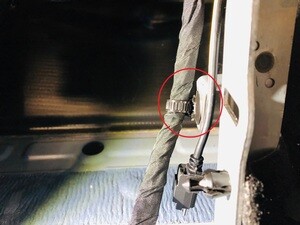
    Informational PurposesAn informational icon, calling your attention
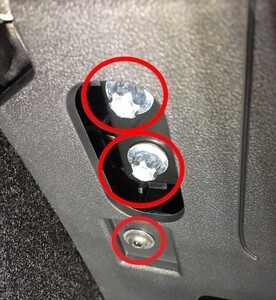
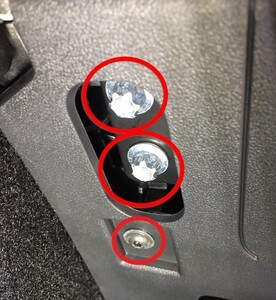
    注
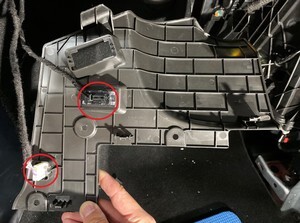
    5 个卡子
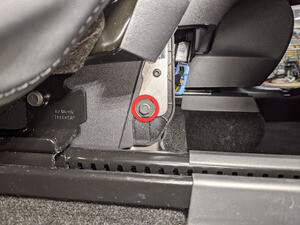
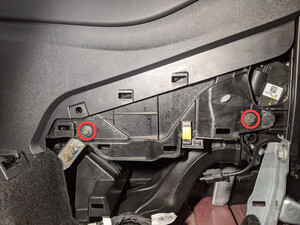
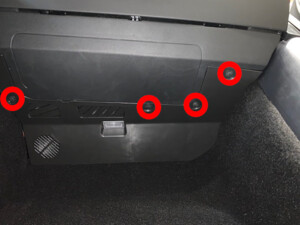
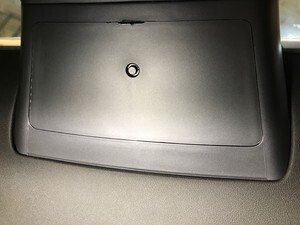
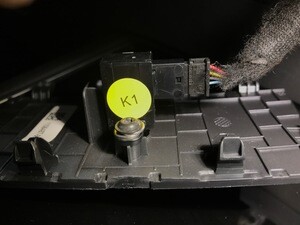
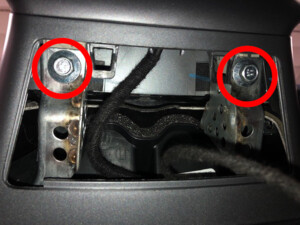
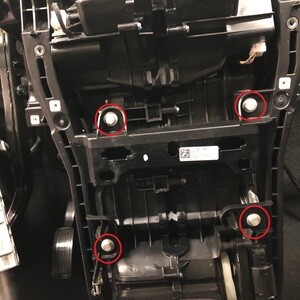
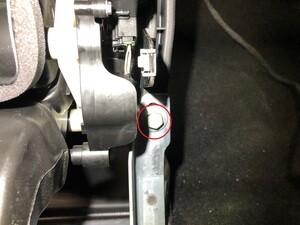
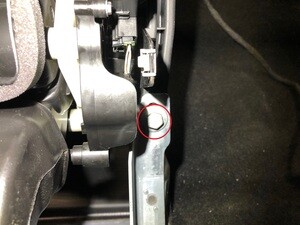
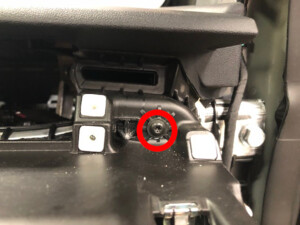
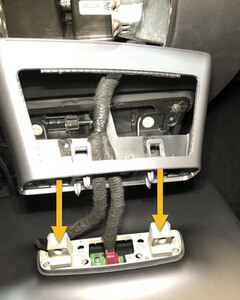
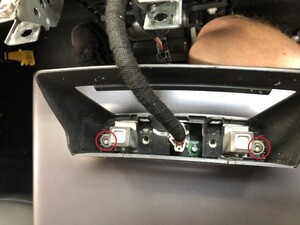
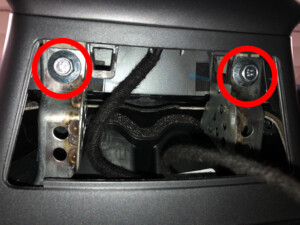
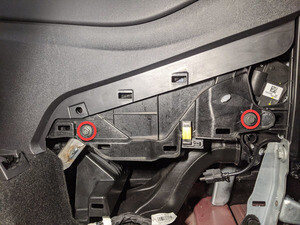
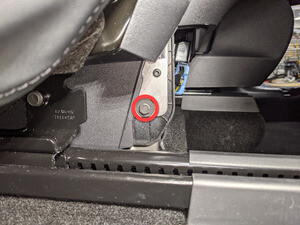
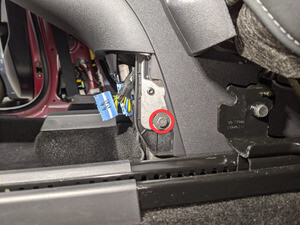
  11. 拆下中控台上的 LH 后外部硬件
    Informational PurposesAn informational icon, calling your attention
    注
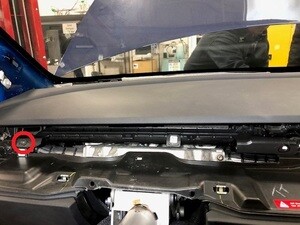
    1 个螺栓,10 毫米,7 Nm
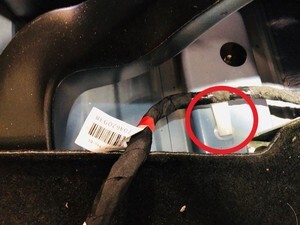
  12. 将左前座椅向后移动
  13. 将右前座椅向前移动
  14. 将 RH 前坐垫升至最高
    Informational PurposesAn informational icon, calling your attention
    注
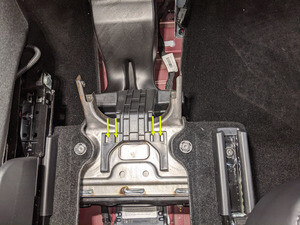
    按需调节座椅靠背,避免触碰顶篷
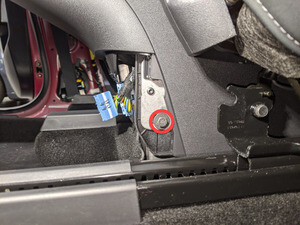
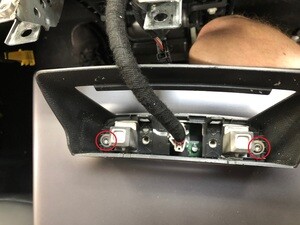
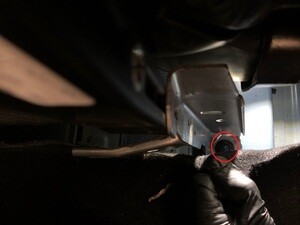
  15. 拆下中控台上的 RH 后外部硬件
    Informational PurposesAn informational icon, calling your attention
    注
    1 个螺栓,10 毫米,7 Nm
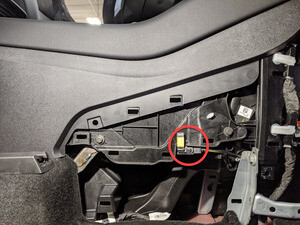
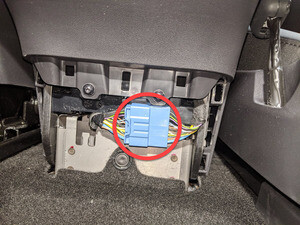
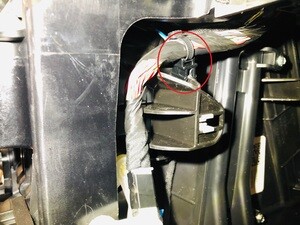
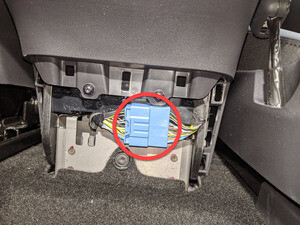
  16. 将右前座椅向后移动
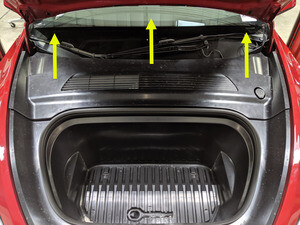
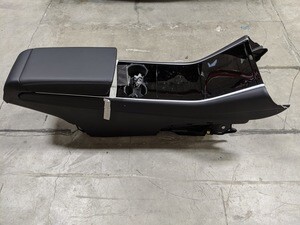
  17. 打开前备箱盖
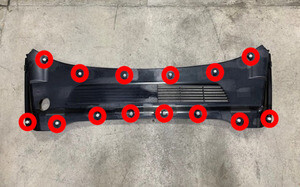
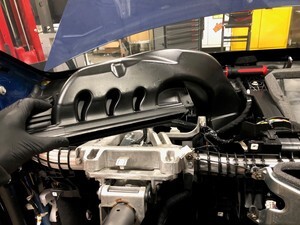
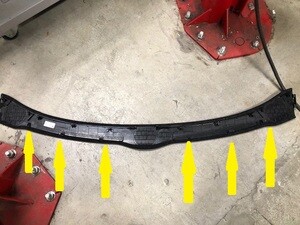
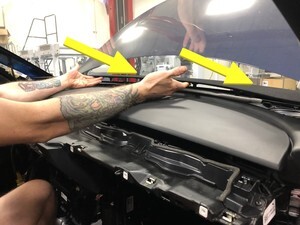
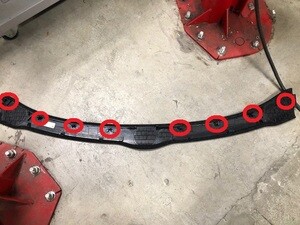
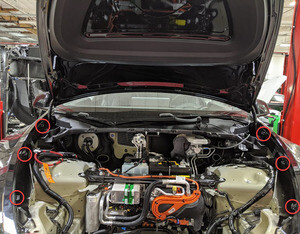
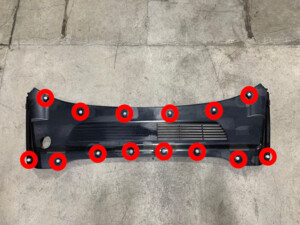
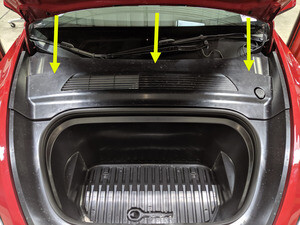
  18. 拆卸后挡板
    Informational PurposesAn informational icon, calling your attention
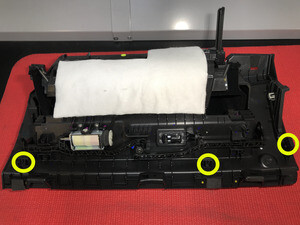
    注
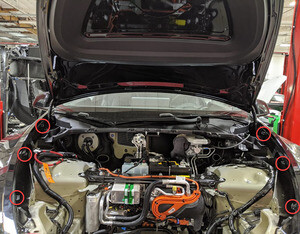
    14 个卡子
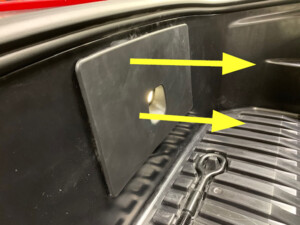
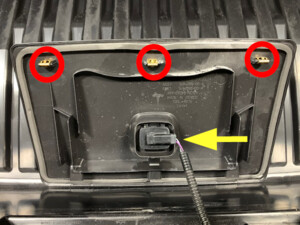
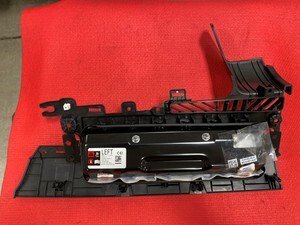
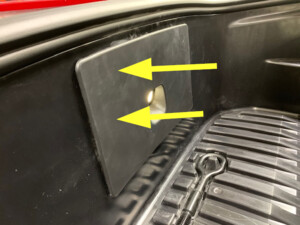
  19. 拆卸检修盖板
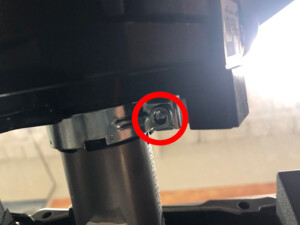
    Informational PurposesAn informational icon, calling your attention
    注
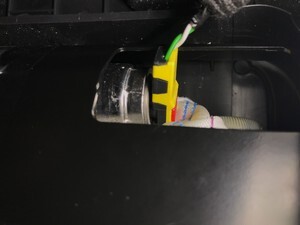
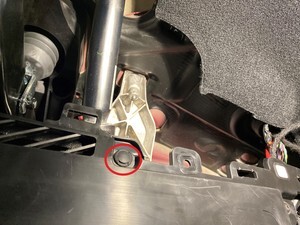
    3 个卡子,1 个连接器
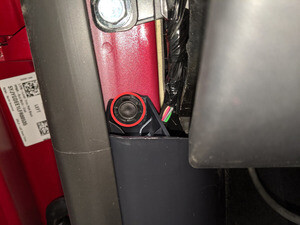
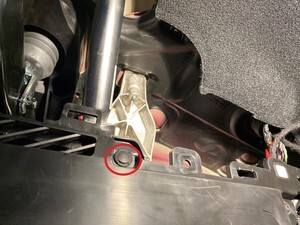
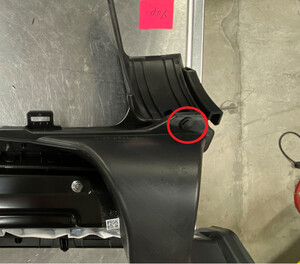
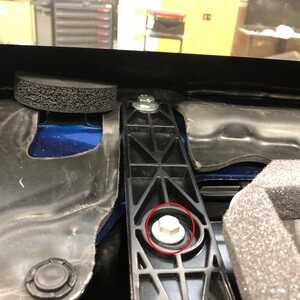
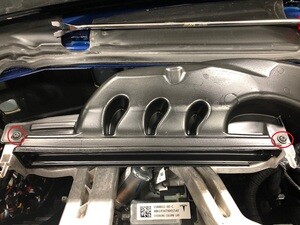
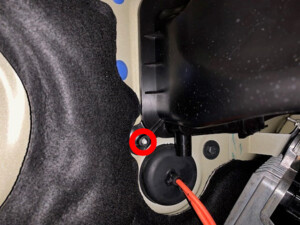
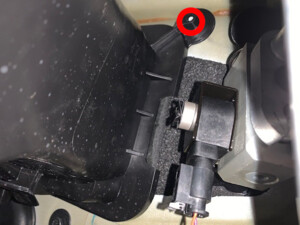
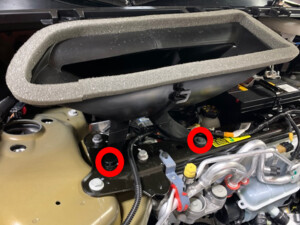
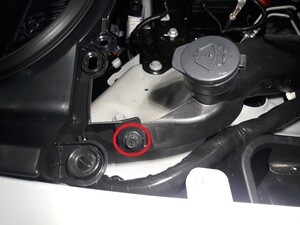
  20. 拆卸用于固定前备箱总成的紧固件
    Informational PurposesAn informational icon, calling your attention
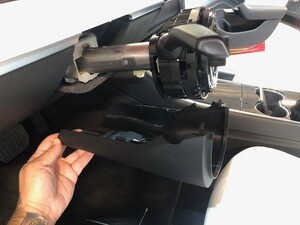
    注
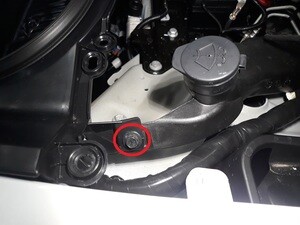
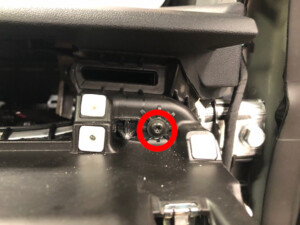
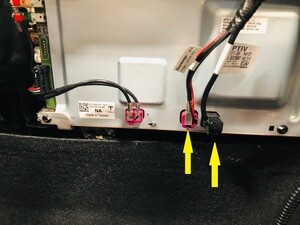
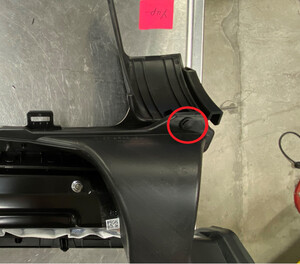
    5 个螺栓,10 毫米,5 Nm;新款车可能加装了 1 个将前备箱固定到储液罐颈部的推拉式卡子
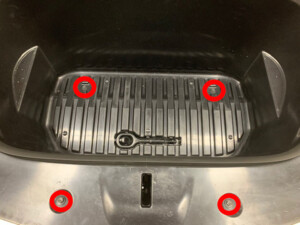
  21. 将前备箱总成从车辆上拆下
    Informational PurposesAn informational icon, calling your attention
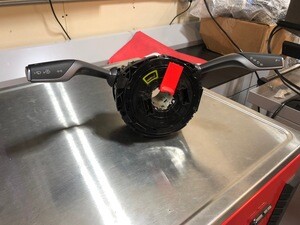
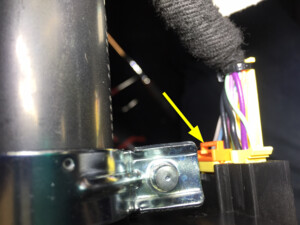
    注
    6 个卡子;更换损坏或丢失的卡子
  22. 使用 Toolbox 3.0 与车辆相连
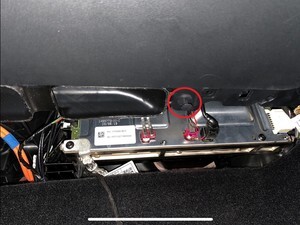
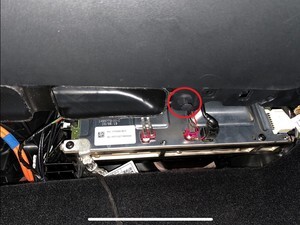
    Informational PurposesAn informational icon, calling your attention
    注
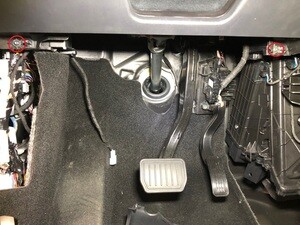
    车辆接口集成在驾驶员脚部空间罩中;打开 Toolbox 3 网站并建立与车辆的连接。选择右上角的连接状态图标,然后选择本地连接(车辆连接后,图标将变为绿色)
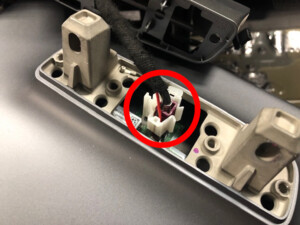
  23. 选择 “Actions/Autodiag”,然后搜索 “Thermal”
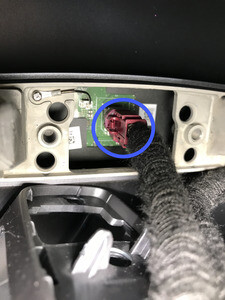
  24. 选择 “Thermal Fluid Fill/Drain”,点击 “Run”,然后等待例行程序完成
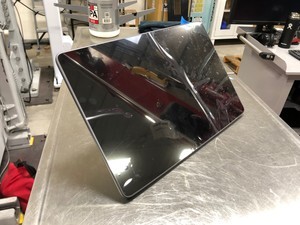
    Informational PurposesAn informational icon, calling your attention
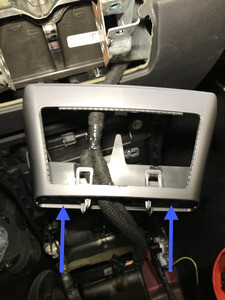
    注
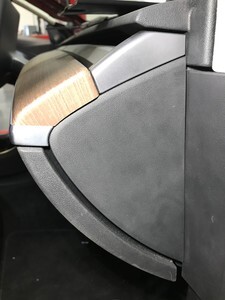
    完成后,选择窗口右上角的“X”关闭;对于与空调相关的维修,请验证所有膨胀阀都处于正确位置;对于所有与冷却液相关的维修,请验证车辆处于 Series 模式;“Thermal Fluid Fill/Drain”例行程序有 5 小时超时;例行程序将持续运行,不会结束
  25. 从以太网端口上拔下高速数据线缆,以断开 Toolbox 3.0 与车辆的连接
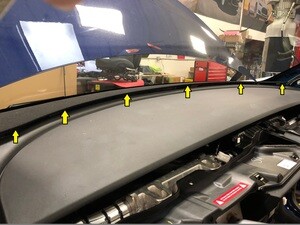
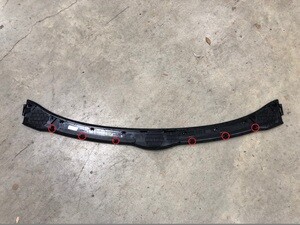
  26. 在中央显示器上关闭车辆电源
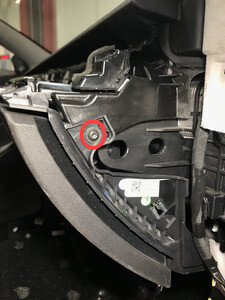
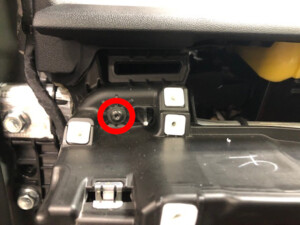
    Informational PurposesAn informational icon, calling your attention
    注
    操作如下:Controls > Safety & Security > Vehicle Power > Power Off
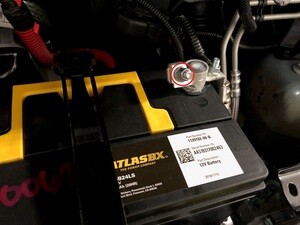
  27. 断开 12V 负极端子和紧急响应回路
    Informational PurposesAn informational icon, calling your attention
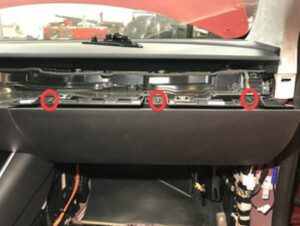
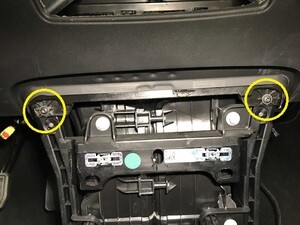
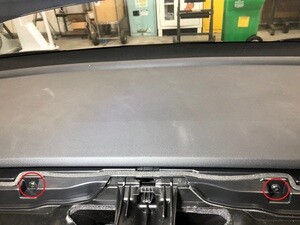
    注
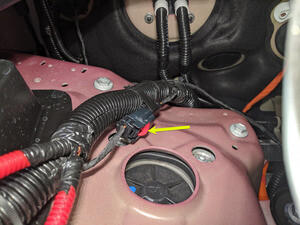
    1 个螺母,10 毫米,6 Nm,1 个连接器;确保车辆处于驻车挡,温度控制系统关闭,断开 12V 电池之前车辆未充电;应先断开负极端子再断开紧急响应回路;等待 2 分钟,确保所有电路完全放电
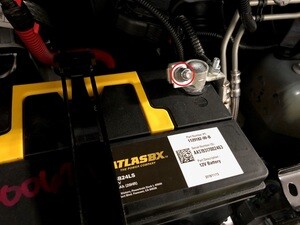
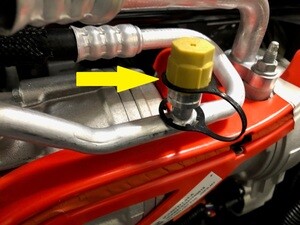
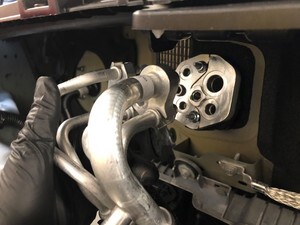
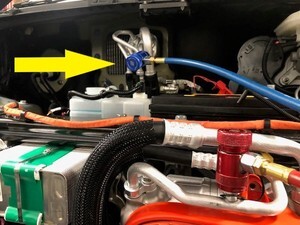
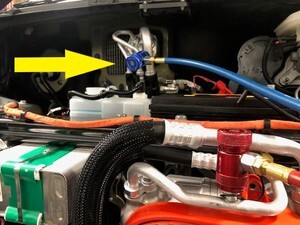
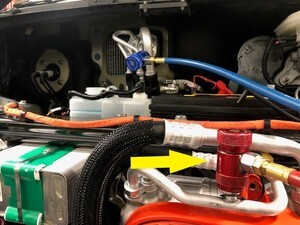
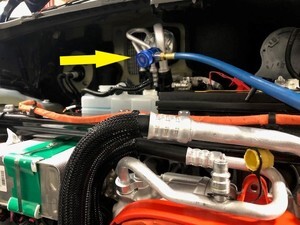
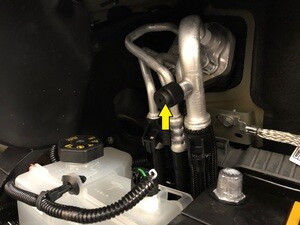
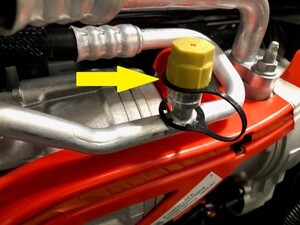
  28. 从空调端口下部和上部拆下端口盖
    Informational PurposesAn informational icon, calling your attention
    注
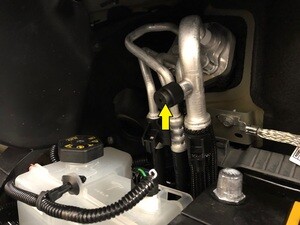
    2 个盖
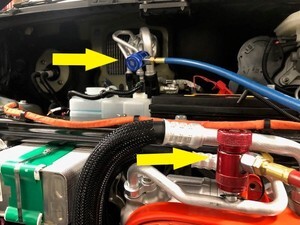
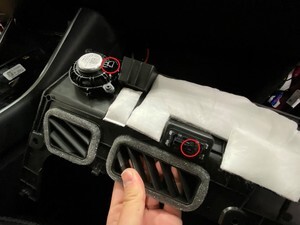
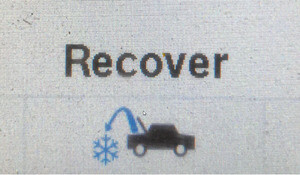
  29. 将软管连接到车辆,然后执行空调回收
    Informational PurposesAn informational icon, calling your attention
    注
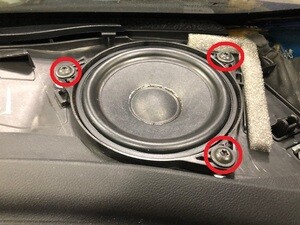
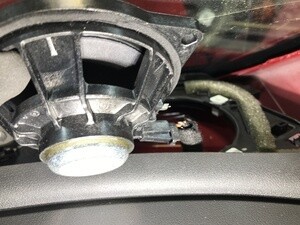
    仅限维修时间;将耦合器连接到车辆;顺时针旋转打开耦合器;打开机器阀门;注意制冷剂和机油的回收量;如果排油量增加超过 30 毫升,请参考排油损失图。
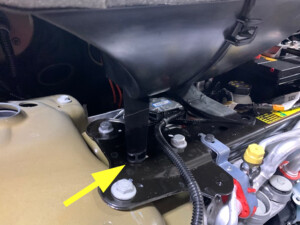
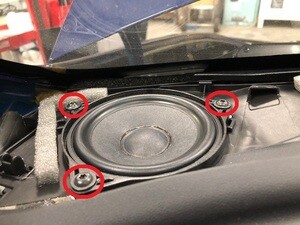
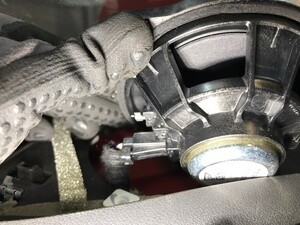
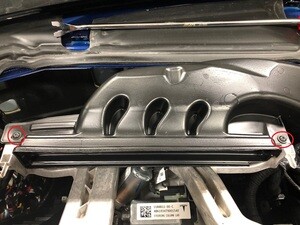
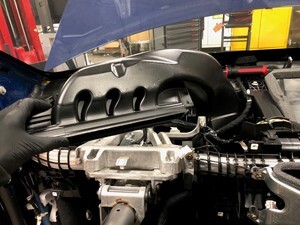
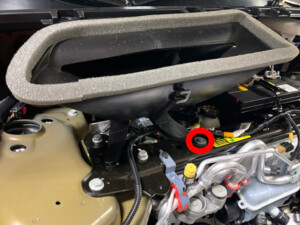
  30. 拆卸新鲜空气进气槽
    Informational PurposesAn informational icon, calling your attention
    注
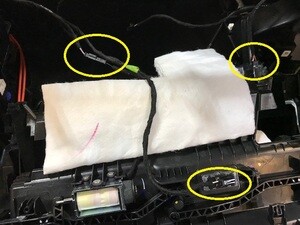
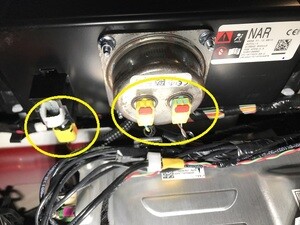
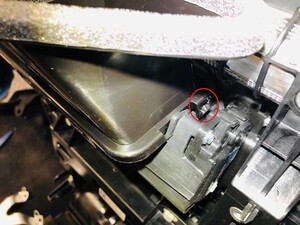
    1 个螺栓,10 毫米,4 Nm,2 个卡子;1 个销;拆下螺栓;将销从温度系统横梁上小心撬下,然后从隔板螺柱上拆下
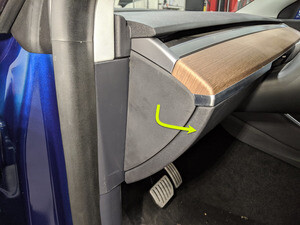
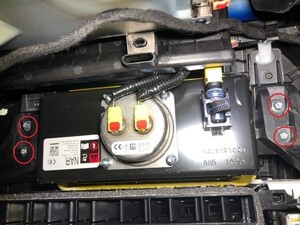
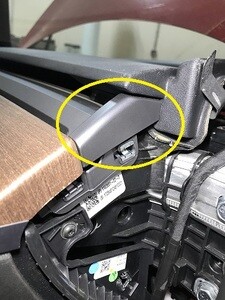
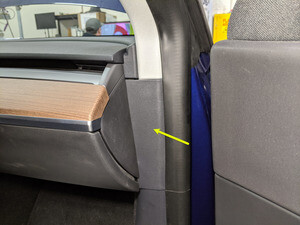
  31. 拆卸仪表板左侧端盖
    Informational PurposesAn informational icon, calling your attention
    注
    3 个卡子
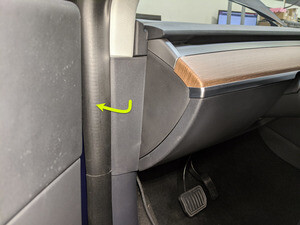
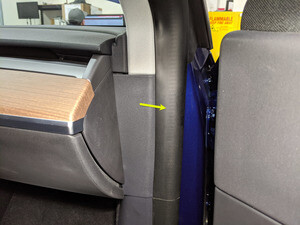
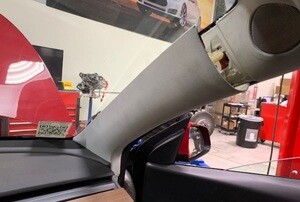
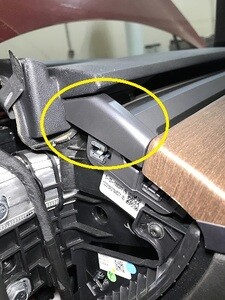
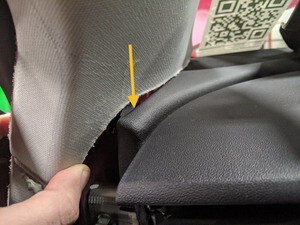
  32. 拆卸左侧 A 柱中部总成
    Informational PurposesAn informational icon, calling your attention
    注
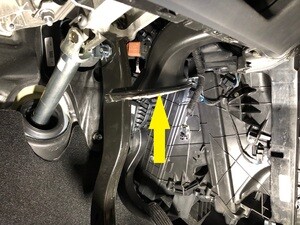
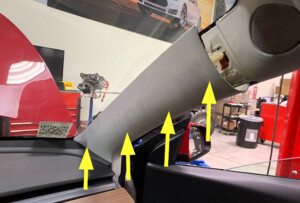
    1 个卡子,1 个锁片;松开上部卡子,然后向上拉动 A 柱中部以将其拆下
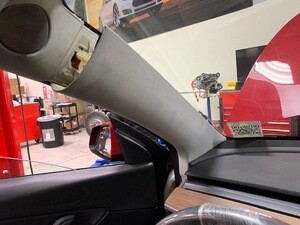
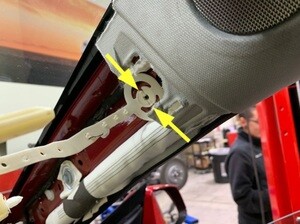
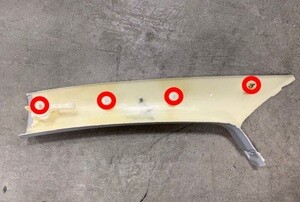
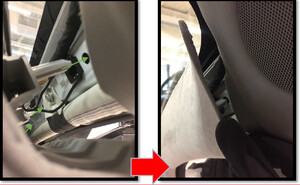
  33. 拆卸左侧 A 柱上饰板
    Informational PurposesAn informational icon, calling your attention
    注
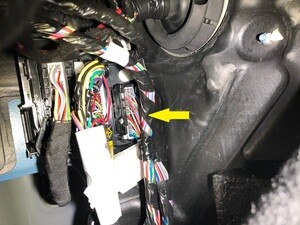
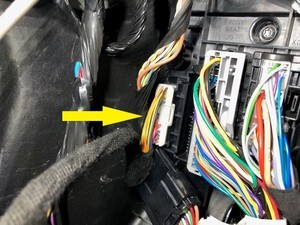
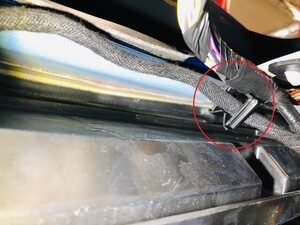
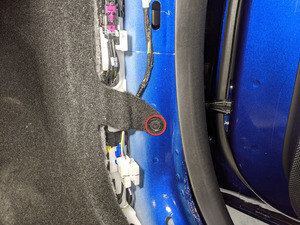
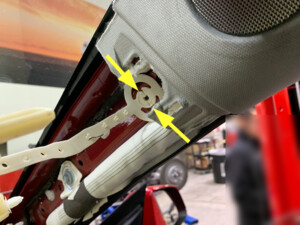
    3 个夹子;拉动 A 柱上部内侧;按下 2 个锁片以便将系带从车身侧拆下;然后向上拉动 A 柱上部,以便将其拆下
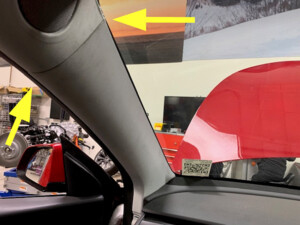
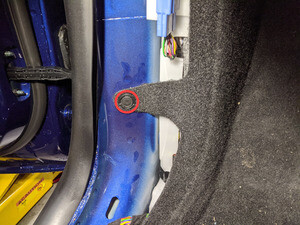
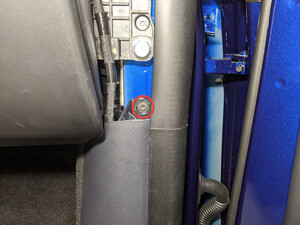
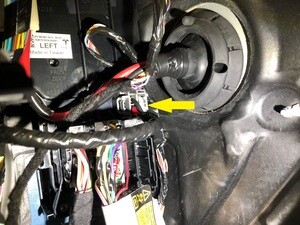
  34. 拆下用于固定 A 柱 LH 下部饰板的夹子
    Informational PurposesAn informational icon, calling your attention
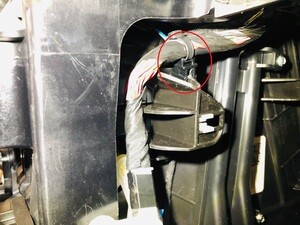
    注
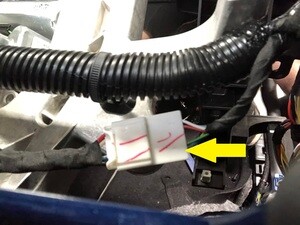
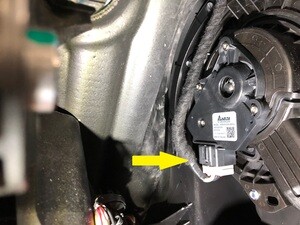
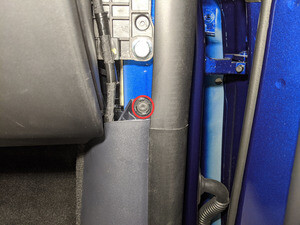
    1 个推拉式卡子
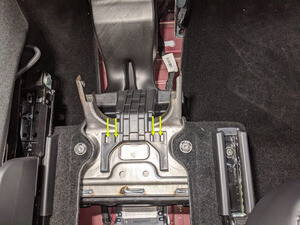
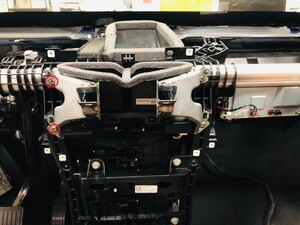
  35. 拆卸左侧 A 柱下饰板
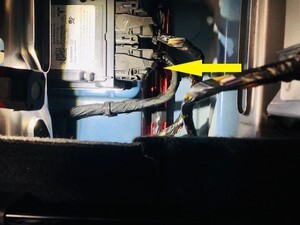
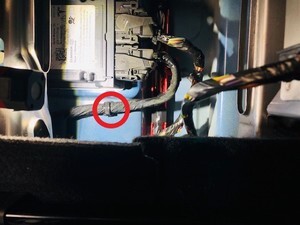
    Informational PurposesAn informational icon, calling your attention
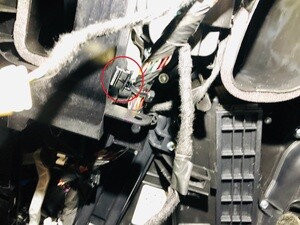
    注
    6 个夹子,2 个导片;向上拉动 A 柱后下部,松开夹子,然后向后拉动,松开饰板
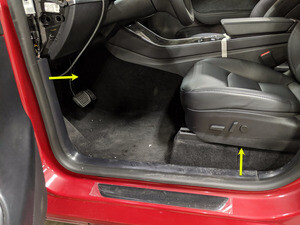
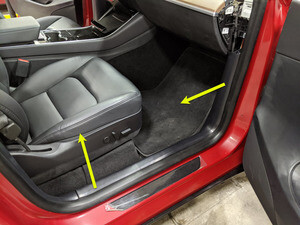
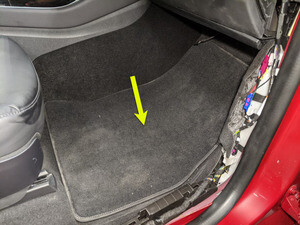
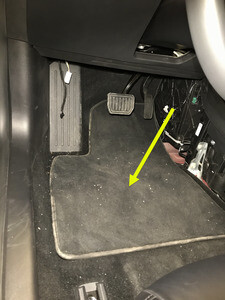
  36. 拆下 LH 前脚垫
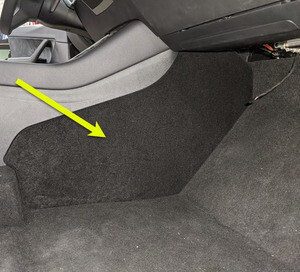
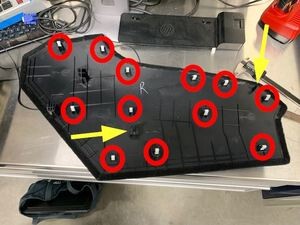
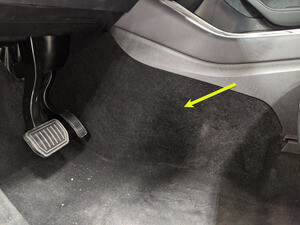
  37. 拆卸中控台左侧面板处地毯
    Informational PurposesAn informational icon, calling your attention
    注
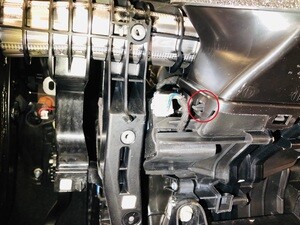
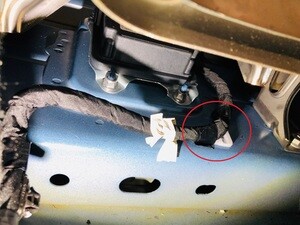
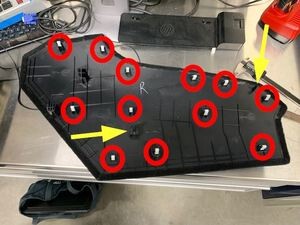
    11 个夹子,2 个导销;使用饰板工具从顶部边缘开始松开上部夹子,然后拉动底部以便松开其余夹子;小心将面板径直拉出控制台,如若面板脱落,可能会损坏
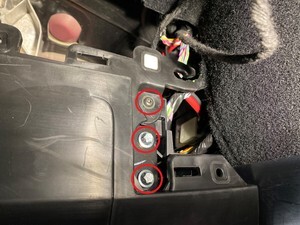
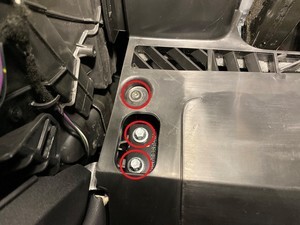
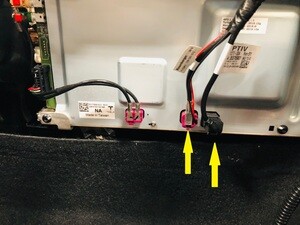
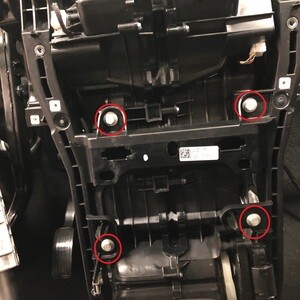
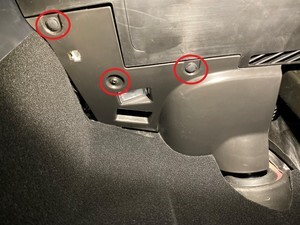
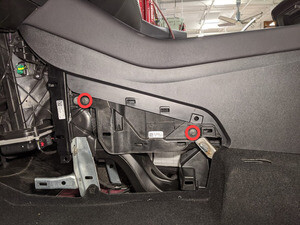
  38. 拆卸中控台左前侧外部硬件
    Informational PurposesAn informational icon, calling your attention
    注
    2 个螺栓,10 毫米,7 Nm
  39. 拆卸用于固定左侧脚部空间盖板的螺钉和卡子
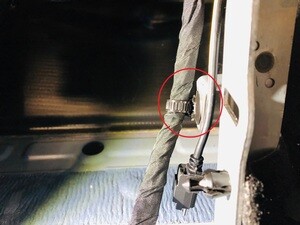
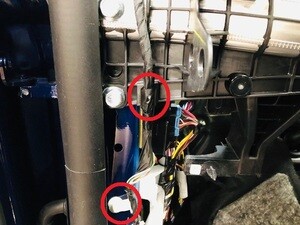
    Informational PurposesAn informational icon, calling your attention
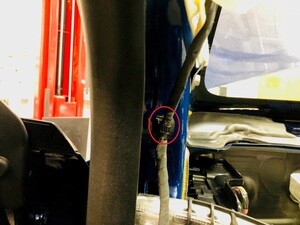
    注
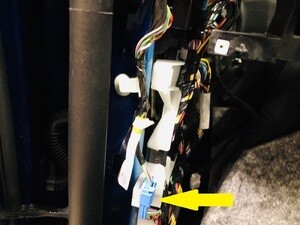
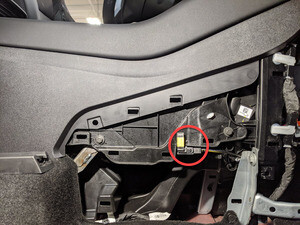
    2 个推拉式卡子,1 个螺钉,T20,2.5 Nm
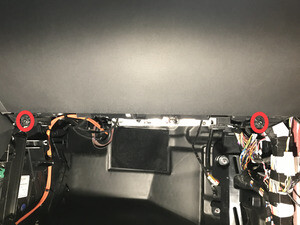
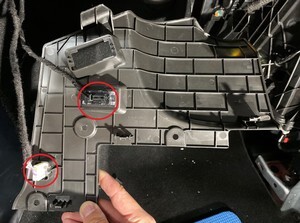
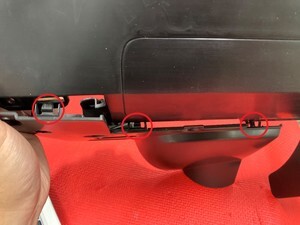
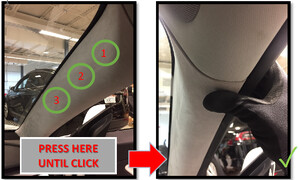
  40. 从左侧脚部空间盖板上拆下连接器,然后将其从车辆上拆下
    Informational PurposesAn informational icon, calling your attention
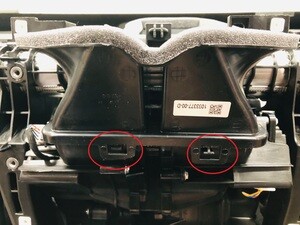
    注
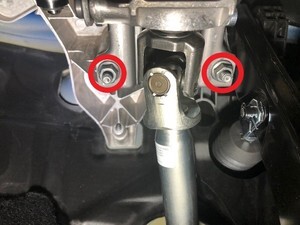
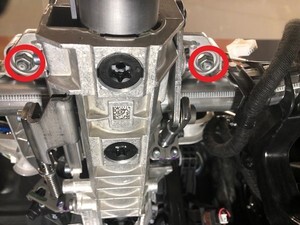
    3 个锁片,1 个以太网连接器,1 个地面照明灯连接器
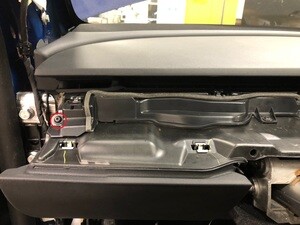
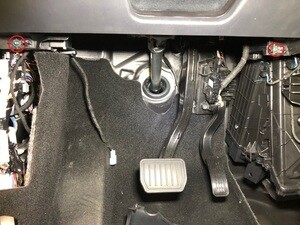
  41. 拆卸将驾驶位膝部气囊固定到车辆的紧固件
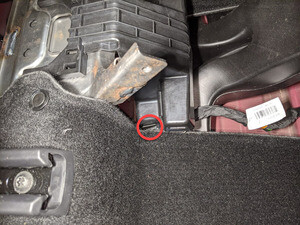
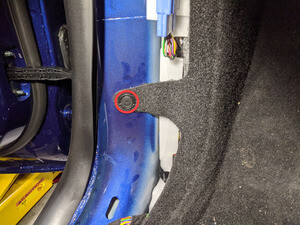
    Informational PurposesAn informational icon, calling your attention
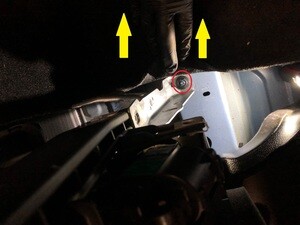
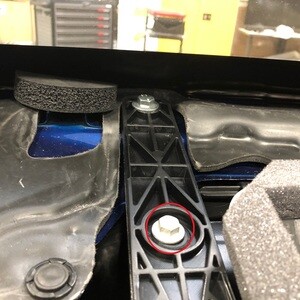
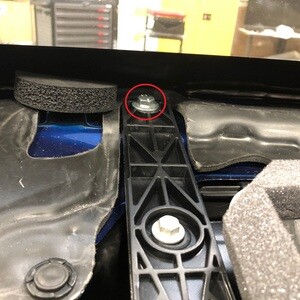
    注
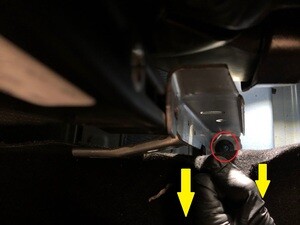
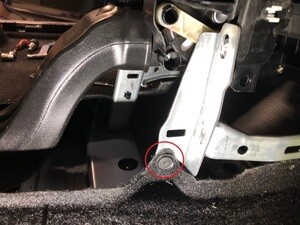
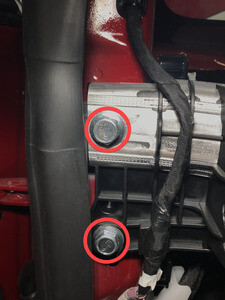
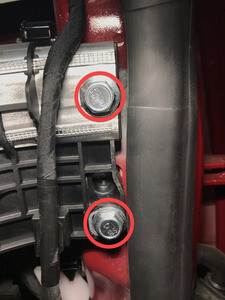
    2 个推拉式夹,2 个螺钉,T20,2 Nm,4 个耐落螺栓,E10,8 Nm;拆下后弃用;下降时需支撑膝部气囊;连接器/线束长度非常短
  42. 断开驾驶位膝部气囊,将其从车辆上拆下
    Informational PurposesAn informational icon, calling your attention
    注
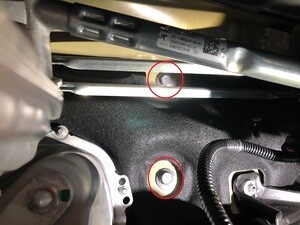
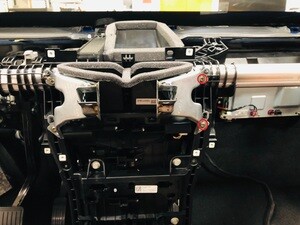
    1 个连接器;松开锁片
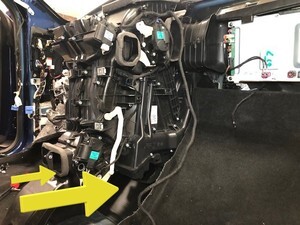
  43. 从 HVAC 模块上拆下左侧脚部空间风管
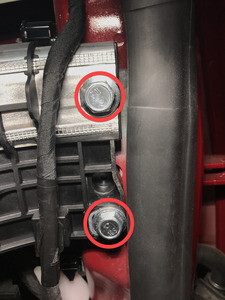
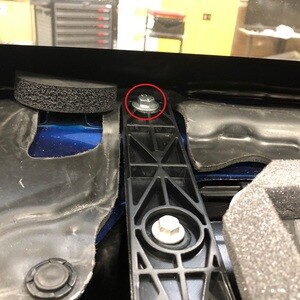
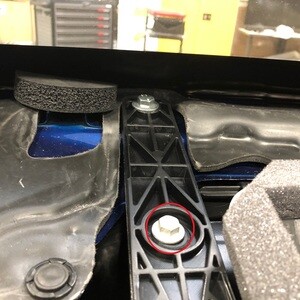
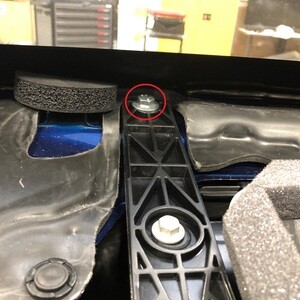
    Informational PurposesAn informational icon, calling your attention
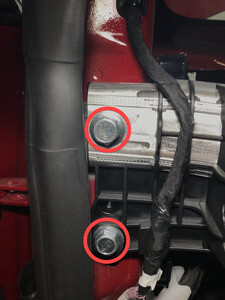
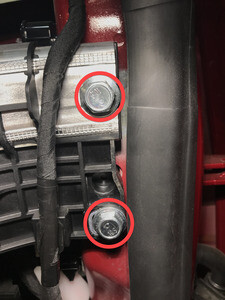
    注
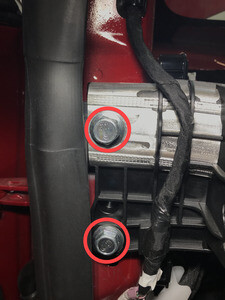
    将 LH 脚部空间进气槽拉向车辆 LH 侧以便将其拆下
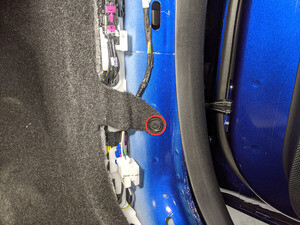
  44. 拆下将座舱 LH 前毡毯固定到车身的夹子
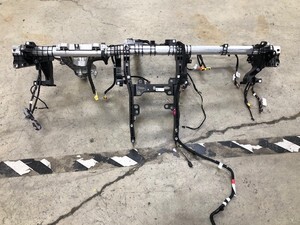
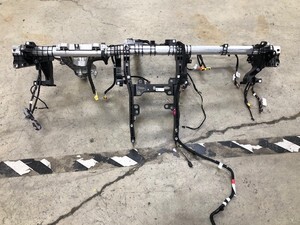
    Informational PurposesAn informational icon, calling your attention
    注
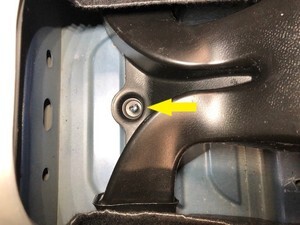
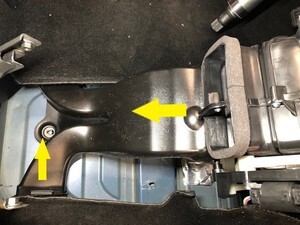
    1 个卡子
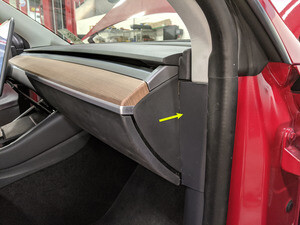
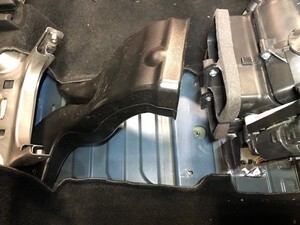
  45. 拆卸仪表板右侧端盖
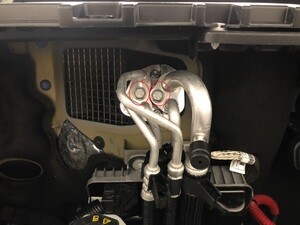
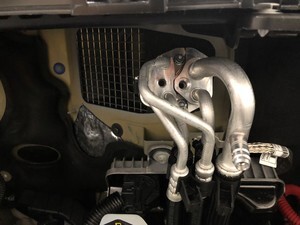
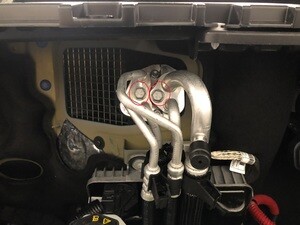
    Informational PurposesAn informational icon, calling your attention
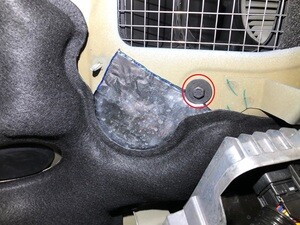
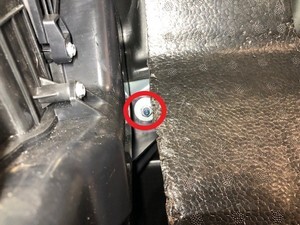
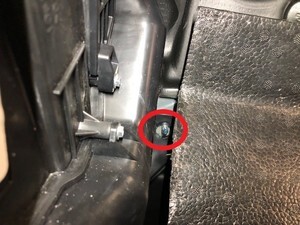
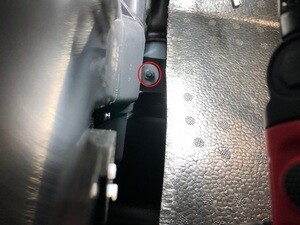
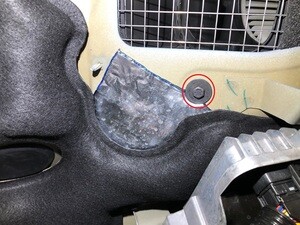
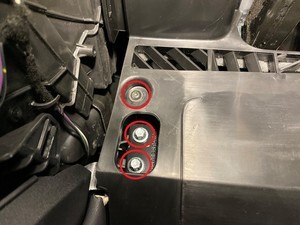
    注
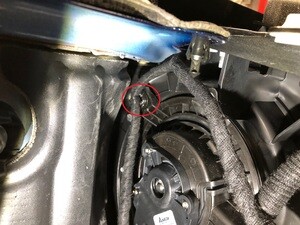
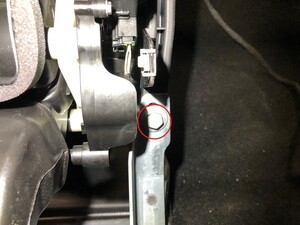
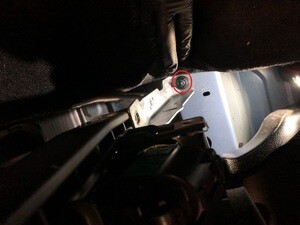
    3 个卡子
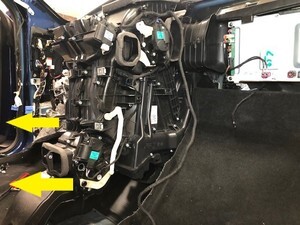
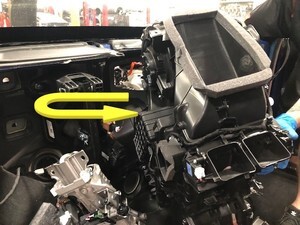
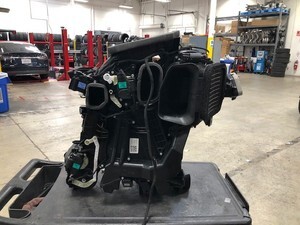
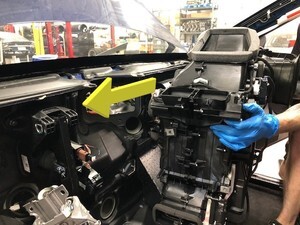
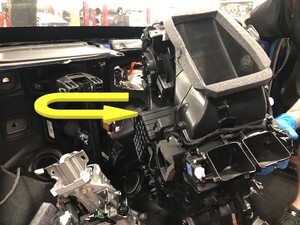
  46. 拆卸右侧 A 柱中部总成
    Informational PurposesAn informational icon, calling your attention
    注
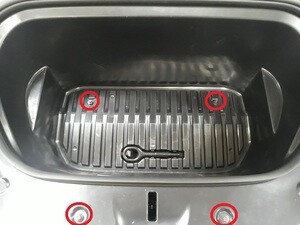
    1 个卡子,1 个锁片;松开上部卡子,然后向上拉动 A 柱中部以将其拆下
  47. 拆卸右侧 A 柱上饰板
    Informational PurposesAn informational icon, calling your attention
    注
    3 个卡子;拉动 A 柱上部内侧;扭动 3 个系带钩并将其拉出外壳后拆下;然后向上拉动 A 柱上部,以将其拆下
  48. 拆下用于固定 A 柱 RH 下部饰板的夹子
    Informational PurposesAn informational icon, calling your attention
    注
    1 个推拉式卡子
  49. 拆卸右侧 A 柱下饰板
    Informational PurposesAn informational icon, calling your attention
    注
    6 个夹子,2 个导片;向上拉动 A 柱后下部,松开夹子,然后向后拉动,松开饰板
  50. 拆卸右前脚垫
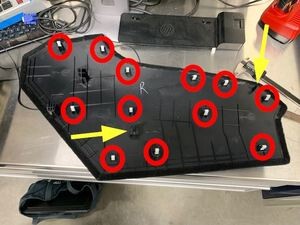
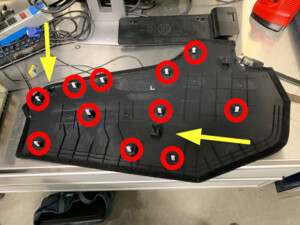
  51. 拆卸中控台右侧面板处地毯
    Informational PurposesAn informational icon, calling your attention
    注
    12 个夹子,2 个定位销;使用饰板工具从顶部边缘开始松开上部夹子;拉动底部以便松开其余夹子;小心将面板径直拉出控制台,如若面板脱落,可能会损坏
  52. 拆卸中控台右前侧外部硬件
    Informational PurposesAn informational icon, calling your attention
    注
    2 个螺栓,10 毫米,7 Nm
  53. 断开中控台右前侧 USB 线束
    Informational PurposesAn informational icon, calling your attention
    注
    1 个 USB 连接器
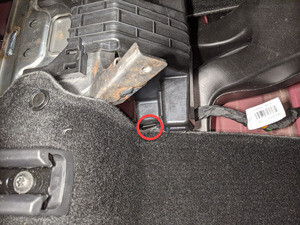
  54. 断开中控台后部线束
    Informational PurposesAn informational icon, calling your attention
    注
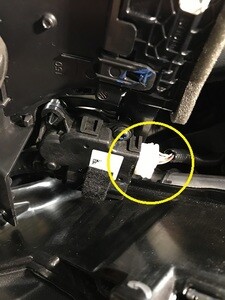
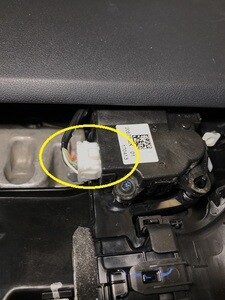
    1 个连接器
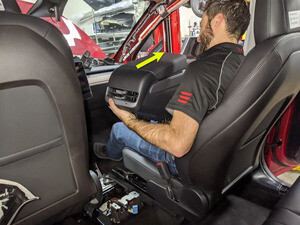
  55. 将中控台从车辆上拆下
    Informational PurposesAn informational icon, calling your attention
    注
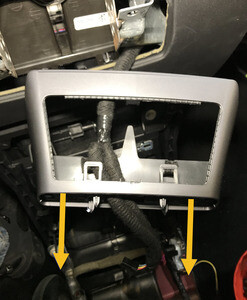
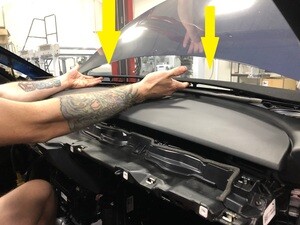
    验证旋转盖处于关闭位置;建议请助手帮忙;向上倾斜中控台后部;向车辆后部拉动总成
  56. 拆下固定右侧脚部空间总成的夹子
    Informational PurposesAn informational icon, calling your attention
    注
    4 个推拉式卡子
  57. 断开 RH 脚部空间总成连接器,将其从车上拆下
    Informational PurposesAn informational icon, calling your attention
    注
    2 个连接器
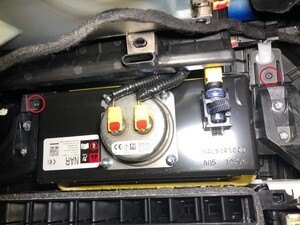
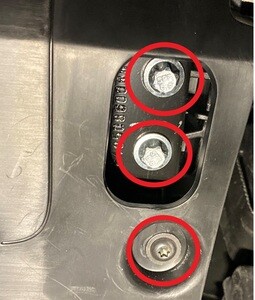
  58. 拆卸将副驾位膝部气囊固定到车辆的紧固件
    Informational PurposesAn informational icon, calling your attention
    注
    2 个螺钉,T20,2 Nm,1 个推拉式夹,4 个耐落螺栓,E10,8 Nm;拆下后弃用推拉式夹;降下时需支撑膝部气囊;连接器/线束长度非常短
  59. 将副驾位膝部气囊从车上拆下
    Informational PurposesAn informational icon, calling your attention
    注
    1 个连接器;松开锁片
  60. 拆下将座舱 RH 前毡毯固定到车身的夹子
    Informational PurposesAn informational icon, calling your attention
    注
    1 个卡子
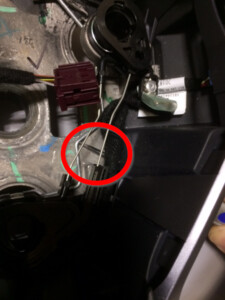
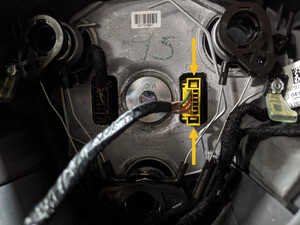
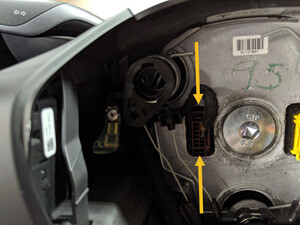
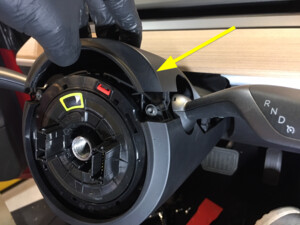
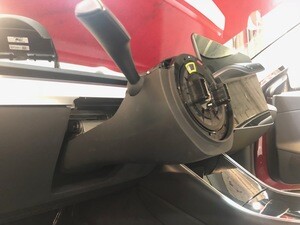
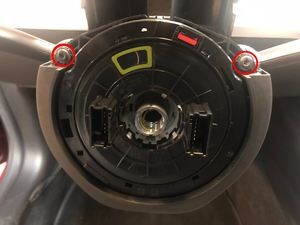
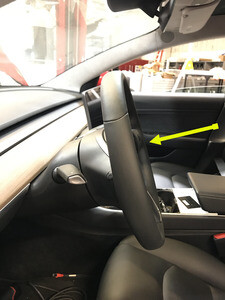
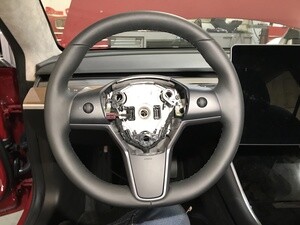
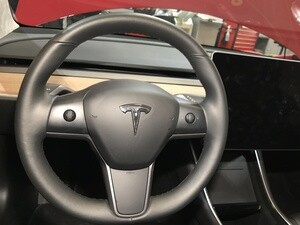
  61. 松开将驾驶位安全气囊固定到方向盘的弹簧夹,然后将驾驶位安全气囊总成拉出方向盘
    Informational PurposesAn informational icon, calling your attention
    注
    1 个弹簧夹,3 个基线;同时从两个检修孔按压弹簧,以便将其松开。检修孔位于 4 点钟和 7 点钟方向
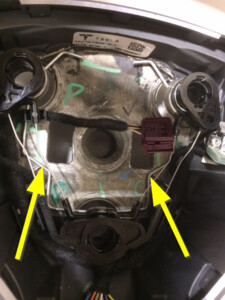
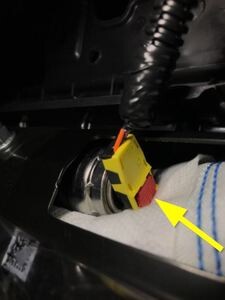
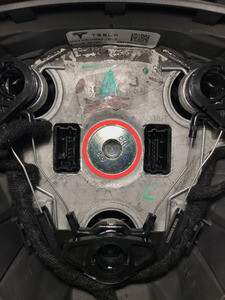
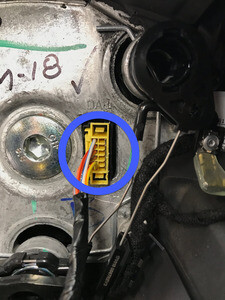
  62. 断开驾驶位气囊连接器,拆下驾驶位气囊总成
    Informational PurposesAn informational icon, calling your attention
    注
    1 个连接器,2 个锁片
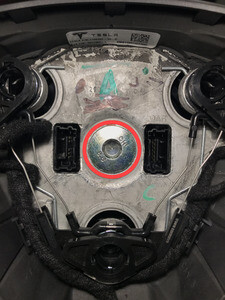
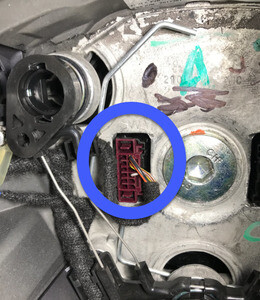
  63. 断开方向盘连接器
    Informational PurposesAn informational icon, calling your attention
    注
    1 个连接器,2 个锁片
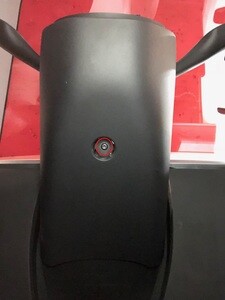
  64. 拆卸将方向盘固定到转向柱的螺栓
    Informational PurposesAn informational icon, calling your attention
    注
    1 个耐落螺栓,10毫米六角,80 Nm;拆下后弃用
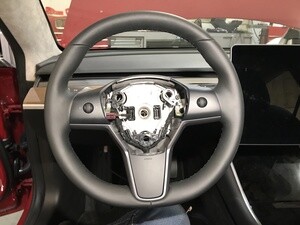
  65. 将方向盘从转向柱上拆下
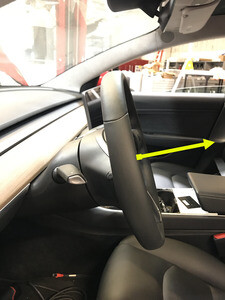
  66. 向上拉动以便将转向柱上部护罩从下部护罩上松开
    Informational PurposesAn informational icon, calling your attention
    注
    4 个卡子
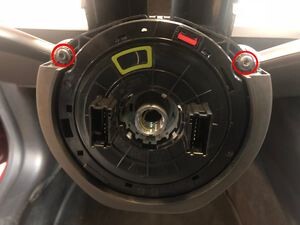
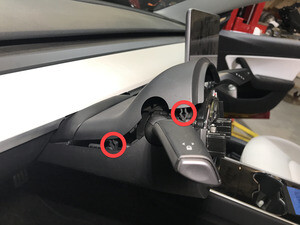
  67. 拆下将下部护罩固定到转向柱的上部螺钉
    Informational PurposesAn informational icon, calling your attention
    注
    2 个螺钉,T20,1.5 Nm
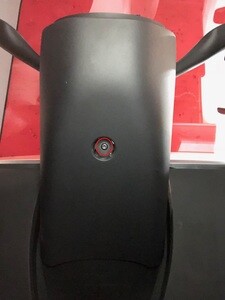
  68. 拆下将下部护罩固定到转向柱的下部螺钉
    Informational PurposesAn informational icon, calling your attention
    注
    1 个螺钉,T20,1.5 Nm
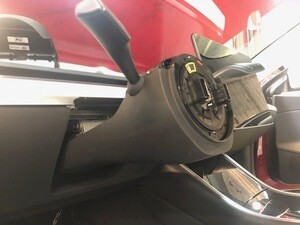
  69. 将下部护罩从转向柱上拆下
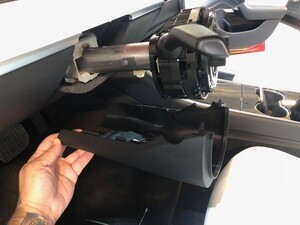
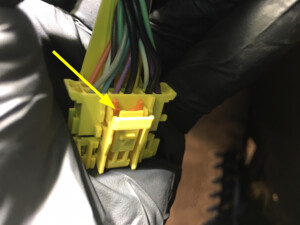
  70. 断开转向柱控制模块总成连接器
    Informational PurposesAn informational icon, calling your attention
    注
    1 个连接器;拆下连接器上的固定卡子,松开连接器,然后从连接器上拆下另一个已损坏的卡子;拆下固定卡子后弃用;原装固定卡子为黑色,更换用固定卡子为橙色
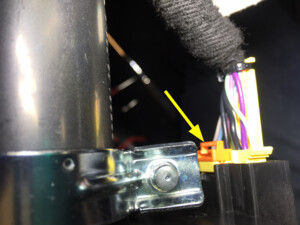
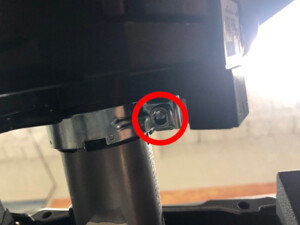
  71. 拆下将 SCCM 固定到转向柱的螺栓
    Informational PurposesAn informational icon, calling your attention
    注
    1 个螺栓,5 毫米内六角,9 Nm
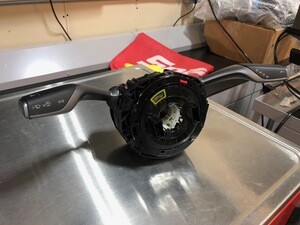
  72. 将转向柱控制模块 (SCCM) 从转向柱上拆下
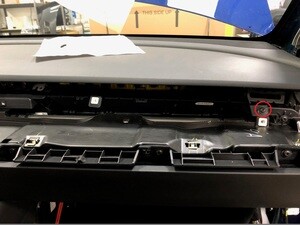
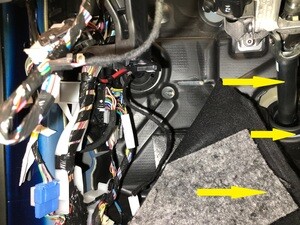
  73. 从仪表板上松开仪表板检修板,然后断开温度传感器连接器
    Informational PurposesAn informational icon, calling your attention
    注
    4 个夹子,4 个锁片,1 个连接器
  74. 拆下将中央显示器固定到仪表板支架的螺栓
    Informational PurposesAn informational icon, calling your attention
    注
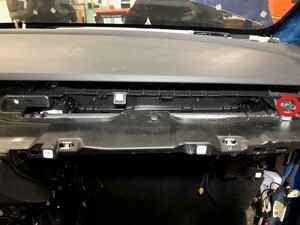
    2 个耐落螺栓,10mm,16 Nm;拆下后弃用;向车辆后部滑动以便将其拆下
  75. 拆下将外壳颈部固定到中央显示器上的螺栓,滑下显示器
    Informational PurposesAn informational icon, calling your attention
    注
    2 个螺栓,T30,3 Nm
  76. 从显示屏连接器上拆下固定夹
    Informational PurposesAn informational icon, calling your attention
    注
    1 个卡子
  77. 断开线束连接器和中央显示屏之间的连接
    Informational PurposesAn informational icon, calling your attention
    注
    1 个连接器
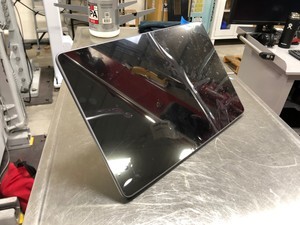
  78. 将中央显示器从车上拆下
  79. 将中央显示器支座外壳从车上拆下
  80. 从主装饰总成上拆下左侧气波卡座盖
    Informational PurposesAn informational icon, calling your attention
    注
    2 个卡子
  81. 从主装饰总成上拆下右侧气波卡座盖
    Informational PurposesAn informational icon, calling your attention
    注
    2 个卡子
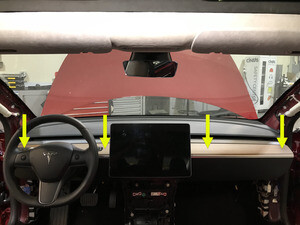
  82. 拆卸主装饰总成
    Informational PurposesAn informational icon, calling your attention
    注
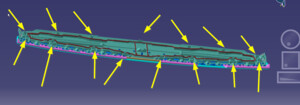
    15 个夹子,1 个中央夹子;按需更换固定夹
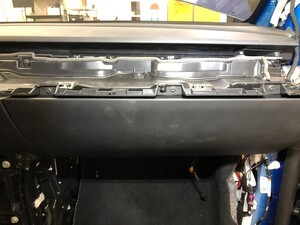
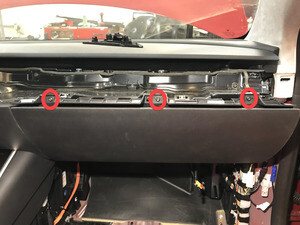
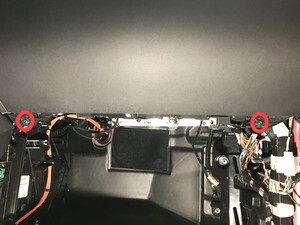
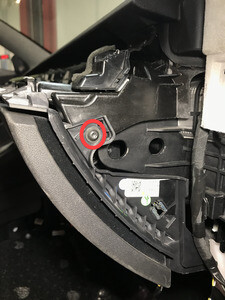
  83. 拆卸将手套箱总成固定到仪表板支架的螺钉
    Informational PurposesAn informational icon, calling your attention
    注
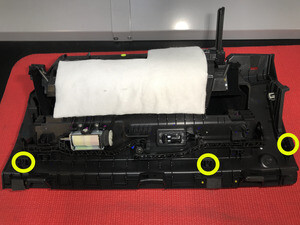
    6 个螺钉,T20,2.3 Nm
  84. 断开手套箱总成连接器
    Informational PurposesAn informational icon, calling your attention
    注
    3 个连接器
  85. 从仪表板支架上拆下手套箱
    Informational PurposesAn informational icon, calling your attention
    注
    3 个卡子
  86. 拆下乘客位脚部空间通风槽
    Informational PurposesAn informational icon, calling your attention
    注
    1 个推拉式卡子
  87. 拆下 RH 仪表板气波槽
    Informational PurposesAn informational icon, calling your attention
    注
    2 个推拉式卡子
  88. 拆卸固定仪表板眉饰左侧的螺钉
    Informational PurposesAn informational icon, calling your attention
    注
    4 个螺钉,T20,2.3 Nm
  89. 拆卸固定仪表板眉饰右侧的螺钉
    Informational PurposesAn informational icon, calling your attention
    注
    4 个螺钉,T20,2.3 Nm
  90. 从车上拆下仪表板眉饰
    Informational PurposesAn informational icon, calling your attention
    注
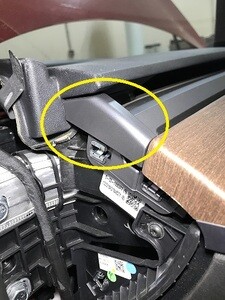
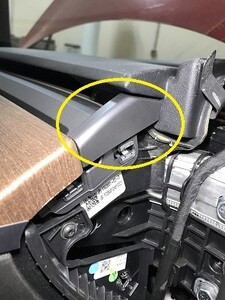
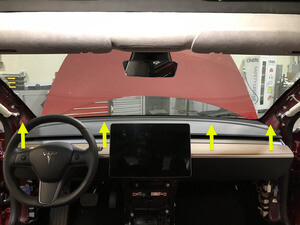
    16 个夹子;需要稍微抬起垫片,以便插入饰板工具以及松开夹子;然后朝向车辆后部滑动仪表板眉饰
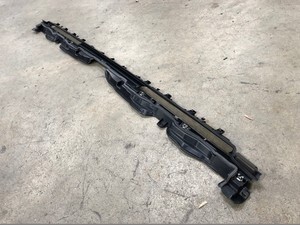
  91. 拉出 RH 通风槽的 RH 侧,并从仪表板上拆下
    Informational PurposesAn informational icon, calling your attention
    注
    1 个螺钉,T20,2.3 Nm
  92. 断开线束连接器与 RH 通风槽的连接,然后拆下通风槽
    Informational PurposesAn informational icon, calling your attention
    注
    1 个连接器
  93. 拉出 LH 通风槽的 LH 侧,并从仪表板上拆下
    Informational PurposesAn informational icon, calling your attention
    注
    1 个螺钉,T20,2.3 Nm
  94. 断开线束连接器与 LH 通风槽的连接,然后拆下通风槽
    Informational PurposesAn informational icon, calling your attention
    注
    1 个连接器
  95. 松开用于固定除霜格栅的卡子
    Informational PurposesAn informational icon, calling your attention
    注
    8 个卡子;更换所有已损坏的卡子
  96. 向上转动除霜格栅后边缘,松开仪表板上的锁片
    Informational PurposesAn informational icon, calling your attention
    注
    6 个锁片
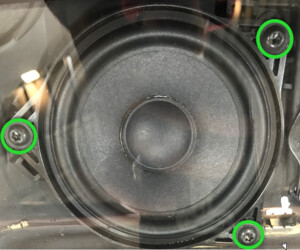
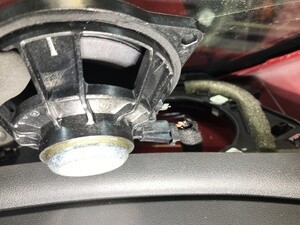
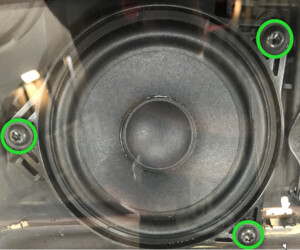
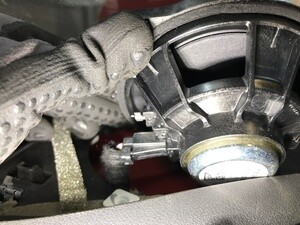
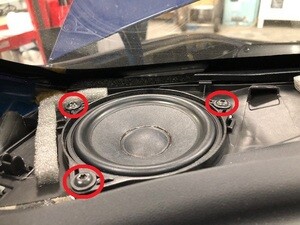
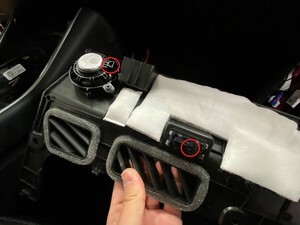
  97. 拆卸将左扬声器固定到仪表板的螺钉,然后拆下扬声器
    Informational PurposesAn informational icon, calling your attention
    注
    3 个螺钉,T20,2.3 Nm,1 个连接器
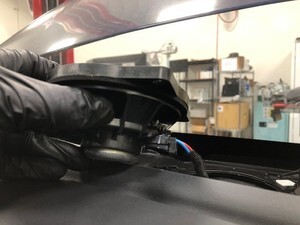
  98. 拆卸将中间扬声器固定到仪表板的螺钉,然后拆下扬声器
    Informational PurposesAn informational icon, calling your attention
    注
    3 个螺钉,T20,2.3 Nm,1 个连接器
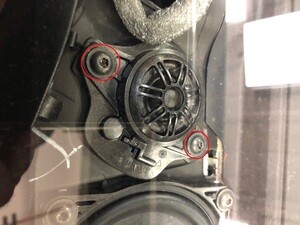
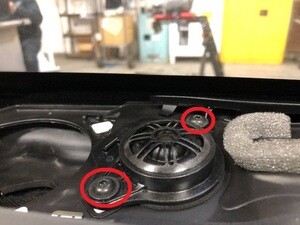
  99. 拆卸将中间高频扬声器固定到仪表板的螺钉,然后拆下扬声器
    Informational PurposesAn informational icon, calling your attention
    注
    2 个螺钉,T20,2.3 Nm,1 个连接器
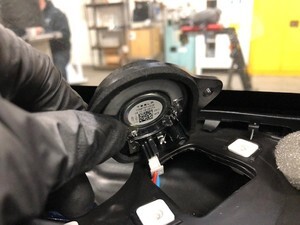
  100. 拆卸将右扬声器固定到仪表板的螺钉,然后拆下扬声器
    Informational PurposesAn informational icon, calling your attention
    注
    3 个螺钉,T20,2.3 Nm,1 个连接器
  101. 断开副驾位气囊总成的连接器
    Informational PurposesAn informational icon, calling your attention
    注
    3 个连接器,北美以外地区 2 个连接器
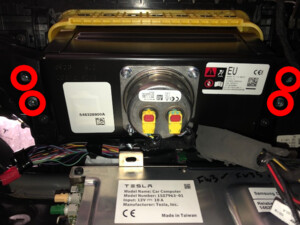
  102. 拆卸将副驾位气囊总成固定到横梁的螺栓
    Informational PurposesAn informational icon, calling your attention
    注
    4 个螺栓,E10 耐落螺栓,8 Nm;拆下后弃用
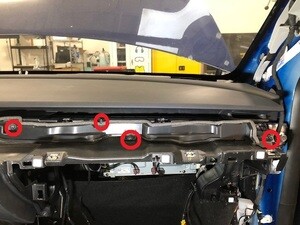
  103. 拆下将仪表板支架 LH 侧固定到副驾位气囊附近的横梁上的螺钉
    Informational PurposesAn informational icon, calling your attention
    注
    2 个螺钉,T20,2.3 Nm
  104. 拆下将仪表板支架固定到 LH 下部横梁的螺钉
    Informational PurposesAn informational icon, calling your attention
    注
    2 个螺钉,T20,2.3 Nm
  105. 拆下将仪表板支架固定到 LH 上部横梁的螺钉
    Informational PurposesAn informational icon, calling your attention
    注
    1 个螺钉,T20,2.3 Nm
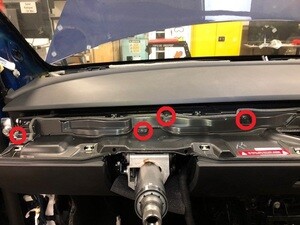
  106. 拆下将仪表板支架固定到正下方横梁的螺钉
    Informational PurposesAn informational icon, calling your attention
    注
    2 个螺钉,T20,2.3 Nm
  107. 拆下将仪表板支架固定到正上方横梁的螺钉
    Informational PurposesAn informational icon, calling your attention
    注
    2 个螺钉,T20,2.3 Nm
  108. 拆下将仪表板支架固定到 RH 上部横梁的螺钉
    Informational PurposesAn informational icon, calling your attention
    注
    1 个螺钉,T20,2.3 Nm
  109. 将仪表板支架从横梁上拆下
    Informational PurposesAn informational icon, calling your attention
    注
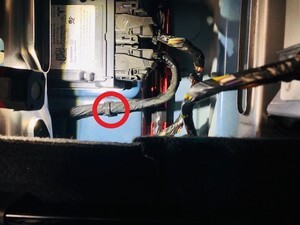
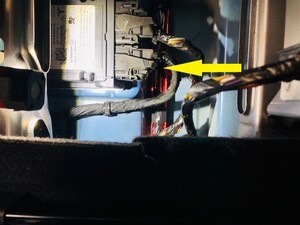
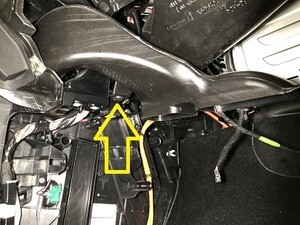
    建议请助手帮忙;小心清理夹在暖通空调总成正上方的线束;清理之后也有助于拆卸
  110. 拆卸将驾驶位风管固定到横梁的螺钉
    Informational PurposesAn informational icon, calling your attention
    注
    2 个螺钉,T20,2.3 Nm
  111. 将驾驶位风管从 HVAC 总成上拆下
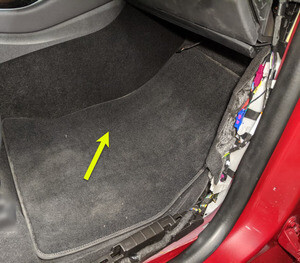
  112. 部分拆下驾驶室左侧地毯
  113. 将前围板连接器从左侧车身控制器上断开
    Informational PurposesAn informational icon, calling your attention
    注
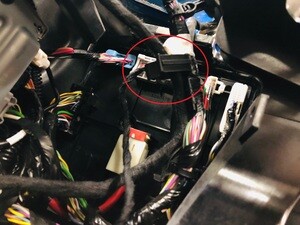
    1 个连接器;松开锁片,小心下拉以便松开连接器
  114. 将 HVAC 连接器从左侧车身控制器上断开
    Informational PurposesAn informational icon, calling your attention
    注
    1 个连接器
  115. 断开连接器与电子转向柱的连接
    Informational PurposesAn informational icon, calling your attention
    注
    1 个连接器
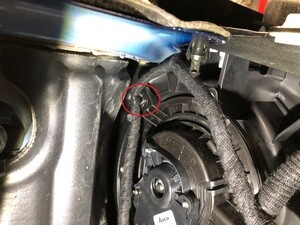
  116. 松开位于鼓风电机总成上的仪表板线束夹
    Informational PurposesAn informational icon, calling your attention
    注
    1 个线束夹
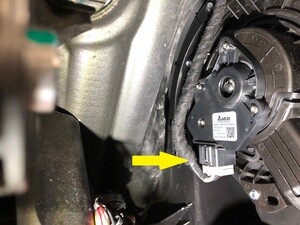
  117. 断开鼓风电机总成上的连接器
    Informational PurposesAn informational icon, calling your attention
    注
    1 个连接器
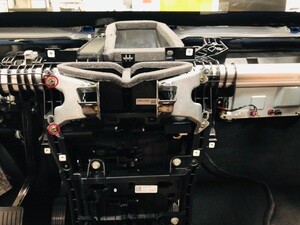
  118. 拆下中控台支架
    Informational PurposesAn informational icon, calling your attention
    注
    1 个夹子,4 个锁片;从升降器上取下锁片后,小心滑向车辆前部
  119. 松开 RCM 旁边的夹子
    Informational PurposesAn informational icon, calling your attention
    注
    1 个线束夹
  120. 断开位于 RCM 上的连接器
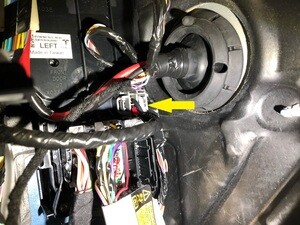
    Informational PurposesAn informational icon, calling your attention
    注
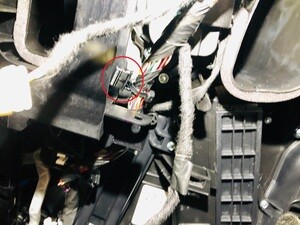
    1 个连接器;向下按压锁片,松开连接器
  121. 松开 RCM 旁边的仪表板线束夹
    Informational PurposesAn informational icon, calling your attention
    注
    1 个线束夹;松开夹子上的内侧锁片,然后从车身上抬起
  122. 松开车身靠近 RH 横梁支架处的仪表板线束夹
    Informational PurposesAn informational icon, calling your attention
    注
    1 个线束夹
  123. 松开横梁上的仪表板线束夹
    Informational PurposesAn informational icon, calling your attention
    注
    1 个线束夹
  124. 松开 RH 下部导管热敏电阻旁边的仪表板线束夹
    Informational PurposesAn informational icon, calling your attention
    注
    1 个线束夹
  125. 松开 RH 上部模式执行机构旁边的仪表板线束夹
    Informational PurposesAn informational icon, calling your attention
    注
    1 个线束夹
  126. 将暖通空调线束与仪表板线束 RH 侧上方的仪表板线束支撑底座分离
    Informational PurposesAn informational icon, calling your attention
    注
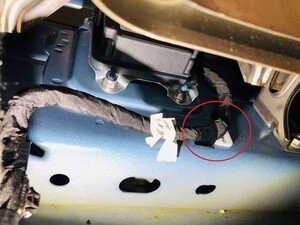
    2 个支撑底座,第一个支撑底座位于暖通空调总成的 RH 侧,第二个支撑底座位于右侧车身控制器旁边
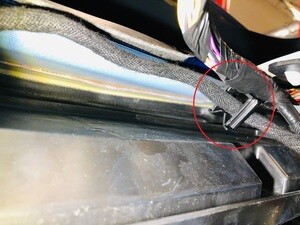
  127. 断开车载电脑上的连接器
    Informational PurposesAn informational icon, calling your attention
    注
    2 个连接器
  128. 部分拆下右侧地毯
  129. 将前围板线束连接器从右侧车身控制器上断开
    Informational PurposesAn informational icon, calling your attention
    注
    1 个连接器
  130. 松开横梁右侧的夹子
    Informational PurposesAn informational icon, calling your attention
    注
    1 个线束夹
  131. 松开车身 A 柱 RH 下部的夹子
    Informational PurposesAn informational icon, calling your attention
    注
    1 个线束夹
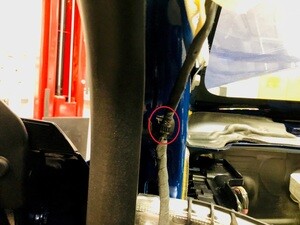
  132. 松开车身 A 柱 LH 上部的顶蓬线束夹
    Informational PurposesAn informational icon, calling your attention
    注
    1 个线束夹
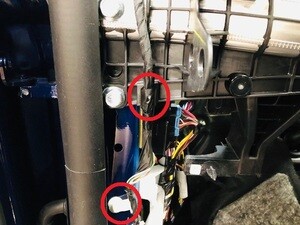
  133. 松开 A 柱 LH 下部的顶蓬线束夹
    Informational PurposesAn informational icon, calling your attention
    注
    2 个卡子
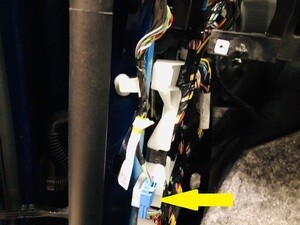
  134. 断开位于 A 柱 LH 下部的顶蓬线束连接器
    Informational PurposesAn informational icon, calling your attention
    注
    1 个连接器
  135. 拆下 LH 触摸屏支架
    Informational PurposesAn informational icon, calling your attention
    注
    2 个螺栓,T30,12 Nm
  136. 拆下 RH 触摸屏支架
    Informational PurposesAn informational icon, calling your attention
    注
    2 个螺栓,T30,12 Nm
  137. 从暖通空调总成上拆下排放器导管适配器
    Informational PurposesAn informational icon, calling your attention
    注
    4 个卡子
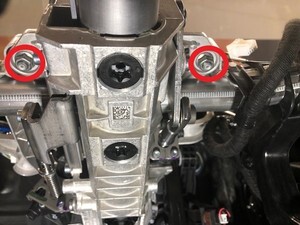
  138. 拆下将上部转向柱固定到横梁的螺母
    Informational PurposesAn informational icon, calling your attention
    注
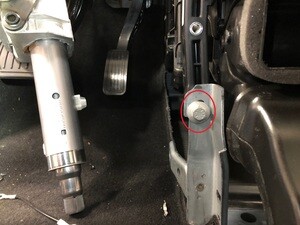
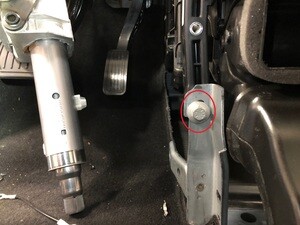
    2 个螺母,13 毫米,15 Nm
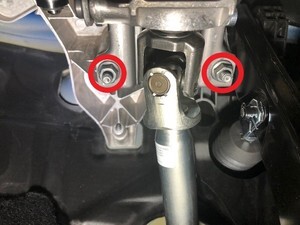
  139. 拧下将下部转向柱固定到横梁的螺母,然后小心拆下转向柱
    Informational PurposesAn informational icon, calling your attention
    注
    2 个螺母,13 毫米,15 Nm
  140. 拆下将毡毯固定到 LH 横梁支架的夹子
    Informational PurposesAn informational icon, calling your attention
    注
    1 个卡子
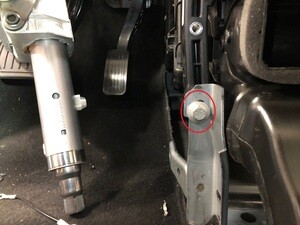
  141. 拆下将 LH 横梁支架固定到横梁的螺栓
    Informational PurposesAn informational icon, calling your attention
    注
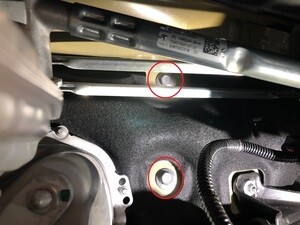
    1 个螺栓,13 毫米,25 Nm
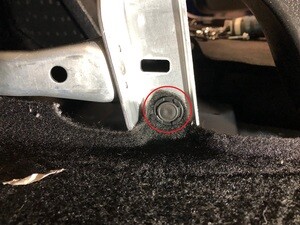
  142. 拧下将 LH 横梁支架固定到车身的螺母,然后拆下 LH 横梁支架
    Informational PurposesAn informational icon, calling your attention
    注
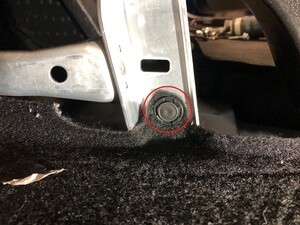
    1 个螺母,13 毫米,25 Nm;略微向车辆 LH 侧拉 LH 毡毯;拆卸期间,记下横梁支架的朝向
  143. 拆下将毡毯固定到 RH 横梁支架的夹子
    Informational PurposesAn informational icon, calling your attention
    注
    1 个卡子
  144. 拆下将 RH 横梁支架固定到横梁的螺栓
    Informational PurposesAn informational icon, calling your attention
    注
    1 个螺栓,13 毫米,25 Nm
  145. 拧下将 RH 横梁支架固定到车身的螺母,然后拆下 RH 横梁支架
    Informational PurposesAn informational icon, calling your attention
    注
    1 个螺母,13 毫米,25 Nm;略微向车辆 RH 侧拉 RH 毡毯;拆卸期间,记下横梁支架的朝向
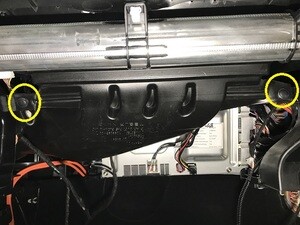
  146. 拆下将横梁固定到暖通空调总成的螺栓
    Informational PurposesAn informational icon, calling your attention
    注
    4 个螺栓,10 毫米,5.5 Nm
  147. 在暖通空调总成 LH 上方,拆下将横梁固定到暖通空调总成的螺栓
    Informational PurposesAn informational icon, calling your attention
    注
    1 个螺栓。10 毫米,5.5 Nm
  148. 拆下将横梁固定到上部整流罩的螺栓
    Informational PurposesAn informational icon, calling your attention
    注
    1 个螺栓,13 毫米,25 Nm
  149. 拆下将横梁固定到车身 LH 侧的螺栓
    Informational PurposesAn informational icon, calling your attention
    注
    2 个螺栓,15 毫米,29 Nm
  150. 拆下将横梁固定到车身 RH 侧的螺栓
    Informational PurposesAn informational icon, calling your attention
    注
    2 个螺栓,15 毫米,29 Nm
  151. 拆卸将横梁固定到隔板左侧的螺栓
    Informational PurposesAn informational icon, calling your attention
    注
    2 个螺栓,13 毫米,25 Nm
  152. 从车上拆下横梁
    Informational PurposesAn informational icon, calling your attention
    注
    建议请助手帮忙
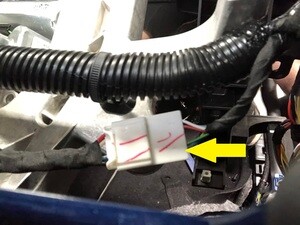
  153. 断开暖通空调连接器与右侧车辆控制器的连接
    Informational PurposesAn informational icon, calling your attention
    注
    1 个连接器
  154. 从位于 LH 和 RH 座椅之间的螺柱上拆下底板导管
    Informational PurposesAn informational icon, calling your attention
    注
    1 个螺柱
  155. 将底板风管从 HVAC 总成上拆下,然后置于一旁
  156. 从暖通空调总成上拆下空调歧管至暖通空调管路
    Informational PurposesAn informational icon, calling your attention
    注
    2 个螺栓,13 毫米,22 Nm
  157. 拆卸将 HVAC 总成固定到隔板右侧的螺栓
    Informational PurposesAn informational icon, calling your attention
    注
    1 个螺栓,10 毫米,5.5 Nm
  158. 拆卸将 HVAC 总成固定到 HVAC 总成右侧车身处的螺母
    Informational PurposesAn informational icon, calling your attention
    注
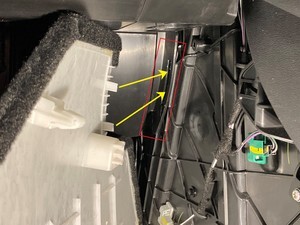
    1 个螺母,10 毫米,5.5 Nm;略微向车辆 RH 侧移动 RH 毡毯和泡沫;建议请助手帮忙支撑暖通空调总成。2020 年 3 月之后生产的车辆可能没有螺柱和螺母
  159. 将 HVAC 总成从车上拆下
    Informational PurposesAn informational icon, calling your attention
    注
    朝向车辆后部拆下暖通空调总成;顺时针转动,并移出副驾位前车门;建议请助手帮忙

安装

  1. 将暖通空调总成安装到车上,然后将暖通空调总成放置在螺柱上
    Informational PurposesAn informational icon, calling your attention
    注
    通过副驾位前车门安装暖通空调总成的前部,逆时针转动,朝向车辆前方安装
  2. 安装将暖通空调总成固定到车身的螺母
    Informational PurposesAn informational icon, calling your attention
    注
    1 个螺母,10 毫米,5.5 Nm;略微向车辆 RH 侧移动 RH 毡毯和泡沫
  3. 安装将 HVAC 总成固定到隔板右侧的螺栓
    Informational PurposesAn informational icon, calling your attention
    注
    1 个螺栓,10 毫米,5.5 Nm
  4. 将底板风管安装到 HVAC 总成
  5. 将底板导管安装到位于 LH 和 RH 座椅之间的螺柱上
    Informational PurposesAn informational icon, calling your attention
    注
    1 个螺柱
  6. 将暖通空调连接器连接到右侧车辆控制器
    Informational PurposesAn informational icon, calling your attention
    注
    1 个连接器
  7. 将空调歧管至暖通空调管路安装到 HVAC 总成
    Informational PurposesAn informational icon, calling your attention
    注
    2 个螺栓,13 毫米,22 Nm
  8. 执行空调真空测试
    Informational PurposesAn informational icon, calling your attention
    注
    仅限维修时间;2 分钟泄漏测试,15 分钟真空测试
  9. 将横梁安装到车上
    Informational PurposesAn informational icon, calling your attention
    注
    建议请助手帮忙
  10. 预装将横梁固定到车身 RH 侧的螺栓
    Informational PurposesAn informational icon, calling your attention
    注
    2 个螺栓,15 毫米,29 Nm;后续步骤中紧固
  11. 预装将横梁固定到车身 LH 侧的螺栓
    Informational PurposesAn informational icon, calling your attention
    注
    2 个螺栓,15 毫米,29 Nm;后续步骤中紧固
  12. 预装将横梁固定到上部整流罩的螺栓
    Informational PurposesAn informational icon, calling your attention
    注
    1 个螺栓,13 毫米,25 Nm
  13. 在暖通空调总成上部 LH 侧预装将横梁固定到暖通空调总成的螺栓
    Informational PurposesAn informational icon, calling your attention
    注
    1 个螺栓,10 毫米,5.5 Nm
  14. 在暖通空调总成前部预装将横梁固定到暖通空调总成的螺栓
    Informational PurposesAn informational icon, calling your attention
    注
    4 个螺栓,10 毫米,5.5 Nm
  15. 安装 RH 横梁支架,预装将 RH 横梁支架固定到车身的螺母
    Informational PurposesAn informational icon, calling your attention
    注
    1 个螺母,13 毫米,25 Nm
  16. 预装将 RH 横梁支架固定到横梁的螺栓
    Informational PurposesAn informational icon, calling your attention
    注
    1 个螺栓,13 毫米,25 Nm
  17. 安装 LH 横梁支架,然后预装将 LH 横梁支架固定到车身的螺母
    Informational PurposesAn informational icon, calling your attention
    注
    1 个螺母,13 毫米,25 Nm
  18. 预装将 LH 横梁支架固定到横梁的螺栓
    Informational PurposesAn informational icon, calling your attention
    注
    1 个螺栓,13 毫米,25 Nm
  19. 安装将横梁固定到隔板左侧的螺栓
    Informational PurposesAn informational icon, calling your attention
    注
    2 个螺栓,13 毫米,25 Nm
  20. 拧紧将 LH 横梁支架固定到横梁的螺栓
    Informational PurposesAn informational icon, calling your attention
    注
    1 个螺栓,13 毫米,25 Nm
  21. 紧固将左侧横梁支架固定到车身的螺母
    Informational PurposesAn informational icon, calling your attention
    注
    1 个螺母,13 毫米,25 Nm
  22. 安装将毡毯固定到 LH 横梁支架的夹子
    Informational PurposesAn informational icon, calling your attention
    注
    1 个卡子
  23. 拧紧将 RH 横梁支架固定到横梁的螺栓
    Informational PurposesAn informational icon, calling your attention
    注
    1 个螺栓,13 毫米,25 Nm
  24. 拧紧将 RH 横梁固定到车身的螺母
    Informational PurposesAn informational icon, calling your attention
    注
    1 个螺母,13 毫米,25 Nm
  25. 安装将毡毯固定到 RH 横梁支架的夹子
    Informational PurposesAn informational icon, calling your attention
    注
    1 个卡子
  26. 拧紧将横梁固定到暖通空调总成的螺栓
    Informational PurposesAn informational icon, calling your attention
    注
    4 个螺栓,10 毫米,5.5 Nm
  27. 拧紧将横梁固定到暖通空调总成的螺栓
    Informational PurposesAn informational icon, calling your attention
    注
    1 个螺栓,10 毫米,5.5 Nm
  28. 拧紧将横梁固定到上部整流罩的螺栓
    Informational PurposesAn informational icon, calling your attention
    注
    1 个螺栓,13 毫米,25 Nm
  29. 拧紧将横梁固定到车身 LH 侧的螺栓
    Informational PurposesAn informational icon, calling your attention
    注
    2 个螺栓,15 毫米,29 Nm
  30. 拧紧将横梁固定到车身 RH 侧的螺栓
    Informational PurposesAn informational icon, calling your attention
    注
    2 个螺栓,15 毫米,29 Nm
  31. 安装将下部转向柱固定到横梁的螺母
    Informational PurposesAn informational icon, calling your attention
    注
    2 个螺母,13 毫米,15 Nm
  32. 安装将上部转向柱固定到横梁的螺母
    Informational PurposesAn informational icon, calling your attention
    注
    2 个螺母,13 毫米,15 Nm
  33. 将排放器导管适配器安装到暖通空调总成
    Informational PurposesAn informational icon, calling your attention
    注
    4 个卡子
  34. 安装 RH 触摸屏支架
    Informational PurposesAn informational icon, calling your attention
    注
    2 个螺栓,T30,12 Nm
  35. 安装 LH 触摸屏支架
    Informational PurposesAn informational icon, calling your attention
    注
    2 个螺栓,T30,12 Nm
  36. 在 A 柱 LH 上部安装顶蓬线束夹
    Informational PurposesAn informational icon, calling your attention
    注
    1 个卡子
  37. 在 A 柱 LH 下部安装顶蓬线束夹
    Informational PurposesAn informational icon, calling your attention
    注
    2 个卡子
  38. 在 A 柱 LH 下部安装顶蓬线束连接器
    Informational PurposesAn informational icon, calling your attention
    注
    1 个连接器
  39. 在 A 柱 RH 下部安装夹子
    Informational PurposesAn informational icon, calling your attention
    注
    1 个卡子
  40. 安装横梁右侧的卡子
  41. 将前围板线束连接器安装到右侧车身控制器
    Informational PurposesAn informational icon, calling your attention
    注
    1 个连接器
  42. 将右侧地毯移回原位
  43. 将连接器安装到车载电脑
    Informational PurposesAn informational icon, calling your attention
    注
    2 个连接器
  44. 将暖通空调线束安装到仪表板线束 RH 侧的仪表板线束支撑底座上
    Informational PurposesAn informational icon, calling your attention
    注
    2 个支撑底座,第一个支撑底座位于暖通空调总成的 RH 侧,第二个支撑底座位于右侧车身控制器旁边
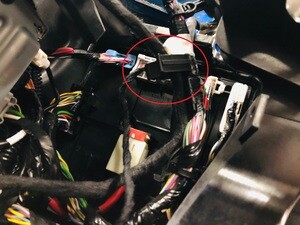
  45. 将仪表板线束夹安装到 RH 上部模式执行机构旁边的暖通空调总成
    Informational PurposesAn informational icon, calling your attention
    注
    1 个夹子
  46. 将仪表板线束夹安装到 RH 下部导管热敏电阻旁边的暖通空调总成
    Informational PurposesAn informational icon, calling your attention
    注
    1 个卡子
  47. 将仪表板线束夹安装到横梁上
    Informational PurposesAn informational icon, calling your attention
    注
    1 个卡子
  48. 在车身靠近 RH 横梁支架处安装仪表板线束夹
    Informational PurposesAn informational icon, calling your attention
    注
    1 个卡子
  49. 安装中控台支架
    Informational PurposesAn informational icon, calling your attention
    注
    1 个夹子,4 个锁片;朝向车辆后部滑动,然后锁定锁片
  50. 在车身靠近 RCM 处安装仪表板线束夹
    Informational PurposesAn informational icon, calling your attention
    注
    1 个卡子
  51. 连接 RCM 上的连接器
    Informational PurposesAn informational icon, calling your attention
    注
    1 个连接器;完全安装连接器,将释放锁片拉入锁定位置
  52. 安装 RCM 旁边的夹子
    Informational PurposesAn informational icon, calling your attention
    注
    1 个卡子
  53. 将连接器连接到鼓风电机总成
    Informational PurposesAn informational icon, calling your attention
    注
    1 个连接器
  54. 安装位于鼓风电机总成上的仪表板线束夹
    Informational PurposesAn informational icon, calling your attention
    注
    1 个卡子
  55. 将连接器连接到电子转向柱上
    Informational PurposesAn informational icon, calling your attention
    注
    1 个连接器
  56. 将 HVAC 连接器连接到左侧车身控制器
    Informational PurposesAn informational icon, calling your attention
    注
    1 个连接器
  57. 将前围板连接器连接到左侧车身控制器
    Informational PurposesAn informational icon, calling your attention
    注
    1 个连接器;连接器完全就位,然后将释放锁片拉入锁定位置
  58. 将驾驶室左侧地毯移回原位
  59. 将驾驶位风管安装到 HVAC 总成
  60. 安装将驾驶位风管固定到横梁的螺钉
    Informational PurposesAn informational icon, calling your attention
    注
    2 个螺钉,T20,2.3 Nm
  61. 将仪表板支架安装到横梁上
    Informational PurposesAn informational icon, calling your attention
    注
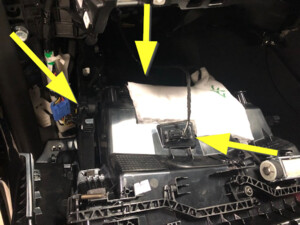
    建议请助手帮忙;小心清理夹在暖通空调总成正上方的线束;清理之后也有助于安装
  62. 安装将仪表板支架固定到 RH 上部横梁的螺钉
    Informational PurposesAn informational icon, calling your attention
    注
    1 个螺钉,T20,2.3 Nm
  63. 安装将仪表板支架固定到正上方横梁的螺钉
    Informational PurposesAn informational icon, calling your attention
    注
    2 个螺钉,T20,2.3 Nm
  64. 安装将仪表板支架固定到正下方横梁的螺钉
    Informational PurposesAn informational icon, calling your attention
    注
    2 个螺钉,T20,2.3 Nm
  65. 安装将仪表板支架固定到 LH 上部横梁的螺钉
    Informational PurposesAn informational icon, calling your attention
    注
    1 个螺钉,T20,2.3 Nm
  66. 安装将仪表板支架固定到 LH 下部横梁的螺钉
    Informational PurposesAn informational icon, calling your attention
    注
    2 个螺钉,T20,2.3 Nm
  67. 安装将仪表板支架 RH 侧固定到副驾位气囊附近的横梁上的螺钉
    Informational PurposesAn informational icon, calling your attention
    注
    2 个螺钉,T20,2.3 Nm
  68. 将副驾位气囊安装到仪表板支架,固定螺栓
    Informational PurposesAn informational icon, calling your attention
    注
    4 个螺纹胶螺栓,E10,8 Nm;安装新的螺纹胶螺栓
  69. 安装副驾位气囊的连接器
    Informational PurposesAn informational icon, calling your attention
    注
    3 个连接器,北美以外地区 2 个连接器
  70. 将右扬声器安装到仪表板支架
    Informational PurposesAn informational icon, calling your attention
    注
    3 个螺钉,T20,2.3 Nm,1 个连接器
  71. 将中间高频扬声器安装到仪表板支架
    Informational PurposesAn informational icon, calling your attention
    注
    2 个螺钉,T20,2.3 Nm,1 个连接器
  72. 将中间扬声器安装到仪表板
    Informational PurposesAn informational icon, calling your attention
    注
    3 个螺钉,T20,2.3 Nm,1 个连接器
  73. 将左扬声器安装到仪表板支架
    Informational PurposesAn informational icon, calling your attention
    注
    3 个螺钉,T20,2.3 Nm,1 个连接器
  74. 将除霜格栅和下部锁片放置到仪表板上
    Informational PurposesAn informational icon, calling your attention
    注
    6 个锁片
  75. 紧固用于固定除霜格栅的卡子
    Informational PurposesAn informational icon, calling your attention
    注
    8 个卡子
  76. 将 LH 通风槽放置在仪表板中,然后连接线束连接器
    Informational PurposesAn informational icon, calling your attention
    注
    1 个连接器
  77. 将 LH 通风槽安装到仪表板中
    Informational PurposesAn informational icon, calling your attention
    注
    1 个螺钉,T20,2.3 Nm
  78. 将 RH 通风槽放置在仪表板中,然后连接线束连接器
    Informational PurposesAn informational icon, calling your attention
    注
    1 个连接器
  79. 将 RH 通风槽右侧安装到仪表板中
    Informational PurposesAn informational icon, calling your attention
    注
    1 个螺钉,T20,2.3 Nm
  80. 将仪表板眉饰安装到车上
    Informational PurposesAn informational icon, calling your attention
    注
    16 个夹子;需要略微抬起顶垫,将仪表板眉饰滑入位
  81. 安装固定仪表板眉饰右侧的螺钉
    Informational PurposesAn informational icon, calling your attention
    注
    4 个螺钉,T20,2.3 Nm
  82. 安装固定仪表板眉饰左侧的螺钉
    Informational PurposesAn informational icon, calling your attention
    注
    4 个螺钉,T20,2.3 Nm
  83. 安装 RH 仪表板气波槽
    Informational PurposesAn informational icon, calling your attention
    注
    2 个推拉式卡子
  84. 安装副驾位脚部空间通风槽
    Informational PurposesAn informational icon, calling your attention
    注
    1 个推拉式卡子
  85. 连接手套箱总成连接器
    Informational PurposesAn informational icon, calling your attention
    注
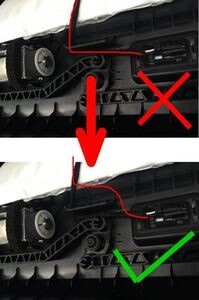
    3 个连接器;重新布置路面照明灯线束,防止阻碍棘爪的移动
  86. 将手套箱安装到仪表板支架上
    Informational PurposesAn informational icon, calling your attention
    注
    3 个卡子
  87. 安装将手套箱总成固定到仪表板支架的螺钉
    Informational PurposesAn informational icon, calling your attention
    注
    6 个螺钉,T20,2.3 Nm
  88. 将中央显示器支座外壳放置到车辆上
  89. 将中央显示器放置到车辆上
  90. 连接中央显示屏
    Informational PurposesAn informational icon, calling your attention
    注
    1 个连接器
  91. 将固定夹安装到中央显示屏连接器
    Informational PurposesAn informational icon, calling your attention
    注
    1 个夹子
  92. 滑下颈部外壳,然后安装将颈部外壳固定到中央显示器的螺栓
    Informational PurposesAn informational icon, calling your attention
    注
    2 个螺栓,T30,3 Nm;
  93. 将中央显示器安装到仪表板支架
    Informational PurposesAn informational icon, calling your attention
    注
    2 个耐落螺栓,10 毫米,16 Nm;安装新 10 毫米耐落螺栓;滑向车前
  94. 连接温度传感器连接器,将仪表板检修板安装到仪表板内
    Informational PurposesAn informational icon, calling your attention
    注
    4 个夹子,4 个锁片,1 个连接器
  95. 将转向柱控制模块 (SCCM) 安装到转向柱上
  96. 安装将 SCCM 固定到转向柱的螺栓
    Informational PurposesAn informational icon, calling your attention
    注
    1 个螺栓,5 毫米内六角,9 Nm
  97. 连接转向柱控制模块 (SCCM) 总成连接器
    Informational PurposesAn informational icon, calling your attention
    注
    1 个连接器;将新的橙色固定夹安装到连接器上,然后安装 SCCM 连接器;执行推拉测试,确保连接器稳妥固定
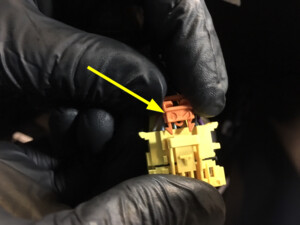
  98. 将下部护罩安装到转向柱上
  99. 安装将下部护罩固定到转向柱的下部螺钉
    Informational PurposesAn informational icon, calling your attention
    注
    1 个螺钉,T20,1.5 Nm
  100. 安装将下部护罩固定到转向柱的上部螺钉
    Informational PurposesAn informational icon, calling your attention
    注
    2 个螺钉,T20,1.5 Nm
  101. 对齐夹子,然后下压,以便将上部护罩安装到下部护罩
    Informational PurposesAn informational icon, calling your attention
    注
    4 个卡子
  102. 将方向盘对准转向柱放置以备安装
    Informational PurposesAn informational icon, calling your attention
    注
    方向盘和转向柱已就位
  103. 安装将方向盘固定到转向柱的螺栓
    Informational PurposesAn informational icon, calling your attention
    注
    1 个耐落螺栓,10 毫米六角,80 Nm;安装新耐落螺栓
  104. 连接方向盘连接器
    Informational PurposesAn informational icon, calling your attention
    注
    1 个连接器
  105. 连接驾驶位气囊连接器
    Informational PurposesAn informational icon, calling your attention
    注
    1 个连接器;确保驾驶位气囊线束顺畅通过驾驶位气囊和喇叭机构的中间区域
  106. 将驾驶位气囊总成固定到方向盘,验证其完全固定
    Informational PurposesAn informational icon, calling your attention
    注
    3 个基线,1 个弹簧夹;在安装驾驶位气囊前,检查以确保下部喇叭支架完全固定到方向盘
  107. 安装主饰板总成
    Informational PurposesAn informational icon, calling your attention
    注
    15 个卡子,1 个中间卡子
  108. 将右侧气波边框盖安装到主饰板总成上
    Informational PurposesAn informational icon, calling your attention
    注
    2 个卡子
  109. 将左侧气波边框盖安装到主饰板总成上
    Informational PurposesAn informational icon, calling your attention
    注
    2 个卡子
  110. 将副驾位膝部气囊安装到车上
    Informational PurposesAn informational icon, calling your attention
    注
    1 个连接器;接合锁片;小心操作,避免损坏连接器/线束;连接连接器期间,需支撑膝部气囊
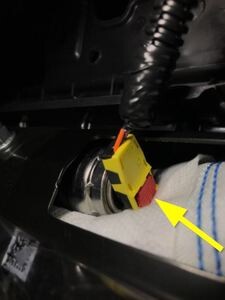
  111. 安装将副驾位膝部气囊固定到车辆的紧固件
    Informational PurposesAn informational icon, calling your attention
    注
    4 个耐落螺栓,E10,8 Nm,2 个螺钉,T20,2 Nm,1 个耐落螺栓;安装新耐落螺栓
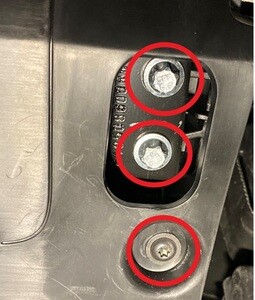
  112. 连接 RH 脚部空间总成连接器
    Informational PurposesAn informational icon, calling your attention
    注
    2 个连接器
  113. 安装固定 RH 脚部空间总成的夹子
    Informational PurposesAn informational icon, calling your attention
    注
    4 个推拉式卡子
  114. 安装将座舱 RH 前毡毯固定到车身的夹子
    Informational PurposesAn informational icon, calling your attention
    注
    1 个卡子
  115. 将左侧脚部空间风管安装到 HVAC 模块
  116. 连接驾驶位膝部气囊,然后将其安装到车辆上
    Informational PurposesAn informational icon, calling your attention
    注
    1 个连接器;接合锁片;小心操作,避免损坏连接器/线束;连接连接器期间,需支撑膝部气囊
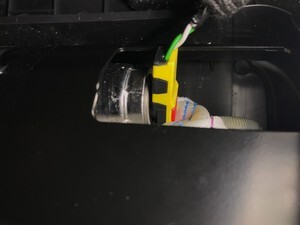
  117. 安装将驾驶位膝部气囊固定到车辆的紧固件
    Informational PurposesAn informational icon, calling your attention
    注
    4 个耐落螺栓,E10,8 Nm;安装新耐落螺栓,2 个螺钉,T20,2 Nm,2 个耐落螺栓
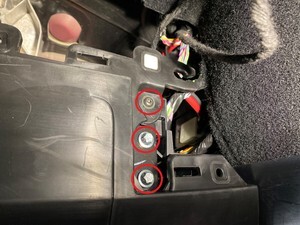
  118. 将连接器安装到左侧脚部空间盖板,并放置入位以备安装,将前部锁片固定到驾驶位气囊总成
    Informational PurposesAn informational icon, calling your attention
    注
    3 个锁片,1 个以太网连接器,1 个地面照明灯连接器
  119. 安装用于固定左侧脚部空间盖板的螺钉和卡子
    Informational PurposesAn informational icon, calling your attention
    注
    1 个螺钉,T20,2.5 Nm,2 个推拉式卡子
  120. 安装将座舱 LH 前毡毯固定到车身的夹子
    Informational PurposesAn informational icon, calling your attention
    注
    1 个卡子
  121. 将中控台安装到车辆上
    Informational PurposesAn informational icon, calling your attention
    注
    建议寻求他人协助;向下倾斜中控台前部,将总成滑向车辆前部,将中控台后部倾斜入位
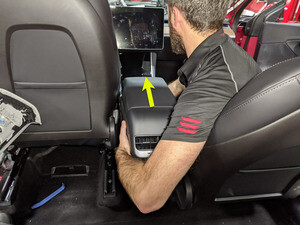
  122. 将线束连接到中控台后部
    Informational PurposesAn informational icon, calling your attention
    注
    1 个连接器
  123. 连接中控台右前方的线束
    Informational PurposesAn informational icon, calling your attention
    注
    1 个 USB 连接器
  124. 将 RH 前外部硬件安装到中控台
    Informational PurposesAn informational icon, calling your attention
    注
    2 个螺栓,10 毫米,7 Nm
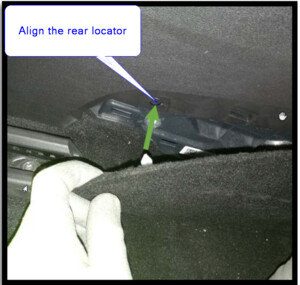
  125. 安装中控台右侧面板处地毯
    Informational PurposesAn informational icon, calling your attention
    注
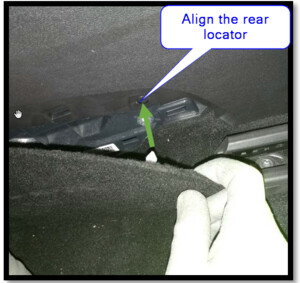
    12 个夹子,2 个定位销;放置侧面板,对齐前定位器,然后对齐后定位器;将侧面板推向控制台以便安装
  126. 安装右前脚垫
  127. 将 LH 前外部硬件安装到中控台
    Informational PurposesAn informational icon, calling your attention
    注
    2 个螺栓,10 毫米,7 Nm
  128. 安装中控台左侧面板处地毯
    Informational PurposesAn informational icon, calling your attention
    注
    11 个夹子,2 个定位销;放置侧面板,将前部对齐前定位器,然后对齐后定位器;将侧面板推向控制台以便安装
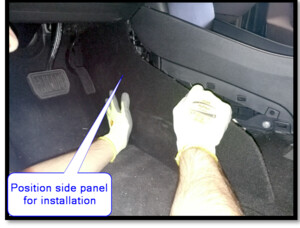
  129. 安装左前脚垫
  130. 安装右侧 A 柱上饰板
    Informational PurposesAn informational icon, calling your attention
    注
    3 个夹子,1 个系带;沿仪表板和扬声器格栅滑动饰板底部,将系带固定到车身侧;从底部开始向上放置夹子;将密封件拉过饰板
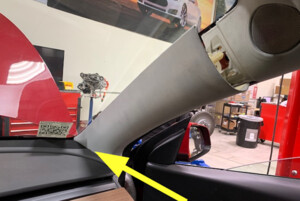
  131. 安装右侧 A 柱下饰板
    Informational PurposesAn informational icon, calling your attention
    注
    1 个夹子,2 个导片;对齐 2 个前部锁片,然后将卡槽对齐线束支架,接着推动后端夹子,以便固定 B 柱下部
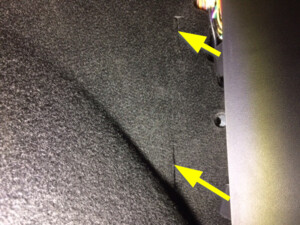
  132. 安装用于固定 A 柱 RH 下部饰板的夹子
    Informational PurposesAn informational icon, calling your attention
    注
    1 个卡子
  133. 安装右侧 A 柱中部总成
    Informational PurposesAn informational icon, calling your attention
    注
    1 个夹子,1 个锁片;对齐底部锁片,然后推动顶部夹子,完全就位中部 A 柱;确保密封件位于饰板顶部
  134. 安装仪表板右侧端盖
    Informational PurposesAn informational icon, calling your attention
    注
    3 个卡子
  135. 安装左侧 A 柱上饰板
    Informational PurposesAn informational icon, calling your attention
    注
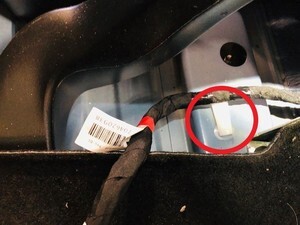
    3 个卡子,1 个系带;如果已从车身侧拆下系带,请更换;将下部滑入位;将系带的 3 个固位钩安装到外壳上;然后对齐上部 3 个卡子;从上至下按压卡子;务必再次检查中部卡子,确认其完全就位
  136. 安装 A 柱 LH 下部饰板
    Informational PurposesAn informational icon, calling your attention
    注
    1 个夹子,2 个导片;对齐 2 个前部锁片,然后将卡槽对齐线束支架,接着推动后端夹子,以便固定 B 柱下部
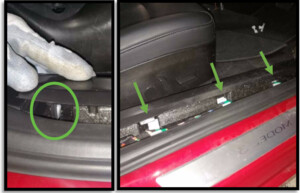
  137. 安装用于固定 A 柱 LH 下部饰板的夹子
    Informational PurposesAn informational icon, calling your attention
    注
    1 个推拉式卡子
  138. 安装左侧 A 柱中部总成
    Informational PurposesAn informational icon, calling your attention
    注
    1 个卡子,1 个锁片;对齐底部锁片,然后推动顶部卡子,使其完全就位于 A 柱中部;将密封件拉过饰板
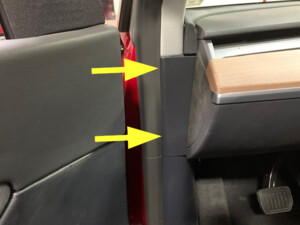
  139. 安装仪表板左侧端盖
    Informational PurposesAn informational icon, calling your attention
    注
    3 个卡子
  140. 从空调歧管至 HVAC 总成上拆下下方空调软管
  141. 使用注油器将测量好的适量机油注回系统
    Informational PurposesAn informational icon, calling your attention
    注
    根据计算得出的机油损耗量,为系统补充适当类型的新机油。请参阅 液体和容量 了解空调机油规格。计算回收期间的机油损耗量,添加 40 毫升以补充旧暖通空调壳体中预计损失的机油。如果回收期间排出的机油量超过 30 毫升,请参考排油损失图。
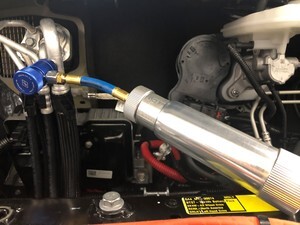
  142. 将下方空调软管安装到空调歧管至 HVAC 总成
  143. 执行空调制冷剂重新加注
    Informational PurposesAn informational icon, calling your attention
    注
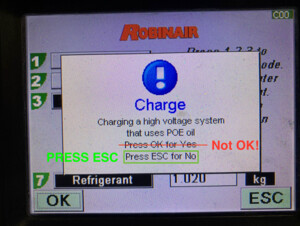
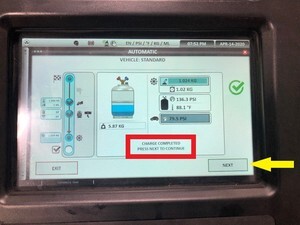
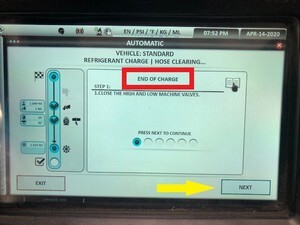
    重新加注制冷剂 1.02 千克(1020 克);对于 Robinair 空调机,按下 ESC 键,点击 “NOT ACCEPT”,不接受清理残留机油的步骤;完成后,按下 “next” 开始“加注结束”流程
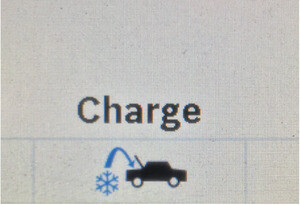
  144. 执行“充注结束”流程的第 1 步
    Informational PurposesAn informational icon, calling your attention
    注
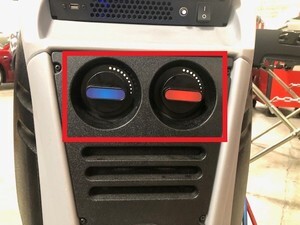
    关闭高位和低位机器阀门,按下 “next” 以继续
  145. 连接紧急响应回路和 12V 负极端子
    Informational PurposesAn informational icon, calling your attention
    注
    1 个螺母,10 毫米,6 Nm,1 个连接器;首先连接紧急响应回路,然后再连接 12V 电池,以避免损坏汽车电脑
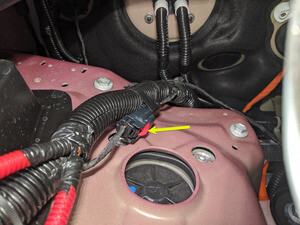
  146. 使用 Toolbox 3.0 与车辆相连
    Informational PurposesAn informational icon, calling your attention
    注
    车辆接口集成在驾驶员脚部空间罩中;打开 Toolbox 3 网站并建立与车辆的连接。选择右上角的连接状态图标,然后选择本地连接(车辆连接后,图标将变为绿色)
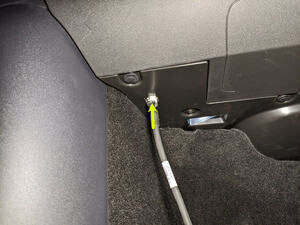
  147. 选择 “Actions/Autodiag”,然后搜索 “commissioning”
  148. 选择TEST-SELF_VCFRONT_X_HEAT-PUMP-COMMISSIONINGvia Toolbox: (link)via Service Mode: Thermal ➜ Refrigerant System ➜ Run Heat Pump Commissioningvia Service Mode Plus: Drive Inverter ➜ Front Drive Inverter Replacement ➜ Heatpump commissioning,点击 “Run”,然后等待例行程序完成。
    Informational PurposesAn informational icon, calling your attention
    注
    如果进入“Thermal Drain/Fill”模式后,未能运行该例程,空调压缩机运行会被阻止;完成后,选择窗口右上角的“X”关闭
  149. 继续执行“加注结束”流程的第 2-4 步,按空调机上显示的说明操作
    Informational PurposesAn informational icon, calling your attention
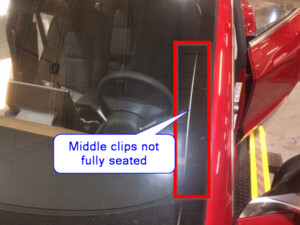
    注
    开启空调;温度设置为“低”;开启“面板”模式;开启“新鲜空气”模式;鼓风机转速设置为 3;验证排放压力不超过 26 巴,吸气压力不低于 1.15 巴;关闭空调,稳定压力,拔下上方软管
  150. 继续执行“加注结束”流程的第 5-6 步,按空调机上显示的说明操作
    Informational PurposesAn informational icon, calling your attention
    注
    开启空调;温度设置为“低”;开启“面板”模式;开启“新鲜空气”模式;鼓风机转速设置为 3;将机器阀门转为“开”;稳定压力,从车辆上拆下下方软管;继续按空调机指南操作,清理空调软管
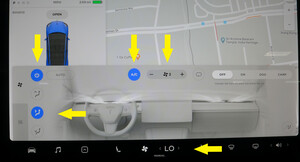
  151. 安装空调端口盖
    Informational PurposesAn informational icon, calling your attention
    注
    2 个盖
  152. 选择 “Actions/Autodiag”,然后搜索 “HVAC”
  153. 选择 “TEST-SELF_VCRIGHT_X_HVAC-PERFORMANCEvia Toolbox: (link)via Service Mode:
    • Thermal ➜ Actions ➜ Test HVAC Performance
    • Thermal ➜ Actions ➜ Test HVAC Performance
    ”,点击 “Run”,然后等待例行程序完成。
    Informational PurposesAn informational icon, calling your attention
    注
    完成后,点击窗口右上角的 “X” 关闭页面
  154. 从以太网端口上拔下高速数据线缆,以断开 Toolbox 3.0 与车辆的连接
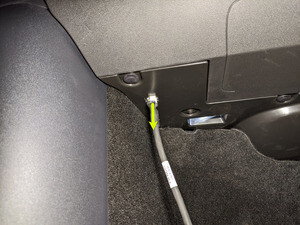
  155. 将左前座椅向前移动
  156. 将 LH 后外部硬件安装到中控台
    Informational PurposesAn informational icon, calling your attention
    注
    1 个螺栓,10 毫米,7 Nm
  157. 将右前座椅向前移动
  158. 将 RH 后外部硬件安装到中控台
    Informational PurposesAn informational icon, calling your attention
    注
    1 个螺栓,10 毫米,7 Nm
  159. 安装控制台后侧下饰板
    Informational PurposesAn informational icon, calling your attention
    注
    5 个卡子
  160. 安装新鲜空气进气槽
    Informational PurposesAn informational icon, calling your attention
    注
    1 个螺栓,10 毫米螺栓,4 Nm,2 个卡子,1 个销;将卡子放置在隔板螺柱上;固定温控棒
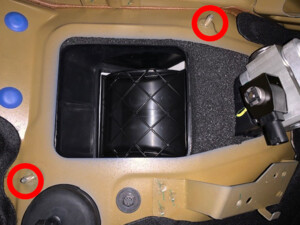
  161. 将前备箱总成安装到车辆中
    Informational PurposesAn informational icon, calling your attention
    注
    6 个卡子;更换损坏或丢失的卡子
  162. 安装用于固定前备箱总成的紧固件
    Informational PurposesAn informational icon, calling your attention
    注
    5 个螺栓,10 毫米,5 Nm;新款车可能加装了 1 个将前备箱固定到清洗器储液罐颈部的推拉式卡子
  163. 安装维修盖板
    Informational PurposesAn informational icon, calling your attention
    注
    3 个卡子,1 个连接器
  164. 安装后挡板
    Informational PurposesAn informational icon, calling your attention
    注
    14 个卡子;固定前备箱后围,防止其在接合前部卡子时弯曲
  165. 关闭前备箱盖
  166. 将右前座椅移回原位
  167. 将左前座椅移回原位
  168. 升起所有车窗
  169. 关闭所有四个车门
    Informational PurposesAn informational icon, calling your attention
    注
    关闭前需解锁后车门