08/04/2024 19:49:26

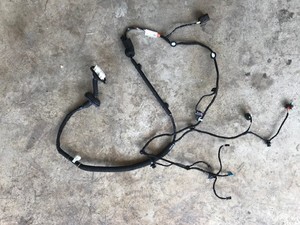
线束 - 车门 - 后 - LH(拆卸和更换)
校正代码 17102802 0.78 注意:除非本程序中另有明确规定,否则上述校正代码和 FRT 反映的是执行本程序(包括关联程序)所需的所有工作。除非明确要求,否则请勿堆叠校正代码。注意:请参阅平均维修工时,深入了解 FRT 及其创建方式。要提供有关 FRT 值的反馈,请发送电子邮件至LaborTimeFeedback@tesla.com。注意:请参阅人员保护,确保在执行以下程序时穿戴适当的个人防护装备 (PPE)。

Warning IconA warning icon, calling your attention to a possibly risky situation
警告
尽管此程序已经过验证,但仍是一个草案。可能没有警告和注意事项。请遵守安全要求,处理或靠近高压系统和部件时,请谨慎操作。请将校正修理内容及反馈发送至ServiceDevelopment@teslamotors.com。
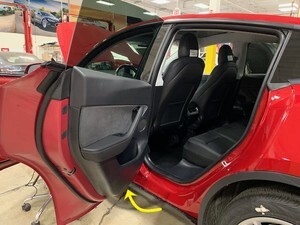
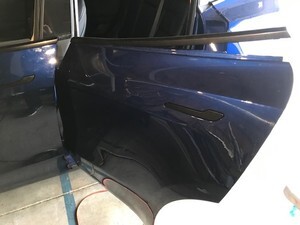
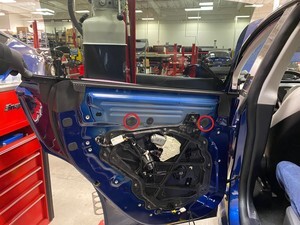
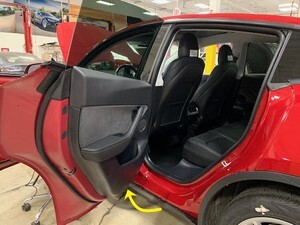
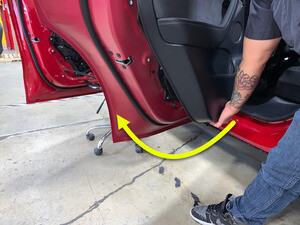
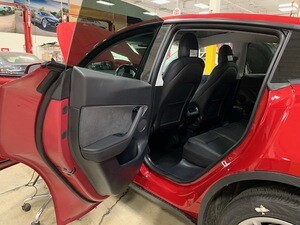
  1. 打开左后车门
  2. 降下左后车窗
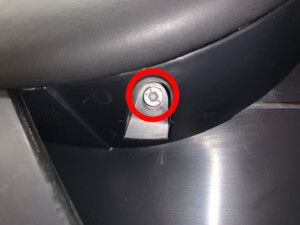
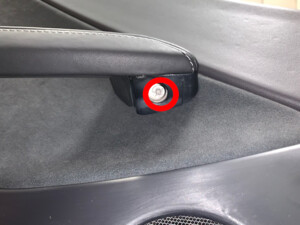
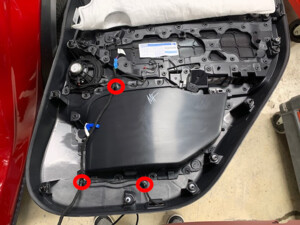
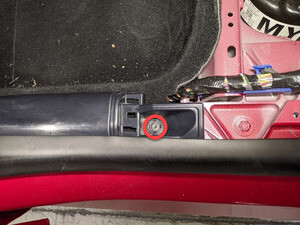
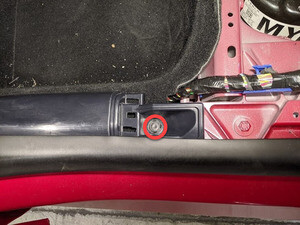
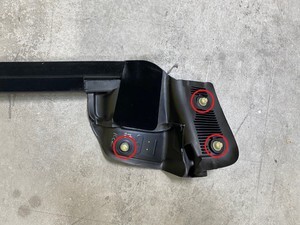
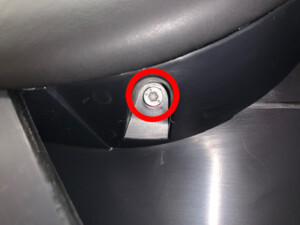
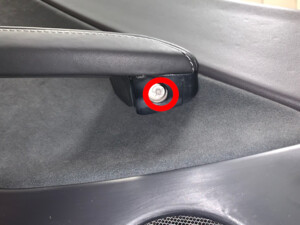
  3. 拆下固定扶手和车门饰板把手下方 LH 后车门板的紧固件
    Informational PurposesAn informational icon, calling your attention
    注
    2 个螺栓,T30,6 Nm
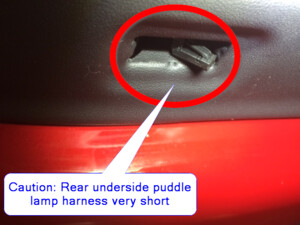
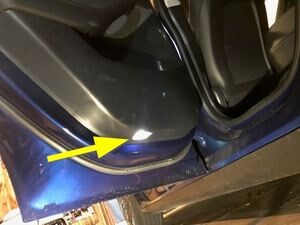
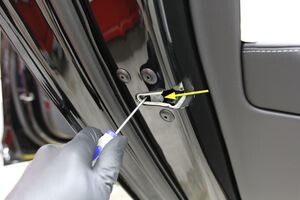
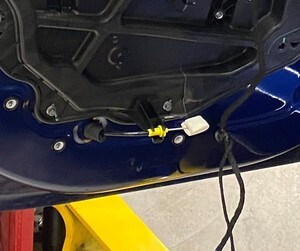
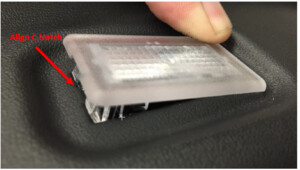
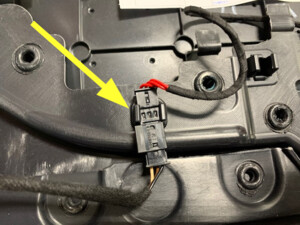
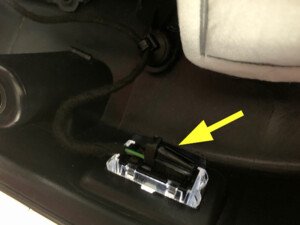
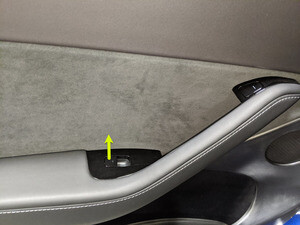
  4. 从 LH 后车门板上拆下下方白色作业灯
    Informational PurposesAn informational icon, calling your attention
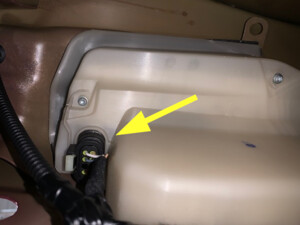
    注
    4 个夹子,1 个连接器;插入饰板工具,朝车门前部松开 C 形切口,然后先用小号平头螺丝刀断开白色作业灯,再将其拆下。注意:线束很短
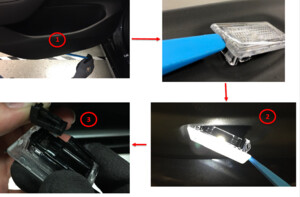
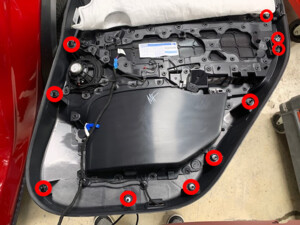
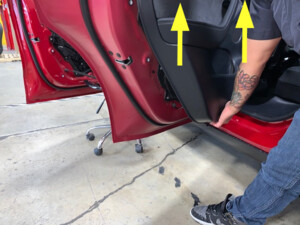
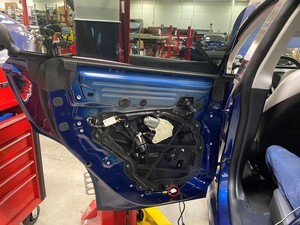
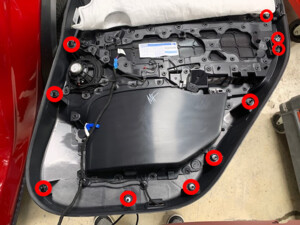
  5. 拆下 LH 后车门板总成
    Informational PurposesAn informational icon, calling your attention
    注
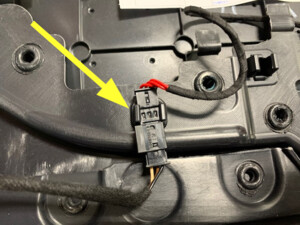
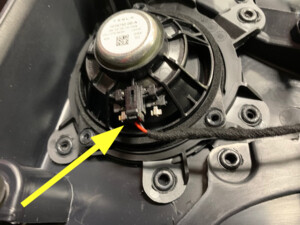
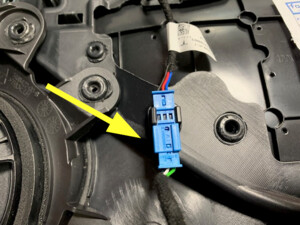
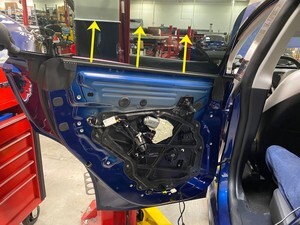
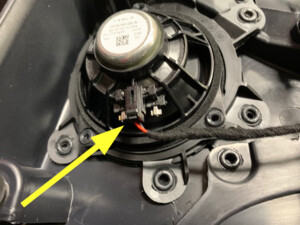
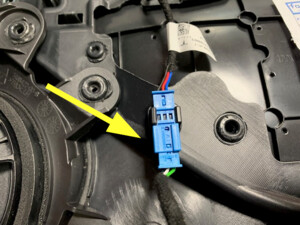
    10 个夹子,3 个枞树夹,3 个连接器;从下方白色作业灯处向外、向上拉,松开将面板固定到车门的夹子,然后拆下车门密封条的顶部;从饰板上拆下线束
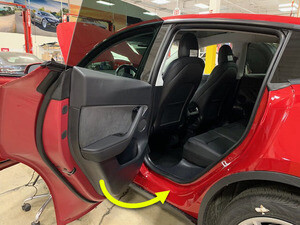
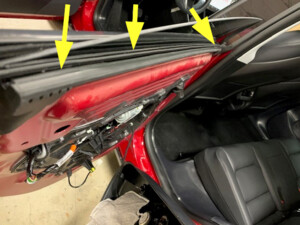
  6. 从 LH 后车门上松开内侧密封条
    Informational PurposesAn informational icon, calling your attention
    注
    6 个夹子;向上拉动以松开密封条,拆下留下的夹子并重新安装到密封条上
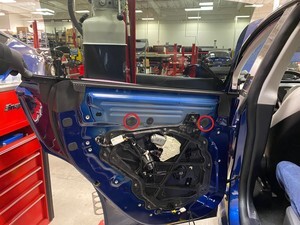
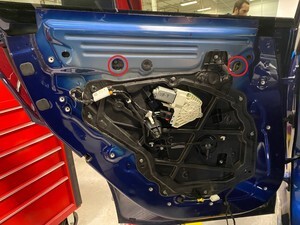
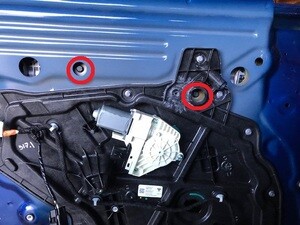
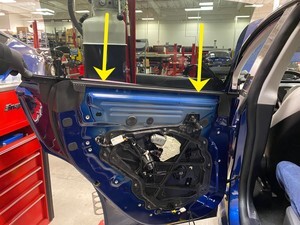
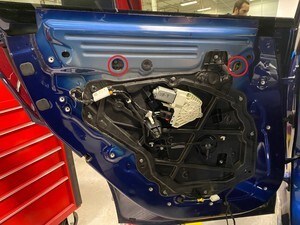
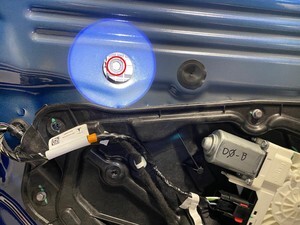
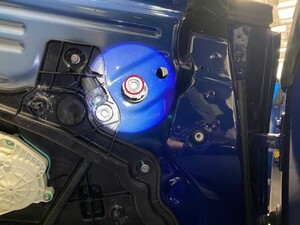
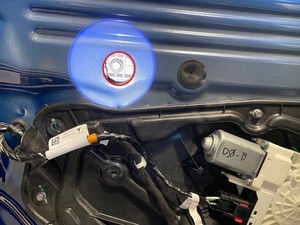
  7. 拆下覆盖车门开口的圆头塞,以便接近升降器导块
    Informational PurposesAn informational icon, calling your attention
    注
    2 个塞子
  8. 暂时将下方白色作业灯连接到 LH 后车门线束
    Informational PurposesAn informational icon, calling your attention
    注
    1 个连接器,小心:对线束/灯进行布线,避免其在关门时损坏
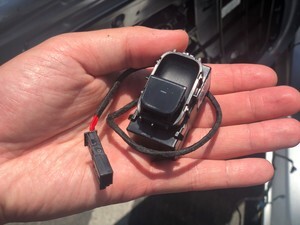
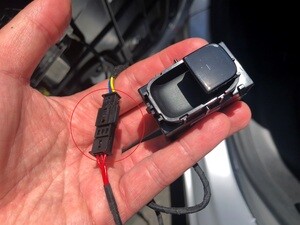
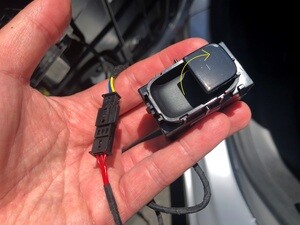
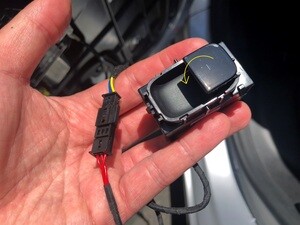
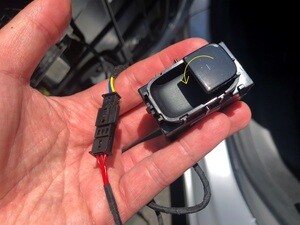
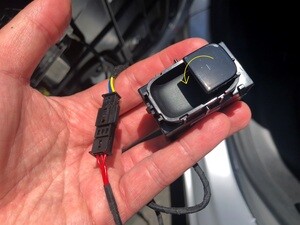
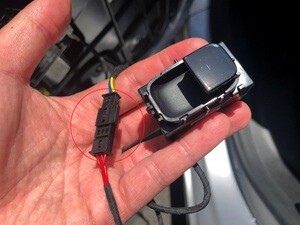
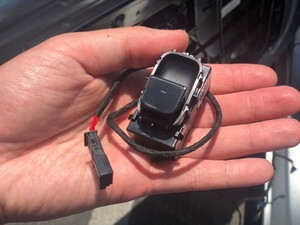
  9. 将车窗开关专用工具连接到 LH 后车门线束
    Informational PurposesAn informational icon, calling your attention
    注
    1 个连接器
  10. 关闭 LH 后车门闩锁,使车窗完全升起
    Informational PurposesAn informational icon, calling your attention
    注
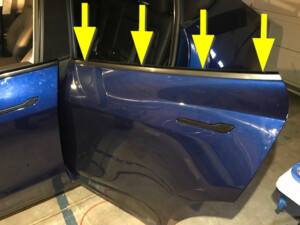
    切勿在车窗位于此位置的情况下关闭车门,这样将损坏上部亮条
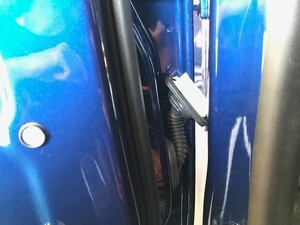
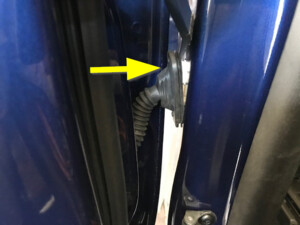
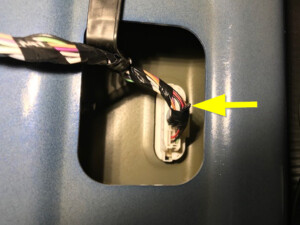
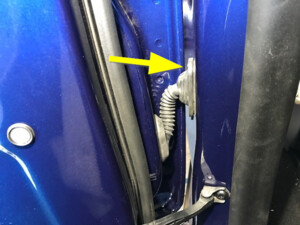
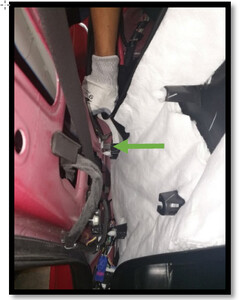
  11. 升起车窗以便接触升降器导块
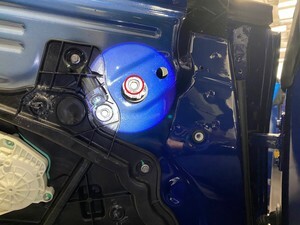
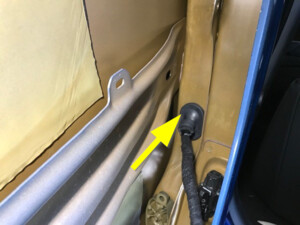
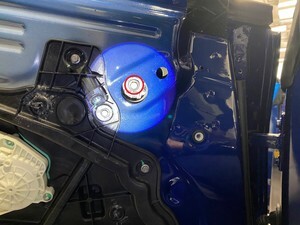
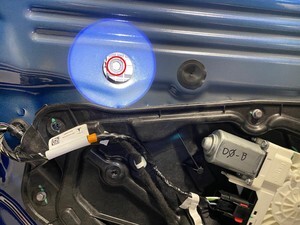
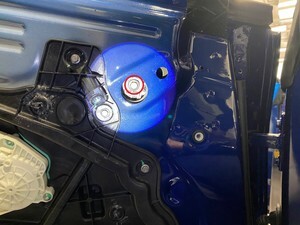
  12. 拆下固定最前面升降器导块的螺栓
    Informational PurposesAn informational icon, calling your attention
    注
    1 个螺栓,10 毫米,12 Nm
  13. 拆下固定最前面升降器导块的螺栓
    Informational PurposesAn informational icon, calling your attention
    注
    1 个螺栓,10 毫米,12 Nm
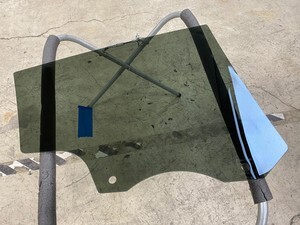
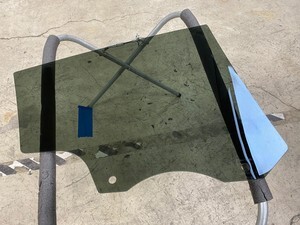
  14. 从 LH 后车门上拆下车窗玻璃
    Informational PurposesAn informational icon, calling your attention
    注
    建议请另一位同事帮忙
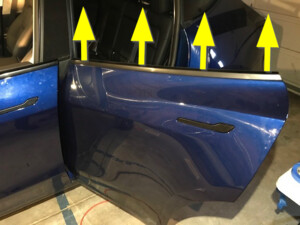
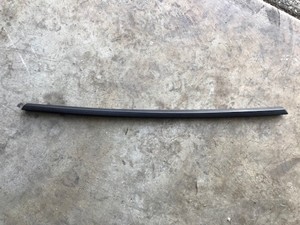
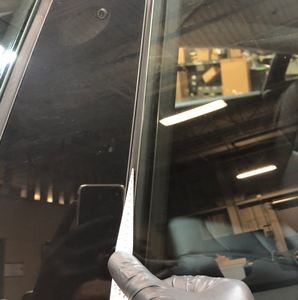
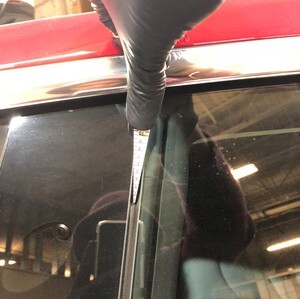
  15. 撬动并向上拉动左后外侧密封条,将其从车门总成上松开
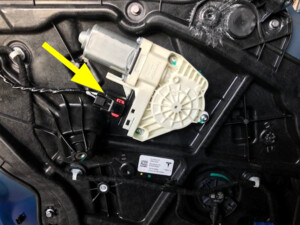
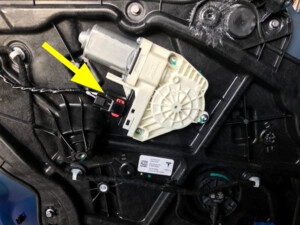
  16. 断开后车窗电机连接器
    Informational PurposesAn informational icon, calling your attention
    注
    1 个连接器;松开锁片,然后松开连接器主体
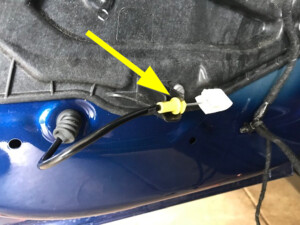
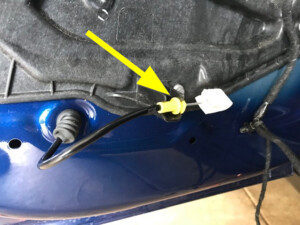
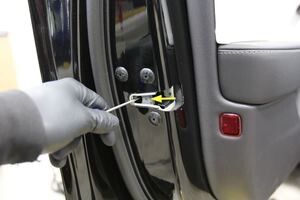
  17. 从车窗升降器面板上拆下闩锁手动分离拉索
    Informational PurposesAn informational icon, calling your attention
    注
    1 个卡子
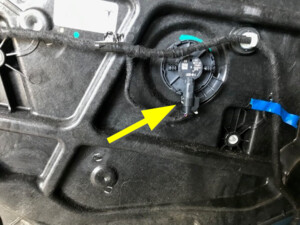
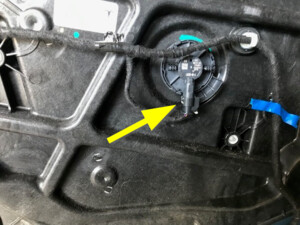
  18. 断开线束与 LH 后压力传感器的连接
    Informational PurposesAn informational icon, calling your attention
    注
    1 个连接器;向后拉锁片,然后松开连接器主体
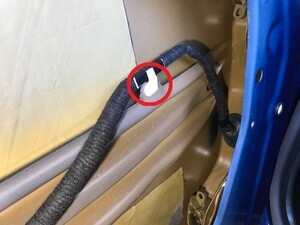
  19. 松开将车门线束固定到封闭板的夹子
    Informational PurposesAn informational icon, calling your attention
    注
    3 个卡子
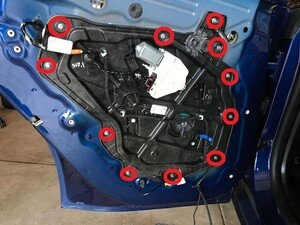
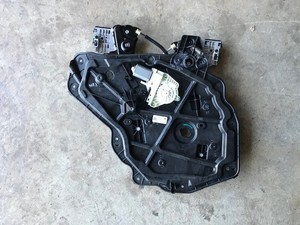
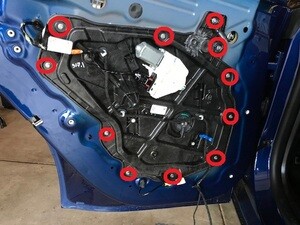
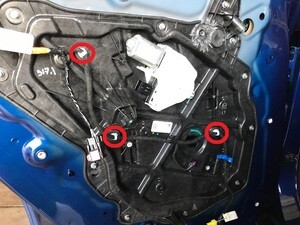
  20. 拆下将车窗升降器固定到车门总成的螺栓
    Informational PurposesAn informational icon, calling your attention
    注
    11 个螺栓,8 毫米,4 Nm
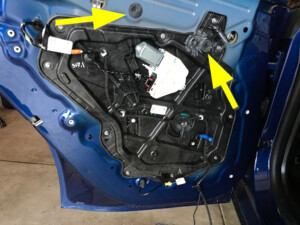
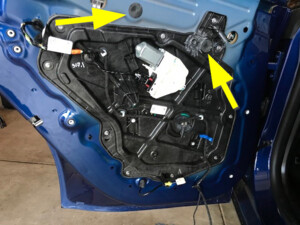
  21. 拆下盖住升降器导轨紧固件的塞子
    Informational PurposesAn informational icon, calling your attention
    注
    2 个塞子
  22. 从车门上拆下封闭板总成
    Informational PurposesAn informational icon, calling your attention
    注
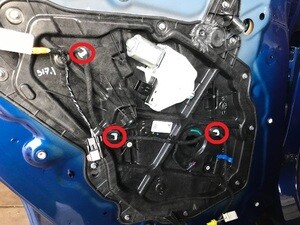
    2 个螺栓,10 毫米,8 Nm;拆下螺栓,然后向下、向外滑动封闭板总成,车窗升降器和封闭板将作为一个整体滑出
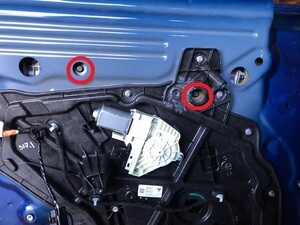
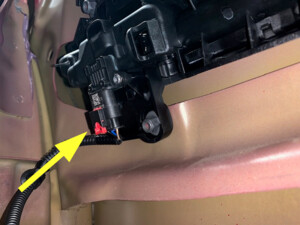
  23. 断开 LH 后外侧车门把手连接器
    Informational PurposesAn informational icon, calling your attention
    注
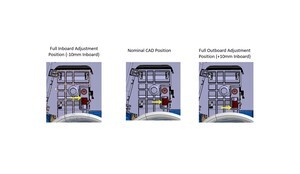
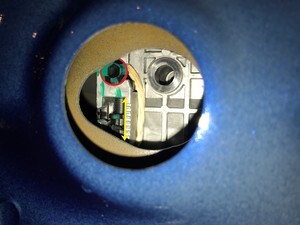
    1 个连接器;拉动以分离锁片,再次拉动以松开连接器主体
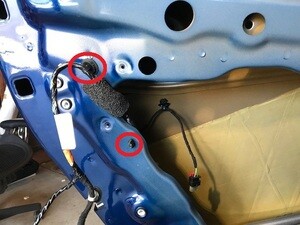
  24. 松开固定 LH 后车门线束的上部夹子
    Informational PurposesAn informational icon, calling your attention
    注
    1 个卡子
  25. 断开 LH 前车门闩锁
    Informational PurposesAn informational icon, calling your attention
    注
    1 个连接器;打开锁片,然后松开连接器
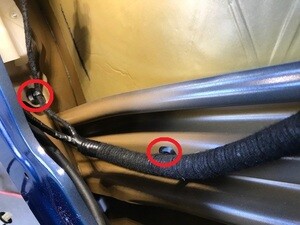
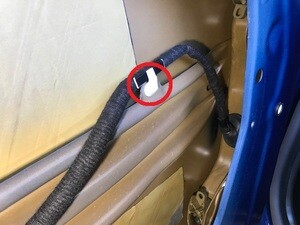
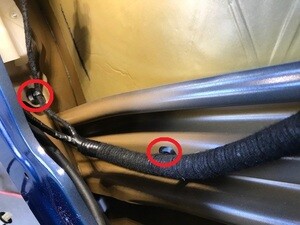
  26. 沿车门侧松开固定 LH 后车门线束的夹子
    Informational PurposesAn informational icon, calling your attention
    注
    3 个卡子
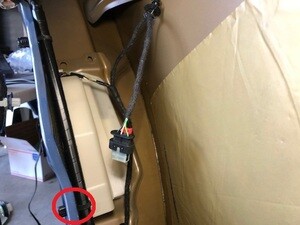
  27. 沿 LH 后车门底部松开线束夹
    Informational PurposesAn informational icon, calling your attention
    注
    3 个卡子
  28. 打开左前车门
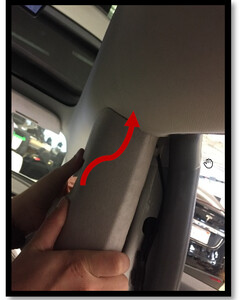
  29. 拆卸左侧 A 柱中部总成
    Informational PurposesAn informational icon, calling your attention
    注
    1 个卡子,1 个锁片;松开上部卡子,然后向上拉动 A 柱中部以将其拆下
  30. 拆下用于固定 A 柱 LH 下部饰板的夹子
    Informational PurposesAn informational icon, calling your attention
    注
    1 个推拉式卡子
  31. 拆卸左侧 A 柱下饰板
    Informational PurposesAn informational icon, calling your attention
    注
    6 个夹子,2 个导片;向上拉动 A 柱后下部,松开夹子,然后向后拉动,松开饰板
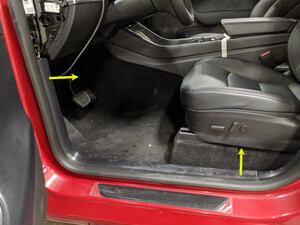
  32. 从车身上松开 LH 前座椅线束和导件
    Informational PurposesAn informational icon, calling your attention
    注
    3 个夹子,1 个基线;基线穿过 LH B 柱下部的检修孔
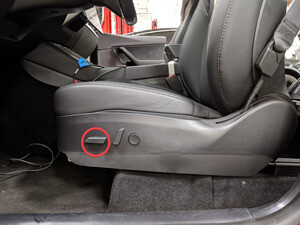
  33. 将左前座椅向前移动
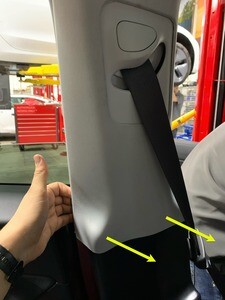
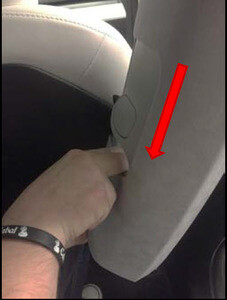
  34. 松开 B 柱 LH 上部总成,移至一旁
    Informational PurposesAn informational icon, calling your attention
    注
    4 个夹子;将 B 柱上部的底端朝车内拉,然后再拉顶端以松开剩余的夹子
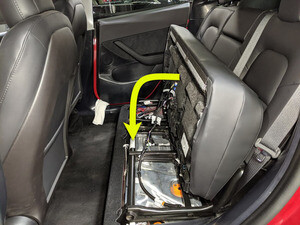
  35. 松开第二排座垫
    Informational PurposesAn informational icon, calling your attention
    注
    将座垫的前边缘向上提起,以便从框架上松开泡沫;将车辆前部向前拉,然后将长条座椅倾靠在 40/60 靠背上
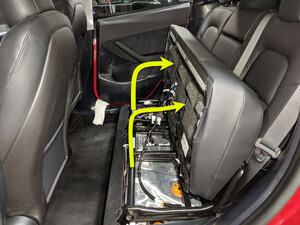
  36. 部分拆下左后车门密封条
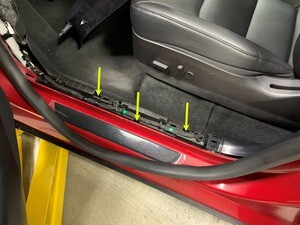
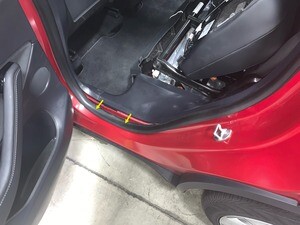
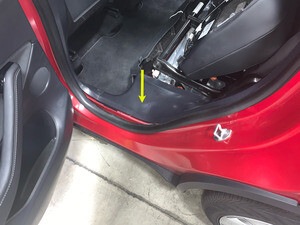
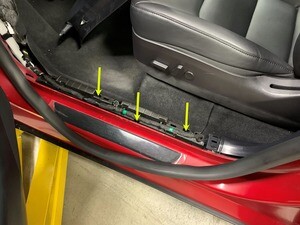
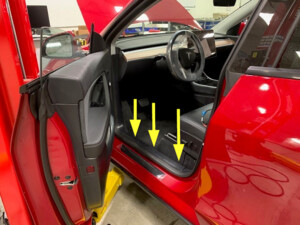
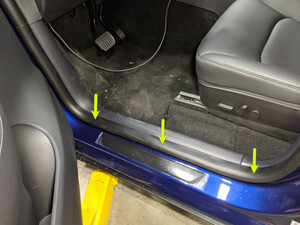
  37. 拆卸左后门槛饰板
    Informational PurposesAn informational icon, calling your attention
    注
    5 个卡子;后边缘卡在后备箱侧饰板上的凹槽中;松开从左后门槛饰板前部到后部的所有卡子
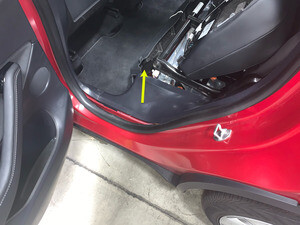
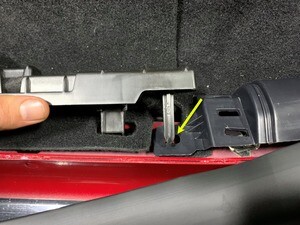
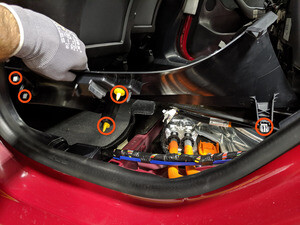
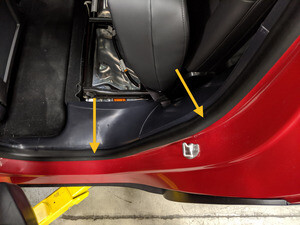
  38. 拆下将 LH B 柱下部固定到车身的夹子
    Informational PurposesAn informational icon, calling your attention
    注
    1 个推拉式夹;夹子用于将 B 柱下部和驾驶室后毡毯固定到车身
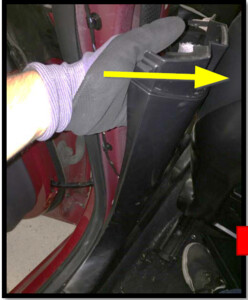
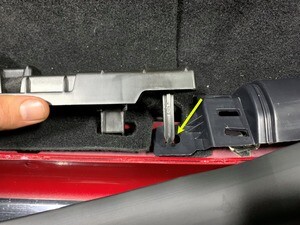
  39. 拆下 LH B 柱下部总成
    Informational PurposesAn informational icon, calling your attention
    注
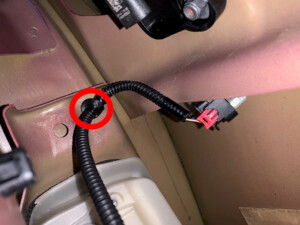
    6 个夹子;拉 B 柱的顶部以松开顶部夹子,然后继续此操作,直至松开底部夹子
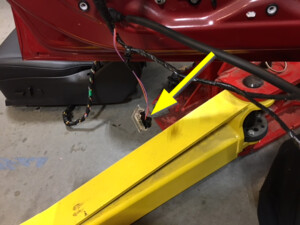
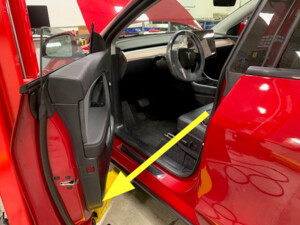
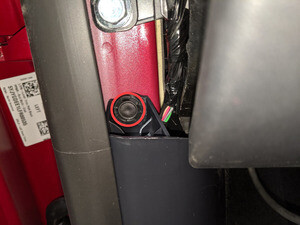
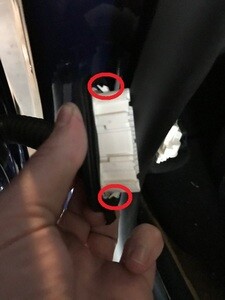
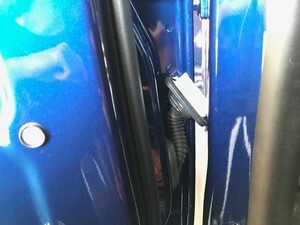
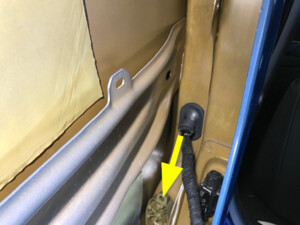
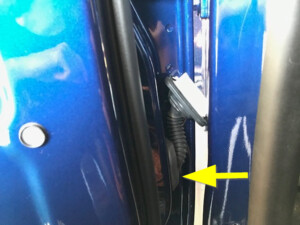
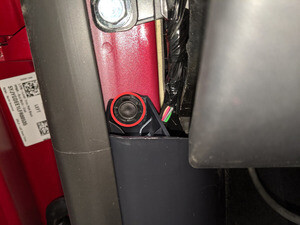
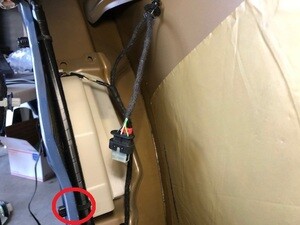
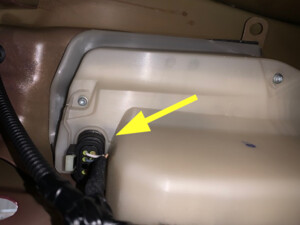
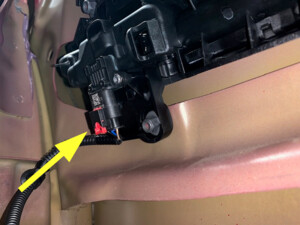
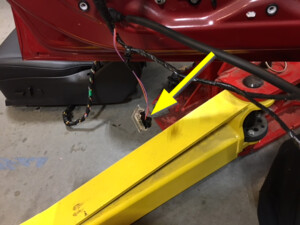
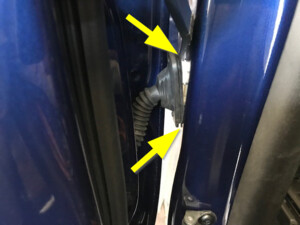
  40. 松开索环连接器,然后从 B 柱区域拆下 LH 后车门线束
    Informational PurposesAn informational icon, calling your attention
    注
    1 个连接器,2 个夹子,1 个索环;先后撬起后车门线束索环的顶部和底部,同时拉离 B 柱以松开车门线束
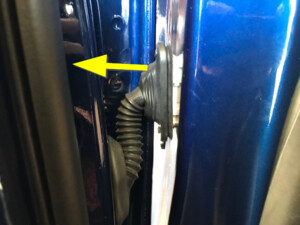
  41. 从 LH 后车门总成上拆下橡胶索环
    Informational PurposesAn informational icon, calling your attention
    注
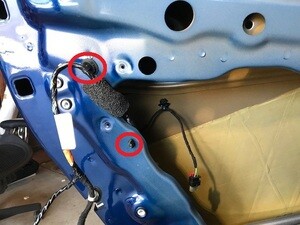
    1 个索环;从车门内拉动索环穿过 LH 后车门总成
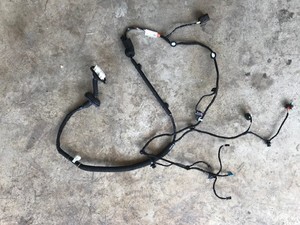
  42. 将左后车门线束从车门总成上拆下
  43. 将左后车门线束放入车门总成中
  44. 将橡胶索环安装到 LH 后车门总成上
    Informational PurposesAn informational icon, calling your attention
    注
    1 个索环
  45. 将 LH 后车门线束安装到 B 柱上
    Informational PurposesAn informational icon, calling your attention
    注
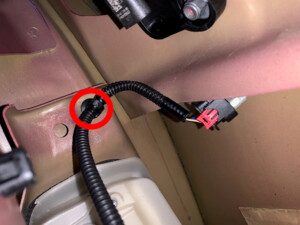
    1 个连接器,2 个夹子,1 个索环;将 LH 后车门线束连接器压到车身线束连接器上;将车身线束连接器固定到位,直到听到咔嗒声;轻轻拉动车身线束连接器以确保其固定到位;确保车门线束索环就位于 B 柱上
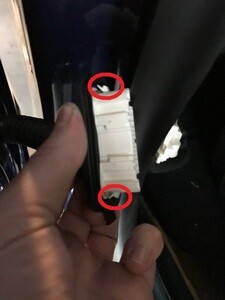
  46. 安装 LH B 柱下部总成
    Informational PurposesAn informational icon, calling your attention
    注
    6 个夹子;将底部导片与其槽口对齐,从底部夹子开始按压,直至顶部夹子
  47. 安装将 LH B 柱下部固定到车身的夹子
    Informational PurposesAn informational icon, calling your attention
    注
    1 个推拉式夹;夹子用于将 B 柱下部和驾驶室后毡毯固定到车身
  48. 安装左后门槛饰板
    Informational PurposesAn informational icon, calling your attention
    注
    5 个卡子;后边缘卡在后备箱侧饰板上的凹槽中;将左后门槛饰板的后边缘安装到后备箱侧饰板,并从后往前固定卡子
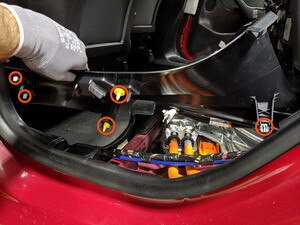
  49. 重新安装左后车门密封条
    Informational PurposesAn informational icon, calling your attention
    注
    将门柱和门槛饰板锁片置于密封条下方
  50. 重新放置第二排座垫
    Informational PurposesAn informational icon, calling your attention
    注
    向后滑动座垫,然后将锁扣和泡沫与座椅滑轨对齐;通过推拉测试确保座垫完全就位
  51. 安装 B 柱 LH 上部总成
    Informational PurposesAn informational icon, calling your attention
    注
    4 个夹子;降下安全带滑块,使其与 B 柱面板对齐;将 B 柱上部的顶部插入顶蓬下方,以便与夹子对齐;按底部以便让 B 柱上部完全安装到 B 柱下部;确保密封条正确覆盖住饰板
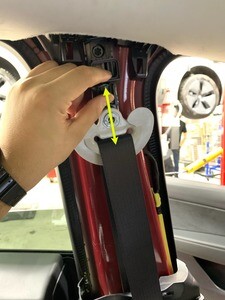
  52. 将左前座椅移回原位
  53. 将 LH 前座椅线束和导件固定到车身
    Informational PurposesAn informational icon, calling your attention
    注
    3 个夹子,1 个基线;基线穿过 LH B 柱下部的检修孔
  54. 安装 A 柱 LH 下部饰板
    Informational PurposesAn informational icon, calling your attention
    注
    6 个夹子,2 个定位销;首先对准前定位销
  55. 安装用于固定 A 柱 LH 下部饰板的夹子
    Informational PurposesAn informational icon, calling your attention
    注
    1 个推拉式卡子
  56. 沿 A 柱下饰板重新放置左前车门密封条
  57. 安装左侧 A 柱中部总成
    Informational PurposesAn informational icon, calling your attention
    注
    1 个卡子,1 个锁片;对齐底部锁片,然后推动顶部卡子,使其完全就位于 A 柱中部;将密封件拉过饰板
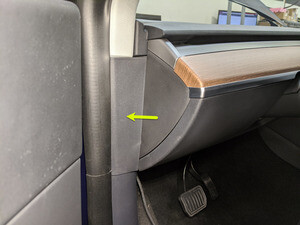
  58. 关闭左前车门
  59. 沿 LH 后车门总成安装线束夹
    Informational PurposesAn informational icon, calling your attention
    注
    3 个卡子
  60. 沿 LH 后车门侧安装线束夹
    Informational PurposesAn informational icon, calling your attention
    注
    3 个卡子
  61. 连接 LH 后车门闩锁
    Informational PurposesAn informational icon, calling your attention
    注
    1 个连接器;将连接器放置到位,然后卡入锁片
  62. 安装固定 LH 后车门线束的上部夹子
    Informational PurposesAn informational icon, calling your attention
    注
    1 个卡子
  63. 将线束连接到车门把手总成
    Informational PurposesAn informational icon, calling your attention
    注
    1 个连接器;将连接器放置到位,然后卡入锁片
  64. 安装封闭板总成
    Informational PurposesAn informational icon, calling your attention
    注
    2 个螺栓,10 毫米,8 Nm;将车窗升降器导轨向上滑动到车门内侧和座椅封闭板外侧;安装并拧紧固定车窗升降器导轨的螺栓
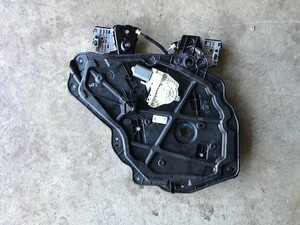
  65. 安装升降器导轨螺栓塞
    Informational PurposesAn informational icon, calling your attention
    注
    2 个塞子
  66. 安装将车窗升降器面板固定到车门总成的螺栓
    Informational PurposesAn informational icon, calling your attention
    注
    11 个螺栓,8 毫米,4 Nm;用手预拧紧螺栓以避免螺纹脱落
  67. 安装将车门线束固定到封闭板的夹子
    Informational PurposesAn informational icon, calling your attention
    注
    3 个卡子
  68. 将车门线束连接到 LH 后压力传感器
    Informational PurposesAn informational icon, calling your attention
    注
    1 个连接器;将连接器放置到位,然后卡入锁片
  69. 将闩锁手动分离拉索安装到车窗升降器面板上
    Informational PurposesAn informational icon, calling your attention
    注
    1 个卡子
  70. 连接后车窗电机线束连接器
    Informational PurposesAn informational icon, calling your attention
    注
    1 个连接器;将连接器放置到位,然后卡入锁片
  71. 向下按压,将 LH 后外侧密封条安装到车门总成上
    Informational PurposesAn informational icon, calling your attention
    注
    可以使用 P-80 润滑剂来简化安装
  72. 将车窗玻璃安装到 LH 后车门上
    Informational PurposesAn informational icon, calling your attention
    注
    建议请另一位同事帮忙
  73. 将车窗玻璃固定到导块夹上并用手卡紧
    Informational PurposesAn informational icon, calling your attention
    注
    2 个螺栓,10 毫米,12 Nm;确保导块没有在升降器上触底,这样才可以根据需要进行调整
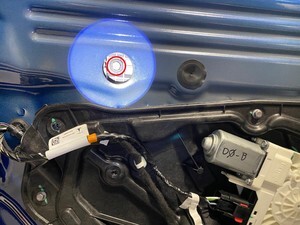
  74. 完全降下车窗
  75. 将内侧密封条安装到 LH 后车门上
    Informational PurposesAn informational icon, calling your attention
    注
    6 个夹子;向下推以固定
  76. 拉动紧急分离拉索以松开左后车门闩锁
  77. 关闭左后车门
  78. 打开左前车门
  79. 完全升起 LH 后车窗
  80. 检查间隙和齐平度
    Informational PurposesAn informational icon, calling your attention
    注
    请参阅 CVIS 了解当前规格、停止程序,必要时重新调整
  81. 打开左后车门
  82. 关闭 LH 后车门闩锁,以便进行车窗高度调节
    Informational PurposesAn informational icon, calling your attention
    注
    切勿在车窗完全升起的情况下关闭车门,以免损坏上部亮条
  83. 调节玻璃以便接触升降器导块
  84. 松开将车窗玻璃固定到升降器导块的螺栓约半圈,以保持位置,但还留有调节空间
    Informational PurposesAn informational icon, calling your attention
    注
    2 个螺栓,10 毫米,12 Nm
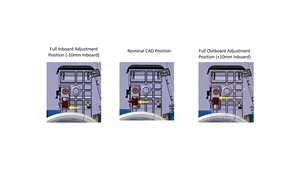
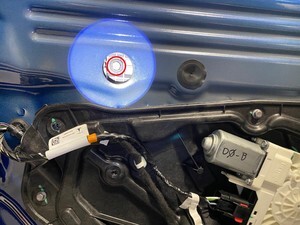
  85. 调节移动玻璃的前部,以便与 B 柱饰板保持齐平
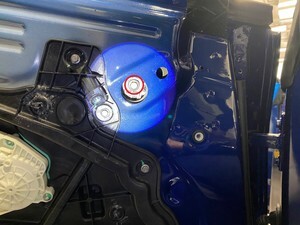
    Informational PurposesAn informational icon, calling your attention
    注
    1 个螺栓;使用 5 毫米六角套筒调节摩擦垫,使玻璃向内侧或外侧倾斜,顺时针转动可实现外侧调节,逆时针转动可实现内侧调节
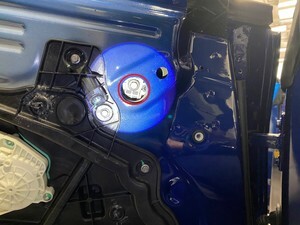
  86. 调节移动玻璃的后部,以便与角窗玻璃总成保持齐平
    Informational PurposesAn informational icon, calling your attention
    注
    1 个螺栓;使用 5 毫米六角套筒调节摩擦垫,使玻璃向内侧或外侧倾斜,顺时针转动可实现外侧调节,逆时针转动可实现内侧调节
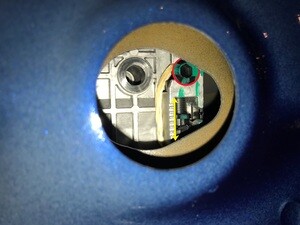
  87. 调节移动玻璃,以达到间隙目标并用手拧紧螺栓
    Informational PurposesAn informational icon, calling your attention
    注
    2 个螺栓,10 毫米,12 Nm
  88. 拉动紧急分离拉索以松开左后车门闩锁
  89. 关闭左后车门
  90. 检查间隙和齐平度
    Informational PurposesAn informational icon, calling your attention
    注
    必要时进行重新调节
  91. 打开左后车门
  92. 关闭 LH 后车门闩锁,以便进行车窗高度调节
    Informational PurposesAn informational icon, calling your attention
    注
    切勿在车窗完全升起的情况下关闭车门,以免损坏上部亮条
  93. 调节玻璃以便接触升降器导块
  94. 拧紧将车窗玻璃固定到升降器导块的螺栓
    Informational PurposesAn informational icon, calling your attention
    注
    2 个螺栓,10 毫米,12 Nm
  95. 拉动紧急分离拉索以松开左后车门闩锁
  96. 降下左后车窗
  97. 断开车窗开关专用工具
    Informational PurposesAn informational icon, calling your attention
    注
    1 个连接器
  98. 安装升降器导块上覆盖车门开口的圆头塞
    Informational PurposesAn informational icon, calling your attention
    注
    2 个塞子
  99. 断开下方白色作业灯与 LH 后车门的连接
    Informational PurposesAn informational icon, calling your attention
    注
    1 个连接器
  100. 将下方白色作业灯安装到后车门板上
    Informational PurposesAn informational icon, calling your attention
    注
    1 个连接器;确保白色作业灯 C 形切口指向车门饰板的前边缘
  101. 安装 LH 后车门板总成
    Informational PurposesAn informational icon, calling your attention
    注
    10 个夹子,3 个枞树夹,4 个连接器;首先固定线束夹,以确保扬声器连接器和下方白色作业灯连接器没有互换,然后进行线束连接;首先将饰板顶部滑入车门密封条,然后将底部摆动着放置到位,确保所有夹子就位
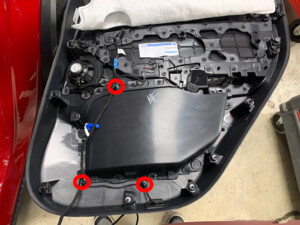
  102. 安装将门板固定到后车门的紧固件
    Informational PurposesAn informational icon, calling your attention
    注
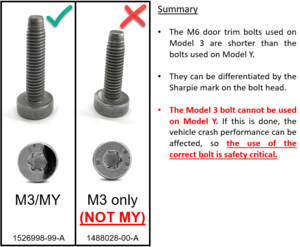
    2 个螺栓,T30,6 Nm;请勿使用较短的 M3 车门紧固件
  103. 升起左后车窗
  104. 关闭左后车门
  105. 使用 Toolbox 3.0 与车辆相连
  106. 选择“Actions/Autodiag”选项卡,然后搜索“window”
  107. 选择TEST-SELF_VCLEFT_REAR-L_CALIBRATE-WINDOWvia Toolbox: (link),点击 “Run”,然后等待例行程序完成。
    Informational PurposesAn informational icon, calling your attention
    注
    窗口会反复升降;完成后,选择窗口右上角的“X”关闭
  108. 从以太网端口上拔下高速数据线缆,以断开 Toolbox 3.0 与车辆的连接
  109. 关闭左前车门