17/06/2024 21:23:35

直流输入总成 - 高压电池(母排类型)(拆卸和更换)
校正代码 16302402 1.56 注意:除非本程序中另有明确规定,否则上述校正代码和 FRT 反映的是执行本程序(包括关联程序)所需的所有工作。除非明确要求,否则请勿堆叠校正代码。注意:请参阅平均维修工时,深入了解 FRT 及其创建方式。要提供有关 FRT 值的反馈,请发送电子邮件至LaborTimeFeedback@tesla.com。注意:请参阅人员保护,确保在执行以下程序时穿戴适当的个人防护装备 (PPE)。

Warning IconA warning icon, calling your attention to a possibly risky situation
警告
尽管此程序已经过验证,但仍是一个草案。可能没有警告和注意事项。请遵守安全要求,处理或靠近高压系统和部件时,请谨慎操作。请将校正修理内容及反馈发送至ServiceDevelopment@teslamotors.com。

    程序

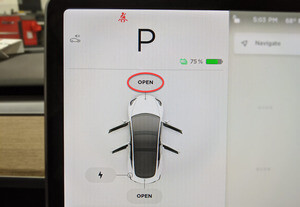
    1. 打开所有四个车门
      Informational PurposesAn informational icon, calling your attention
      注
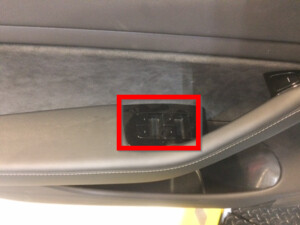
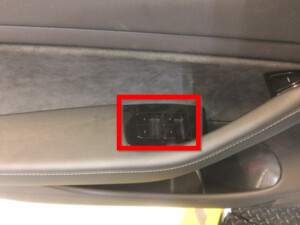
      锁定后车门以防断电时意外关闭
    2. 降下所有车窗
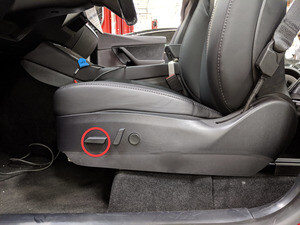
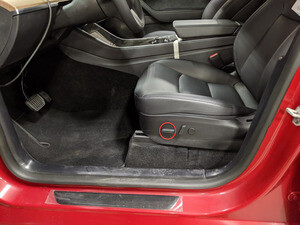
    3. 将左前座椅向前移动
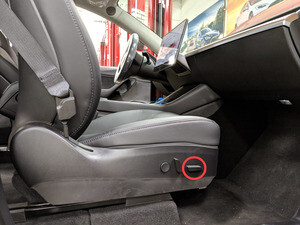
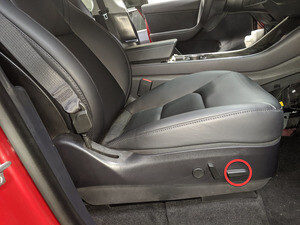
    4. 将右前座椅向前移动
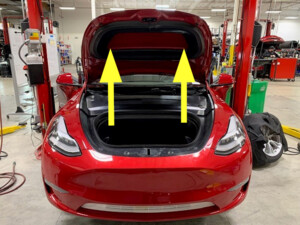
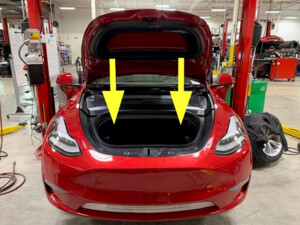
    5. 打开前备箱盖
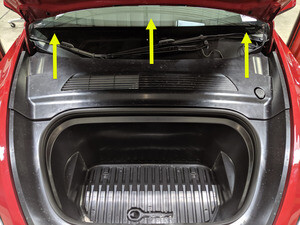
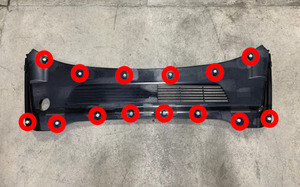
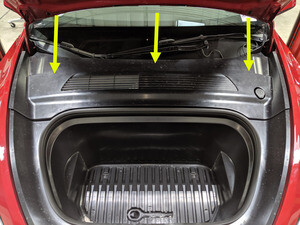
    6. 拆卸后挡板
      Informational PurposesAn informational icon, calling your attention
      注
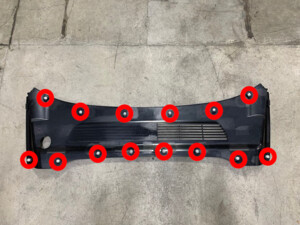
      14 个卡子
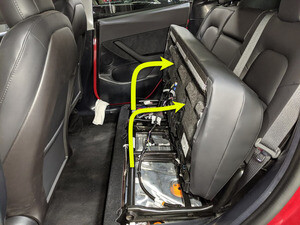
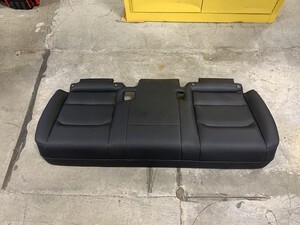
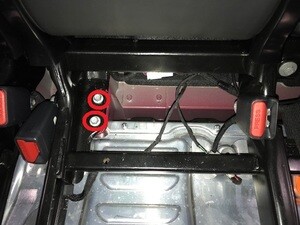
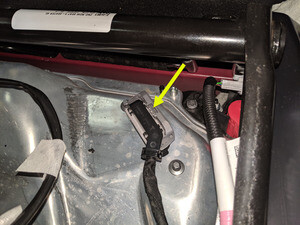
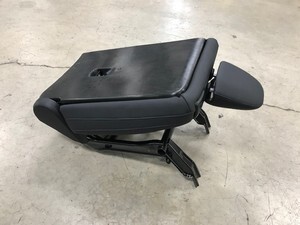
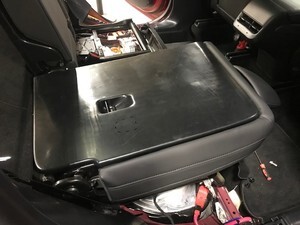
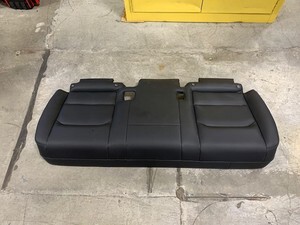
    7. 拆卸第二排座椅座垫
      Informational PurposesAn informational icon, calling your attention
      注
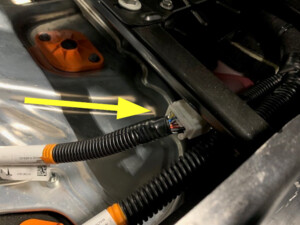
      1 个连接器;将座垫前边缘向上抬起,以从框架上松开泡沫
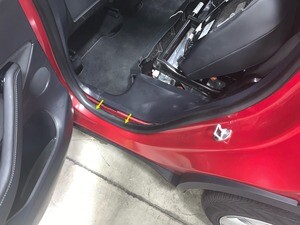
    8. 部分拆下左后车门密封条
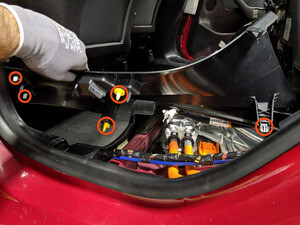
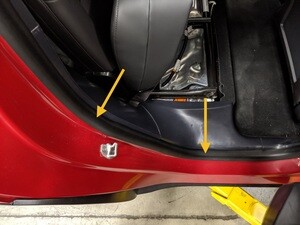
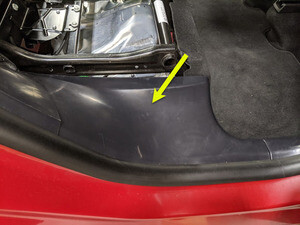
    9. 拆卸左后门槛饰板
      Informational PurposesAn informational icon, calling your attention
      注
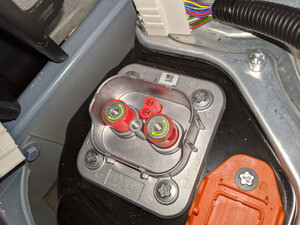
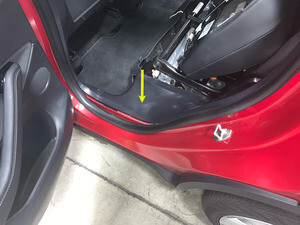
      5 个卡子;后边缘卡在后备箱侧饰板上的凹槽中;松开从左后门槛饰板前部到后部的所有卡子
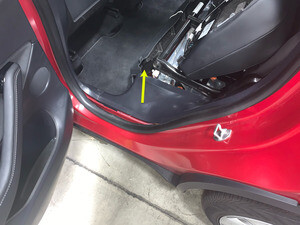
    10. 部分拆下右后车门密封条
      Informational PurposesAn informational icon, calling your attention
      注
      门柱和门槛饰板的锁片位于密封条下方
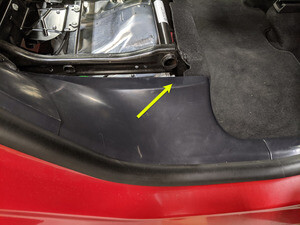
    11. 拆卸右后门槛饰板
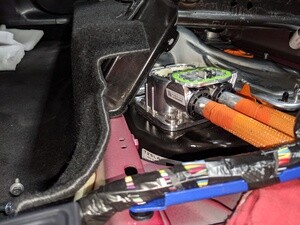
      Informational PurposesAn informational icon, calling your attention
      注
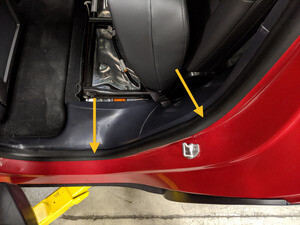
      5 个卡子;后边缘卡在后备箱侧饰板上的凹槽中;松开从右后门槛饰板前部到后部的所有卡子
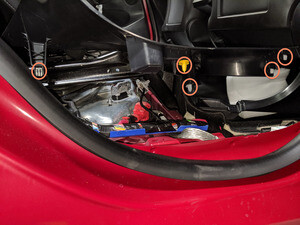
    12. 拆卸将驾驶室后部主地毯固定到车辆的卡子
      Informational PurposesAn informational icon, calling your attention
      注
      3 个推拉式卡子
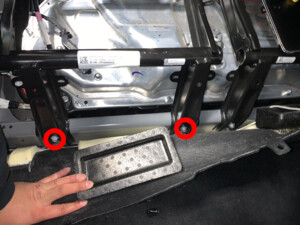
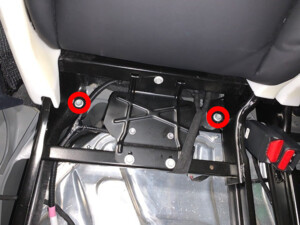
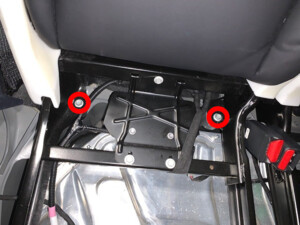
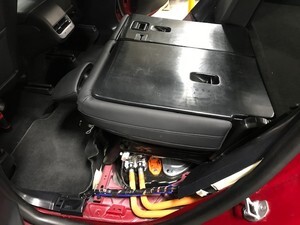
    13. 拆卸将 40 百分比座椅框架固定到车身的紧固件
      Informational PurposesAn informational icon, calling your attention
      注
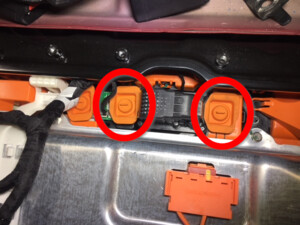
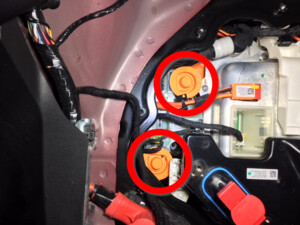
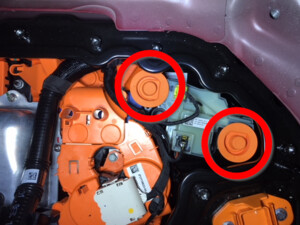
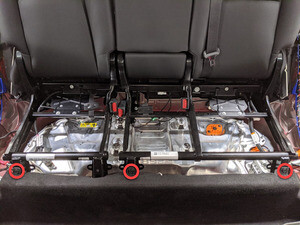
      4 个螺栓,11 毫米,37 Nm;座椅底部螺栓位于主地毯后部
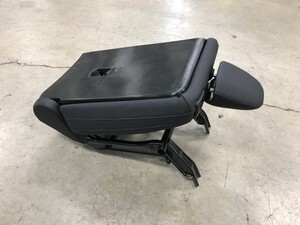
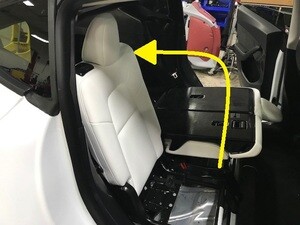
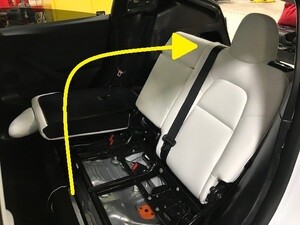
    14. 放倒 40 百分比座椅
      Informational PurposesAn informational icon, calling your attention
      注
      保护座垫;切勿在折叠无座垫的座椅后在其上放置重物,否则有可能压弯框架上的定位锁片
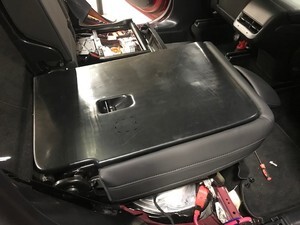
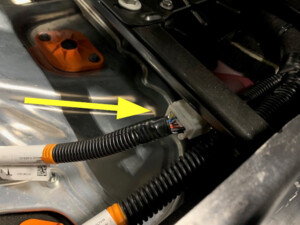
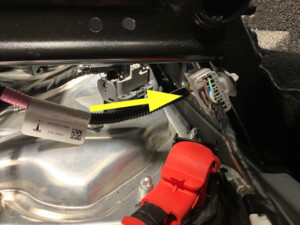
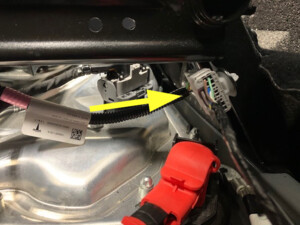
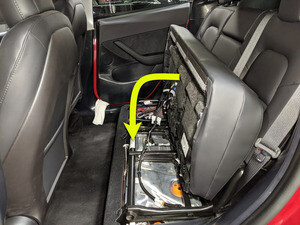
    15. 断开 40 百分比座椅连接器
      Informational PurposesAn informational icon, calling your attention
      注
      1 个连接器
    16. 从车身拆下第二排 40 百分比座椅总成
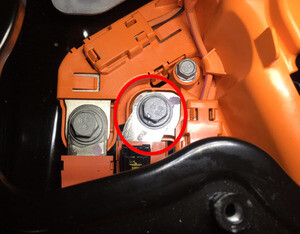
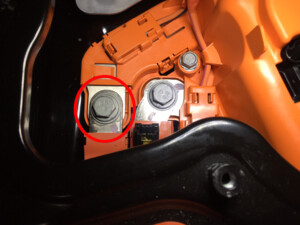
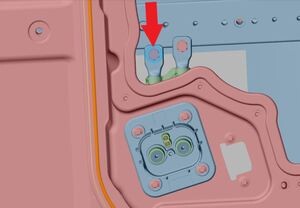
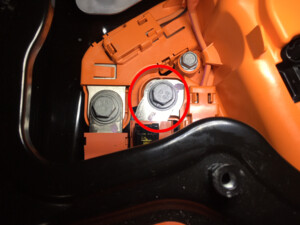
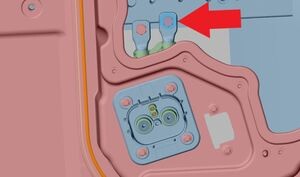
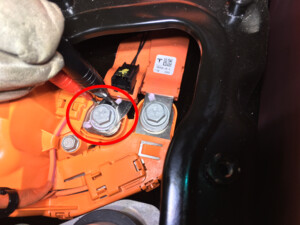
      Informational PurposesAn informational icon, calling your attention
      注
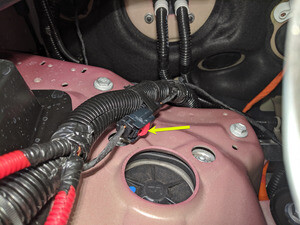
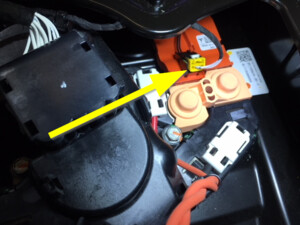
      建议寻求他人协助
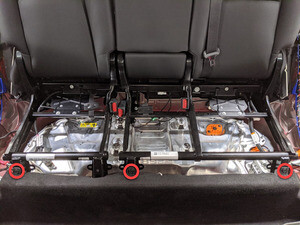
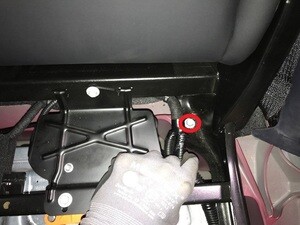
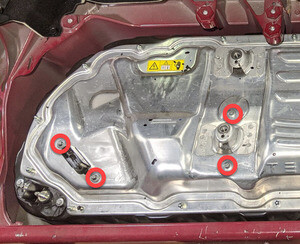
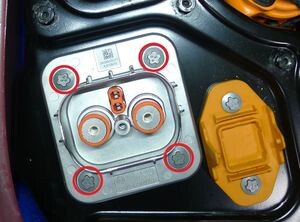
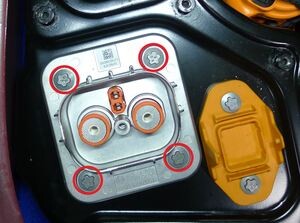
    17. 拆卸将 60 百分比座椅框架固定到车身的紧固件
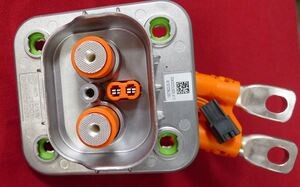
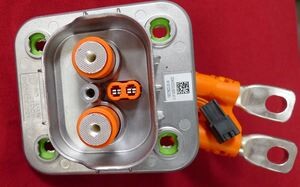
      Informational PurposesAn informational icon, calling your attention
      注
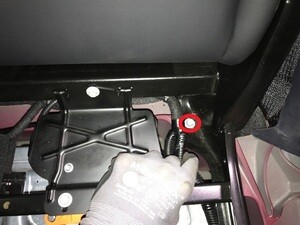
      5 个螺栓,11 毫米,37 Nm;座椅底部螺栓位于主地毯后部
    18. 放倒 60 百分比座椅
      Informational PurposesAn informational icon, calling your attention
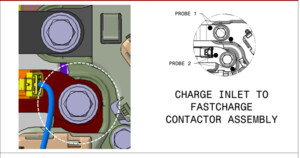
      注
      视需要保护座椅靠背蒙皮;切勿在折叠无座垫的座椅后在其上放置重物,否则有可能压弯框架上的定位锁片
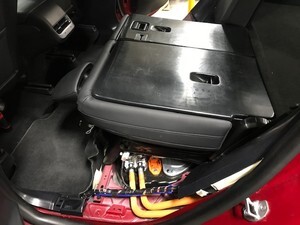
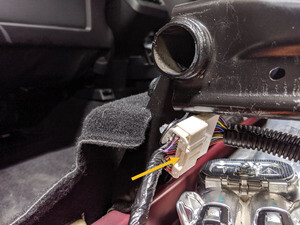
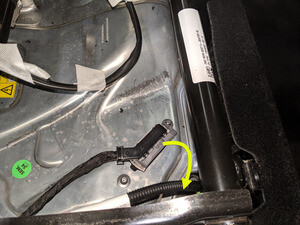
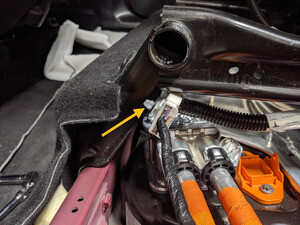
    19. 断开左侧座椅框架上的逻辑连接器
      Informational PurposesAn informational icon, calling your attention
      注
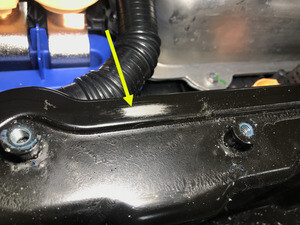
      1 个连接器
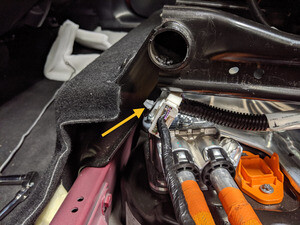
    20. 从左侧座椅框架上拆下连接器线束夹
      Informational PurposesAn informational icon, calling your attention
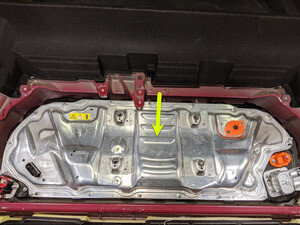
      注
      1 个夹子;锁定夹子上的锁片,避免损坏
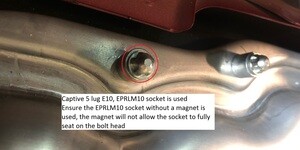
    21. 将第二排 60 百分比座椅总成从车身拆下
      Informational PurposesAn informational icon, calling your attention
      注
      建议寻求他人协助
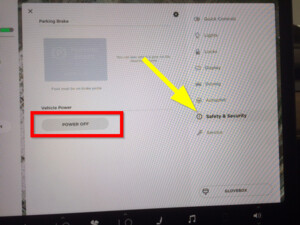
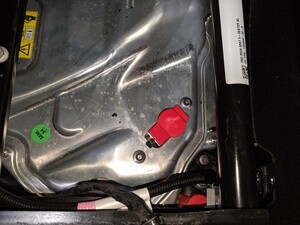
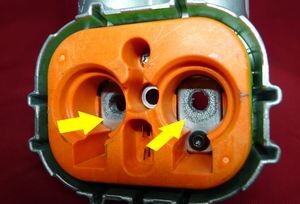
    22. 在中央显示器上关闭车辆电源
      Informational PurposesAn informational icon, calling your attention
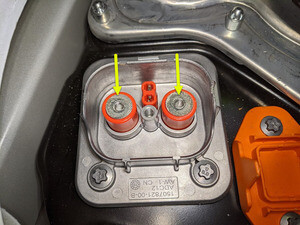
      注
      操作如下:Controls > Safety & Security > Vehicle Power > Power Off
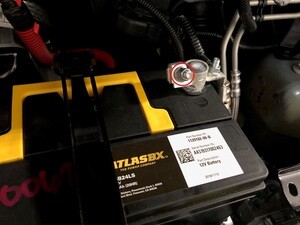
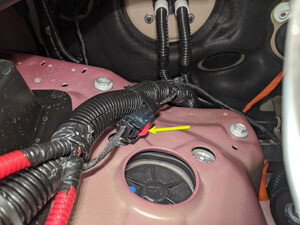
    23. 断开 12V 负极端子和紧急响应回路
      Informational PurposesAn informational icon, calling your attention
      注
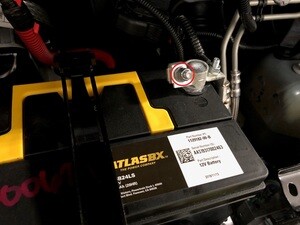
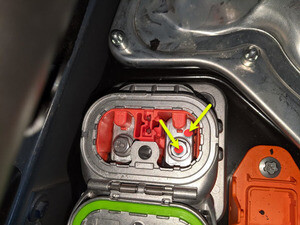
      1 个螺母,10 毫米,6 Nm,1 个连接器;确保车辆处于驻车挡,温度控制系统关闭,断开 12V 电池之前车辆未充电;应先断开负极端子再断开紧急响应回路;等待 2 分钟,确保所有电路完全放电
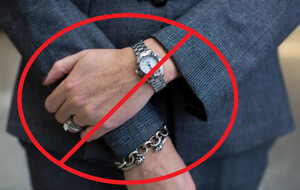
    24. 取出口袋中的所有物品并确保未佩戴金属饰品
    25. 检查高压绝缘手套
      Informational PurposesAn informational icon, calling your attention
      注
      使用前检查手套是否损坏;请参阅维修文档 TN-15-92-003 R1,了解有关检查高压手套的信息。

    26. 佩戴高压绝缘手套和皮革手套
      Informational PurposesAn informational icon, calling your attention
      注
      使用 Hioki 测试仪时,请务必佩戴电工保护手套
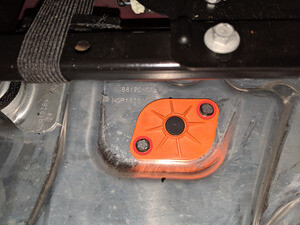
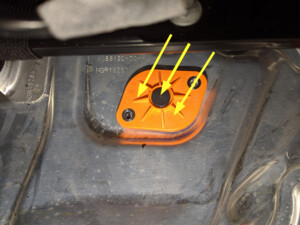
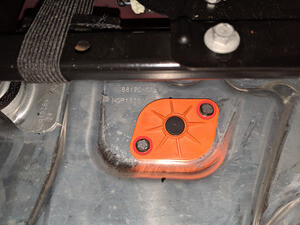
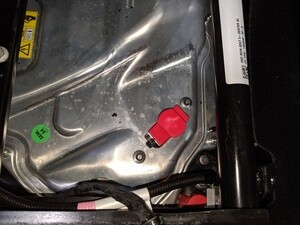
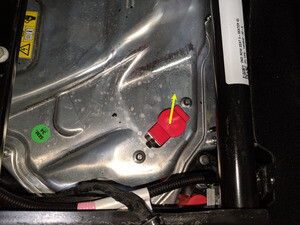
    27. 拆卸将高压电池仓探针盖固定到高压电池仓盖板的螺栓。
      Informational PurposesAn informational icon, calling your attention
      注
      2 个螺栓,EP10 五角,6 Nm;拆下后弃用
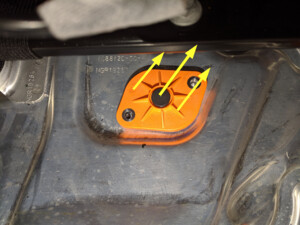
    28. 将高压电池仓探针盖从高压电池仓盖板上拆下。
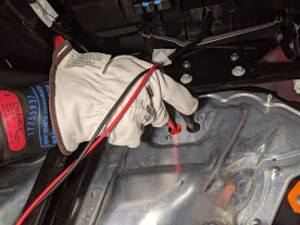
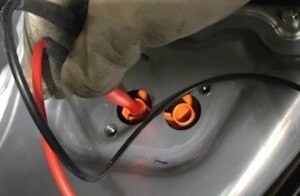
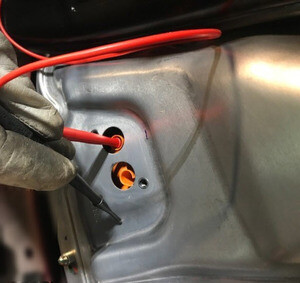
    29. 确认无高电压
      Informational PurposesAn informational icon, calling your attention
      注
      操作高压组件时,务必佩戴个人防护装备(高压手套、护目镜),测量 B+ 至接地、B- 至接地、B+ 至 B- 的电压;如果电压大于 10V,则说明电池组触点开关未断开或熔焊;停止作业并联系维修工程部
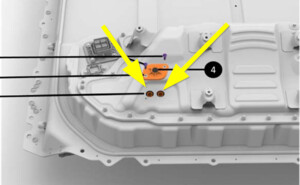
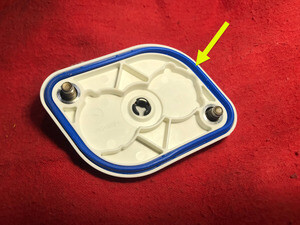
    30. 检查高压电池仓探针盖垫片,然后将其放置在高压电池仓盖板上
      Informational PurposesAn informational icon, calling your attention
      注
      确认未出现肉眼可见的损坏
    31. 安装将高压电池仓探针盖固定到高压电池仓盖板的螺栓
      Informational PurposesAn informational icon, calling your attention
      注
      2 个螺栓,EP10 五角,6 Nm;安装新的橡胶垫圈螺栓
    32. 脱下高压绝缘手套
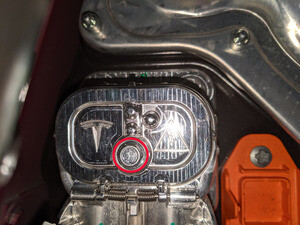
    33. 拆下固定母排罩检修盖板的紧固件
      Informational PurposesAn informational icon, calling your attention
      注
      1 个螺栓,10 毫米,9 Nm
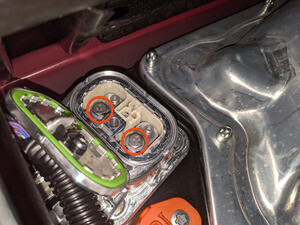
    34. 拆卸将充电接口母排套件固定到高压接头的螺栓
      Informational PurposesAn informational icon, calling your attention
      注
      2 个螺栓,10 毫米,9 Nm
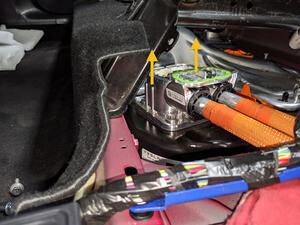
    35. 抬起母排套件连接器,从高压接头上拆下
    36. 断开高压控制器逻辑连接器,然后安装逻辑盖
      Informational PurposesAn informational icon, calling your attention
      注
      1 个连接器,1 个盖子;松开锁片,然后向下推动把手以松开连接器
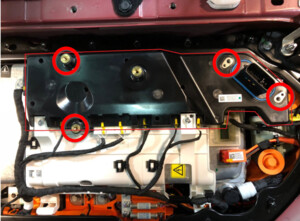
    37. 拆卸将高压电池仓盖板固定到高压控制器的紧固件。
      Informational PurposesAn informational icon, calling your attention
      注
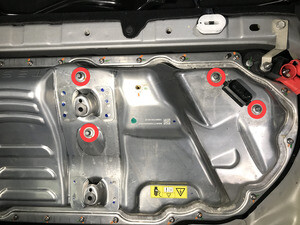
      4 个螺栓,E10,5 Nm + 30 度;拆下后弃用
    38. 拆卸高压控制器逻辑盖
      Informational PurposesAn informational icon, calling your attention
      注
      1 个盖子
    39. 拆卸将高压电池仓盖板固定到高压电池的螺栓
      Informational PurposesAn informational icon, calling your attention
      注
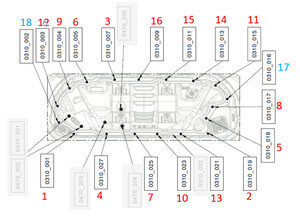
      18 个螺栓,E10 五角,8 Nm。使用无磁铁 E10 五角套筒;紧固件已安装,并将固定到高压电池仓盖板上
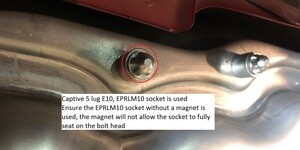
    40. 检查高压绝缘手套
      Informational PurposesAn informational icon, calling your attention
      注
      使用前检查手套是否损坏;请参阅维修文档 TN-15-92-003 R1,了解有关检查高压手套的信息。
    41. 佩戴高压绝缘手套和皮革手套
      Informational PurposesAn informational icon, calling your attention
      注
      使用 Hioki 测试仪时,请务必佩戴电工保护手套
    42. 从高压电池上拆下高压电池仓盖板
      Informational PurposesAn informational icon, calling your attention
      注
      检查高压电池仓是否缺失任何绝缘体;如有缺失且能够安装,应在进行下一步之前予以安装。
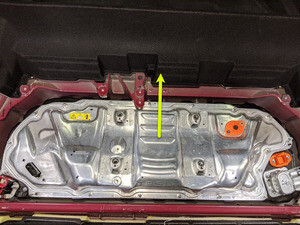
    43. 安装电池烟火和分流器绝缘体
      Informational PurposesAn informational icon, calling your attention
      注
      2 个绝缘体
    44. 将高压接头绝缘体安装到正极电池组触点开关
      Informational PurposesAn informational icon, calling your attention
      注
      2 个绝缘体
    45. 将高压接头绝缘体安装到负极电池组触点开关
      Informational PurposesAn informational icon, calling your attention
      注
      2 个绝缘体
    46. 将直流输入总成绝缘体安装到两个快充母排输入侧
      Informational PurposesAn informational icon, calling your attention
      注
      1 个绝缘体
    47. 安装负极交流输入端子盖板
      Informational PurposesAn informational icon, calling your attention
      注
      1 个盖板,3 个夹子;小心使用,夹子极易损坏
    48. 安装正极交流输入端子盖板
      Informational PurposesAn informational icon, calling your attention
      注
      1 个盖板,3 个夹子;小心使用,夹子极易损坏
    49. 安装保险丝检修口绝缘体
      Informational PurposesAn informational icon, calling your attention
      注
      3 个卡子
    50. 安装高压控制器逻辑盖
      Informational PurposesAn informational icon, calling your attention
      注
      1 个盖子
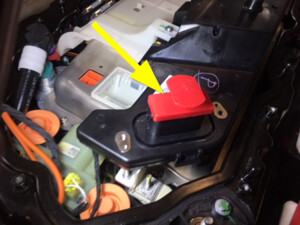
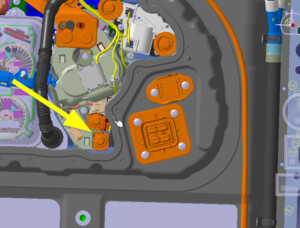
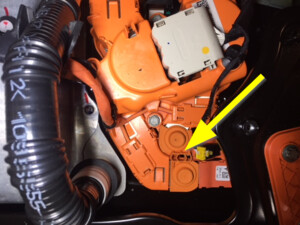
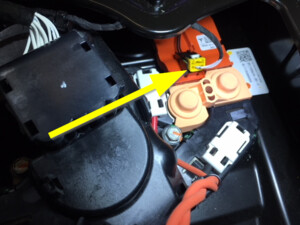
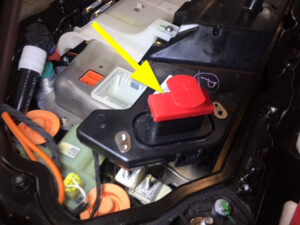
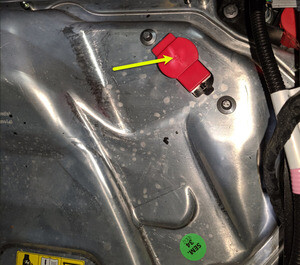
    51. 拆下烟火电池隔离开关。请参阅烟火电池断接开关(拆卸和更换)。
    52. 从快充母排输入侧拆下直流输入总成绝缘体
      Informational PurposesAn informational icon, calling your attention
      注
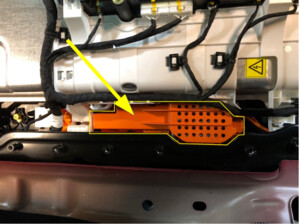
      1 个绝缘体
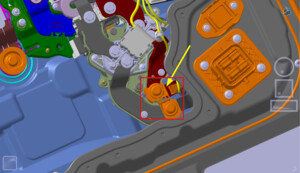
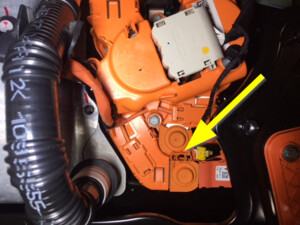
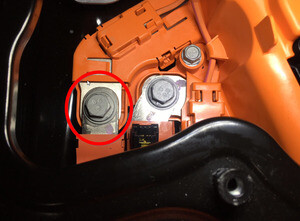
    53. 拆卸固定负极快充母排输入侧和负极母排直流输入总成的螺栓
      Informational PurposesAn informational icon, calling your attention
      注
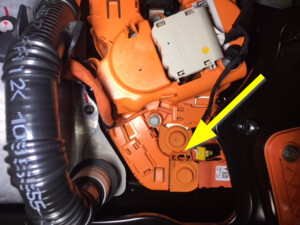
      1 个螺纹胶螺栓,13 毫米,9 Nm;拆下后弃用
    54. 拆卸固定正极快充母排输入侧和正极母排直流输入总成的螺栓
      Informational PurposesAn informational icon, calling your attention
      注
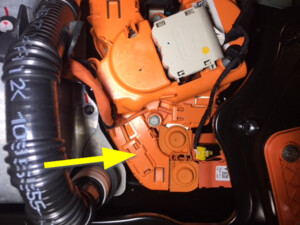
      1 个螺纹胶螺栓,13 毫米,9 Nm;拆下后弃用
    55. 断开超级线束连接器和直流输入总成之间的连接
      Informational PurposesAn informational icon, calling your attention
      注
      1 个连接器
    56. 拆卸将母排直流输入总成固定到高压电池仓的螺栓
      Informational PurposesAn informational icon, calling your attention
      注
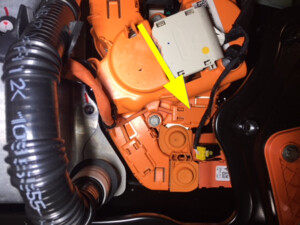
      4 个螺栓,E10 五角,10 Nm;拆下后弃用
    57. 将直流输入母排总成从高压电池仓上拆下。
    58. 将直流输入母排总成安装到高压电池仓上。
      Informational PurposesAn informational icon, calling your attention
      注
      确保不损坏密封件,并正确入位
    59. 安装将直流输入母排总成固定到高压电池仓的螺栓
      Informational PurposesAn informational icon, calling your attention
      注
      4 个螺栓,E10 五角,10 Nm;安装新螺栓;紧固后标记
    60. 安装固定负极快充母排输入侧和负极直流输入母排总成的螺栓
      Informational PurposesAn informational icon, calling your attention
      注
      1 个螺纹胶螺栓,13 毫米,9 Nm;紧固后标记;安装新的螺纹胶螺栓
    61. 安装固定正极快充母排输入侧和正极直流输入母排总成的螺栓
      Informational PurposesAn informational icon, calling your attention
      注
      1 个螺纹胶螺栓,13 毫米,9 Nm;紧固后标记;安装新的螺纹胶螺栓
    62. 在直流输入母排总成的高压接头处执行 Hioki 电阻测试
      Informational PurposesAn informational icon, calling your attention
      注
      2 个高压接头,60 微欧或更低;测试:从负极快充母排至负极直流输入母排以及从正极快充母排至正极直流输入母排
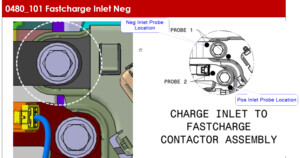
    63. 将直流输入总成绝缘体安装到两个快充母排输入侧
      Informational PurposesAn informational icon, calling your attention
      注
      1 个绝缘体
    64. 连接超级线束连接器和直流输入总成
      Informational PurposesAn informational icon, calling your attention
      注
      1 个连接器
    65. 测量烟火电池隔离开关安装点间的电压,然后安装烟火电池隔离开关。请参阅烟火电池断接开关(拆卸和更换)。
    66. 使用异丙醇清洁高压控制器螺柱和高压电池仓盖板下方。
      Informational PurposesAn informational icon, calling your attention
      注
      4 个螺柱
    67. 检查高压电池仓壁是否损坏
      Informational PurposesAn informational icon, calling your attention
      注
      任何导致密封件不平整的凹陷或破损均会引发泄漏,不可再次使用;如果有涂漆从高压电池仓壁脱落,无论是否沾黏在密封件上,均需要在再次组装时进行外壳泄漏测试;仍可再次使用。
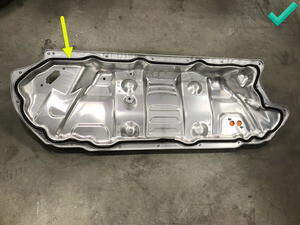
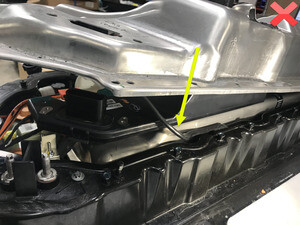
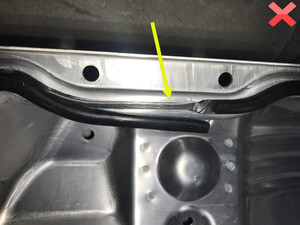
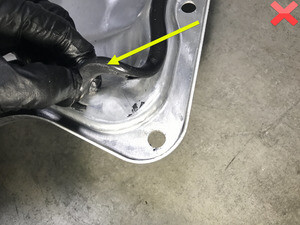
    68. 检查高压电池仓盖板密封件,确认无明显损坏。
      Informational PurposesAn informational icon, calling your attention
      注
      为清晰起见,图中展示近距离图像;脱层和破损的密封件不得再次使用
    69. 拆卸高压控制器逻辑盖
      Informational PurposesAn informational icon, calling your attention
      注
      1 个盖子
    70. 将高压电池仓盖板放置到高压电池上,以便安装
      Informational PurposesAn informational icon, calling your attention
      注
      确保所有可触及的绝缘体均已就位,覆盖所有高压组件后,不再需要佩戴电工保护手套。
    71. 安装高压控制器逻辑盖
      Informational PurposesAn informational icon, calling your attention
      注
      1 个盖子
    72. 安装将高压电池仓盖板固定到高压电池的螺栓
      Informational PurposesAn informational icon, calling your attention
      注
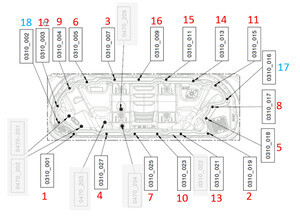
      18 个螺栓,E10 五角,8 Nm;使用无磁铁的 E10 五角套筒;紧固件已就位;请遵循图示紧固顺序
    73. 安装将高压电池仓盖板固定到高压控制器的紧固件。
      Informational PurposesAn informational icon, calling your attention
      注
      4 个螺栓,E10,5 Nm + 30 度;安装新螺栓
    74. 脱下高压绝缘手套
    75. 拆卸逻辑盖,然后连接高压控制器逻辑连接器
      Informational PurposesAn informational icon, calling your attention
      注
      1 个连接器,1 个盖子;对齐连接器,然后将把手拉至锁定位置以使连接器完全就位
    76. 清理母排高压连接器接触表面残留的导电膏 Penetrox_x000A_
      Informational PurposesAn informational icon, calling your attention
      注
      清理 Penetrox 后等待风干 1 分钟;重新使用母排期间,需要清理高压连接器
    77. 清理高压连接器接触面残留的 Penetrox
      Informational PurposesAn informational icon, calling your attention
      注
      清理 Penetrox 后等待风干 1 分钟;新母排的高压连接器已预涂 Penetrox
    78. 将 Penetrox 涂抹到高压连接器接头上
      Informational PurposesAn informational icon, calling your attention
      注
      在两条引线的任一侧涂抹两滴直径约为 5 毫米的 Penetrox A-13;均匀铺开,确认已完全覆盖接触面
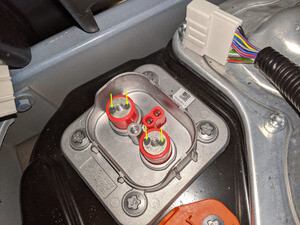
    79. 放置母排套件连接器,然后下降至高压接头上
    80. 安装将充电接口母排套件固定到高压接头的螺栓
      Informational PurposesAn informational icon, calling your attention
      注
      2 个螺栓,10 毫米,9 Nm
    81. 检查高压绝缘手套
      Informational PurposesAn informational icon, calling your attention
      注
      使用前检查手套是否损坏;请参阅维修文档 TN-15-92-003 R1,了解有关检查高压手套的信息。
    82. 佩戴高压绝缘手套和皮革手套
      Informational PurposesAn informational icon, calling your attention
      注
      使用 Hioki 测试仪时,请务必佩戴电工保护手套
    83. 在高压母排引线至螺栓头的高压接头处执行 Hioki 电阻测试
      Informational PurposesAn informational icon, calling your attention
      注
      2 个高压接头;可接受电阻为 50 微欧至 195 微欧。如果电阻大于 195 微欧,请停止作业,上报 Toolbox 会话。如果电阻低于 50 微欧,请重新放置探针并重新测量。如果电阻反复在 0 微欧至 50 微欧之间变化,表明已通过 Hioki 测试,可执行下一步。
    84. 脱下高压绝缘手套
    85. 安装固定母排罩检修盖板的紧固件
      Informational PurposesAn informational icon, calling your attention
      注
      1 个螺栓,10 毫米,9 Nm
    86. 将第二排 40 百分比座椅总成安装到车内
      Informational PurposesAn informational icon, calling your attention
      注
      建议寻求他人协助
    87. 将 40 百分比座椅框架连接器与车身线束相连
      Informational PurposesAn informational icon, calling your attention
      注
      1 个连接器
    88. 折叠 40 百分比座椅至垂直位置
      Informational PurposesAn informational icon, calling your attention
      注
      拆卸座垫保护装置
    89. 将 40 百分比座椅框架固定到车上
      Informational PurposesAn informational icon, calling your attention
      注
      4 个螺栓,11 毫米,37 Nm;座椅底部螺栓位于主地毯后部;按顺序紧固螺栓;前部外侧 -> 后部内侧 -> 后部外侧 -> 前部内侧
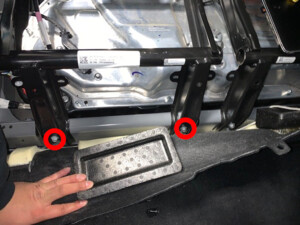
    90. 安装右后门槛饰板
      Informational PurposesAn informational icon, calling your attention
      注
      5 个卡子;后边缘卡在后备箱侧饰板上的凹槽中;将右后门槛饰板的后边缘安装到后备箱侧饰板,并从后往前固定卡子
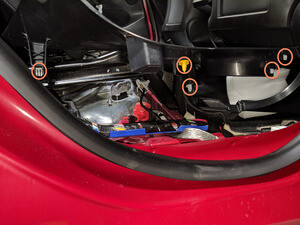
    91. 重新安装右后车门密封条
      Informational PurposesAn informational icon, calling your attention
      注
      将门柱和门槛饰板锁片置于密封条下方
    92. 安装第二排 60 百分比座椅总成
      Informational PurposesAn informational icon, calling your attention
      注
      建议寻求他人协助
    93. 将连接器线束夹安装到左侧座椅框架
      Informational PurposesAn informational icon, calling your attention
      注
      1 个夹子
    94. 连接左侧座椅框架处的逻辑连接器
      Informational PurposesAn informational icon, calling your attention
      注
      1 个连接器
    95. 折叠 60 百分比座椅至垂直位置
      Informational PurposesAn informational icon, calling your attention
      注
      视需要拆下座椅靠背保护件
    96. 安装将 60 百分比座椅框架固定到车身的紧固件
      Informational PurposesAn informational icon, calling your attention
      注
      5 个螺栓,11 毫米,37 Nm;座椅底部螺栓位于主地毯后部;按顺序紧固螺栓;前部外侧 -> 后部内侧 2 个 -> 后部外侧 -> 前部内侧
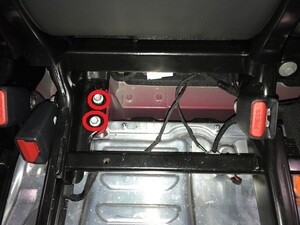
    97. 安装左后门槛饰板
      Informational PurposesAn informational icon, calling your attention
      注
      5 个卡子;后边缘卡在后备箱侧饰板上的凹槽中;将左后门槛饰板的后边缘安装到后备箱侧饰板,并从后往前固定卡子
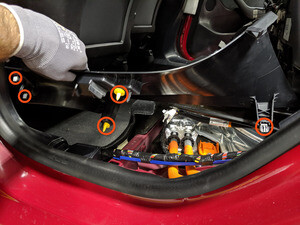
    98. 重新安装左后车门密封条
      Informational PurposesAn informational icon, calling your attention
      注
      将门柱和门槛饰板锁片置于密封条下方
    99. 安装将驾驶室后部主地毯固定到车辆的卡子
      Informational PurposesAn informational icon, calling your attention
      注
      3 个推拉式卡子
    100. 安装第二排座椅座垫
      Informational PurposesAn informational icon, calling your attention
      注
      1 个连接器;向后滑动后座垫,然后将泡沫与座椅滑轨对齐;进行推拉测试以确保座垫已完全就位
    101. 连接紧急响应回路和 12V 负极端子
      Informational PurposesAn informational icon, calling your attention
      注
      1 个螺母,10 毫米,6 Nm,1 个连接器;首先连接紧急响应回路,然后再连接 12V 电池,以避免损坏汽车电脑
    102. 安装后挡板
      Informational PurposesAn informational icon, calling your attention
      注
      14 个卡子;固定前备箱后围,防止其在接合前部卡子时弯曲
    103. 关闭前备箱盖
    104. 将左前座椅移回原位
    105. 将右前座椅移回原位
    106. 升起所有车窗
    107. 关闭所有四个车门
      Informational PurposesAn informational icon, calling your attention
      注
      关闭前需解锁后车门