14/11/2024 15:01:58

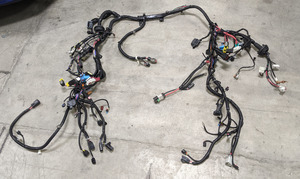
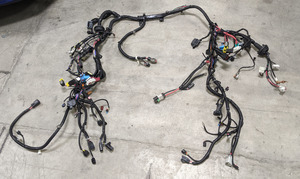
线束 - 主前(拆卸和更换)
校正代码 17100702 7.20 注意:除非本程序中另有明确规定,否则上述校正代码和 FRT 反映的是执行本程序(包括关联程序)所需的所有工作。除非明确要求,否则请勿堆叠校正代码。 注意:请参阅平均维修工时,深入了解 FRT 及其创建方式。要提供有关 FRT 值的反馈,请发送电子邮件至LaborTimeFeedback@tesla.com。 注意:执行下述程序时,请参阅人员保护确认已穿戴适当的个人防护装备 (PPE)。

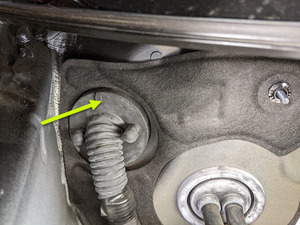
Warning IconA warning icon, calling your attention to a possibly risky situation
警告
尽管此程序已经过验证,但仍是一个草案。可能没有警告和注意事项。请遵守安全要求,处理或靠近高压系统和部件时,请谨慎操作。请将校正修理内容及反馈发送至ServiceDevelopment@teslamotors.com。
Informational PurposesAn informational icon, calling your attention
注
本程序适用于此零件的原始版本。新车型已推出此零件的更新/地区专用全球更新版本,相应程序如下: 线束 - 主前(欧洲、中东和非洲)(拆卸和更换)。

拆卸

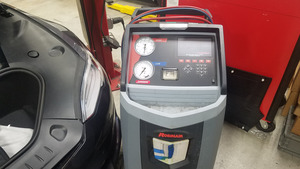
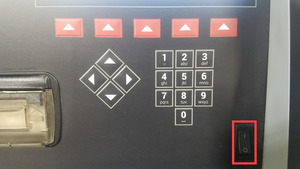
  1. 连接空调机电源并打开开关
    Informational PurposesAn informational icon, calling your attention
    注
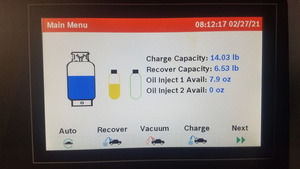
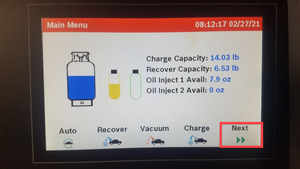
    仅限维修时间;机器将运行各种后台任务;等待主菜单出现后再继续
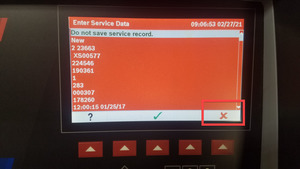
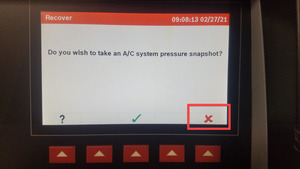
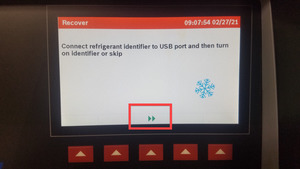
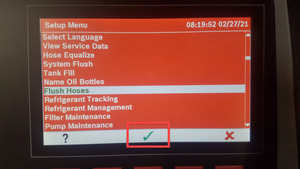
  2. 出现提示时跳过以下界面
    Informational PurposesAn informational icon, calling your attention
    注
    使用图片中所示的选择
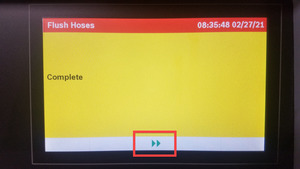
  3. 进行软管冲洗
    Informational PurposesAn informational icon, calling your attention
    注
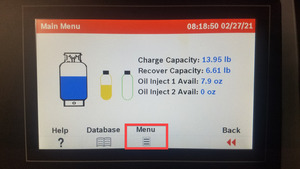
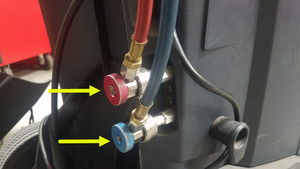
    仅限维修时间;将耦合器连接到机器;顺时针旋转打开耦合器;点击 Main Menu > Menu > Flush hoses > Verify hose connection;该过程完成后机器会发出蜂鸣声
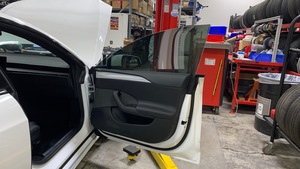
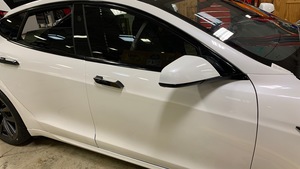
  4. 打开左前车门
  5. 降下左右前车窗
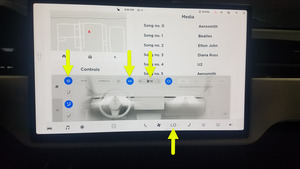
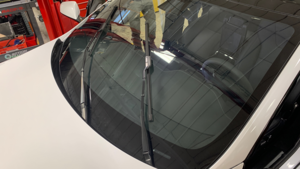
  6. 通过中央显示屏,使雨刮器进入“Service Mode”
    Informational PurposesAn informational icon, calling your attention
    注
    操作如下:Controls > Service > Wiper Service Mode
  7. 通过“维护模式”或 Toolbox 执行以下例行程序(请参阅 面板执行器0005 - 维修模式): PROC_VCFRONT_X_START-THERMAL-FILL-DRAIN-REFRIGERANTvia Toolbox: (link)
    Informational PurposesAn informational icon, calling your attention
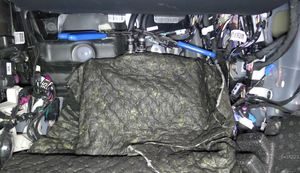
    注
    完成后,点击右上角的 “X” 关闭窗口,Thermal Fluid Fill/Drain 例行程序的时间限制为 5 小时,5 小时后,膨胀阀将关闭,必须重新执行此例行程序,通过 Garage > Vitals > HP > Refrigerant Loop EXV 确认膨胀阀处于打开位置,确认液冷冷凝器、左侧 CC、蒸发器、右侧 CC 和冷却器均处于 ~100%。再循环处于 ~20% 状态,液冷冷凝器电磁阀处于打开状态
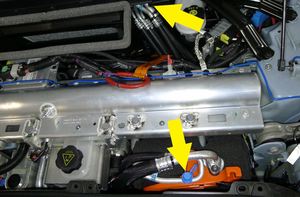
  8. 拆下前备箱储物单元。请参阅。
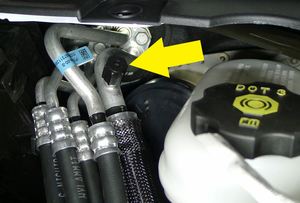
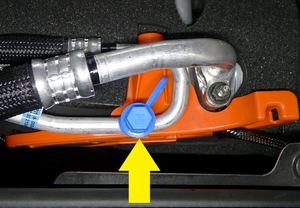
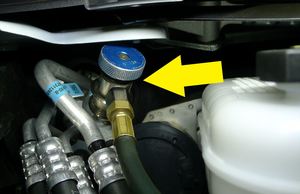
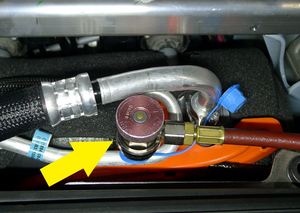
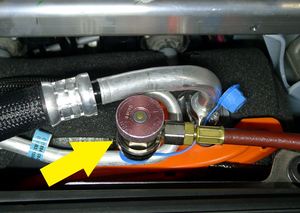
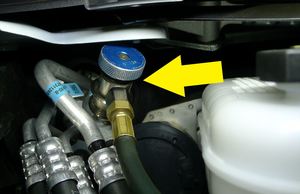
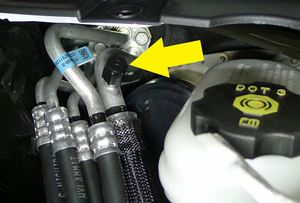
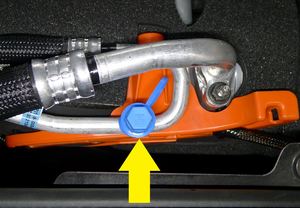
  9. 从空调端口下部和上部拆下端口盖
    Informational PurposesAn informational icon, calling your attention
    注
    2 个盖子
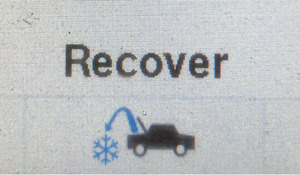
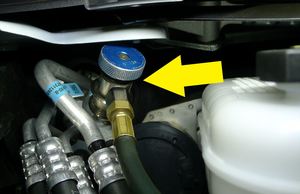
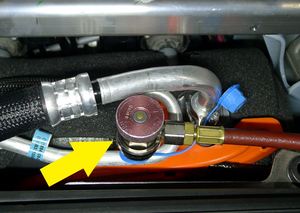
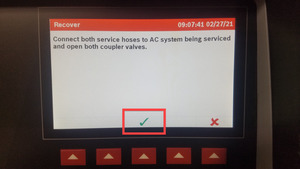
  10. 将软管连接到车辆,然后执行空调回收
    Informational PurposesAn informational icon, calling your attention
    注
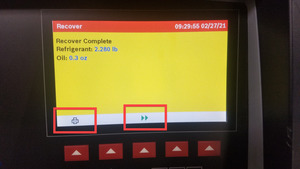
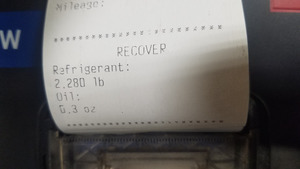
    将耦合器连接到车辆,记录制冷剂和机油的回收量,标记机油排放罐的机油液位(用胶带标记液位),顺时针旋转打开耦合器,点击 Main Menu > Recover > Verify hose connection;该过程完成后机器将发出蜂鸣声;车辆可以无人看管。记录或打印制冷剂和机油的回收量;应回收制冷剂约 2.24 磅(1.02 千克),应回收机油约 0.3 盎司(8.87 毫升),如果机油排放量增加超过 1.01 盎司(30 毫升),请参阅排油损耗图 https://toolbox.teslamotors.com/articles/353700
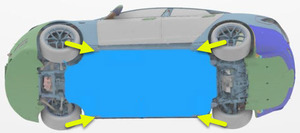
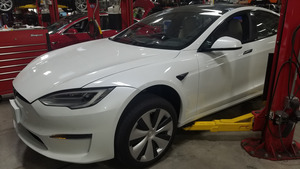
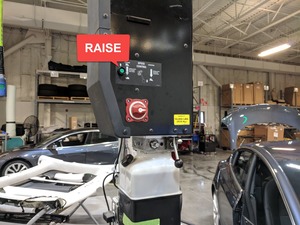
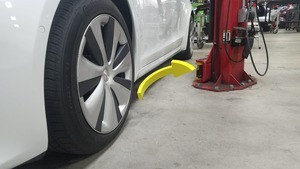
  11. 举升并支撑车辆
    Informational PurposesAn informational icon, calling your attention
    注
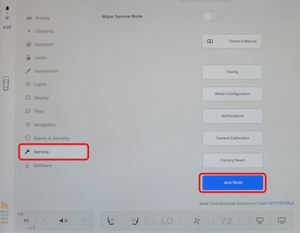
    准备升起车辆,将空气悬架设置为“千斤顶模式”,将举升臂衬垫放在车辆千斤顶垫上
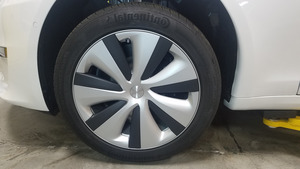
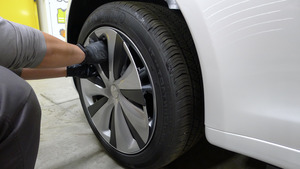
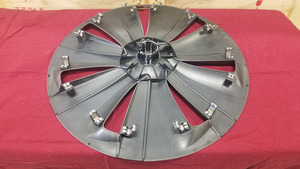
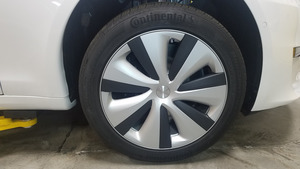
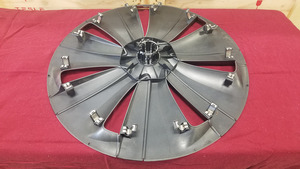
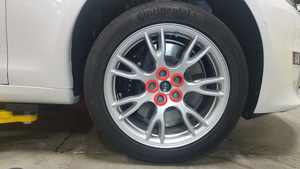
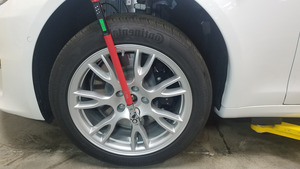
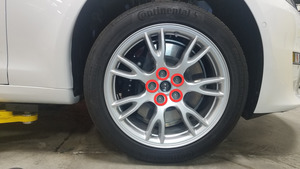
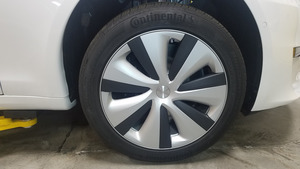
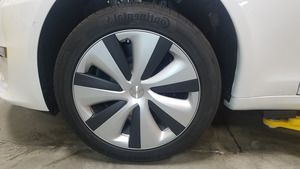
  12. 拆下左前轮毂盖
    Informational PurposesAn informational icon, calling your attention
    注
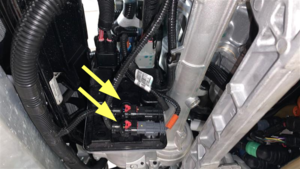
    每隔一根辐条抬起一次,直至轮毂盖从轮辋上松开
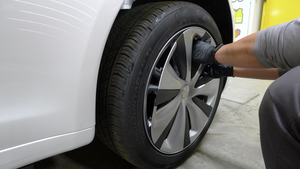
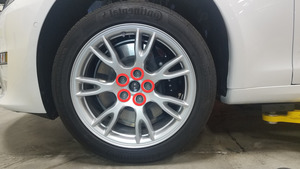
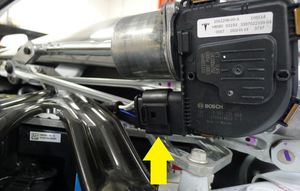
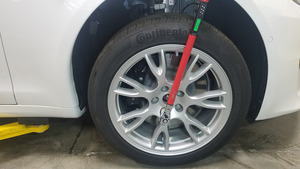
  13. 拆下右前轮毂盖
    Informational PurposesAn informational icon, calling your attention
    注
    每隔一根辐条抬起一次,直至轮毂盖从轮辋上松开
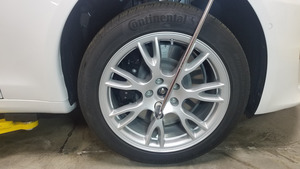
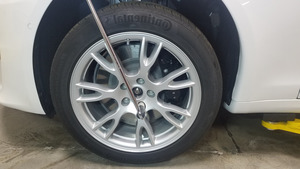
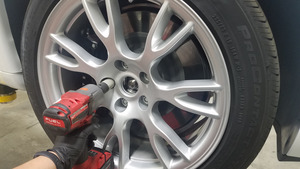
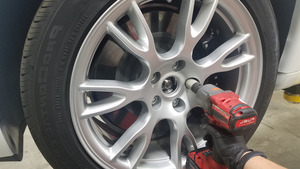
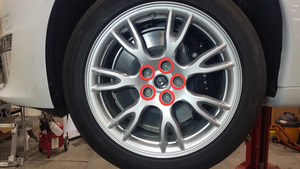
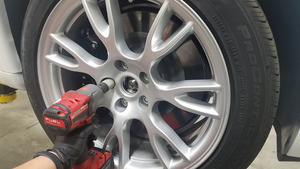
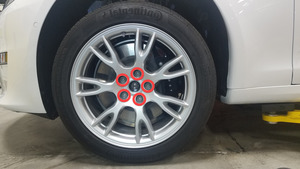
  14. 松开右前轮毂
    Informational PurposesAn informational icon, calling your attention
    注
    5 个螺母,21 毫米,175 Nm
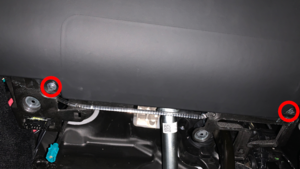
  15. 松开左前轮毂
    Informational PurposesAn informational icon, calling your attention
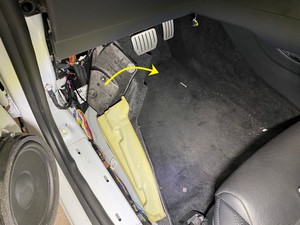
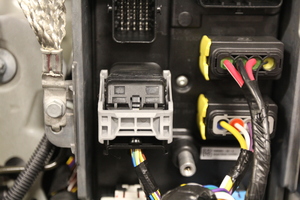
    注
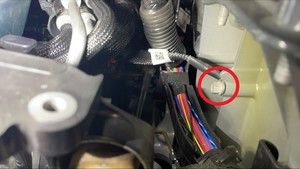
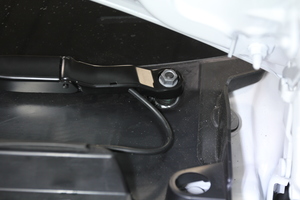
    5 个螺母,21 毫米,175 Nm
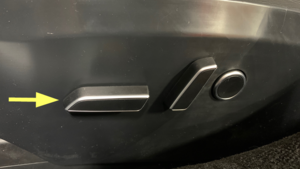
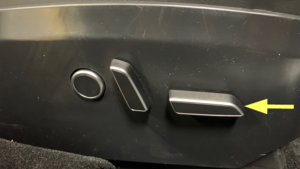
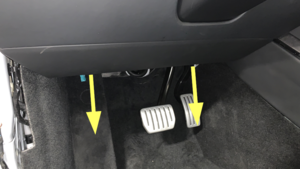
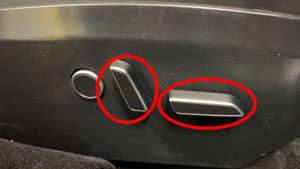
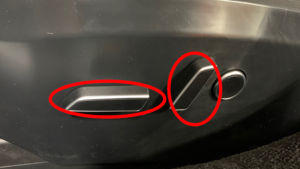
  16. 将左前座椅向后移动
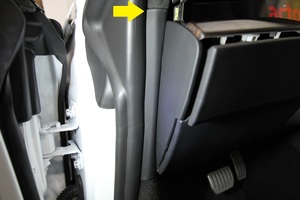
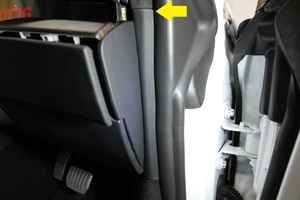
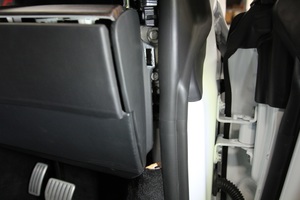
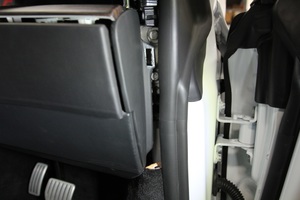
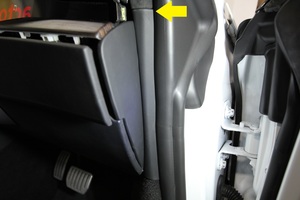
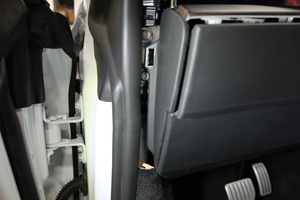
  17. 拆下左侧 A 柱中部饰板
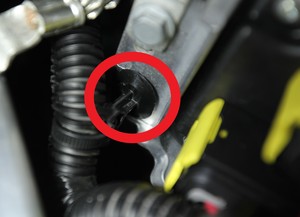
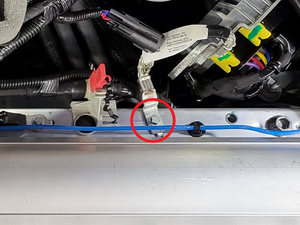
    Informational PurposesAn informational icon, calling your attention
    注
    1 个卡子,2 个锁片
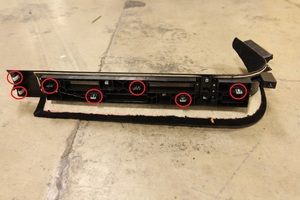
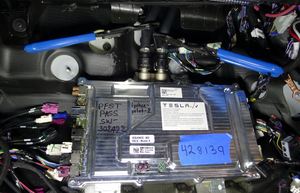
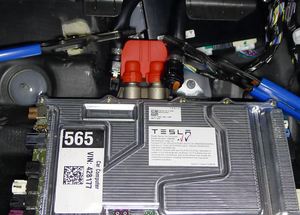
  18. 拆下左侧 A 柱下部饰板
    Informational PurposesAn informational icon, calling your attention
    注
    7 个卡子
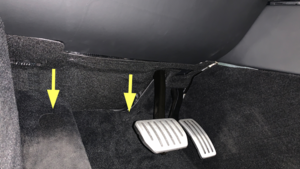
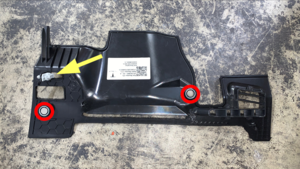
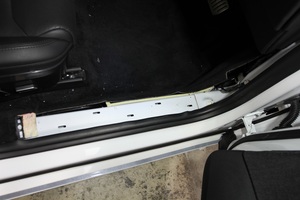
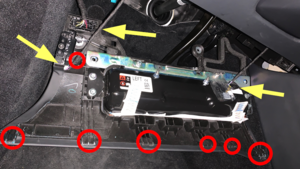
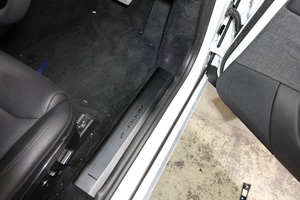
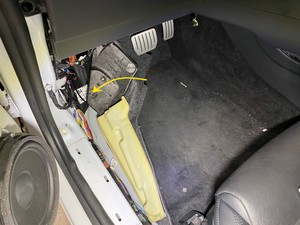
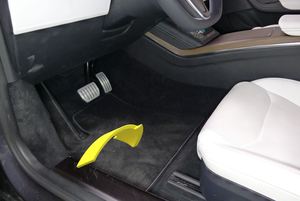
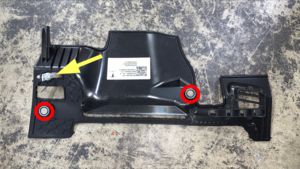
  19. 拆下左侧脚部空间盖板
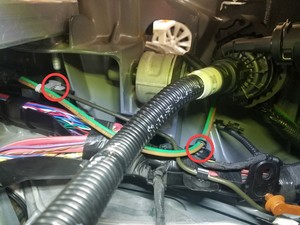
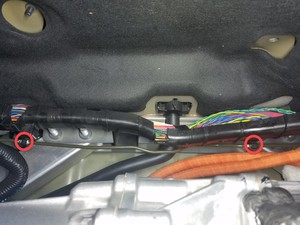
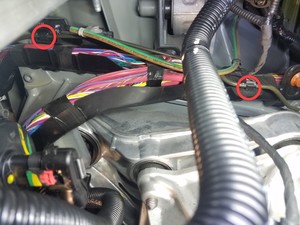
    Informational PurposesAn informational icon, calling your attention
    注
    1 个连接器,2 个磁铁
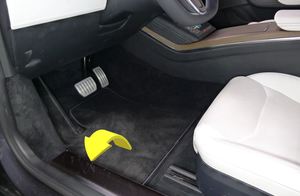
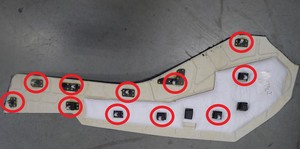
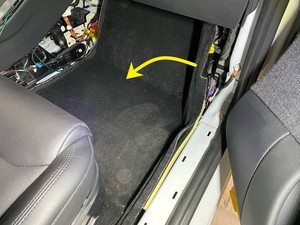
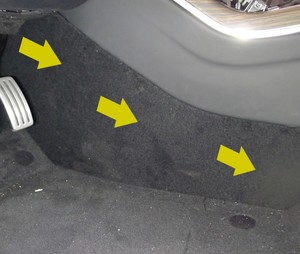
  20. 拆下左前脚垫
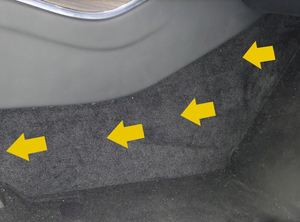
  21. 拆下左侧中控台地毯
    Informational PurposesAn informational icon, calling your attention
    注
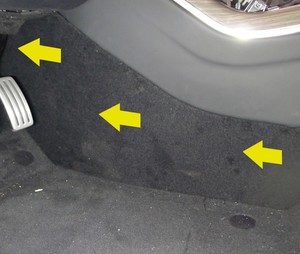
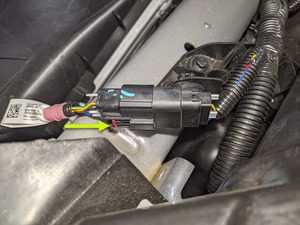
    11 个卡子
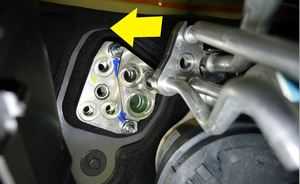
  22. 松开左侧下部前围板高效分子空气 (HEPA) 过滤器总成螺栓
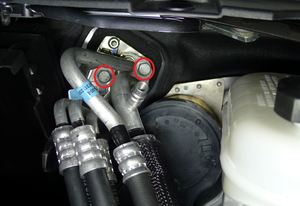
    Informational PurposesAn informational icon, calling your attention
    注
    1 个螺栓,10 毫米,7 Nm
  23. 打开右前车门
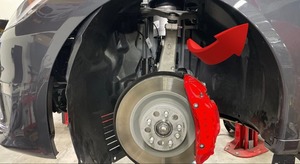
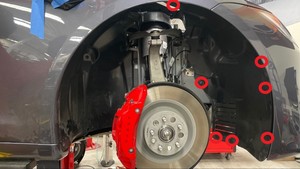
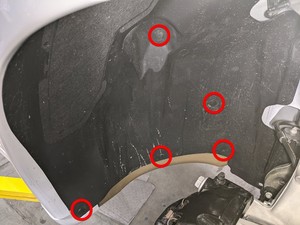
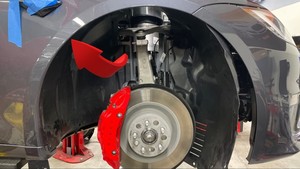
  24. 将右前座椅向后移动
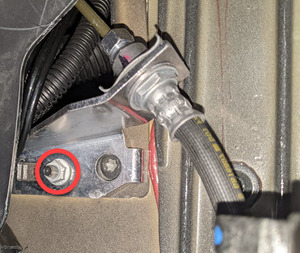
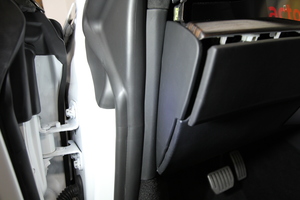
  25. 拆下右侧 A 柱中部饰板
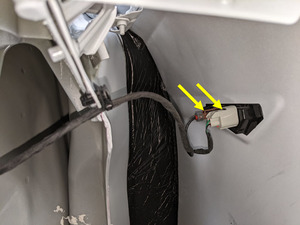
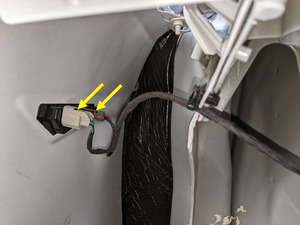
    Informational PurposesAn informational icon, calling your attention
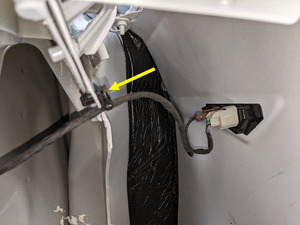
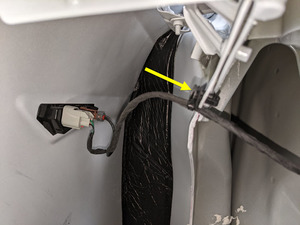
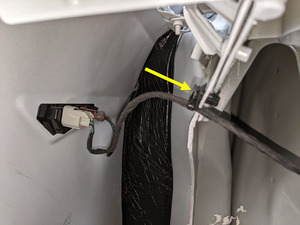
    注
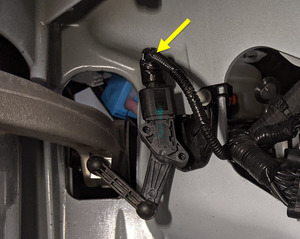
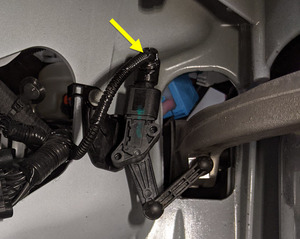
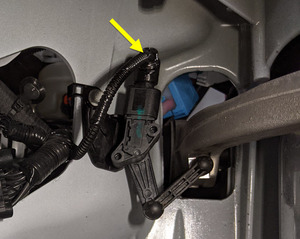
    1 个卡子,2 个锁片
  26. 拆下右侧 A 柱下饰板
    Informational PurposesAn informational icon, calling your attention
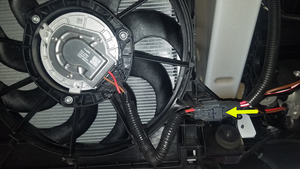
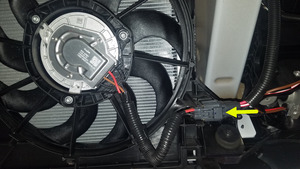
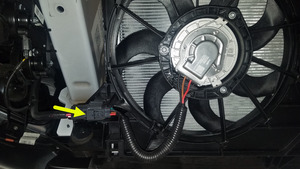
    注
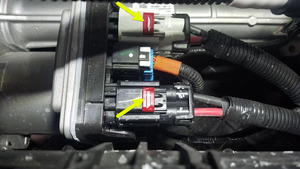
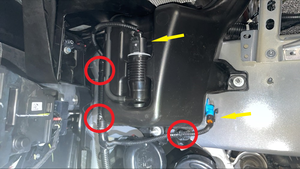
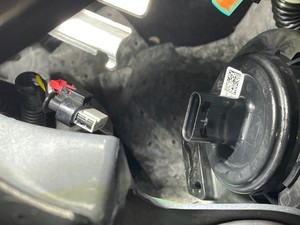
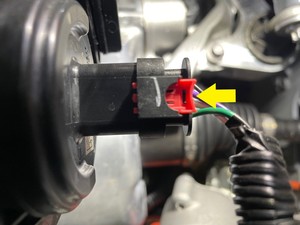
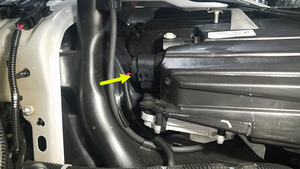
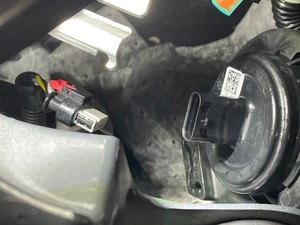
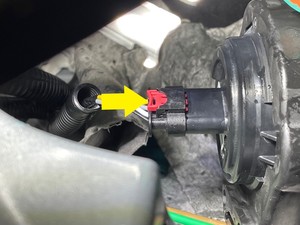
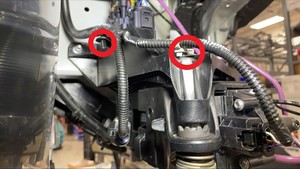
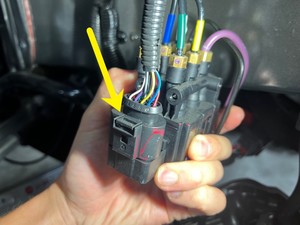
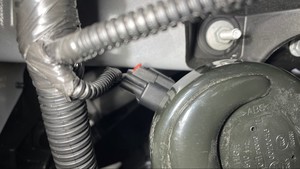
    7 个卡子
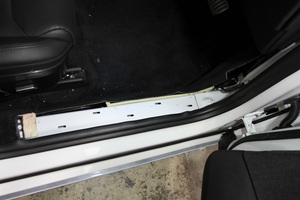
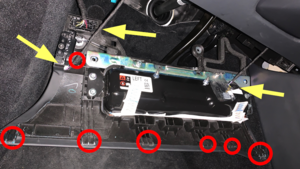
  27. 拆下右侧脚部空间盖板
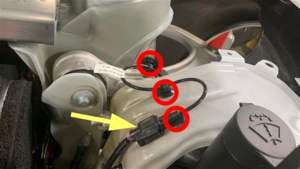
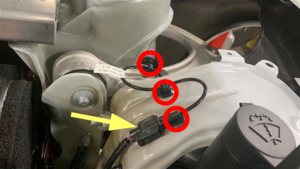
    Informational PurposesAn informational icon, calling your attention
    注
    3 个磁铁,1 个连接器
  28. 拆下右前脚垫
  29. 拆下右侧中控台地毯
    Informational PurposesAn informational icon, calling your attention
    注
    11 个卡子
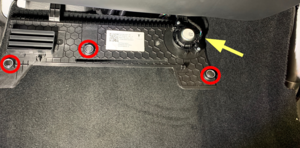
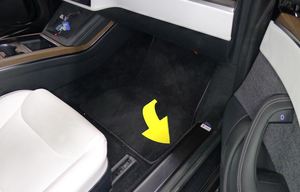
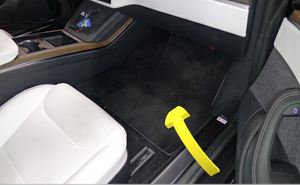
  30. 将右侧前驾驶室地毯折叠到一旁,以便操作
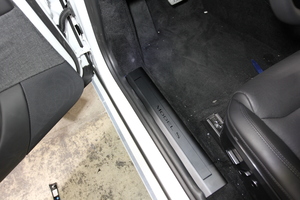
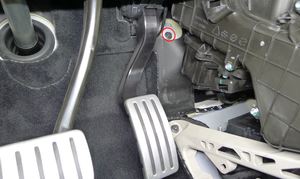
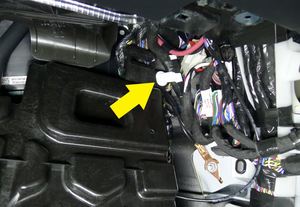
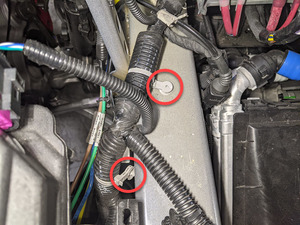
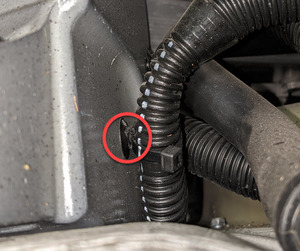
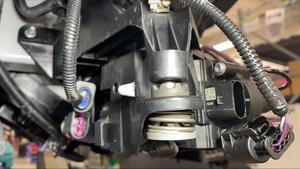
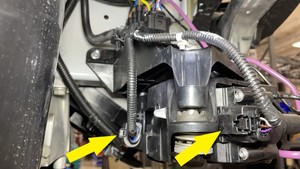
  31. 从右侧脚踏板板件上松开线束
    Informational PurposesAn informational icon, calling your attention
    注
    1 个夹子
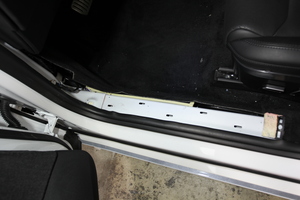
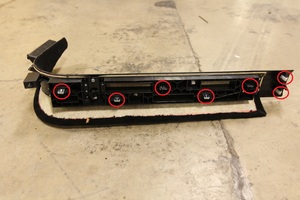
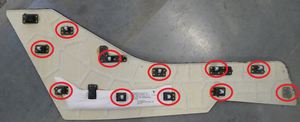
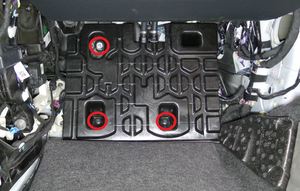
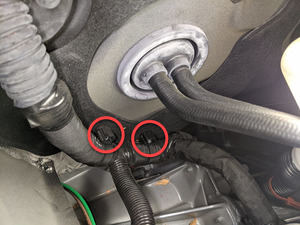
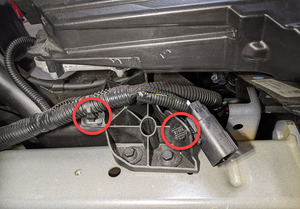
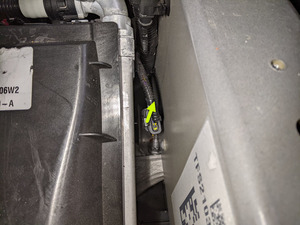
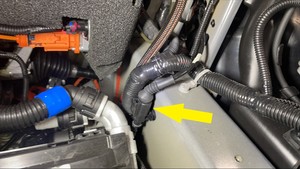
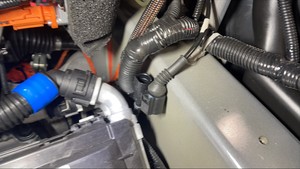
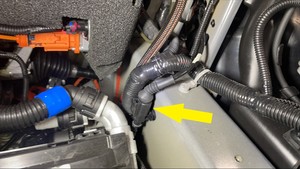
  32. 拆下右侧脚踏板板件
    Informational PurposesAn informational icon, calling your attention
    注
    2 个螺栓,10 毫米,5 Nm,1 个螺母,10 毫米,5 Nm
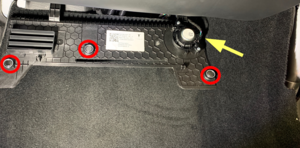
  33. 松开右侧下部前围板高效分子空气 (HEPA) 过滤器总成螺栓
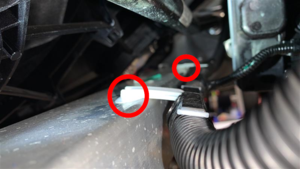
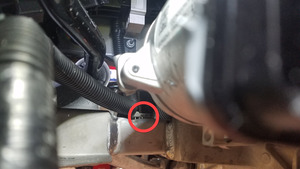
    Informational PurposesAn informational icon, calling your attention
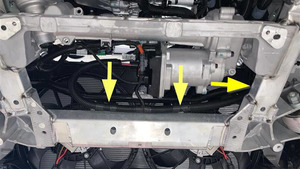
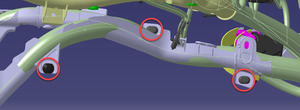
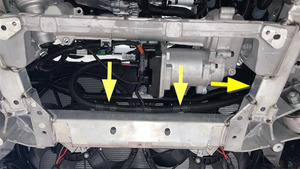
    注
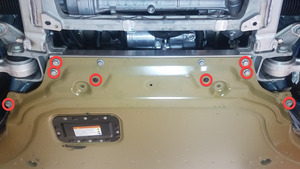
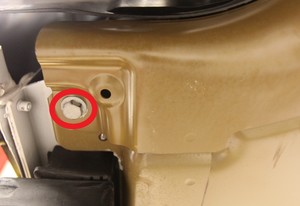
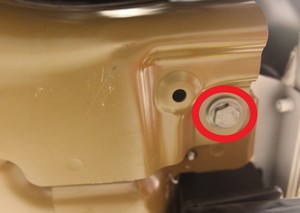
    1 个螺栓,10 毫米,7 Nm
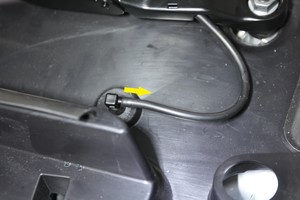
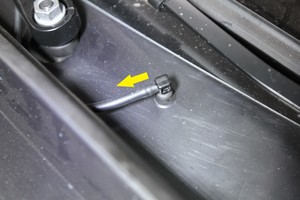
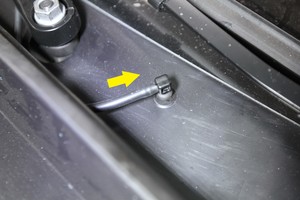
  34. 松开左侧雨刮器臂软管喷嘴
    Informational PurposesAn informational icon, calling your attention
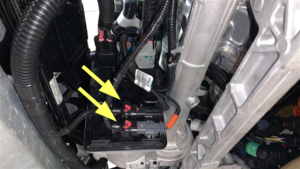
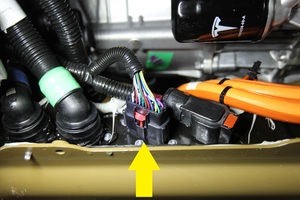
    注
    1 个软管
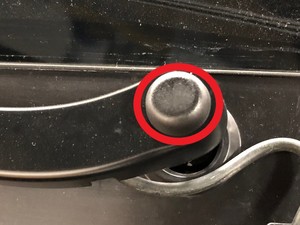
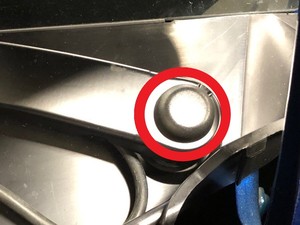
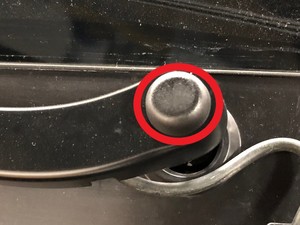
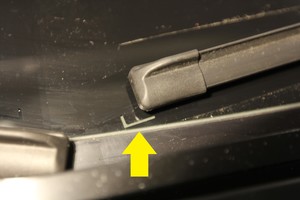
  35. 拆下左侧雨刮器臂螺母盖
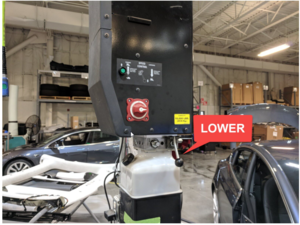
    Informational PurposesAn informational icon, calling your attention
    注
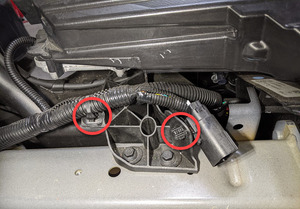
    1 个盖子
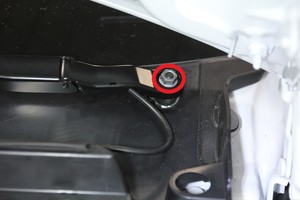
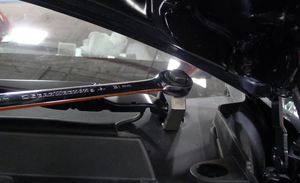
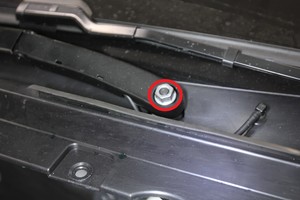
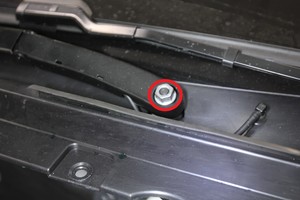
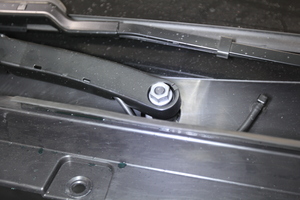
  36. 拆下左侧雨刮器臂螺母并松开总成
    Informational PurposesAn informational icon, calling your attention
    注
    1 个螺母,15 毫米,26 Nm
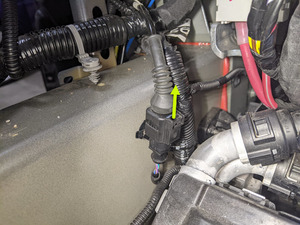
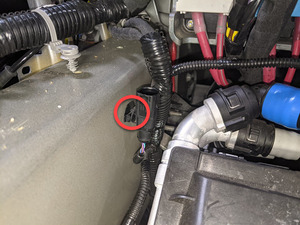
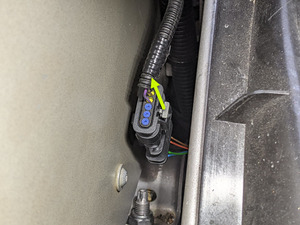
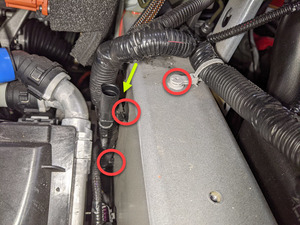
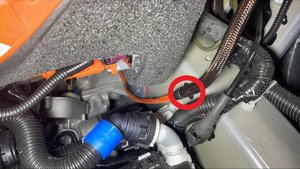
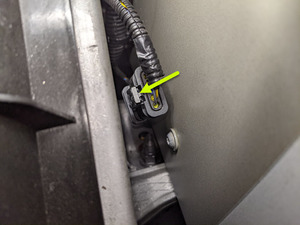
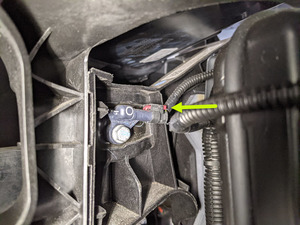
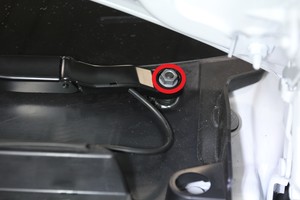
  37. 松开右侧雨刮器臂软管喷嘴
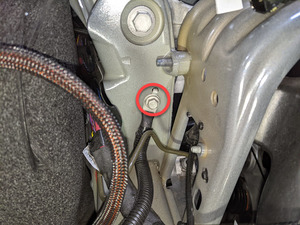
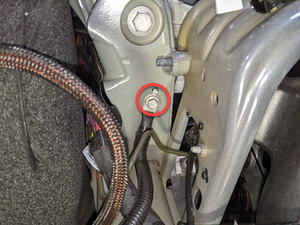
    Informational PurposesAn informational icon, calling your attention
    注
    1 个软管
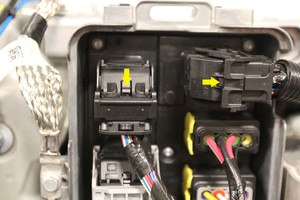
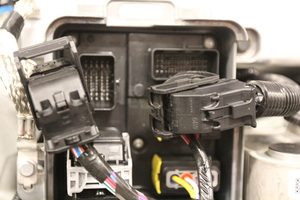
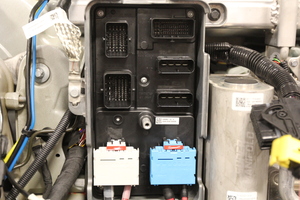
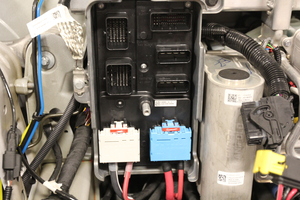
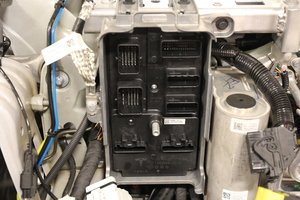
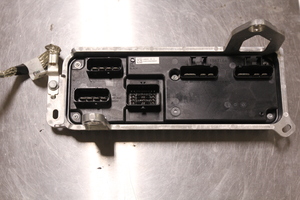
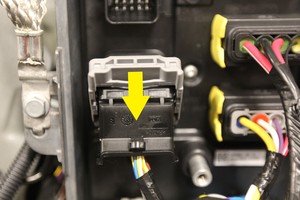
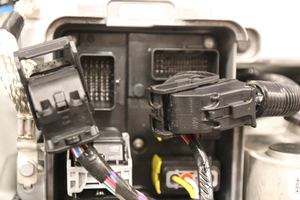
  38. 拆下右侧雨刮器臂螺母盖
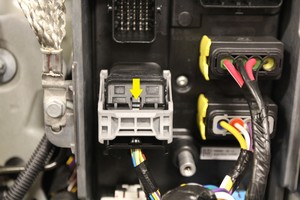
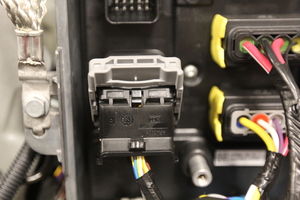
    Informational PurposesAn informational icon, calling your attention
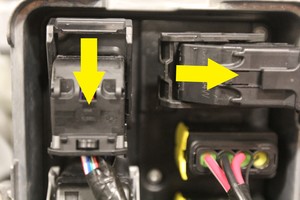
    注
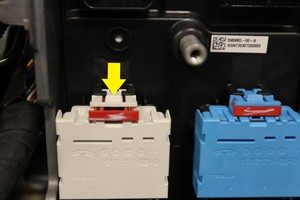
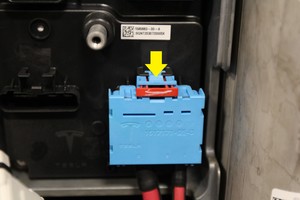
    1 个盖子
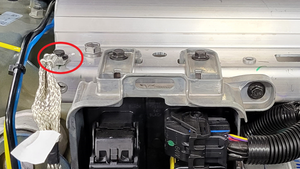
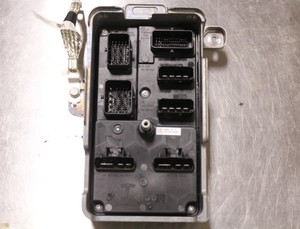
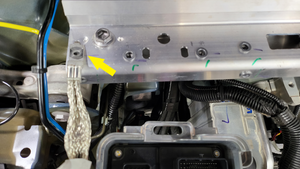
  39. 拆下右侧雨刮器臂螺母并松开总成
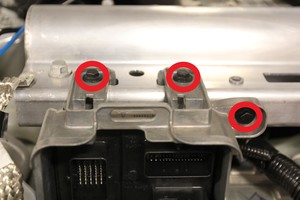
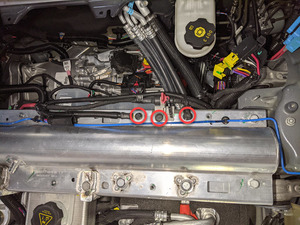
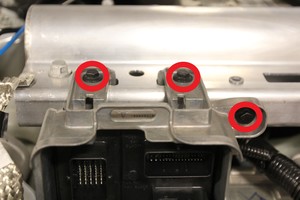
    Informational PurposesAn informational icon, calling your attention
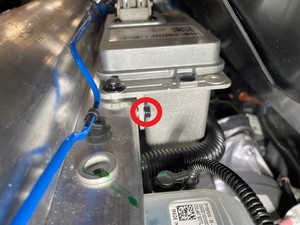
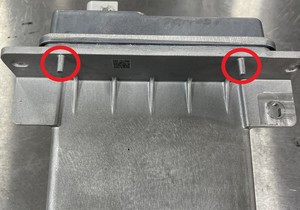
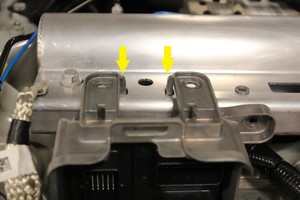
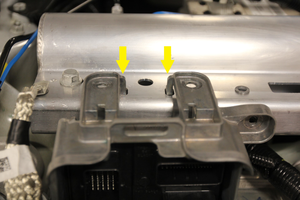
    注
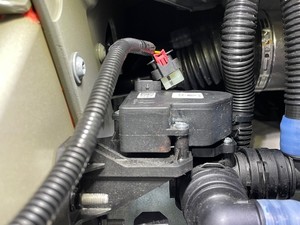
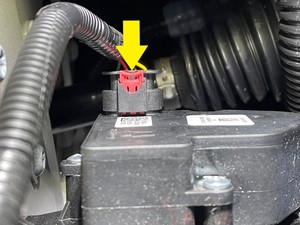
    1 个螺母,15 毫米,26 Nm
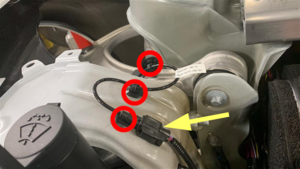
  40. 通过左侧减震塔盖板松开清洗器软管喷嘴
    Informational PurposesAn informational icon, calling your attention
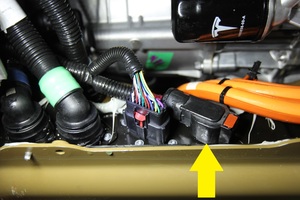
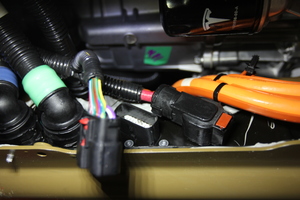
    注
    1 个软管,3 个卡子
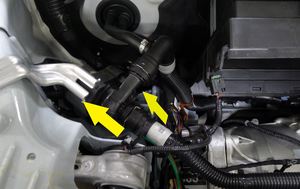
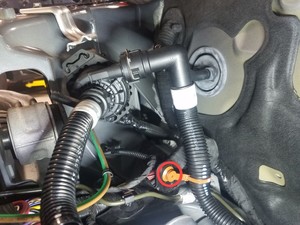
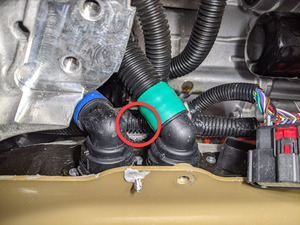
  41. 拆下左侧减震塔盖板
    Informational PurposesAn informational icon, calling your attention
    注
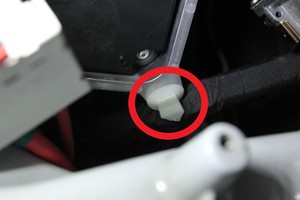
    3 个推拉式卡子,1 个树形头卡子
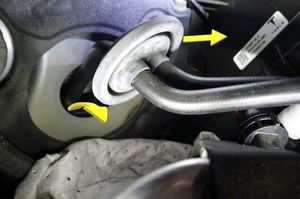
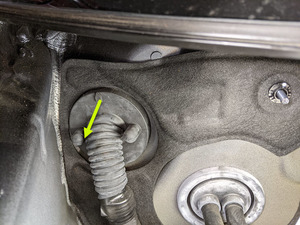
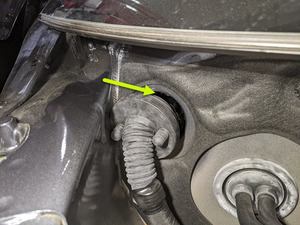
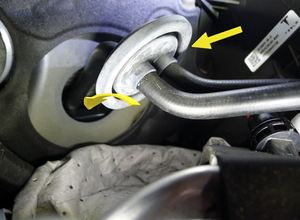
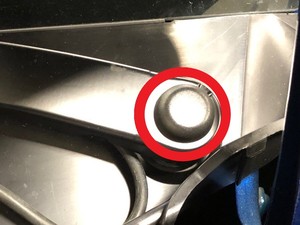
  42. 拆下右侧减震塔盖板
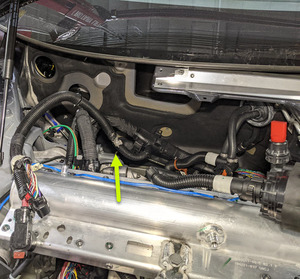
    Informational PurposesAn informational icon, calling your attention
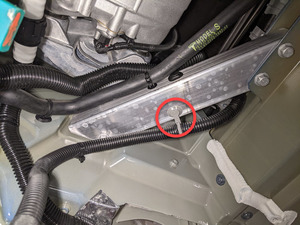
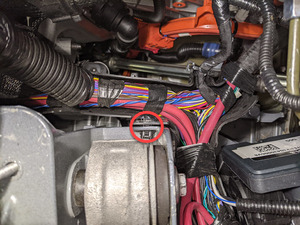
    注
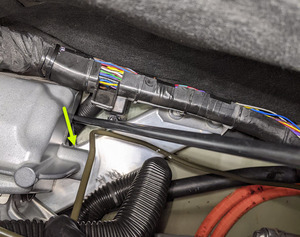
    3 个推拉式卡子,1 个树形头卡子
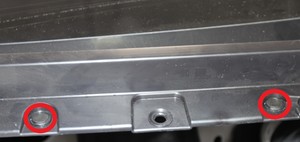
  43. 拆下雨刮器前围篦板面板
    Informational PurposesAn informational icon, calling your attention
    注
    4 个推拉式卡子,2 个端部锁片
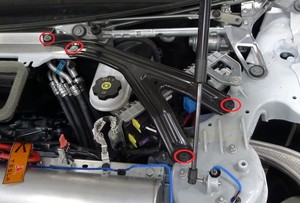
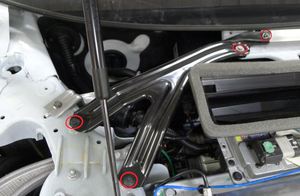
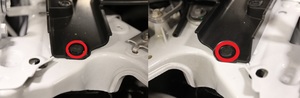
  44. 拆下用于固定左侧 V 型支架的紧固件并拆下总成
    Informational PurposesAn informational icon, calling your attention
    注
    3 个螺栓,10 毫米,18 Nm,1 个螺母,10 毫米,9 Nm
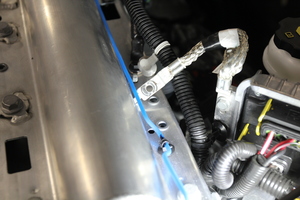
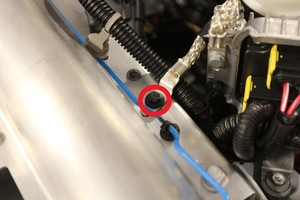
  45. 拆下用于固定右侧 V 型支架的紧固件并拆下总成
    Informational PurposesAn informational icon, calling your attention
    注
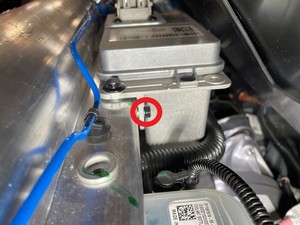
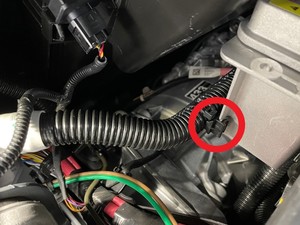
    3 个螺栓,10 毫米,18 Nm,1 个螺母,10 毫米,9 Nm
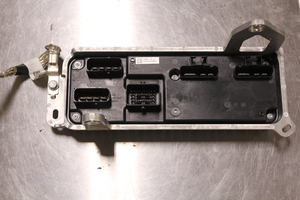
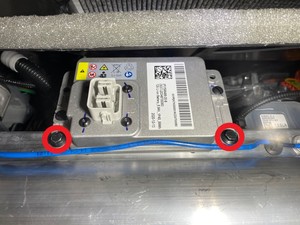
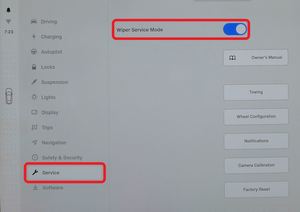
  46. 通过中央显示屏,使雨刮器进入“Service Mode”
    Informational PurposesAn informational icon, calling your attention
    注
    操作如下:Controls > Service > Wiper Service Mode
  47. 通过中央显示器关闭车辆电源
    Informational PurposesAn informational icon, calling your attention
    注
    操作如下:Controls > Safety & Security > Power Off
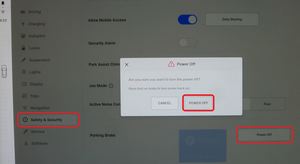
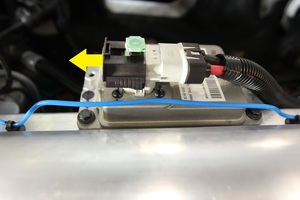
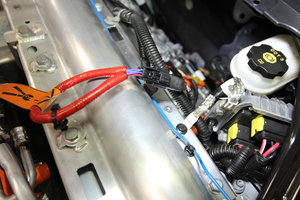
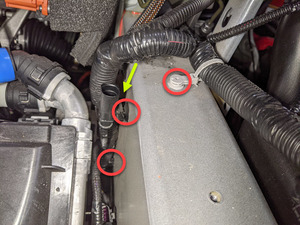
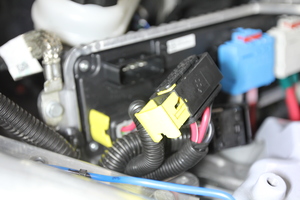
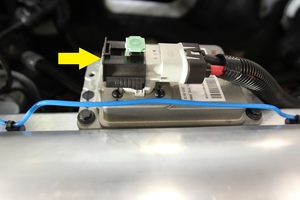
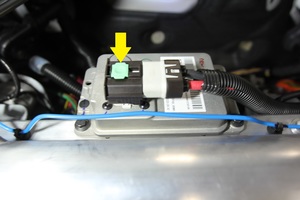
  48. 断开低压电池连接器和紧急响应回路
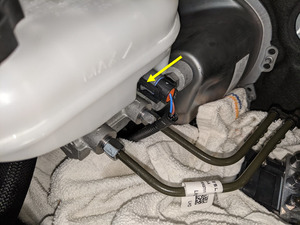
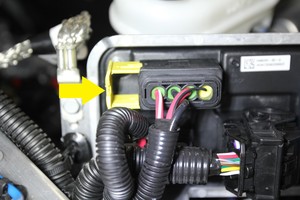
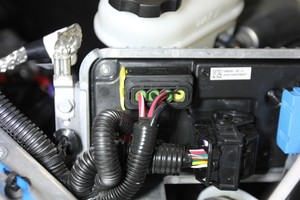
    Informational PurposesAn informational icon, calling your attention
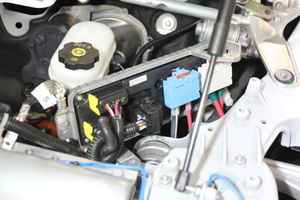
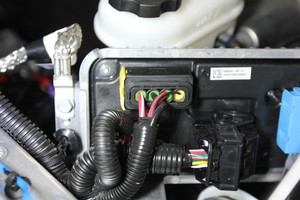
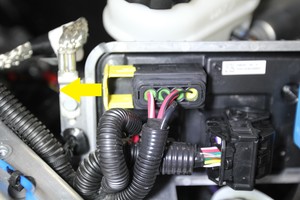
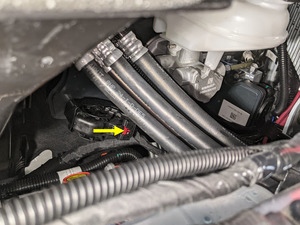
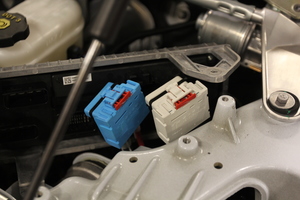
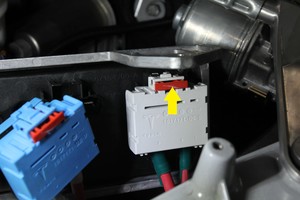
    注
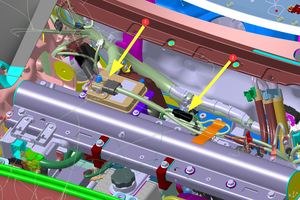
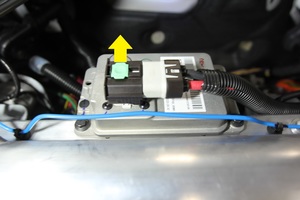
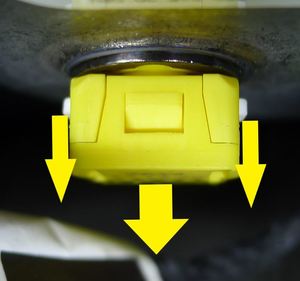
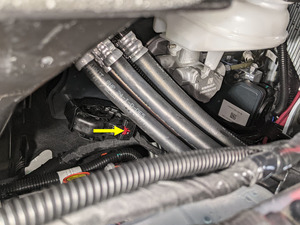
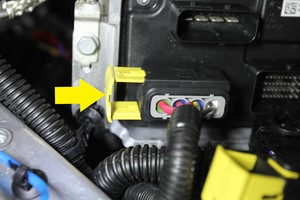
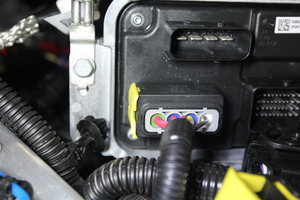
    2 个连接器;提起并松开绿色锁片,向外拉动黑色连接器锁以断开连接
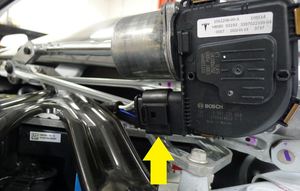
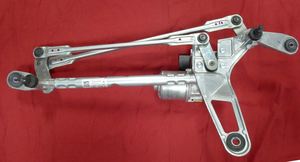
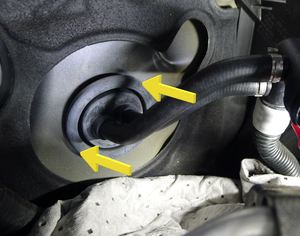
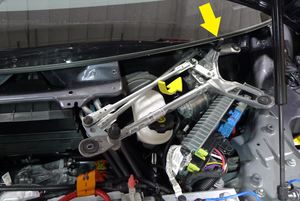
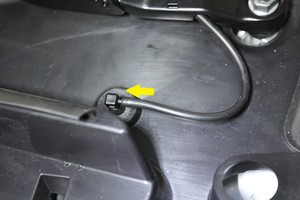
  49. 拆下雨刮器模块
    Informational PurposesAn informational icon, calling your attention
    注
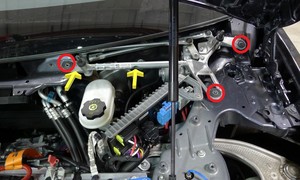
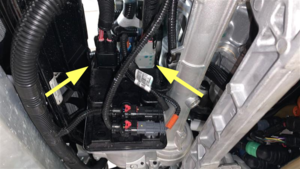
    3 个螺栓,10 毫米,8 Nm,1 个连接器;将模块向前并向上旋转,以接触连接器;在拆卸过程中注意观察左侧雨刮器臂枢轴,避免损坏挡风玻璃
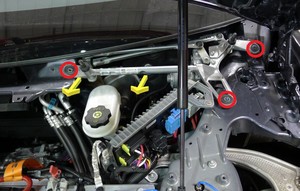
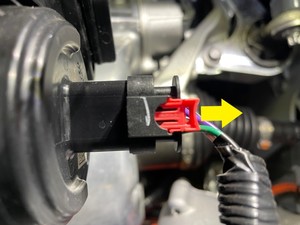
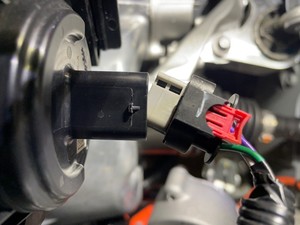
  50. 从低压电池上松开固定超级歧管至电池泵供给软管的卡子
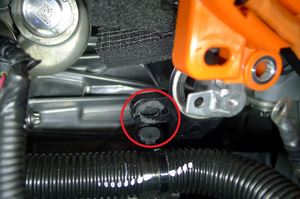
    Informational PurposesAn informational icon, calling your attention
    注
    1 个卡子
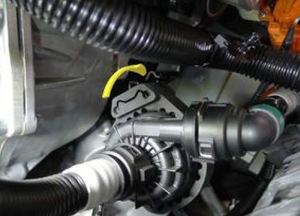
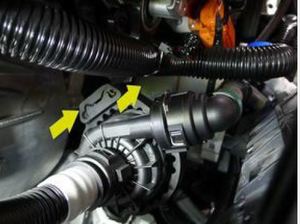
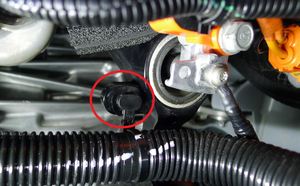
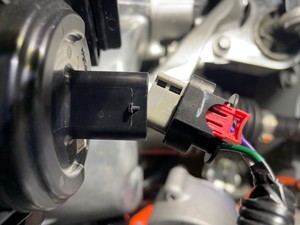
  51. 拆下用于固定低压电池的紧固件,然后将其移至一旁
    Informational PurposesAn informational icon, calling your attention
    注
    3 个螺栓,10 毫米,9 Nm,2 个固定销;注意固定销位置,小心地将总成移至一旁
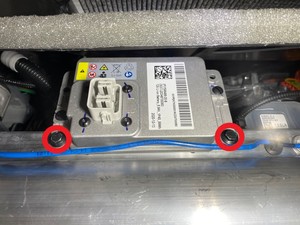
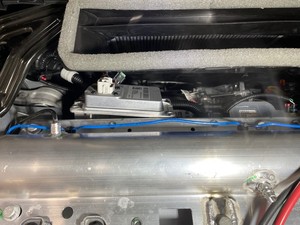
  52. 断开空气质量传感器线束
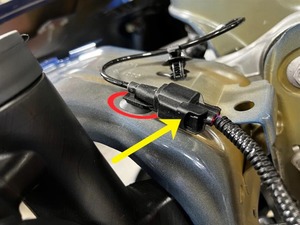
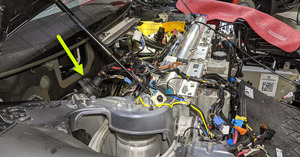
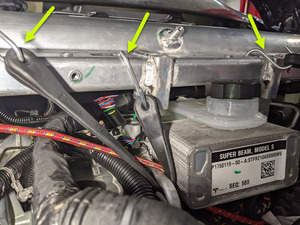
    Informational PurposesAn informational icon, calling your attention
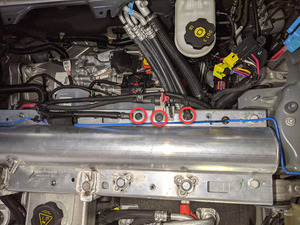
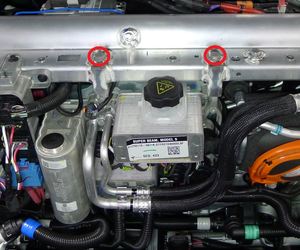
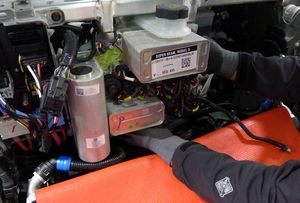
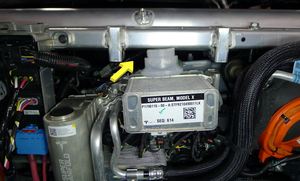
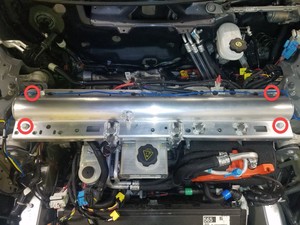
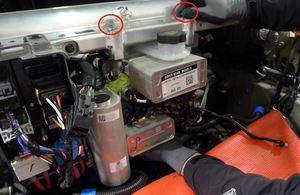
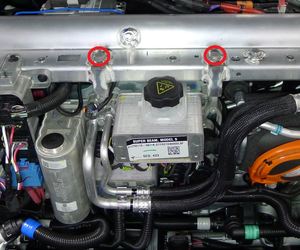
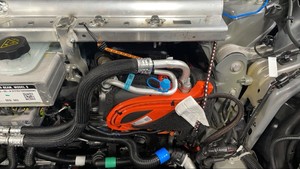
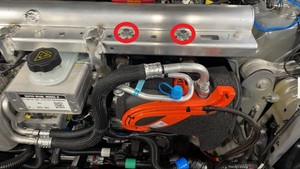
    注
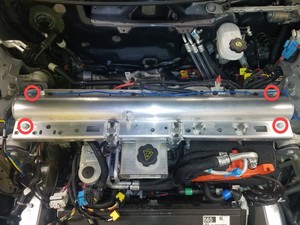
    1 个连接器
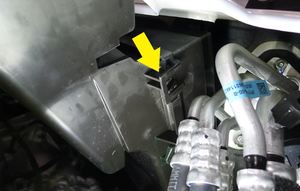
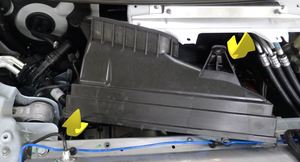
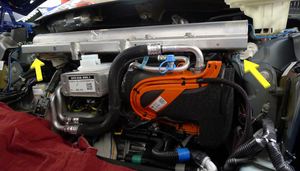
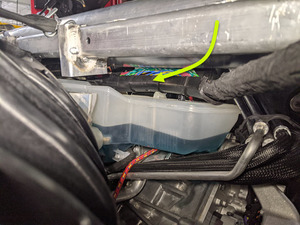
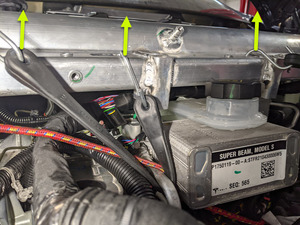
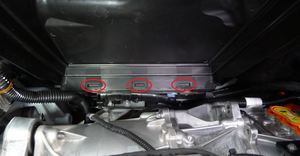
  53. 拆下高效分子空气 (HEPA) 过滤器总成盖板
    Informational PurposesAn informational icon, calling your attention
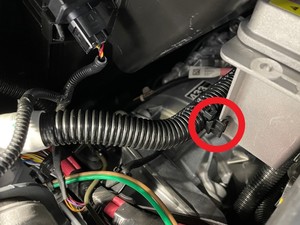
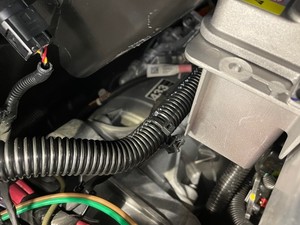
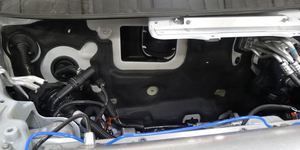
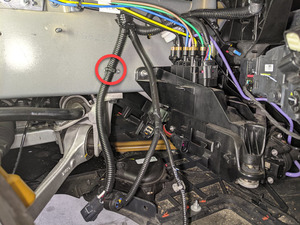
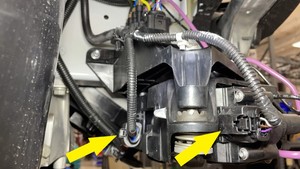
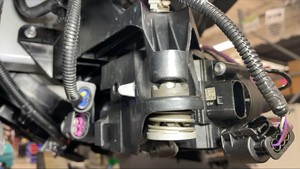
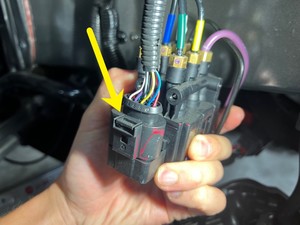
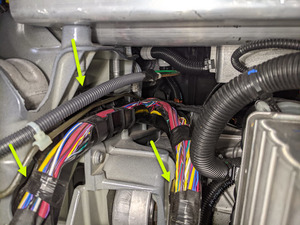
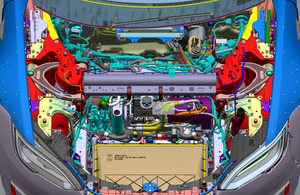
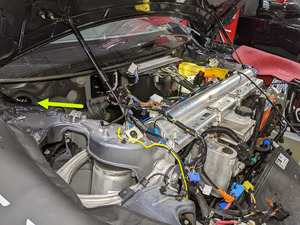
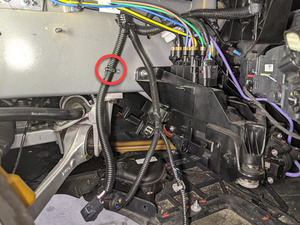
    注
    2 个锁片,2 个固定销,2 个槽;请小心操作,切勿损坏安装卡子;将盖板向前并向上移动到 V 型支架横梁前方
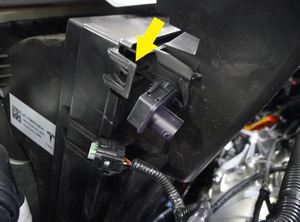
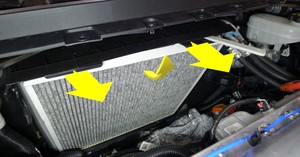
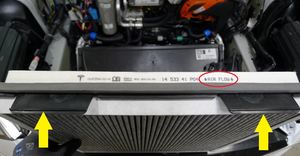
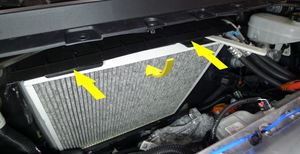
  54. 拆下高效分子空气 (HEPA) 过滤器
    Informational PurposesAn informational icon, calling your attention
    注
    2 个卡子;松开卡子;将过滤器往前推动着从外壳中取出
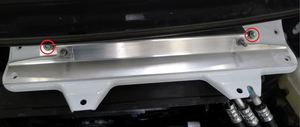
  55. 松开 V 型支架横梁
    Informational PurposesAn informational icon, calling your attention
    注
    2 个螺母,10 毫米,18 Nm
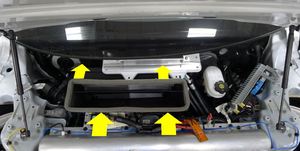
  56. 拆下高效分子空气 (HEPA) 过滤器外壳总成
    Informational PurposesAn informational icon, calling your attention
    注
    2 个螺母,10 毫米,7 Nm;将 V 型支架横梁向前旋转,以便能够接触到高效分子空气 (HEPA) 过滤器总成固定螺母;将总成向前并向上移动着从车辆上取下
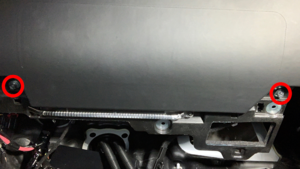
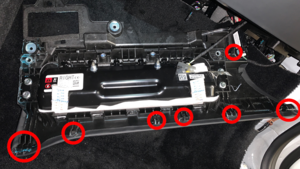
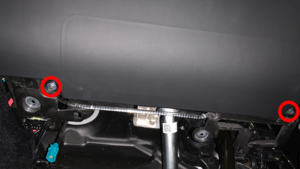
  57. 拆下将左侧膝部气囊总成固定到车辆的紧固件
    Informational PurposesAn informational icon, calling your attention
    注
    2 个螺纹胶螺栓,E10,8 Nm;拆下后弃用
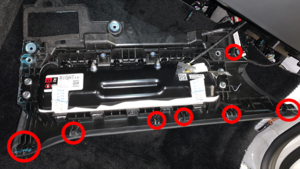
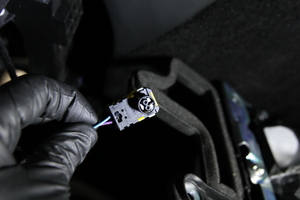
  58. 从车辆上拆下左侧膝部气囊总成
    Informational PurposesAn informational icon, calling your attention
    注
    3 个连接器,1 个卡子,6 个锁片;松开气囊连接器上的 2 个锁片
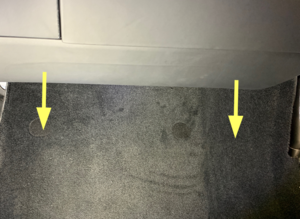
  59. 将驾驶室左前地毯折叠至一旁,以便操作
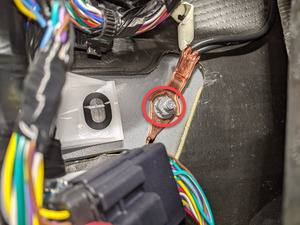
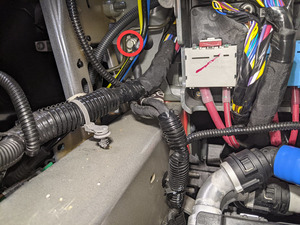
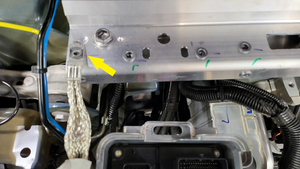
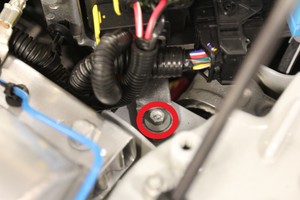
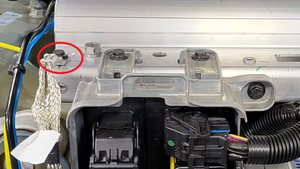
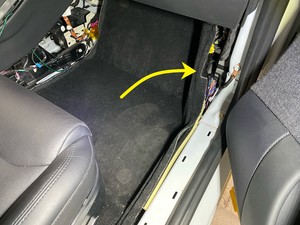
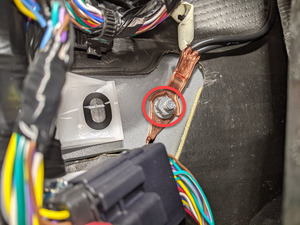
  60. 从左侧脚部空间区域拆下前备箱线束接地
    Informational PurposesAn informational icon, calling your attention
    注
    1 个螺母,10 毫米,8 Nm
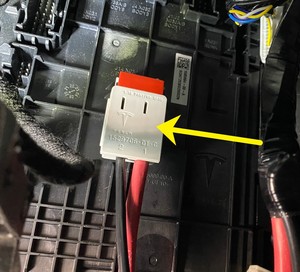
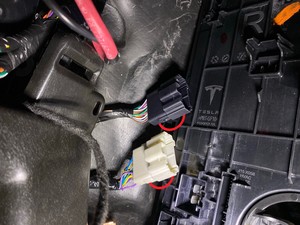
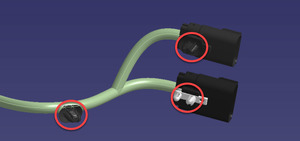
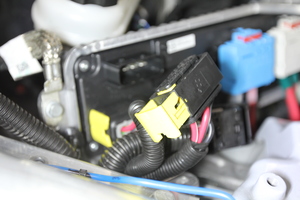
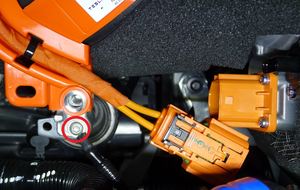
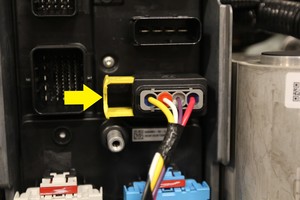
  61. 断开 J14 X036 电源连接器
    Informational PurposesAn informational icon, calling your attention
    注
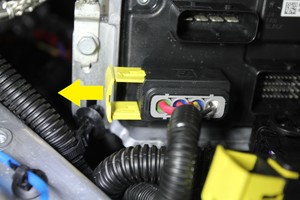
    1 个连接器;松开锁并拆下
  62. 断开 J9 X037 前备箱连接器
    Informational PurposesAn informational icon, calling your attention
    注
    1 个连接器
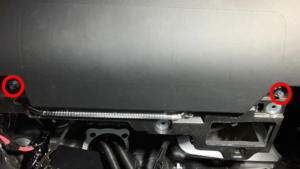
  63. 拆下将右侧膝部气囊总成固定在车辆上的紧固件
    Informational PurposesAn informational icon, calling your attention
    注
    2 个螺纹胶螺栓,E10,8 Nm;拆下后弃用
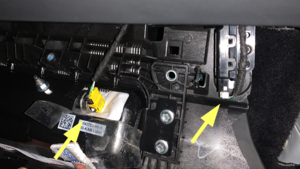
  64. 从车辆上拆下右侧膝部气囊总成
    Informational PurposesAn informational icon, calling your attention
    注
    2 个连接器,6 个锁片,1 个卡子;松开安全气囊连接器上的 2 个锁片
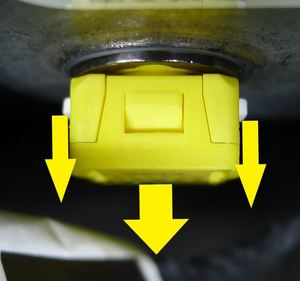
  65. 将冷却液软管卡夹安装到冷却板软管上
    Informational PurposesAn informational icon, calling your attention
    注
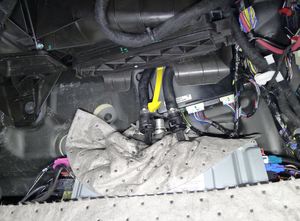
    2 个软管;在车载电脑周围放置冷却液吸收性材料
  66. 将冷却液软管从车载电脑冷却板总成上松开
    Informational PurposesAn informational icon, calling your attention
    注
    2 个弹簧锁;在软管和车载电脑上安装冷却液插头
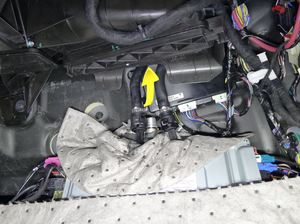
  67. 通过隔板拆下车载电脑供液软管
    Informational PurposesAn informational icon, calling your attention
    注
    从车载电脑供液软管上拆下冷却液软管卡夹;确保塞好塞子,不会泄漏;将软管引至 HVAC 总成和隔板之间
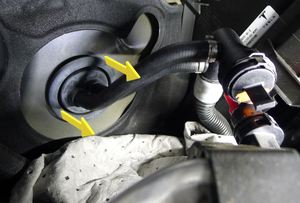
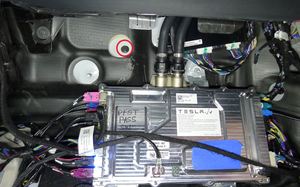
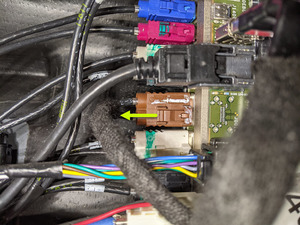
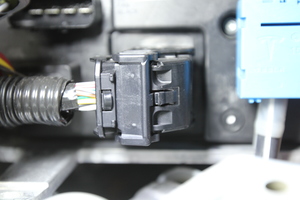
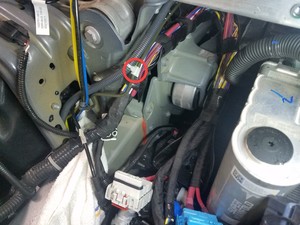
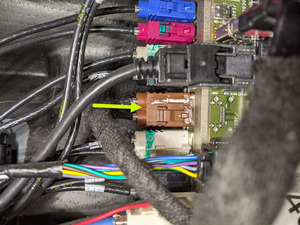
  68. 从车载电脑上断开棕色 Fakra 连接器
    Informational PurposesAn informational icon, calling your attention
    注
    1 个连接器,X836
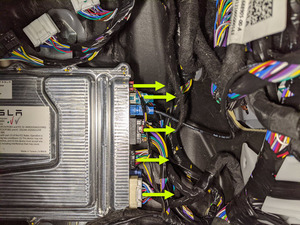
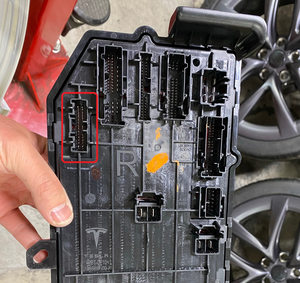
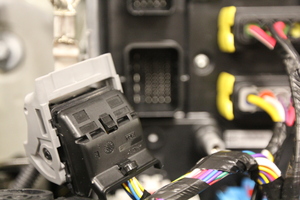
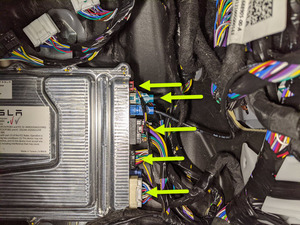
  69. 断开车载电脑右侧的前备箱连接器
    Informational PurposesAn informational icon, calling your attention
    注
    5 个连接器
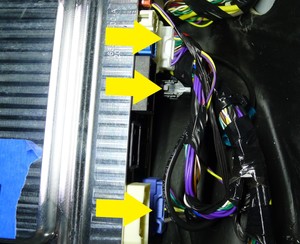
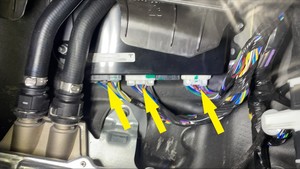
  70. 松开 AP 主板右侧的连接器
    Informational PurposesAn informational icon, calling your attention
    注
    3 个连接器;在拆卸前松开连接器上的锁
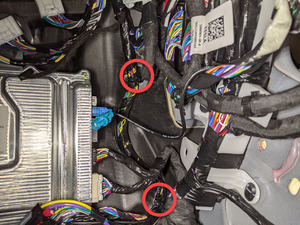
  71. 从右侧脚部空间区域处松开前备箱线束
    Informational PurposesAn informational icon, calling your attention
    注
    2 个夹子
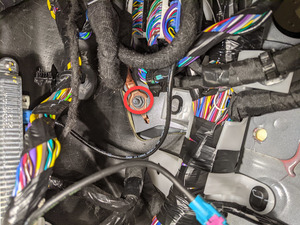
  72. 从右侧脚部空间区域拆下前备箱线束接地
    Informational PurposesAn informational icon, calling your attention
    注
    1 个螺母,10 毫米,8 Nm
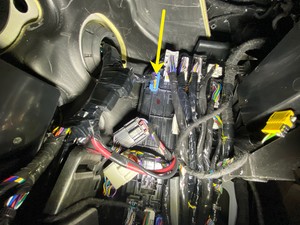
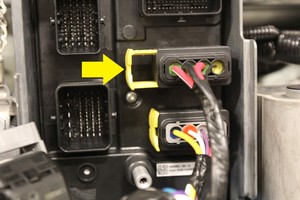
  73. 断开 J14 X056 电源连接器
    Informational PurposesAn informational icon, calling your attention
    注
    1 个连接器;松开锁并拆下
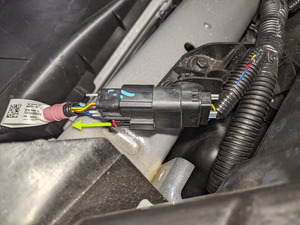
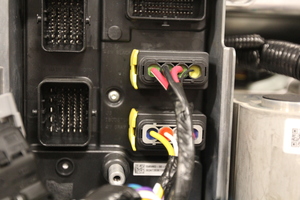
  74. 断开线束连接器
    Informational PurposesAn informational icon, calling your attention
    注
    2 个连接器;松开锁并拆下
  75. 从右侧控制器上松开线束连接器卡子
    Informational PurposesAn informational icon, calling your attention
    注
    2 个卡子
  76. 断开 J9 X050 前备箱连接器
    Informational PurposesAn informational icon, calling your attention
    注
    1 个连接器
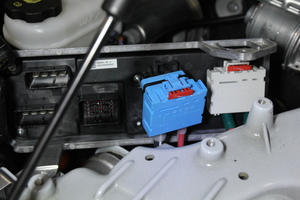
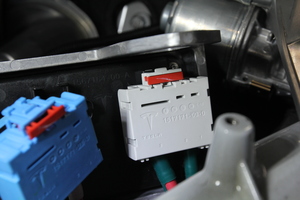
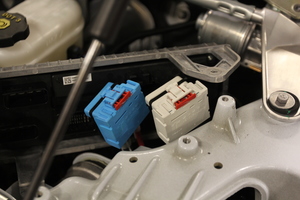
  77. 从 TASC 2.0 电子控制单元 (ECU)上松开电气连接器
    Informational PurposesAn informational icon, calling your attention
    注
    3 个连接器
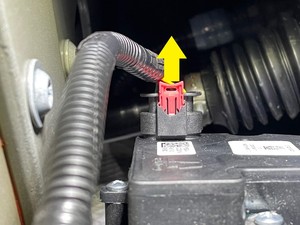
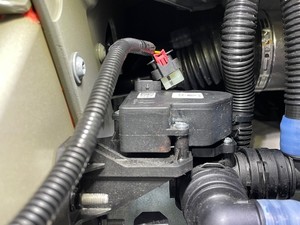
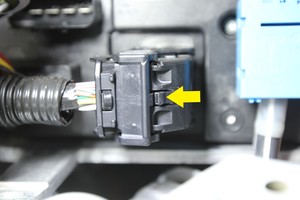
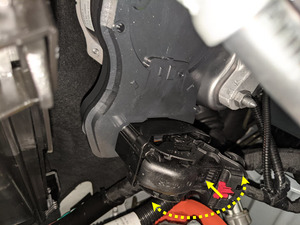
  78. 断开转向机总成连接器
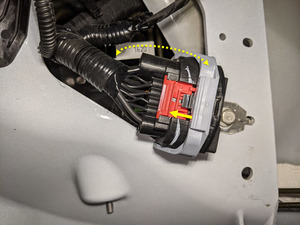
    Informational PurposesAn informational icon, calling your attention
    注
    2 个连接器;两级连接器;滑动红色锁片进行解锁,然后按住连接器释放装置将其断开
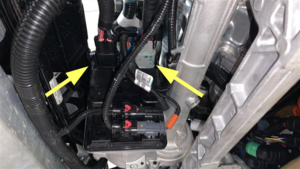
  79. 将空调软管从车辆上拆下
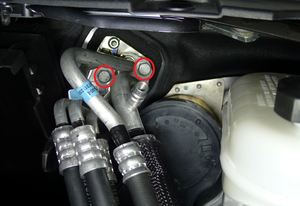
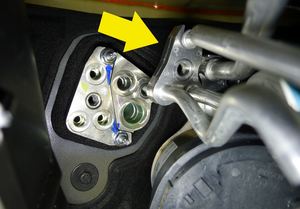
  80. 从 HVAC 总成上拆下五通 HVAC 管路
    Informational PurposesAn informational icon, calling your attention
    注
    2 个螺栓,13 毫米,22 Nm
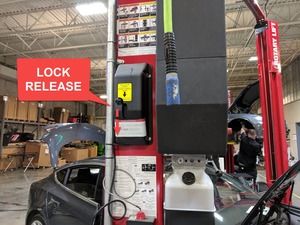
  81. 将车辆适当抬升后降至锁止位
    Informational PurposesAn informational icon, calling your attention
    注
    将车辆设置到适宜的作业高度;务必在听到两侧的锁发出清晰的锁止声后再降下,否则车辆可能会发生侧倾
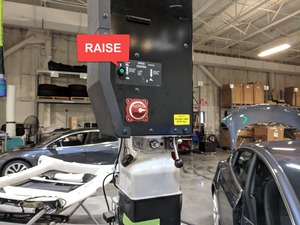
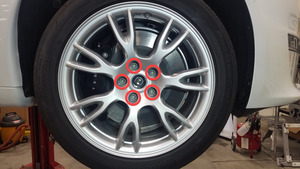
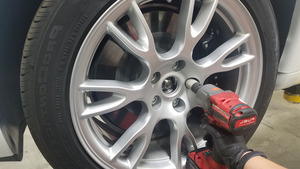
  82. 拆下右前轮毂
    Informational PurposesAn informational icon, calling your attention
    注
    5 个螺母,21 毫米,175 Nm
  83. 拆下左前轮毂
    Informational PurposesAn informational icon, calling your attention
    注
    5 个螺母,21 毫米,175 Nm
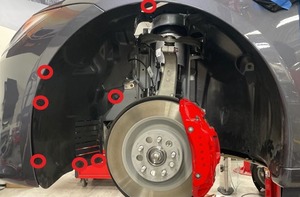
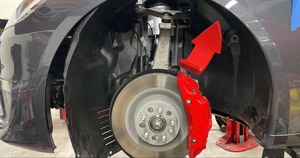
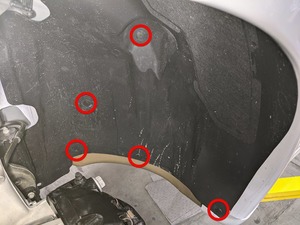
  84. 拆下左前轮毂内衬
    Informational PurposesAn informational icon, calling your attention
    注
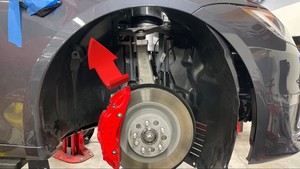
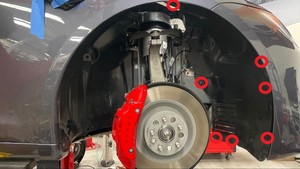
    13 个卡子,2 个风扇卡子
  85. 从车身上拆下左侧前震动软管支架
    Informational PurposesAn informational icon, calling your attention
    注
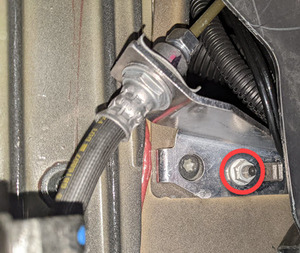
    1 个螺栓,10 毫米,8 Nm
  86. 断开左侧前转向灯
    Informational PurposesAn informational icon, calling your attention
    注
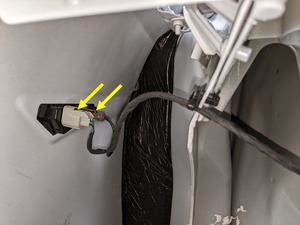
    2 个连接器
  87. 从车身上松开左侧转向灯线束
    Informational PurposesAn informational icon, calling your attention
    注
    1 个夹子
  88. 断开左前行驶高度传感器
    Informational PurposesAn informational icon, calling your attention
    注
    1 个连接器
  89. 断开接地连接器 (G500)
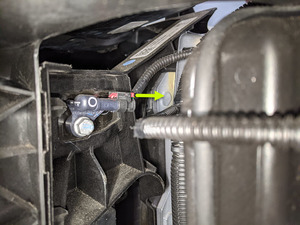
    Informational PurposesAn informational icon, calling your attention
    注
    1 个连接器;松开红色锁片,然后按压黑色锁扣,旋转控制杆将其断开
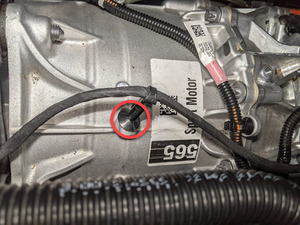
  90. 断开左前加速传感器
    Informational PurposesAn informational icon, calling your attention
    注
    1 个连接器;松开红色锁片
  91. 断开左侧冷却风扇模块连接器
    Informational PurposesAn informational icon, calling your attention
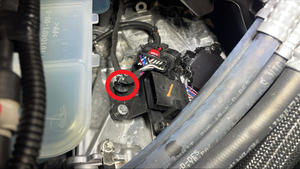
    注
    1 个连接器;断开前塞住冷却液软管,以免冷却液损坏连接器
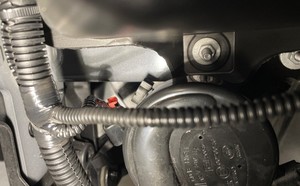
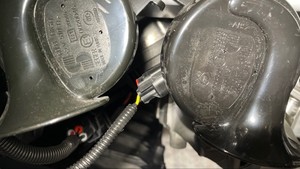
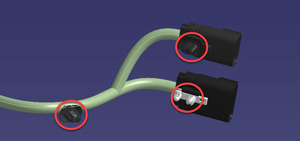
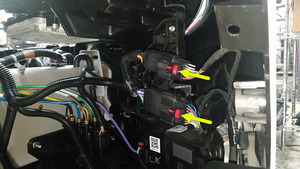
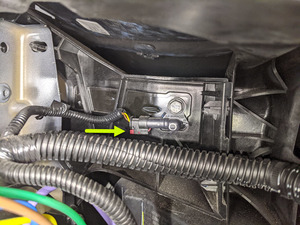
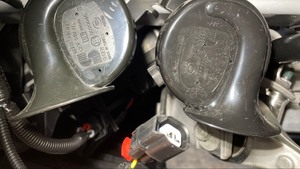
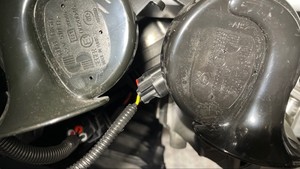
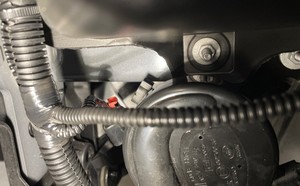
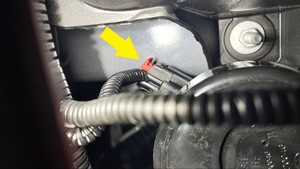
  92. 断开高音喇叭连接
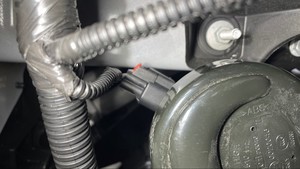
    Informational PurposesAn informational icon, calling your attention
    注
    1 个锁止连接器;松开红色锁片
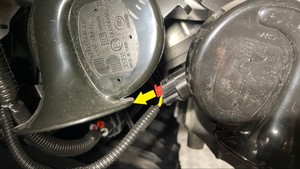
  93. 松开低音喇叭连接
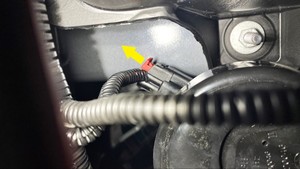
    Informational PurposesAn informational icon, calling your attention
    注
    1 个锁止连接器;松开红色锁片
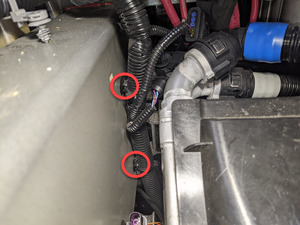
  94. 从清洗器系统上断开前备箱线束
    Informational PurposesAn informational icon, calling your attention
    注
    2 个连接器,3 个树形头卡子;断开连接器后拆下树形头卡子
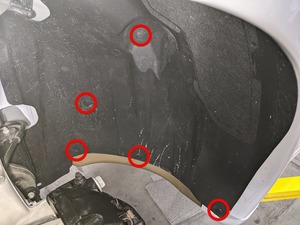
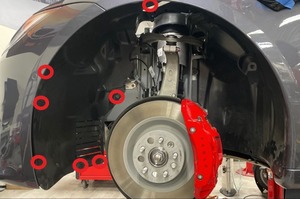
  95. 拆下右前轮毂内衬
    Informational PurposesAn informational icon, calling your attention
    注
    13 个卡子;松开卡子,将其从车上拆下
  96. 从车身上拆下右侧前震动支架
    Informational PurposesAn informational icon, calling your attention
    注
    1 个螺栓,10 毫米,8 Nm
  97. 断开右侧前转向灯
    Informational PurposesAn informational icon, calling your attention
    注
    2 个连接器
  98. 从车身上松开右侧转向灯线束
    Informational PurposesAn informational icon, calling your attention
    注
    1 个夹子
  99. 断开右前行驶高度传感器
    Informational PurposesAn informational icon, calling your attention
    注
    1 个连接器
  100. 断开接地连接器 (G500)
    Informational PurposesAn informational icon, calling your attention
    注
    1 个连接器;松开红色锁片,然后按压黑色锁扣,旋转控制杆将其断开
  101. 断开右侧冷却风扇模块连接器
    Informational PurposesAn informational icon, calling your attention
    注
    1 个连接器;断开前塞住冷却液软管,以免冷却液损坏连接器
  102. 从右侧轮罩区域处松开前备箱线束
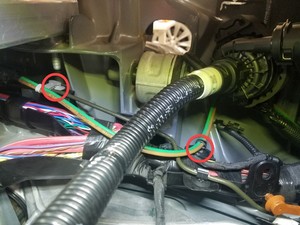
    Informational PurposesAn informational icon, calling your attention
    注
    1 个夹子
  103. 断开空气压缩机连接
    Informational PurposesAn informational icon, calling your attention
    注
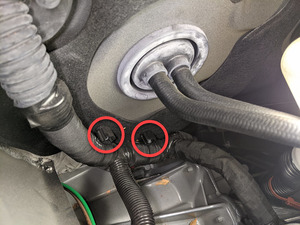
    2 个连接器
  104. 松开空气悬架阀组连接器
    Informational PurposesAn informational icon, calling your attention
    注
    1 个连接器
  105. 松开将电气线束固定至空气压缩机支架的夹子
    Informational PurposesAn informational icon, calling your attention
    注
    2 个夹子
  106. 断开右侧前加速器
    Informational PurposesAn informational icon, calling your attention
    注
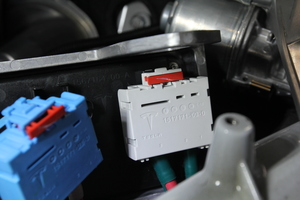
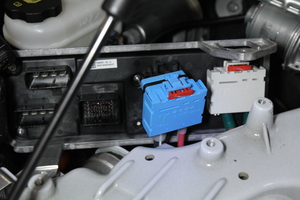
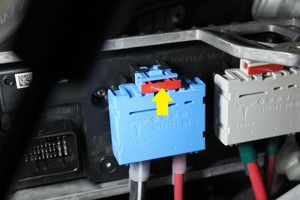
    1 个连接器;切勿向下按压红色锁片;拉动红色锁片以解锁;再次拉动松开连接器
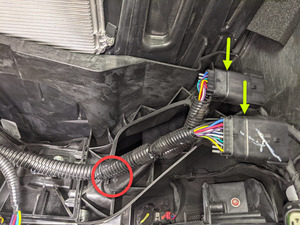
  107. 断开前饰板线束
    Informational PurposesAn informational icon, calling your attention
    注
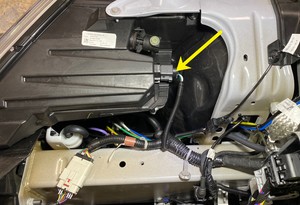
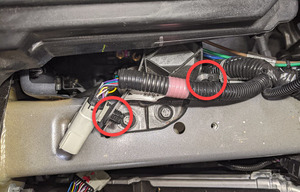
    2 个连接器;拉动红色锁片使锁脱离,然后将其断开;位于右侧轮拱内衬后方
  108. 从前端支架处松开前备箱线束
    Informational PurposesAn informational icon, calling your attention
    注
    3 个夹子
  109. 完全升起车辆,然后将举升机降低至锁止位
    Informational PurposesAn informational icon, calling your attention
    注
    将车辆设置到适宜的作业高度;务必在听到两侧的锁发出清晰的锁止声后再降下,否则车辆可能会发生侧倾
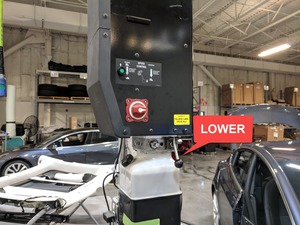
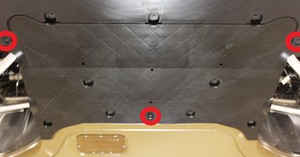
  110. 拆下将前流线型护板固定到裙板和高压电池上的卡子
    Informational PurposesAn informational icon, calling your attention
    注
    3 个推拉式卡子
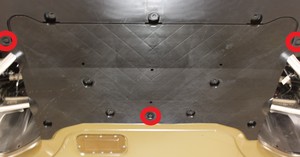
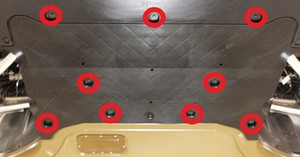
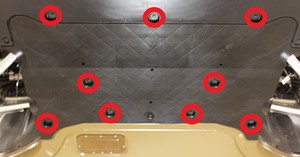
  111. 拆下用于固定前流线型护板的螺栓,并将前流线型护板从车辆上拆下
    Informational PurposesAn informational icon, calling your attention
    注
    9 个螺栓,10 毫米,6 Nm
  112. 断开电动助力转向 CAN 连接器
    Informational PurposesAn informational icon, calling your attention
    注
    2 个连接器;切勿向下按红色锁片;拉动红色锁片使锁脱离;再次拉动松开连接器
  113. 松开副车架上的前备箱线束
    Informational PurposesAn informational icon, calling your attention
    注
    3 个卡子;从副车架上将线束抽出
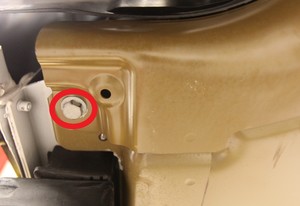
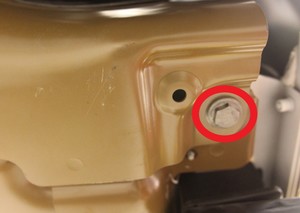
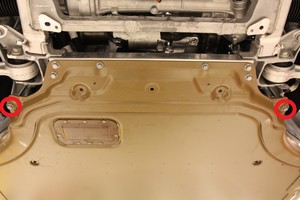
  114. 拆下将前车底护板固定到车身门槛的螺栓
    Informational PurposesAn informational icon, calling your attention
    注
    2 个螺栓,15 毫米,30 Nm
  115. 拆下将前车底护板固定到车身铸件的螺栓
    Informational PurposesAn informational icon, calling your attention
    注
    2 个螺栓,15 毫米,60 Nm
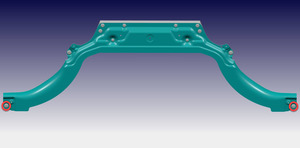
  116. 拆下将前车底护板固定到前副车架的螺栓,然后拆下车底护板
    Informational PurposesAn informational icon, calling your attention
    注
    4 个螺栓,15 毫米,70 Nm;2 个螺栓,10 毫米,10 Nm
  117. 断开高压电池的逻辑连接器
    Informational PurposesAn informational icon, calling your attention
    注
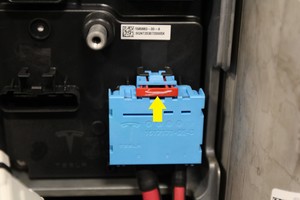
    1 个连接器;向外拉红色锁片,然后松开连接器
  118. 断开高压电池的电源连接器
    Informational PurposesAn informational icon, calling your attention
    注
    1 个连接器;向外拉红色锁片,然后松开连接器
  119. 从高压电池和车身上松开前备箱线束
    Informational PurposesAn informational icon, calling your attention
    注
    2 个夹子
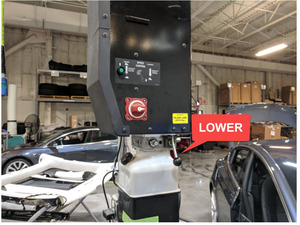
  120. 部分降低车辆,然后将举升机设定至锁止位
    Informational PurposesAn informational icon, calling your attention
    注
    将举升机升离锁止位,然后固定住释放杆,使锁具在车辆降下时保持活动自如;将车辆设置到适宜的作业高度
  121. 断开右前照灯连接器
    Informational PurposesAn informational icon, calling your attention
    注
    1 个连接器
  122. 从右侧断开前端模块线束
    Informational PurposesAn informational icon, calling your attention
    注
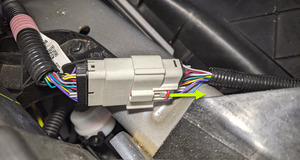
    1 个连接器;松开锁片
  123. 从前端支架和防撞轨的顶部右侧松开前备箱线束
    Informational PurposesAn informational icon, calling your attention
    注
    2 个夹子
  124. 从右侧防撞轨处松开前备箱线束
    Informational PurposesAn informational icon, calling your attention
    注
    2 个夹子
  125. 从前备箱线束上断开右侧前减震器线束
    Informational PurposesAn informational icon, calling your attention
    注
    1 个连接器
  126. 从右侧防撞轨处松开减震器线束
    Informational PurposesAn informational icon, calling your attention
    注
    1 个夹子
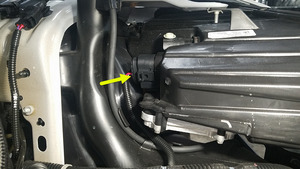
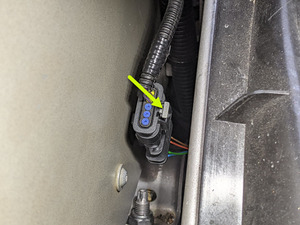
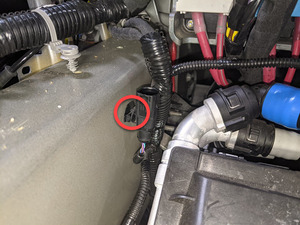
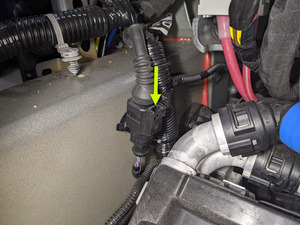
  127. 断开防撞轨上散热器右侧的黑色连接器
    Informational PurposesAn informational icon, calling your attention
    注
    1 个连接器;松开锁片
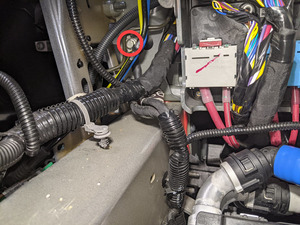
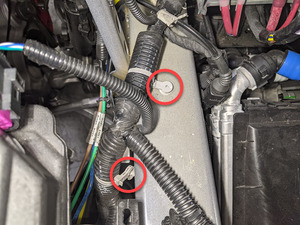
  128. 拆下将右侧接地固定到右侧防撞轨的螺栓
    Informational PurposesAn informational icon, calling your attention
    注
    1 个螺栓,10 毫米,8 Nm
  129. 从前备箱线束上断开右前轮毂转速感应器
    Informational PurposesAn informational icon, calling your attention
    注
    1 个连接器,1 个卡子
  130. 从右侧防撞轨的前备箱侧松开前备箱线束
    Informational PurposesAn informational icon, calling your attention
    注
    2 个夹子
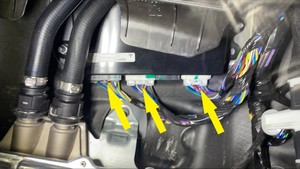
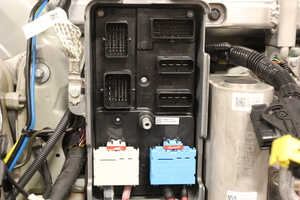
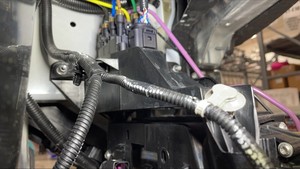
  131. 松开前控制器的上部连接
    Informational PurposesAn informational icon, calling your attention
    注
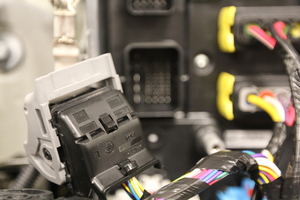
    2 个锁止连接器;推入锁片,抬起控制杆即可松开
  132. 松开前控制器的左侧中间连接
    Informational PurposesAn informational icon, calling your attention
    注
    1 个锁止连接器;推入锁片,抬起控制杆即可松开
  133. 松开前控制器的右侧中间连接
    Informational PurposesAn informational icon, calling your attention
    注
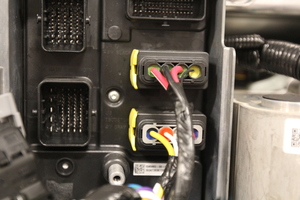
    2 个锁止连接器;向外滑动锁止机构即可松开
  134. 松开前控制器的下部连接
    Informational PurposesAn informational icon, calling your attention
    注
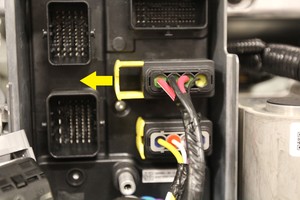
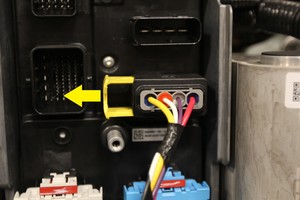
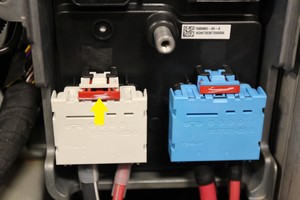
    2 个锁止连接器;向外滑动红色锁片即可松开
  135. 拆下固定前控制器接地线的螺栓
    Informational PurposesAn informational icon, calling your attention
    注
    1 个螺栓,10 毫米,10 Nm
  136. 拆下用于固定前控制器的螺栓
    Informational PurposesAn informational icon, calling your attention
    注
    3 个螺栓,10 毫米,10 Nm
  137. 将前控制器从车辆上拆下,并将接地线从支柱塔梁上松开
    Informational PurposesAn informational icon, calling your attention
    注
    2 个定位锁片,1 条接地线
  138. 松开三通阀连接
    Informational PurposesAn informational icon, calling your attention
    注
    1 个锁止连接器;松开红色锁片并向外滑动以断开连接
  139. 拆下将空气悬架后管束固定到前备箱线束右侧的卡子
    Informational PurposesAn informational icon, calling your attention
    注
    2 个卡子
  140. 从卡子上松开右侧前制动管
    Informational PurposesAn informational icon, calling your attention
    注
    5 个卡子;请勿弯折管子
  141. 松开电池冷却液温度传感器连接器
    Informational PurposesAn informational icon, calling your attention
    注
    1 个锁止连接器;松开红色锁片并向外滑动以断开连接
  142. 拆下将电池供给软管固定到前备箱线束右侧的卡子
    Informational PurposesAn informational icon, calling your attention
    注
    1 个卡子
  143. 从电池冷却液泵上松开电池供给软管
    Informational PurposesAn informational icon, calling your attention
    注
    1 个软管夹,2 个塞子;堵住软管两端
  144. 松开电池冷却液泵连接
    Informational PurposesAn informational icon, calling your attention
    注
    1 个连接器;松开红色锁片并向外滑动以断开连接
  145. 从车身右侧前侧松开前备箱线束
    Informational PurposesAn informational icon, calling your attention
    注
    3 个夹子
  146. 从隔板右侧松开前备箱线束
    Informational PurposesAn informational icon, calling your attention
    注
    2 个夹子
  147. 从隔板右侧松开索环
    Informational PurposesAn informational icon, calling your attention
    注
    1 个索环
  148. 小心地移动前备箱线束分支,使其穿过隔板右侧
    Informational PurposesAn informational icon, calling your attention
    注
    将其移至一侧,以便腾出空间
  149. 从横梁下方松开布设于高压电池处的分支
    Informational PurposesAn informational icon, calling your attention
    注
    1 个卡子;沿软管向下到右侧车身横梁;将卡子撬具置于卡子和横梁之间;从横梁底部取出卡子;可能需要用锤子轻轻敲击工具手柄,小心不要损坏冷却液软管
  150. 从前驱动单元线束上松开前备箱线束
    Informational PurposesAn informational icon, calling your attention
    注
    1 个锁止连接器;松开锁片
  151. 松开将前备箱线束固定到前驱动单元低压线束支架的夹子
    Informational PurposesAn informational icon, calling your attention
    注
    1 个夹子
  152. 从前驱动单元总成上松开前备箱线束
    Informational PurposesAn informational icon, calling your attention
    注
    1 个夹子
  153. 断开左前照灯
    Informational PurposesAn informational icon, calling your attention
    注
    1 个连接器
  154. 从左侧前端模块线束连接上断开前备箱线束
    Informational PurposesAn informational icon, calling your attention
    注
    1 个连接器;松开红色锁片
  155. 从前端支架顶部左侧松开前备箱线束
    Informational PurposesAn informational icon, calling your attention
    注
    2 个夹子
  156. 从左侧防撞轨处断开前备箱线束
    Informational PurposesAn informational icon, calling your attention
    注
    1 个连接器;松开锁片
  157. 松开左侧前减震器线束连接
    Informational PurposesAn informational icon, calling your attention
    注
    1 个连接器
  158. 从前备箱线束上断开左前轮毂转速传感器
    Informational PurposesAn informational icon, calling your attention
    注
    1 个连接器,3 个卡子
  159. 从左侧防撞轨处拆下前备箱线束接地
    Informational PurposesAn informational icon, calling your attention
    注
    1 个螺栓,10 毫米,8 Nm
  160. 从左侧防撞轨处松开前备箱线束
    Informational PurposesAn informational icon, calling your attention
    注
    4 个夹子
  161. 松开电池控制器接地线
    Informational PurposesAn informational icon, calling your attention
    注
    1 个螺栓,10 毫米,9 Nm
  162. 从电池控制器上松开线束夹
    Informational PurposesAn informational icon, calling your attention
    注
    1 个树形头卡子
  163. 拆下用于固定电池控制器和倾斜控制器的紧固件,以便操作
    Informational PurposesAn informational icon, calling your attention
    注
    1 个螺栓,10 毫米,10 Nm,1 个螺母,10 毫米,10 Nm
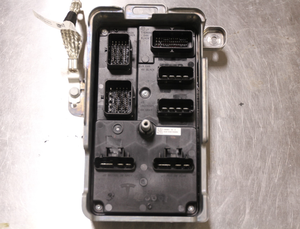
  164. 从电池控制器上松开顶部 J4 连接器
    Informational PurposesAn informational icon, calling your attention
    注
    1 个锁止连接器;向外滑动锁定机构即可松开
  165. 从电池控制器上松开中部 J5 连接器
    Informational PurposesAn informational icon, calling your attention
    注
    1 个锁止连接器;推入锁片,抬起控制杆即可松开
  166. 从电池控制器上松开侧边 J3 连接器
    Informational PurposesAn informational icon, calling your attention
    注
    1 个锁止连接器;向外滑动锁定机构即可松开
  167. 从电池控制器上松开中部 J2 连接器
    Informational PurposesAn informational icon, calling your attention
    注
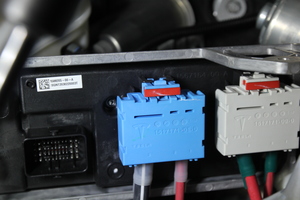
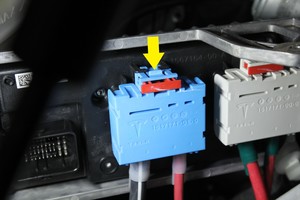
    1 个锁止连接器;将红色锁片向外滑动并松开
  168. 从电池控制器上松开侧边 J1 连接器
    Informational PurposesAn informational icon, calling your attention
    注
    1 个锁止连接器;将红色锁片向外滑动并松开
  169. 从电池控制器上松开线束夹
    Informational PurposesAn informational icon, calling your attention
    注
    1 个夹子
  170. 从车辆上拆下电池控制器
  171. 从支柱塔梁上松开低压线束
    Informational PurposesAn informational icon, calling your attention
    注
    1 个螺栓,10 毫米,8 Nm,2 个卡子
  172. 断开制动液液位传感器
    Informational PurposesAn informational icon, calling your attention
    注
    1 个连接器
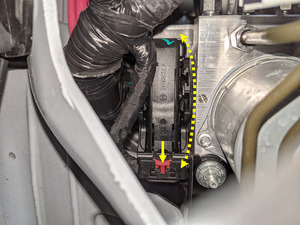
  173. 断开制动助力器电子控制单元 (ECU) 连接器
    Informational PurposesAn informational icon, calling your attention
    注
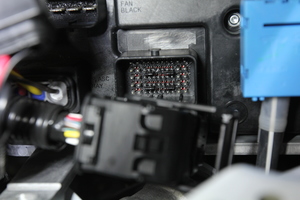
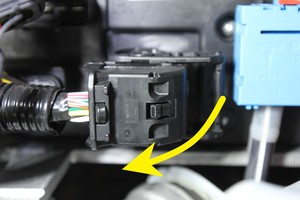
    1 个连接器;松开红色锁片,然后下压黑色锁片,旋转控制杆将其断开
  174. 断开液压控制单元
    Informational PurposesAn informational icon, calling your attention
    注
    1 个连接器;松开红色锁片,向上旋转控制杆以拆下
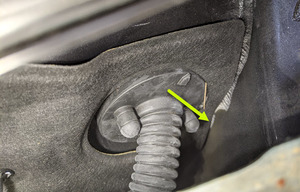
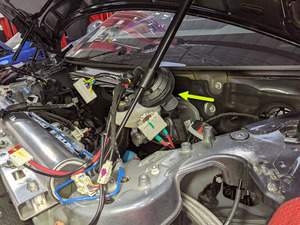
  175. 从隔板左侧松开索环
    Informational PurposesAn informational icon, calling your attention
    注
    1 个索环
  176. 小心地移动前备箱线束分支,使其穿过隔板左侧
    Informational PurposesAn informational icon, calling your attention
    注
    将其移至一侧,以便腾出空间
  177. 从隔板处松开前备箱线束导件
    Informational PurposesAn informational icon, calling your attention
    注
    2 个夹子
  178. 从车身上松开空调压缩机高压线束夹子
    Informational PurposesAn informational icon, calling your attention
    注
    1 个夹子
  179. 断开空调压缩机逻辑连接器
    Informational PurposesAn informational icon, calling your attention
    注
    1 个锁止电气连接器;切勿向下按压红色锁片,拉动以使锁脱离,再次拉动松开连接器
  180. 拆下将空调压缩机逻辑线束固定到空调压缩机高压线束支架的卡子
    Informational PurposesAn informational icon, calling your attention
    注
    1 个树形头卡子
  181. 拆下空调压缩机接地带
    Informational PurposesAn informational icon, calling your attention
    注
    1 个螺栓,T25,7 Nm
  182. 松开将冷却液软管固定到空调压缩机支架的卡子
    Informational PurposesAn informational icon, calling your attention
    注
    1 个树形头卡子
  183. 松开动力总成冷却液泵连接
    Informational PurposesAn informational icon, calling your attention
    注
    1 个连接器;松开红色锁片并向外滑动以断开连接
  184. 从空调压缩机支架上拆下动力总成冷却液泵
    Informational PurposesAn informational icon, calling your attention
    注
    将泵总成从压缩机上滑下,使其脱离下部支架
  185. 将压缩机支架从支柱塔梁上松开
    Informational PurposesAn informational icon, calling your attention
    注
    2 个螺栓,15 毫米,31 Nm;建议寻求他人协助;拆卸紧固件的同时支撑空调压缩机;小心地将空调压缩机和空调压缩机支架向车辆前部和支柱塔梁下移开;在冷却液软管和超级歧管线束周围务必小心操作;将翼子板盖板放在风扇外壳上,轻轻地将空调压缩机总成放下
  186. 从车身螺柱上拆下前驱动单元接地带
    Informational PurposesAn informational icon, calling your attention
    注
    1 个螺栓,12 毫米,15 Nm;拆下接地带总成
  187. 从左侧防撞轨处松开前备箱线束导件
    Informational PurposesAn informational icon, calling your attention
    注
    2 个夹子
  188. 使用弹力绳支撑超级歧管
    Informational PurposesAn informational icon, calling your attention
    注
    这是后续拆卸前备箱线束所必需的步骤;务必小心操作,避免对周围部件造成损坏
  189. 拆下将超级歧管固定到支柱塔梁的螺栓
    Informational PurposesAn informational icon, calling your attention
    注
    2 个螺栓,15 毫米,31 Nm;建议寻求他人协助;从底部和储液罐处支撑
  190. 松开支柱塔梁
    Informational PurposesAn informational icon, calling your attention
    注
    4 个螺栓,15 毫米,60 Nm
  191. 在支柱塔梁的左右侧下方各放置一块折叠的毛巾
    Informational PurposesAn informational icon, calling your attention
    注
    将支柱塔梁抬起,以便清洁超级歧管顶部和横梁底部之间的储液罐加注口;如有需要,建议寻求他人协助
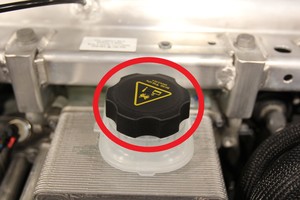
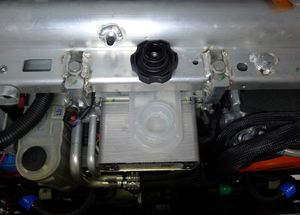
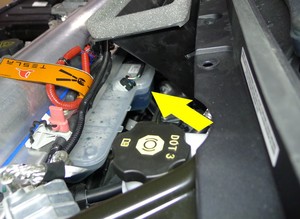
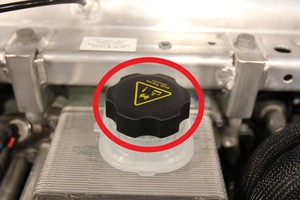
  192. 拆下冷却液罐罐盖
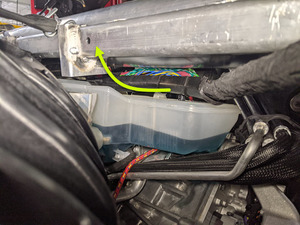
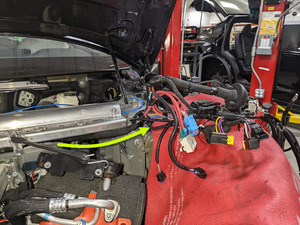
  193. 从车上拆下前备箱线束
    Informational PurposesAn informational icon, calling your attention
    注
    建议寻求他人协助;将线束从支柱塔梁和超级歧管之间送出;小心地移动线束,避免触碰周围部件;根据需要移动弹力绳的周围线束,以便腾出空间

安装

  1. 将前备箱线束安装到位
    Informational PurposesAn informational icon, calling your attention
    注
    将线束送入支柱塔梁和超级歧管之间;小心地移动线束,避免触碰周围部件;根据需要移动弹力绳的周围线束,以便腾出空间;将每个分支放置到位,以便安装
  2. 小心地移动前备箱线束分支,使其穿过隔板左侧
    Informational PurposesAn informational icon, calling your attention
    注
    1 个索环
  3. 将前备箱线束安装至隔板左侧
    Informational PurposesAn informational icon, calling your attention
    注
    1 个索环
  4. 小心地移动前备箱线束分支,使其穿过隔板右侧
    Informational PurposesAn informational icon, calling your attention
    注
    放置到位,以便安装
  5. 将前备箱线束索环固定至隔板右侧
    Informational PurposesAn informational icon, calling your attention
    注
    1 个索环
  6. 将前备箱线束引向高压电池,并在横梁下方固定夹子
    Informational PurposesAn informational icon, calling your attention
    注
    1 个夹子
  7. 将前备箱线束固定到防撞轨的右侧
    Informational PurposesAn informational icon, calling your attention
    注
    3 个夹子
  8. 将前备箱线束安装至左侧防撞轨处
    Informational PurposesAn informational icon, calling your attention
    注
    2 个夹子
  9. 取走支柱塔梁左右两侧下方的车间毛巾
  10. 紧固支柱塔梁
    Informational PurposesAn informational icon, calling your attention
    注
    4 个螺栓,15 毫米,60 Nm;放置横梁,用手预拧螺栓
  11. 安装将超级歧管固定到支柱塔梁上的螺栓
    Informational PurposesAn informational icon, calling your attention
    注
    2 个螺栓,15 毫米,31 Nm;建议寻求他人协助;从底部和储液罐处支撑;用手预拧超级歧管的螺栓
  12. 拆下支撑超级歧管总成的弹力绳
  13. 将前驱动单元接地带安装到车身螺栓上
    Informational PurposesAn informational icon, calling your attention
    注
    1 个螺栓,12 毫米,15 Nm;将接地带放置到位,以便安装
  14. 安装将空调压缩机支架固定到支柱塔梁上的螺栓
    Informational PurposesAn informational icon, calling your attention
    注
    2 个螺栓,15 毫米,31 Nm;建议寻求他人协助;小心支撑并固定空调压缩机总成;避免对其他部件造成损伤;拆下弹力绳
  15. 将空调压缩机高压线束夹固定至车身
    Informational PurposesAn informational icon, calling your attention
    注
    1 个夹子
  16. 安装空调压缩机接地带
    Informational PurposesAn informational icon, calling your attention
    注
    1 个螺栓,T25,7 Nm
  17. 将动力总成冷却液泵固定到空调压缩机支架上
    Informational PurposesAn informational icon, calling your attention
    注
    将泵总成滑到压缩机下部支架上
  18. 安装将冷却液软管固定到空调压缩机支架的卡子
    Informational PurposesAn informational icon, calling your attention
    注
    1 个树形头卡子
  19. 固定动力总成冷却液泵的连接
    Informational PurposesAn informational icon, calling your attention
    注
    1 个连接器;固定连接器并完全接合红色锁片
  20. 将前备箱线束安装至左侧防撞轨处
    Informational PurposesAn informational icon, calling your attention
    注
    4 个夹子
  21. 将前备箱线束接地安装到左侧防撞轨上
    Informational PurposesAn informational icon, calling your attention
    注
    1 个螺栓,10 毫米,8 Nm
  22. 将左前轮毂速度传感器连接到前备箱线束
    Informational PurposesAn informational icon, calling your attention
    注
    1 个连接器,3 个卡子
  23. 固定左前减震器线束连接
    Informational PurposesAn informational icon, calling your attention
    注
    1 个连接器
  24. 将前备箱线束连接到左侧防撞轨上
    Informational PurposesAn informational icon, calling your attention
    注
    1 个连接器;接合锁片
  25. 将前备箱线束固定在前端支架的左侧顶部
    Informational PurposesAn informational icon, calling your attention
    注
    2 个夹子
  26. 将前备箱线束连接到左侧前端模块线束连接上
    Informational PurposesAn informational icon, calling your attention
    注
    1 个连接器;固定红色锁片
  27. 连接左侧大灯连接器
    Informational PurposesAn informational icon, calling your attention
    注
    1 个连接器
  28. 连接液压控制单元
    Informational PurposesAn informational icon, calling your attention
    注
    1 个连接器;固定连接器并向下旋转控制杆,然后紧固锁片
  29. 连接制动助力器电子控制单元 (ECU) 连接器
    Informational PurposesAn informational icon, calling your attention
    注
    1 个连接器;对准连接器并旋转控制杆至完全固定;紧固红色锁片
  30. 将低压线束安装到支柱塔梁上
    Informational PurposesAn informational icon, calling your attention
    注
    1 个螺栓,10 毫米,8 Nm,2 个卡子
  31. 将电池控制器置于车辆中
  32. 将线束夹紧固到电池控制器上
    Informational PurposesAn informational icon, calling your attention
    注
    1 个夹子
  33. 将侧边 J1 连接器紧固到电池控制器上
    Informational PurposesAn informational icon, calling your attention
    注
    1 个锁止连接器;接合红色锁片
  34. 将中部 J2 连接器紧固到电池控制器上
    Informational PurposesAn informational icon, calling your attention
    注
    1 个锁止连接器;接合红色锁片
  35. 将侧边 J3 连接器紧固到电池控制器上
    Informational PurposesAn informational icon, calling your attention
    注
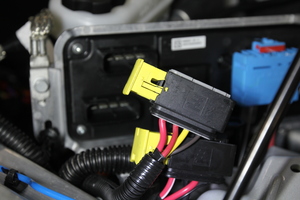
    1 个锁止连接器;确认黄色锁片已完全打开;紧固连接器,锁定机构将开始接合
  36. 将中部 J5 连接器紧固到电池控制器上
    Informational PurposesAn informational icon, calling your attention
    注
    1 个锁止连接器;确认控制杆已完全打开;固定连接器,控制杆将开始接合
  37. 将顶部 J4 连接器紧固到电池控制器上
    Informational PurposesAn informational icon, calling your attention
    注
    1 个锁止连接器;确认黄色锁片已完全打开;紧固连接器,锁定机构将开始接合
  38. 将线束夹紧固到电池控制器上
    Informational PurposesAn informational icon, calling your attention
    注
    1 个夹子
  39. 紧固电池控制器接地线
    Informational PurposesAn informational icon, calling your attention
    注
    1 个螺栓,10 毫米或五角 E10,9 Nm
  40. 将电池控制器向前放置并安装紧固件
    Informational PurposesAn informational icon, calling your attention
    注
    1 个螺栓,10 毫米,10 Nm,1 个螺母,10 毫米,10 Nm
  41. 将前备箱线束固定到前驱动单元上
    Informational PurposesAn informational icon, calling your attention
    注
    1 个夹子
  42. 安装将前备箱线束固定到前驱动单元低压线束支架的夹子
    Informational PurposesAn informational icon, calling your attention
    注
    1 个夹子
  43. 将前备箱线束固定到前驱动单元线束上
    Informational PurposesAn informational icon, calling your attention
    注
    1 个连接器;接合红色锁片
  44. 将前备箱线束导件安装到隔板上
    Informational PurposesAn informational icon, calling your attention
    注
    3 个夹子
  45. 将右侧前制动管固定到卡子上
    Informational PurposesAn informational icon, calling your attention
    注
    5 个卡子;请勿弯折管子
  46. 将前备箱线束固定至隔板右侧
    Informational PurposesAn informational icon, calling your attention
    注
    2 个夹子
  47. 安装将空气悬架后管束固定到前备箱线束右侧的夹子
    Informational PurposesAn informational icon, calling your attention
    注
    2 个夹子
  48. 将车载电脑供液软管固定至隔板
    Informational PurposesAn informational icon, calling your attention
    注
    将软管移动到 HVAC 总成和隔板之间;确保索环完全置于隔板内
  49. 固定电池冷却液泵连接器
    Informational PurposesAn informational icon, calling your attention
    注
    1 个连接器;固定连接器并完全接合红色锁片
  50. 将电池冷却液泵紧固到支架上
    Informational PurposesAn informational icon, calling your attention
    注
    1 个卡子;将冷却液泵滑到支架上,并将下部冷却液软管固定到支架上
  51. 安装将电池供给软管固定至前备箱线束的卡子
    Informational PurposesAn informational icon, calling your attention
    注
    1 个卡子
  52. 固定电池冷却液温度传感器连接器
    Informational PurposesAn informational icon, calling your attention
    注
    1 个锁止连接器;固定连接器并完全接合红色锁片
  53. 固定三通阀连接
    Informational PurposesAn informational icon, calling your attention
    注
    1 个锁止连接器;固定连接器并完全接合红色锁片
  54. 放置前控制器以便安装,然后放置好接地线
    Informational PurposesAn informational icon, calling your attention
    注
    2 个定位锁片,1 条接地线
  55. 安装用于固定前控制器的螺栓
    Informational PurposesAn informational icon, calling your attention
    注
    3 个螺栓,10 毫米,10 Nm。从侧边螺栓开始
  56. 安装用于固定前控制器接地线的螺栓
    Informational PurposesAn informational icon, calling your attention
    注
    1 个螺栓,10 毫米,10 Nm
  57. 固定前控制器的下部连接
    Informational PurposesAn informational icon, calling your attention
    注
    2 个锁止连接器;接合红色锁片
  58. 固定前控制器的右侧中间连接
    Informational PurposesAn informational icon, calling your attention
    注
    2 个锁止连接器;确认黄色锁片已完全打开;固定连接器,锁止机构将开始接合
  59. 固定前控制器的左侧中间连接
    Informational PurposesAn informational icon, calling your attention
    注
    1 个锁止连接器;确认控制杆已完全打开;固定连接器,控制杆将开始接合
  60. 固定前控制器的上部连接
    Informational PurposesAn informational icon, calling your attention
    注
    2 个锁止连接器;确认控制杆已完全打开;固定连接器,控制杆将开始接合
  61. 将前备箱线束安装至右侧防撞轨
    Informational PurposesAn informational icon, calling your attention
    注
    2 个夹子
  62. 将右前轮毂转速传感器连接到前备箱线束
    Informational PurposesAn informational icon, calling your attention
    注
    1 个连接器,3 个卡子
  63. 安装将右侧接地固定到右侧防撞轨的螺栓
    Informational PurposesAn informational icon, calling your attention
    注
    1 个螺栓,10 毫米,8 Nm
  64. 连接防撞轨上散热器右侧的黑色连接器
    Informational PurposesAn informational icon, calling your attention
    注
    1 个连接器;接合锁片
  65. 将减震器线束连接器固定至右侧防撞轨
    Informational PurposesAn informational icon, calling your attention
    注
    1 个卡子
  66. 连接右侧前减震器线束
    Informational PurposesAn informational icon, calling your attention
    注
    1 个连接器
  67. 将前备箱线束固定至右侧防撞轨
    Informational PurposesAn informational icon, calling your attention
    注
    2 个夹子
  68. 将前备箱线束固定至前端支架和防撞轨的顶部右侧
    Informational PurposesAn informational icon, calling your attention
    注
    2 个夹子
  69. 将前备箱线束连接到右侧前端模块线束连接
    Informational PurposesAn informational icon, calling your attention
    注
    1 个连接器;接合红色锁片
  70. 连接右侧大灯连接器
    Informational PurposesAn informational icon, calling your attention
    注
    1 个连接器
  71. 完全升起车辆,然后将举升机降低至锁止位
    Informational PurposesAn informational icon, calling your attention
    注
    将车辆设置到适宜的作业高度;务必在听到两侧的锁发出清晰的锁止声后再降下,否则车辆可能会发生侧倾
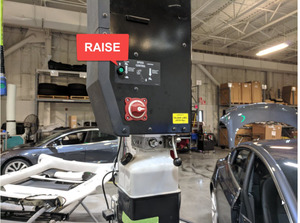
  72. 将前备箱线束固定至高压电池和车身上
    Informational PurposesAn informational icon, calling your attention
    注
    2 个夹子
  73. 将电源连接器固定到高压电池
    Informational PurposesAn informational icon, calling your attention
    注
    1 个连接器;接合红色锁片
  74. 将逻辑连接器固定到高压电池
    Informational PurposesAn informational icon, calling your attention
    注
    1 个连接器;接合红色锁片
  75. 将前滑板放置到位,以便安装,并拧入所有螺栓
    Informational PurposesAn informational icon, calling your attention
    注
    4 个螺栓,15 毫米,70 Nm;2 个螺栓,15 毫米,60 Nm;2 个螺栓,15 毫米,30 Nm;2 个螺栓,10 毫米,10 Nm;在后续步骤中紧固
  76. 紧固将前车底护板固定到车身铸件的螺栓
    Informational PurposesAn informational icon, calling your attention
    注
    2 个螺栓,15 毫米,60 Nm
  77. 紧固将前车底护板固定到车身门槛的螺栓
    Informational PurposesAn informational icon, calling your attention
    注
    2 个螺栓,15 毫米,30 Nm
  78. 将前备箱线束固定至副车架上
    Informational PurposesAn informational icon, calling your attention
    注
    3 个夹子
  79. 连接 EPAS CAN 连接器
    Informational PurposesAn informational icon, calling your attention
    注
    2 个连接器;接合锁片
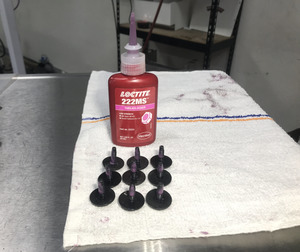
  80. 向前流线型护板螺栓上涂抹 Loctite 222,然后安装将前流线型护板固定到车辆的紧固件
    Informational PurposesAn informational icon, calling your attention
    注
    9 个螺栓,10 毫米,6 Nm
  81. 安装将前流线型护板固定到裙板和高压电池上的卡子
    Informational PurposesAn informational icon, calling your attention
    注
    3 个推拉式卡子
  82. 部分降低车辆,然后将举升机设定至锁止位
    Informational PurposesAn informational icon, calling your attention
    注
    将举升机升离锁止位,然后固定住释放杆,使锁具在车辆降下时保持活动自如;将车辆设置到适宜的作业高度
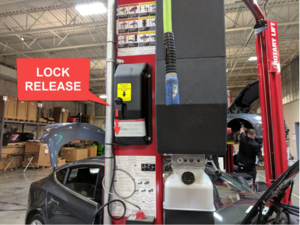
  83. 将前备箱线束固定到前端支架上
    Informational PurposesAn informational icon, calling your attention
    注
    3 个夹子
  84. 连接前饰板线束
    Informational PurposesAn informational icon, calling your attention
    注
    2 个连接器;接合锁片;位于右轮拱内衬后
  85. 连接右侧前加速器
    Informational PurposesAn informational icon, calling your attention
    注
    1 个连接器;接合锁片
  86. 安装将电气线束固定到空气压缩机支架的卡子
    Informational PurposesAn informational icon, calling your attention
    注
    2 个夹子
  87. 固定空气悬架阀组连接器
    Informational PurposesAn informational icon, calling your attention
    注
    1 个连接器
  88. 固定空气压缩机连接器
    Informational PurposesAn informational icon, calling your attention
    注
    2 个连接器
  89. 将前备箱线束固定至右侧轮罩区域
    Informational PurposesAn informational icon, calling your attention
    注
    1 个夹子
  90. 安装右侧冷却风扇模块连接器
    Informational PurposesAn informational icon, calling your attention
    注
    1 个连接器
  91. 连接接地连接器 (G500)
    Informational PurposesAn informational icon, calling your attention
    注
    1 个连接器;固定红色锁片
  92. 连接右前行驶高度传感器
    Informational PurposesAn informational icon, calling your attention
    注
    1 个连接器
  93. 将右侧转向灯线束固定到车身
    Informational PurposesAn informational icon, calling your attention
    注
    1 个夹子
  94. 连接右侧前转向灯
    Informational PurposesAn informational icon, calling your attention
    注
    2 个连接器;从外部支撑转向灯,防止固定卡子损坏
  95. 将右侧前震动支架固定至车身
    Informational PurposesAn informational icon, calling your attention
    注
    1 个螺栓,10 毫米,8 Nm
  96. 安装右前轮毂内衬
    Informational PurposesAn informational icon, calling your attention
    注
    13 个卡子
  97. 将前备箱线束连接到清洗器系统
    Informational PurposesAn informational icon, calling your attention
    注
    2 个连接器,3 个树形头卡子
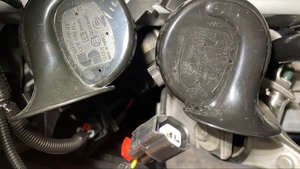
  98. 固定低音喇叭连接
    Informational PurposesAn informational icon, calling your attention
    注
    1 个锁止连接器;确认完全就位并接合红色锁片
  99. 固定高音喇叭连接
    Informational PurposesAn informational icon, calling your attention
    注
    1 个锁止连接器;确认完全就位并接合红色锁片
  100. 安装左侧冷却风扇模块连接器
    Informational PurposesAn informational icon, calling your attention
    注
    1 个连接器
  101. 连接左前加速传感器
    Informational PurposesAn informational icon, calling your attention
    注
    1 个连接器;接合红色锁片
  102. 连接接地连接器 (G500)
    Informational PurposesAn informational icon, calling your attention
    注
    1 个连接器;固定红色锁片
  103. 连接左前行驶高度传感器
    Informational PurposesAn informational icon, calling your attention
    注
    1 个连接器
  104. 将左侧转向灯线束固定到车身
    Informational PurposesAn informational icon, calling your attention
    注
    1 个夹子
  105. 连接左侧前转向灯
    Informational PurposesAn informational icon, calling your attention
    注
    2 个连接器;从外部支撑转向灯,防止固定卡子损坏
  106. 将左侧前震动软管支架固定至车身
    Informational PurposesAn informational icon, calling your attention
    注
    1 个螺栓,10 毫米,8 Nm
  107. 安装左前轮毂内衬
    Informational PurposesAn informational icon, calling your attention
    注
    13 个卡子
  108. 安装左前轮毂
    Informational PurposesAn informational icon, calling your attention
    注
    5 个螺母,21 毫米,175 Nm;先手动拧紧带耳螺母,然后再使用电动工具
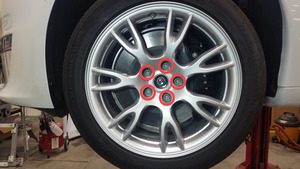
  109. 安装右前轮毂
    Informational PurposesAn informational icon, calling your attention
    注
    5 个螺母,21 毫米,175 Nm;先手动拧紧带耳螺母,然后再使用电动工具
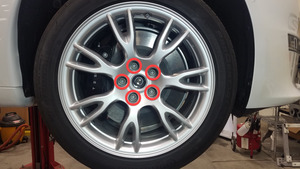
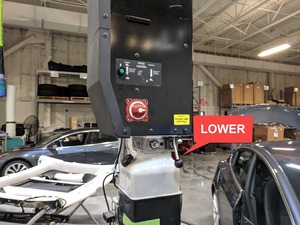
  110. 降下车辆,直至轮胎接触到地面
    Informational PurposesAn informational icon, calling your attention
    注
    将举升机升离锁止位,然后固定住释放杆,使锁具在降下车辆时保持活动自如
  111. 在将五通 HVAC 管路安装到 HVAC 总成上
    Informational PurposesAn informational icon, calling your attention
    注
    2 个螺栓,13 毫米,22 Nm
  112. 将空调软管重新连接到车辆
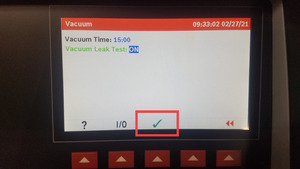
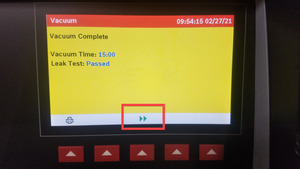
  113. 进行空调真空和泄漏测试
    Informational PurposesAn informational icon, calling your attention
    注
    将真空时间设定为 15 分钟,将泄漏测试设置为 "ON";机器将在流程完成后发出蜂鸣声;车辆可以无人看管;确认泄漏测试通过后再进行后续操作
  114. 安装高效分子空气 (HEPA) 过滤器外壳总成
    Informational PurposesAn informational icon, calling your attention
    注
    2 个螺母,10 毫米,7 Nm;将总成向下移动到横梁下方;将 V 型支架横梁托架旋转到安装位置
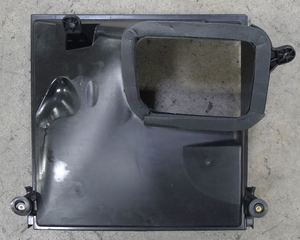
  115. 固定 V 型支架横梁
    Informational PurposesAn informational icon, calling your attention
    注
    2 个螺母,10 毫米,18 Nm
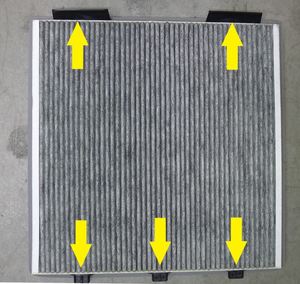
  116. 安装高效分子空气 (HEPA) 过滤器
    Informational PurposesAn informational icon, calling your attention
    注
    3 个固定销,2 个卡子;将 3 个固定销对准外壳的底部;确认气流方向;确保卡子锁定并将过滤器固定在外壳中
  117. 安装高效分子空气 (HEPA) 过滤器总成盖板
    Informational PurposesAn informational icon, calling your attention
    注
    2 个锁片,2 个固定销,2 个槽;将盖板向下移动到 V 型支架横梁下方;完全接合密封件和锁片
  118. 连接空气质量传感器线束
    Informational PurposesAn informational icon, calling your attention
    注
    1 个连接器
  119. 安装将低压电池固定到支柱塔梁的紧固件
    Informational PurposesAn informational icon, calling your attention
    注
    3 个螺栓,10 毫米,9 Nm,2 个固定销;移动到位并安装紧固件
  120. 安装将超级歧管至电池泵供给软管固定到低压电池上的卡子
    Informational PurposesAn informational icon, calling your attention
    注
    1 个卡子
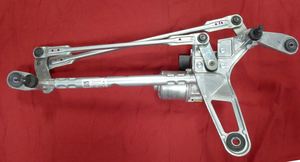
  121. 安装雨刮器模块
    Informational PurposesAn informational icon, calling your attention
    注
    3 个螺栓,10 毫米,8 Nm,1 个连接器;先固定电气连接器;将模块向后旋转到挡风玻璃下面;在安装过程中观察左侧雨刮器臂枢轴,避免损坏挡风玻璃
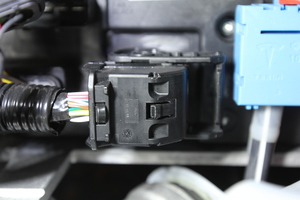
  122. 连接转向机总成连接器
    Informational PurposesAn informational icon, calling your attention
    注
    2 个连接器,两级连接器;连接时务必听到清晰的锁止声,确保锁片已接合
  123. 将冷却液软管固定到车载电脑冷却板总成上
    Informational PurposesAn informational icon, calling your attention
    注
    2 个弹簧锁;取下冷却液塞和吸收性材料;确保弹簧锁接合,并对每个软管接头进行拉推拉测试
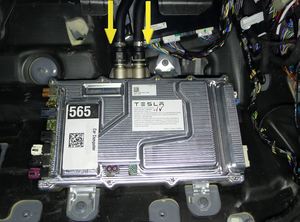
  124. 将电气连接器固定至 TASC 2.0 电子控制单元 (ECU)
    Informational PurposesAn informational icon, calling your attention
    注
    3 个连接器
  125. 连接 J9 X050 前备箱连接器
    Informational PurposesAn informational icon, calling your attention
    注
    1 个连接器
  126. 将线束连接器卡子固定到右侧控制器上
    Informational PurposesAn informational icon, calling your attention
    注
    2 个卡子
  127. 连接线束连接器
    Informational PurposesAn informational icon, calling your attention
    注
    2 个连接器;将连接器放置到位,锁好闩锁
  128. 连接 J14 X056 电源连接器
    Informational PurposesAn informational icon, calling your attention
    注
    1 个连接器;将连接器放置到位,然后将锁接合
  129. 安装将前备箱线束接地固定至右侧脚部空间区域附近的螺栓
    Informational PurposesAn informational icon, calling your attention
    注
    1 个螺栓,10 毫米,8 Nm
  130. 将前备箱线束固定至右侧脚部空间区域
    Informational PurposesAn informational icon, calling your attention
    注
    2 个夹子
  131. 安装 AP 主板右侧的连接器
    Informational PurposesAn informational icon, calling your attention
    注
    3 个连接器
  132. 将前备箱连接器连接到车载电脑右侧上
    Informational PurposesAn informational icon, calling your attention
    注
    5 个连接器
  133. 将棕色 Fakra 连接器连接到车载电脑上
    Informational PurposesAn informational icon, calling your attention
    注
    1 个连接器,X836
  134. 紧固右侧下部前围板高效分子空气 (HEPA) 过滤器总成螺栓
    Informational PurposesAn informational icon, calling your attention
    注
    1 个螺栓,10 毫米,7 Nm
  135. 安装右侧脚踏板板件
    Informational PurposesAn informational icon, calling your attention
    注
    2 个螺栓,10 毫米,5 Nm,1 个螺母,10 毫米,5 Nm
  136. 将线束固定到右侧脚踏板板件
    Informational PurposesAn informational icon, calling your attention
    注
    1 个夹子
  137. 将右侧主地毯折回原位
  138. 安装右侧中控台地毯
    Informational PurposesAn informational icon, calling your attention
    注
    11 个卡子
  139. 安装右前脚垫
  140. 安装右侧脚部空间盖板
    Informational PurposesAn informational icon, calling your attention
    注
    3 个磁铁,1 个连接器
  141. 安装右侧 A 柱下饰板
    Informational PurposesAn informational icon, calling your attention
    注
    7 个卡子;确认挡雨条已正确就位
  142. 安装右侧 A 柱中部饰板
    Informational PurposesAn informational icon, calling your attention
    注
    1 个卡子,2 个锁片;检查挡雨条是否正确安装
  143. 将右侧主地毯折回原位
  144. 将右侧膝部气囊总成安装到车辆上
    Informational PurposesAn informational icon, calling your attention
    注
    2 个连接器,6 个锁片,1 个卡子;完全就位前,勾上锁片;小心操作,以免损坏连接器/线束;连接连接器期间,需支撑膝部气囊
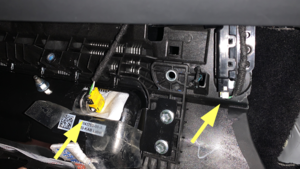
  145. 安装将右侧膝部气囊总成固定到车辆的紧固件
    Informational PurposesAn informational icon, calling your attention
    注
    2 个螺纹胶螺栓,E10,8 Nm;安装新的紧固件
  146. 连接 J9 X037 前备箱连接器
    Informational PurposesAn informational icon, calling your attention
    注
    1 个连接器
  147. 连接 J14 X036 电源连接器
    Informational PurposesAn informational icon, calling your attention
    注
    1 个连接器;将连接器放置到位,然后将锁接合
  148. 将前备箱线束接地安装至左侧脚部空间区域
    Informational PurposesAn informational icon, calling your attention
    注
    1 个螺栓,10 毫米,8 Nm
  149. 固定左侧高效分子空气 (HEPA) 过滤器总成下部前围板螺栓
    Informational PurposesAn informational icon, calling your attention
    注
    1 个螺栓,10 毫米,7 Nm
  150. 将左侧主地毯折回原位
  151. 安装左前脚垫
  152. 安装左侧脚部空间盖板
    Informational PurposesAn informational icon, calling your attention
    注
    1 个连接器,2 个磁铁
  153. 安装左侧 A 柱下部饰板
    Informational PurposesAn informational icon, calling your attention
    注
    7 个卡子;确认挡雨条已正确就位
  154. 安装中控台左侧地毯
    Informational PurposesAn informational icon, calling your attention
    注
    11 个卡子
  155. 安装左侧 A 柱中部饰板
    Informational PurposesAn informational icon, calling your attention
    注
    1 个卡子,2 个锁片;检查挡雨条是否正确安装
  156. 将左侧膝部气囊总成安装到车辆上
    Informational PurposesAn informational icon, calling your attention
    注
    1 个卡子,3 个连接器,6 个锁片;放置到位前勾上锁片;小心操作,以免损坏连接器/线束;连接连接器时,需支撑膝部气囊
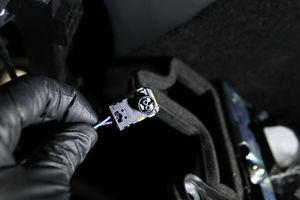
  157. 安装将左侧膝部气囊总成固定到车辆的紧固件
    Informational PurposesAn informational icon, calling your attention
    注
    2 个螺纹胶螺栓,E10,8 Nm;安装新的紧固件
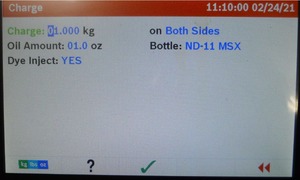
  158. 在空调机上选择 “refrigerant charge”
    Informational PurposesAn informational icon, calling your attention
    注
    选择 "refrigerant charge" 下的箭头,输入 1.02 千克(1020 克)的制冷剂加注量
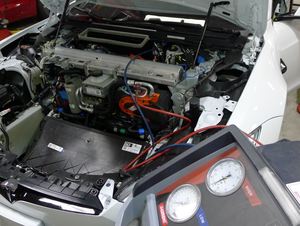
  159. 连接紧急响应回路和低压电池连接器
    Informational PurposesAn informational icon, calling your attention
    注
    2 个连接器;首先固定紧急响应回路;连接好低压电池,并将黑色连接器锁向内推动以固定;完全就位后接合绿色锁片
  160. 通过中央显示器,使雨刮器退出“维护模式”
  161. 安装并紧固用于固定左侧 V 型支架的紧固件
    Informational PurposesAn informational icon, calling your attention
    注
    3 个螺栓,10 毫米,18 Nm,1 个螺母,10 毫米,9 Nm
  162. 安装并紧固用于固定右侧 V 型支架的紧固件
    Informational PurposesAn informational icon, calling your attention
    注
    3 个螺栓,10 毫米,18 Nm,1 个螺母,10 毫米,9 Nm
  163. 安装雨刮器前围篦板面板
    Informational PurposesAn informational icon, calling your attention
    注
    4 个推拉式卡子,2 个端部锁片
  164. 安装雨刮器前围篦板面板
    Informational PurposesAn informational icon, calling your attention
    注
    4 个推拉式卡子,2 个端部锁片
  165. 安装右侧雨刮器臂总成并紧固螺母
    Informational PurposesAn informational icon, calling your attention
    注
    1 个螺母,15 毫米,26 Nm;将雨刮器与挡风玻璃上的参考标记对齐
  166. 安装右侧雨刮器臂螺母盖
  167. 固定右侧雨刮器臂清洗器喷嘴
    Informational PurposesAn informational icon, calling your attention
    注
    1 个软管;软管安装在雨刮器臂下
  168. 安装左侧雨刮器臂总成并紧固螺母
    Informational PurposesAn informational icon, calling your attention
    注
    1 个螺母,15 毫米,26 Nm;将雨刮器与挡风玻璃上的参考标记对齐
  169. 安装左侧雨刮器臂螺母盖
  170. 固定左侧雨刮器臂清洗器喷嘴
    Informational PurposesAn informational icon, calling your attention
    注
    1 个软管;软管安装在雨刮器臂下
  171. 通过左侧减震塔盖板固定清洗器软管喷嘴
    Informational PurposesAn informational icon, calling your attention
    注
    1 个软管,3 个卡子
  172. 安装左侧减震塔盖板
    Informational PurposesAn informational icon, calling your attention
    注
    3 个推拉式卡子,1 个树形头卡子
  173. 安装右侧减震塔盖板
    Informational PurposesAn informational icon, calling your attention
    注
    3 个推拉式卡子,1 个树形头卡子
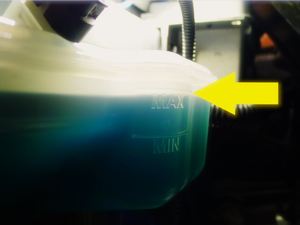
  174. 检查冷却液液位,必要时加满
    Informational PurposesAn informational icon, calling your attention
    注
    确保液位位于 Max 线处;按需求加满
  175. 将右前座椅移回原位
  176. 关闭右侧前车门
  177. 通过“维护模式”或 Toolbox 执行以下例行程序(请参阅 面板执行器0005 - 维修模式): PROC_VCFRONT_X_STOP-THERMAL-FILL-DRAINvia Toolbox: (link)via Service Mode:
    • Thermal ➜ Actions ➜ Stop Thermal Fill/Drain
    • Thermal ➜ Coolant System ➜ Stop Coolant Fill/Drain
    • Thermal ➜ Refrigerant System ➜ Stop Refrigerant Fill/Drain
    via Service Mode Plus:
    • Drive Inverter ➜ Front Drive Inverter Replacement ➜ Stop Fluid Fill/Drain
    • Drive Inverter ➜ Rear Drive Inverter Replacement ➜ Stop Fluid Fill/Drain
    • Drive Inverter ➜ Rear Left Drive Inverter Replacement ➜ Stop Fluid Fill/Drain
    • Drive Inverter ➜ Rear Right Drive Inverter Replacement ➜ Stop Fluid Fill/Drain
    • Drive Unit ➜ Front Drive Unit Replacement ➜ Stop Coolant Fill/Drain
    • Drive Unit ➜ Rear Drive Unit Replacement ➜ Stop Coolant Fill/Drain
    Informational PurposesAn informational icon, calling your attention
    注
    完成后,点击右上角的 "X" 关闭窗口
  178. 通过“维护模式”或 Toolbox 执行以下例行程序(请参阅 面板执行器0005 - 维修模式): TEST-SELF_VCFRONT_X_HEAT-PUMP-COMMISSIONINGvia Toolbox: (link)via Service Mode: Thermal ➜ Refrigerant System ➜ Run Heat Pump Commissioningvia Service Mode Plus: Drive Inverter ➜ Front Drive Inverter Replacement ➜ Heatpump commissioning
    Informational PurposesAn informational icon, calling your attention
    注
    如果进入 "Thermal Drain/Fill" 模式后,此例行程序未运行,空调压缩机运行将被阻止;完成后,点击右上角的 "X" 关闭窗口
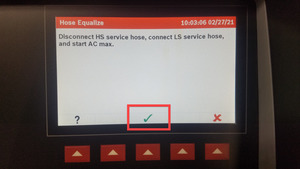
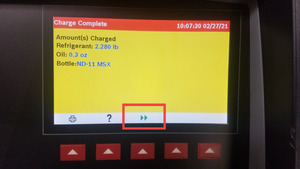
  179. 继续执行“软管平衡”步骤,完成空调重新加注,并按照空调机上显示的说明进行操作
    Informational PurposesAn informational icon, calling your attention
    注
    将上部耦合器与车辆断开;开启空调;温度设置为“低”;开启“面板”模式;开启“新风”模式;鼓风机转速设置为 10;验证“软管平衡”设置;验证排放压力不超过 26 巴,吸气压力不低于 1.15 巴,
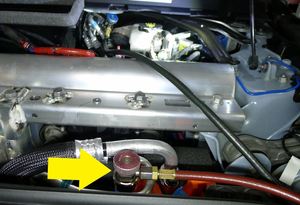
  180. 继续执行“软管平衡”步骤,完成空调重新加注,并按照空调机上显示的说明进行操作
    Informational PurposesAn informational icon, calling your attention
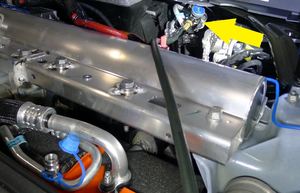
    注
    将下部耦合器从车辆上拆下;关闭车辆;验证“软管平衡”设置;该过程完成后机器会发出蜂鸣声
  181. 安装空调端口盖
    Informational PurposesAn informational icon, calling your attention
    注
    2 个盖子
  182. 通过“维护模式”或 Toolbox 执行以下例行程序(请参阅 面板执行器0005 - 维修模式): TEST_VCFRONT_X_THERMAL-COOLANT-AIR-PURGEvia Toolbox: (link)via Service Mode:
    • Thermal ➜ Actions ➜ Coolant Purge Stop or Coolant Purge Start
    • Thermal ➜ Coolant System ➜ Coolant Purge Start
    via Service Mode Plus:
    • Drive Inverter ➜ Front Drive Inverter Replacement ➜ Coolant Air Purge
    • Drive Inverter ➜ Rear Drive Inverter Replacement ➜ Coolant Air Purge
    • Drive Inverter ➜ Rear Left Drive Inverter Replacement ➜ Coolant Air Purge
    • Drive Inverter ➜ Rear Right Drive Inverter Replacement ➜ Coolant Air Purge
    • Drive Unit ➜ Front Drive Unit Replacement ➜ Coolant Air Purge
    • Drive Unit ➜ Rear Drive Unit Replacement ➜ Coolant Air Purge
  183. 通过“维护模式”或 Toolbox 执行以下例行程序(请参阅 面板执行器0005 - 维修模式): TEST-SELF_VCFRONT_X_THERMAL-PERFORMANCEvia Toolbox: (link)via Service Mode: Thermal ➜ Actions ➜ Test Thermal Performancevia Service Mode Plus:
    • Drive Inverter ➜ Front Drive Inverter Replacement ➜ Thermal System Test
    • Drive Inverter ➜ Rear Drive Inverter Replacement ➜ Thermal System Test
    • Drive Inverter ➜ Rear Left Drive Inverter Replacement ➜ Thermal System Test
    • Drive Inverter ➜ Rear Right Drive Inverter Replacement ➜ Thermal System Test
    • Drive Unit ➜ Front Drive Unit Replacement ➜ Thermal System Test
    • Drive Unit ➜ Rear Drive Unit Replacement ➜ Thermal System Test
    Informational PurposesAn informational icon, calling your attention
    注
    完成后,点击右上角的 "X" 关闭窗口
  184. 检查冷却液液位,必要时加满
    Informational PurposesAn informational icon, calling your attention
    注
    确保液位位于 Max 线处;按需求加满
  185. 安装冷却液罐罐盖
  186. 安装前备箱储物单元。请参阅。
  187. 紧固左前轮毂
    Informational PurposesAn informational icon, calling your attention
    注
    5 个螺母,21 毫米,175 Nm
  188. 紧固右前轮毂
    Informational PurposesAn informational icon, calling your attention
    注
    5 个螺母,21 毫米,175 Nm
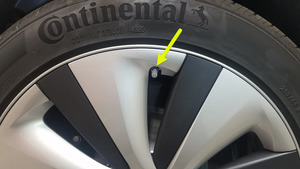
  189. 安装右前轮毂盖
    Informational PurposesAn informational icon, calling your attention
    注
    对齐气门嘴和轮毂盖
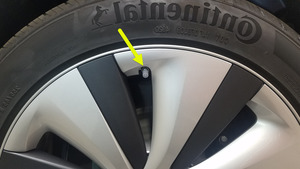
  190. 安装左前轮毂盖
    Informational PurposesAn informational icon, calling your attention
    注
    对齐气门嘴和轮毂盖
  191. 将车辆驶离举升机
    Informational PurposesAn informational icon, calling your attention
    注
    完全降下举升架臂并将其从车底移走;将空气悬架退出“千斤顶模式”
  192. 将左前座椅移回原位
  193. 升起左前和右前车窗
  194. 关闭左前车门