24/08/2023 18:44:22

天线 - 卫星广播(拆卸和更换)
校正代码 21311002 注意:除非本程序中另有明确规定,否则上述校正代码和 FRT 反映的是执行本程序(包括关联程序)所需的所有工作。除非明确要求,否则请勿堆叠校正代码。 注意:请参阅平均维修工时,深入了解 FRT 及其创建方式。要提供有关 FRT 值的反馈,请发送电子邮件至LaborTimeFeedback@tesla.com。 注意:执行下述程序时,请参阅人员保护确认已穿戴适当的个人防护装备 (PPE)。

Warning IconA warning icon, calling your attention to a possibly risky situation
警告
尽管此程序已经过验证,但仍是一个草案。可能没有警告和注意事项。请遵守安全要求,处理或靠近高压系统和部件时,请谨慎操作。请将校正修理内容及反馈发送至ServiceDevelopment@teslamotors.com。
Warning IconA warning icon, calling your attention to a possibly risky situation
警告
仅适用于欧洲:只有接受过二异氰酸酯操作培训并完成所有必修认证课程的技术人员才允许执行使用聚氨酯和含有二异氰酸酯的其他产品的程序。处理含有二异氰酸酯的产品时必须穿戴适当的个人防护装备 (PPE)。
  1. 打开 LH 前车门
  2. 降下左侧前车窗
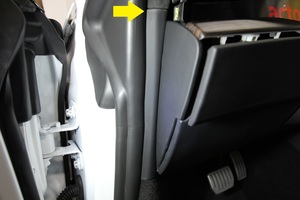
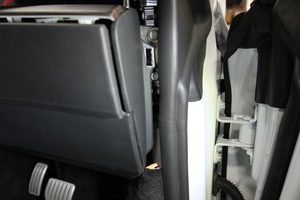
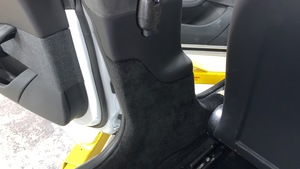
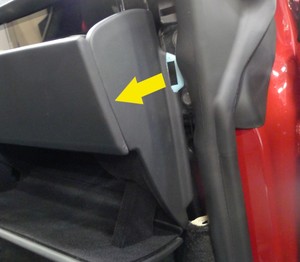
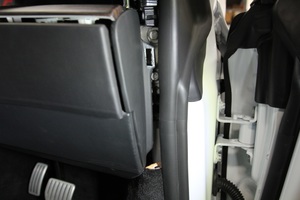
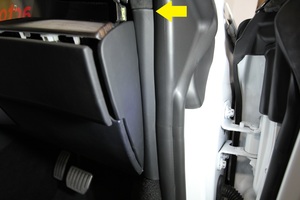
  3. 拆下左侧 A 柱中部饰板
    Informational PurposesAn informational icon, calling your attention
    注
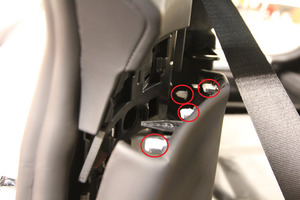
    1 个卡子,2 个锁片
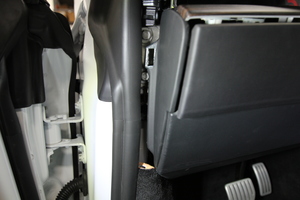
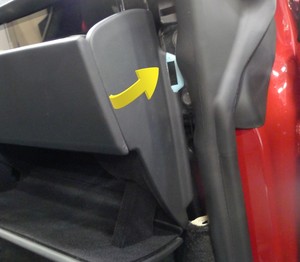
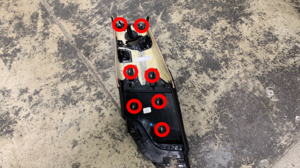
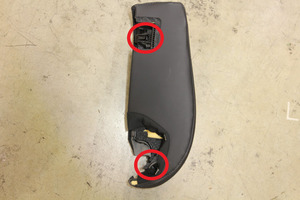
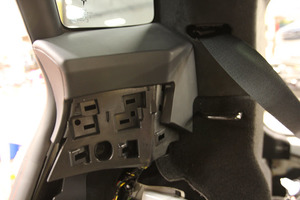
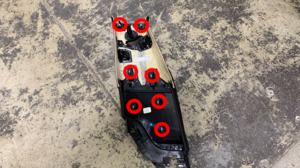
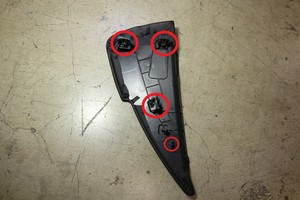
  4. 拆下左侧仪表板端盖
    Informational PurposesAn informational icon, calling your attention
    注
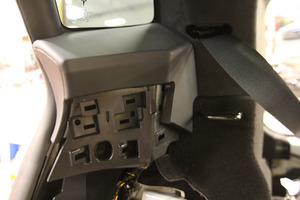
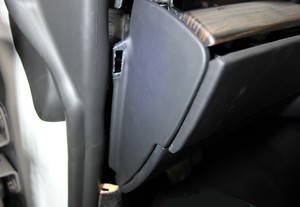
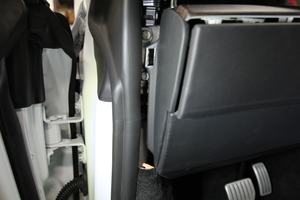
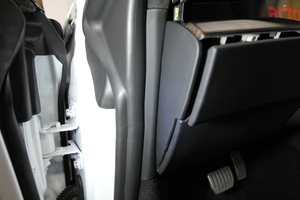
    4 个卡子
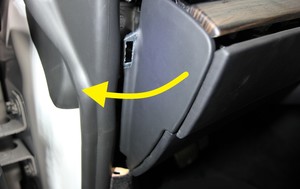
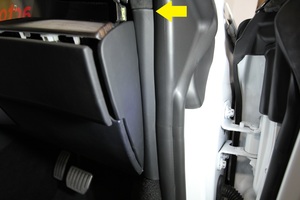
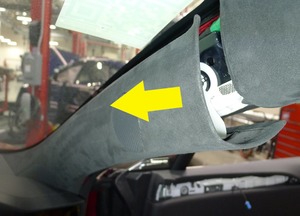
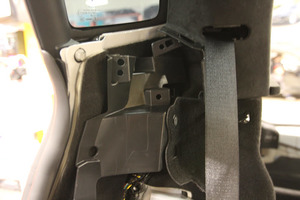
  5. 拆下左侧 A 柱上部饰板
    Informational PurposesAn informational icon, calling your attention
    注
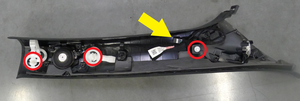
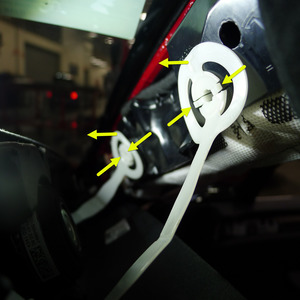
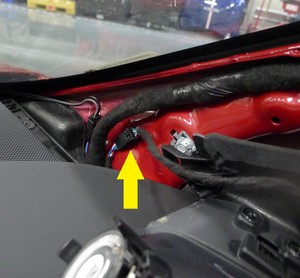
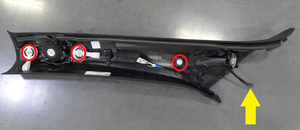
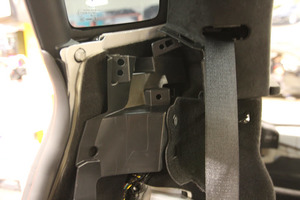
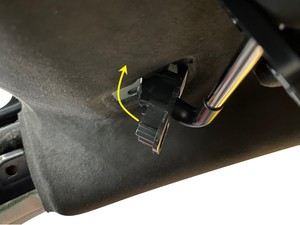
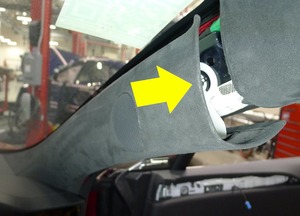
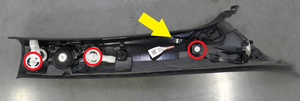
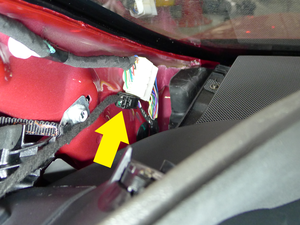
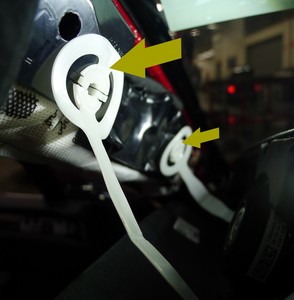
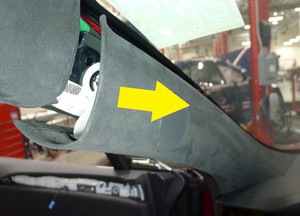
    2 个系带夹,1 个卡子,1 个连接器,拉动 A 柱上部内侧;按下 2 个锁片以便将系带从车身侧拆下,断开高频扬声器,然后向上拉动 A 柱上部将其拆下
  6. 拆下左侧遮阳板支架盖板
    Informational PurposesAn informational icon, calling your attention
    注
    4 个卡子;打开遮阳板可能会腾出更大的作业空间
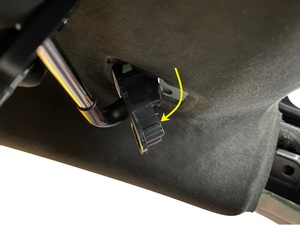
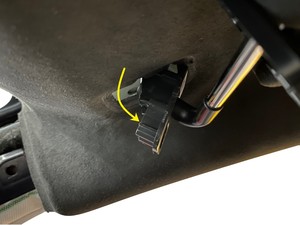
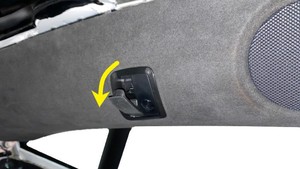
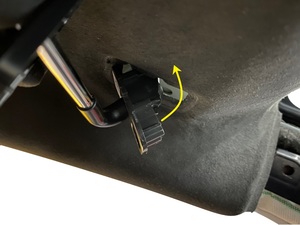
  7. 拆下左侧遮阳板紧固件
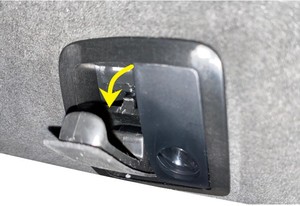
    Informational PurposesAn informational icon, calling your attention
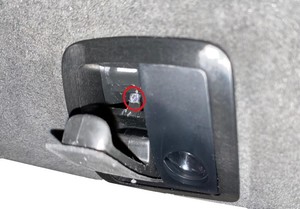
    注
    1 个螺钉,T25,3.5 Nm;打开遮阳板可腾出更大的作业空间
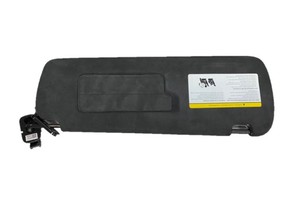
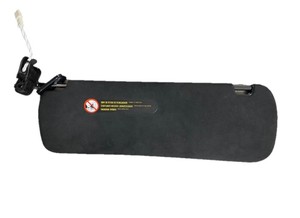
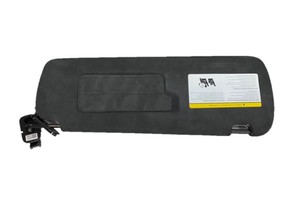
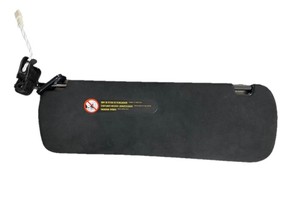
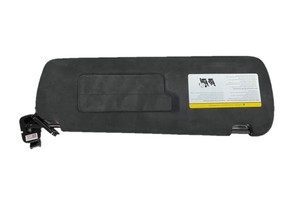
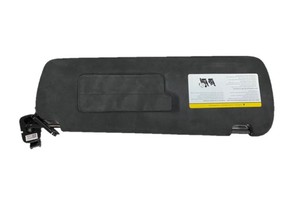
  8. 从顶篷区域拆下左侧遮阳板
    Informational PurposesAn informational icon, calling your attention
    注
    折叠遮阳板到合上和打开位置,但不要锁定到位
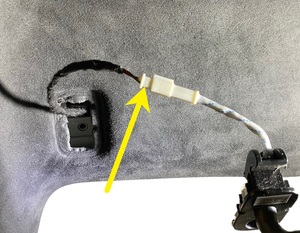
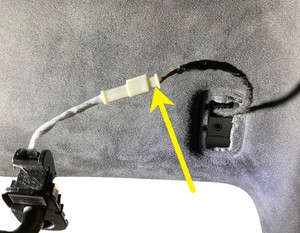
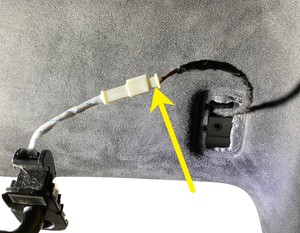
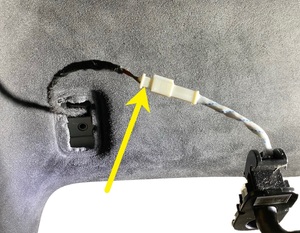
  9. 断开左侧遮阳板连接器
    Informational PurposesAn informational icon, calling your attention
    注
    1 个连接器
  10. 打开右侧前车门
  11. 拆下右侧A 柱中部饰板
    Informational PurposesAn informational icon, calling your attention
    注
    1 个卡子,2 个锁片
  12. 拆下右侧仪表板端盖
    Informational PurposesAn informational icon, calling your attention
    注
    4 个卡子
  13. 拆下右侧A 柱上部饰板
    Informational PurposesAn informational icon, calling your attention
    注
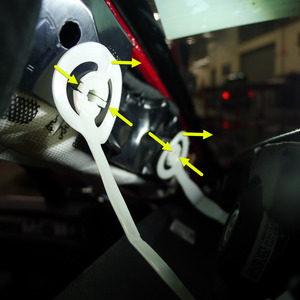
    2 个系带夹,1 个卡子,1 个连接器,拉动 A 柱上部内侧;按下 2 个锁片以便将系带从车身侧拆下,断开高频扬声器,然后向上拉动 A 柱上部将其拆下
  14. 拆下右侧遮阳板支架盖板
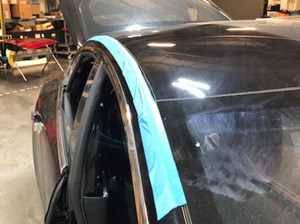
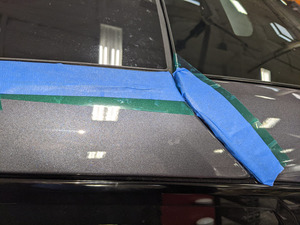
    Informational PurposesAn informational icon, calling your attention
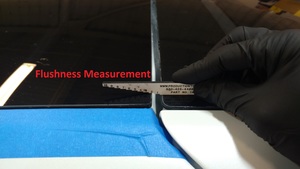
    注
    4 个卡子;打开遮阳板可能会腾出更大的作业空间
  15. 拆下右侧遮阳板紧固件
    Informational PurposesAn informational icon, calling your attention
    注
    1 个螺钉,T25,3.5 Nm;打开遮阳板可能会增加作业空间
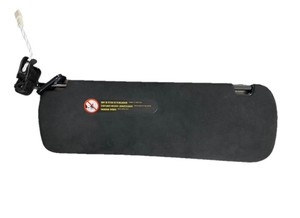
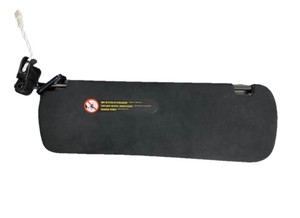
  16. 从顶篷区域拆下右侧遮阳板
  17. 断开右侧遮阳板连接器
    Informational PurposesAn informational icon, calling your attention
    注
    1 个连接器
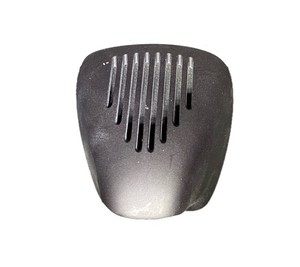
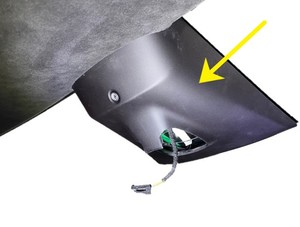
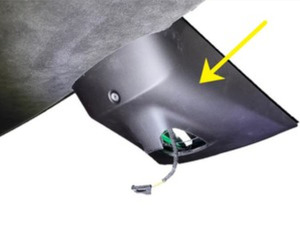
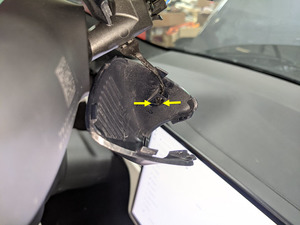
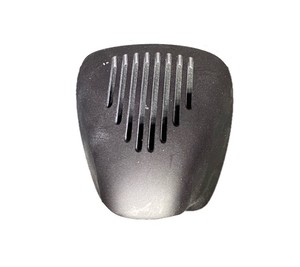
  18. 取下后视镜下盖
    Informational PurposesAn informational icon, calling your attention
    注
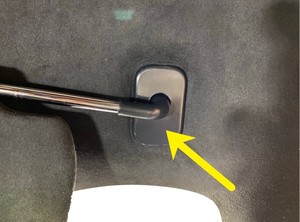
    4 个锁片,向内按压盖板侧边,然后向下拉动底部边缘以取下
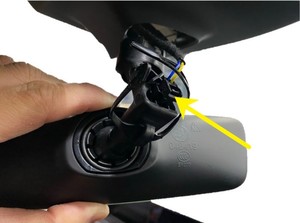
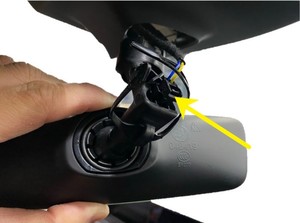
  19. 断开后视镜连接器
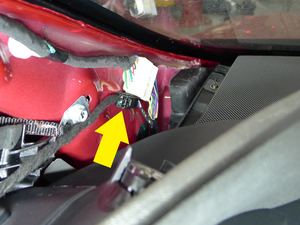
    Informational PurposesAn informational icon, calling your attention
    注
    1 个连接器
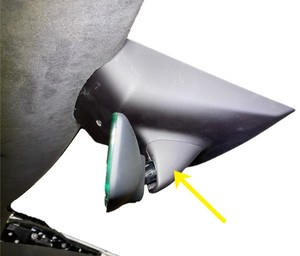
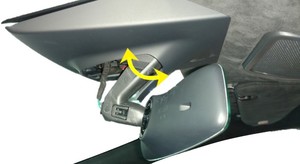
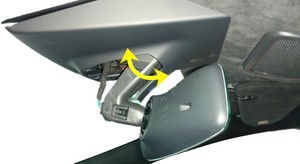
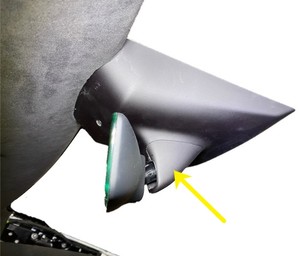
  20. 拆下后视镜
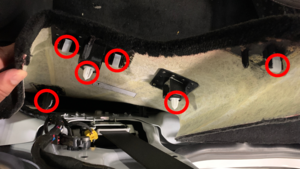
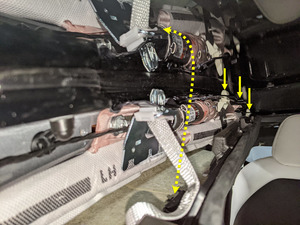
    Informational PurposesAn informational icon, calling your attention
    注
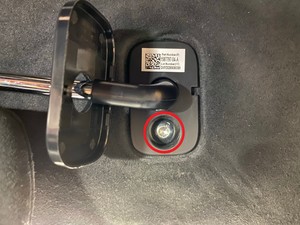
    旋转后视镜以将其拆下
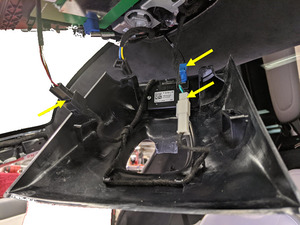
  21. 拆下后视镜上盖
    Informational PurposesAn informational icon, calling your attention
    注
    4 个卡子,3 个连接器,小心地向下拉后视镜上盖,将其从卡子上松开
  22. 前移左侧前座椅
  23. 打开左侧后车门
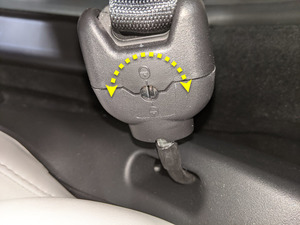
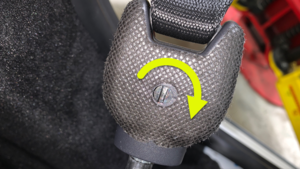
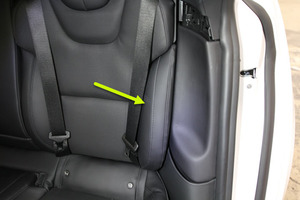
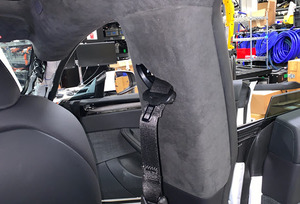
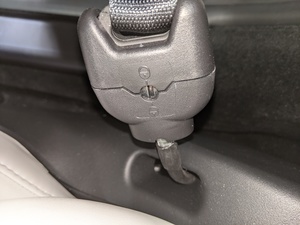
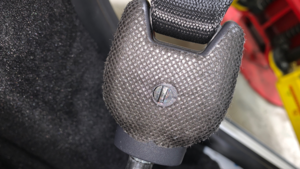
  24. 松开前排左侧座椅安全带
    Informational PurposesAn informational icon, calling your attention
    注
    逆时针旋转释放机构。松开后,请顺时针旋回
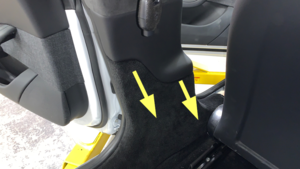
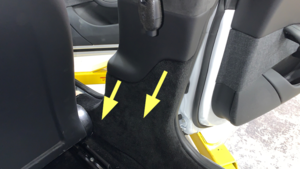
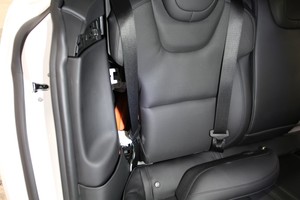
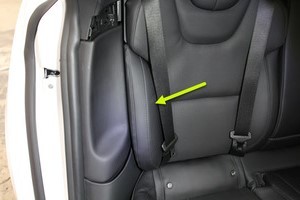
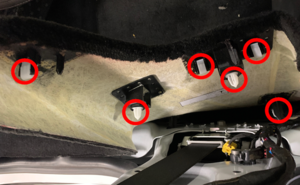
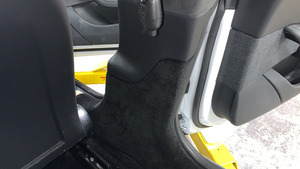
  25. 部分松开左侧 B 柱下部
    Informational PurposesAn informational icon, calling your attention
    注
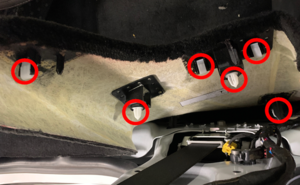
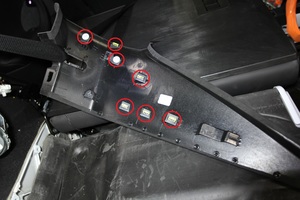
    6 个卡子;从上部饰板和车身上松开
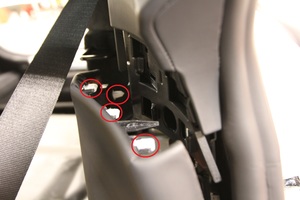
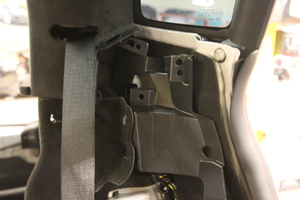
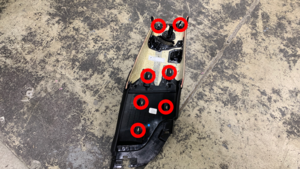
  26. 拆下左侧 B 柱上部
    Informational PurposesAn informational icon, calling your attention
    注
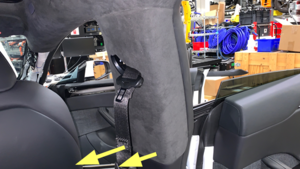
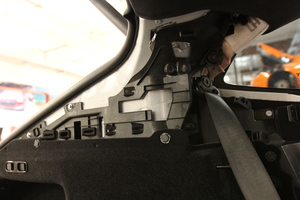
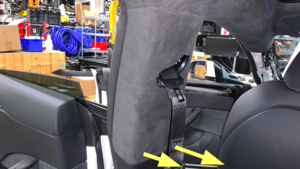
    7 个卡子;松开卡子并将安全带穿过 B 柱;小心不要使 B 柱上部分离;饰板中心附近有塑料焊缝,将上部和下部固定在一起
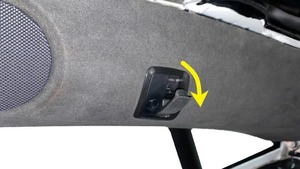
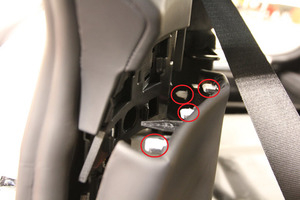
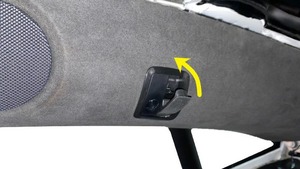
  27. 推动以打开左侧衣帽钩
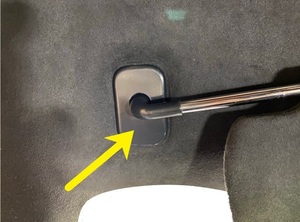
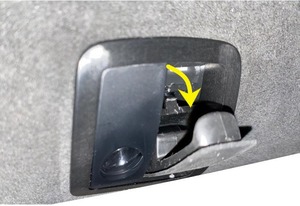
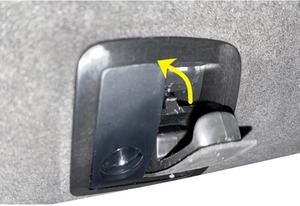
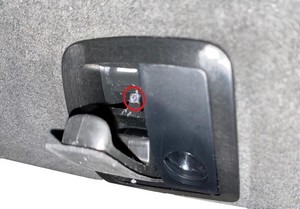
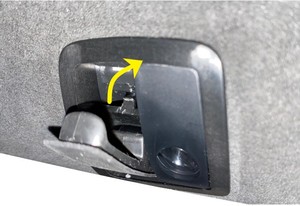
  28. 撬开左侧衣帽钩螺钉盖板
    Informational PurposesAn informational icon, calling your attention
    注
    2 个锁片
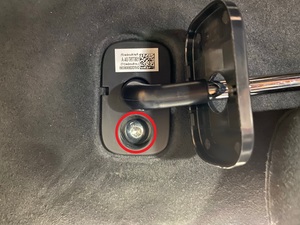
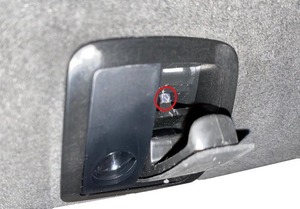
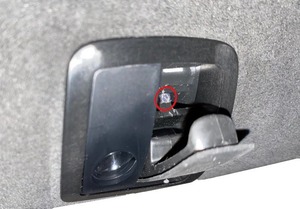
  29. 拆下左侧衣帽钩螺钉
    Informational PurposesAn informational icon, calling your attention
    注
    1 个螺钉,T25,2.5 Nm
  30. 前移右侧前座椅
  31. 打开右侧后车门
  32. 松开前排右侧座椅安全带
    Informational PurposesAn informational icon, calling your attention
    注
    逆时针旋转释放机构。松开后,请顺时针旋回
  33. 部分松开右侧B 柱下部
    Informational PurposesAn informational icon, calling your attention
    注
    6 个卡子;从上部饰板和车身上松开
  34. 拆下右侧B 柱上部
    Informational PurposesAn informational icon, calling your attention
    注
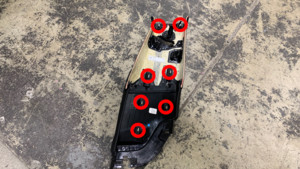
    7 个卡子;松开卡子并将安全带穿过 B 柱;小心不要使 B 柱上部分离;饰板中心附近有塑料焊缝,将上部和下部固定在一起
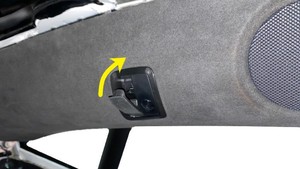
  35. 推动以打开右侧衣帽钩
  36. 撬开右侧衣帽钩螺钉盖板
    Informational PurposesAn informational icon, calling your attention
    注
    2 个锁片
  37. 拆下右侧衣帽钩螺钉
    Informational PurposesAn informational icon, calling your attention
    注
    1 个螺钉,T25,2.5 Nm
  38. 打开掀背尾门
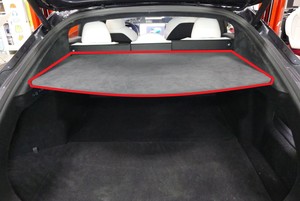
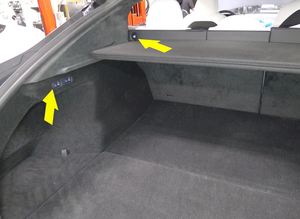
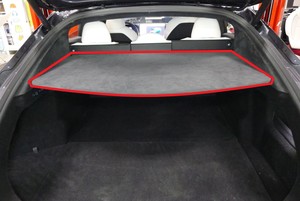
  39. 拆下行李架
  40. 拆下左侧承梁饰板
    Informational PurposesAn informational icon, calling your attention
    注
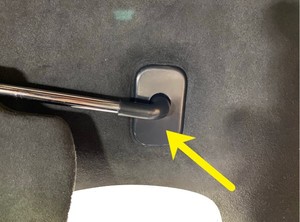
    1 个卡子,1 个锁片,从上部入手
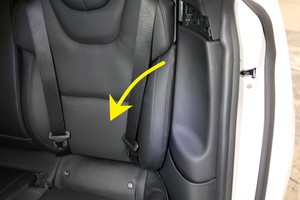
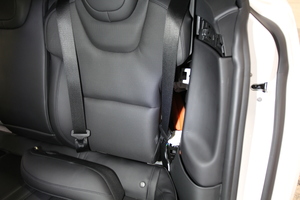
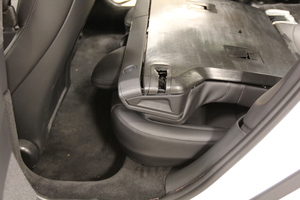
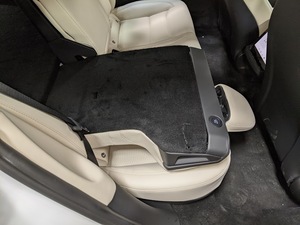
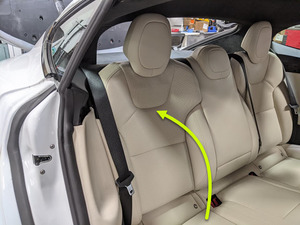
  41. 放倒 60 百分比座椅
    Informational PurposesAn informational icon, calling your attention
    注
    按动靠背按钮或行李箱开关松开座椅。如果没有座垫,请按要求保护座椅
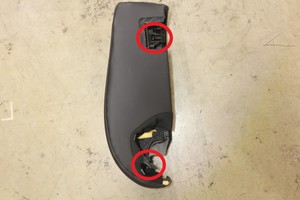
  42. 将左侧 C 柱下部饰板与左侧 C 柱中部饰板分离
    Informational PurposesAn informational icon, calling your attention
    注
    4 个卡子,1 个基线
  43. 拆下左侧 C 柱中部饰板
    Informational PurposesAn informational icon, calling your attention
    注
    3 个卡子
  44. 拆下左侧 C 柱上部饰板,并放至一旁
    Informational PurposesAn informational icon, calling your attention
    注
    7 个卡子
  45. 拆下右侧承梁饰板
    Informational PurposesAn informational icon, calling your attention
    注
    1 个卡子,1 个锁片,从上部入手
  46. 放倒 40 百分比座椅
    Informational PurposesAn informational icon, calling your attention
    注
    如果没有座垫,请按要求保护座椅
  47. 将右侧C 柱下部饰板与右侧C 柱中部饰板分离
    Informational PurposesAn informational icon, calling your attention
    注
    4 个卡子,1 个基线
  48. 拆下右侧C 柱中部饰板
    Informational PurposesAn informational icon, calling your attention
    注
    3 个卡子
  49. 拆下右侧C 柱上部饰板,并放至一旁
    Informational PurposesAn informational icon, calling your attention
    注
    7 个卡子
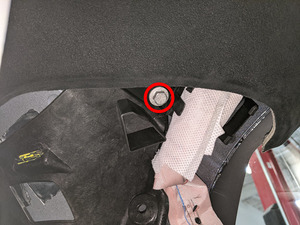
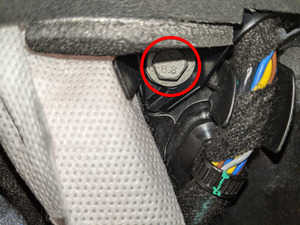
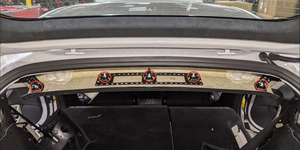
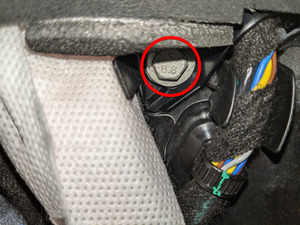
  50. 拆下将顶篷后部固定到车身的螺栓
    Informational PurposesAn informational icon, calling your attention
    注
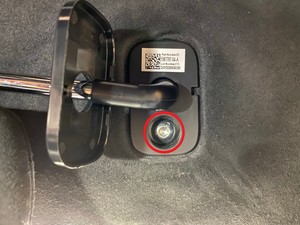
    2 个螺栓,10 毫米,3 Nm,螺栓位于顶篷的左侧及右侧
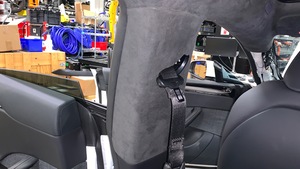
  51. 从车身松开顶篷
    Informational PurposesAn informational icon, calling your attention
    注
    18 个卡子,2 个挂钩;松开时,顶篷将由 8 个系带支撑;向上再向内推动,将衣帽钩总成上的挂钩从车身上松开
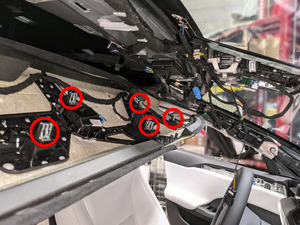
  52. 关闭掀背尾门
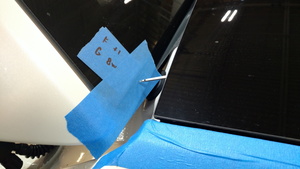
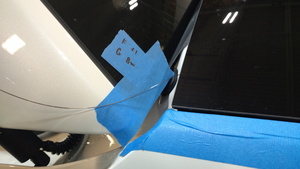
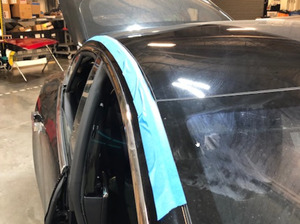
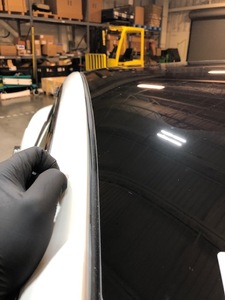
  53. 在车辆外部粘贴胶带
    Informational PurposesAn informational icon, calling your attention
    注
    盖住掀背尾门的侧纵梁和前角
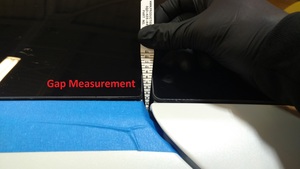
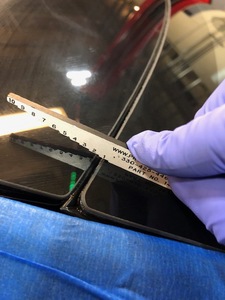
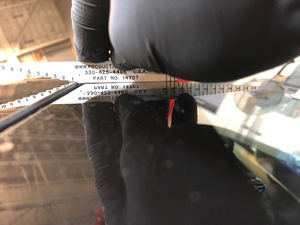
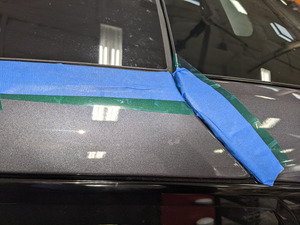
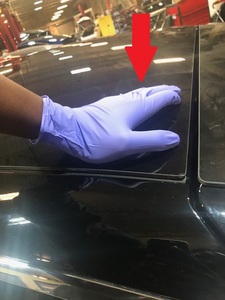
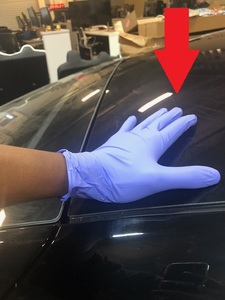
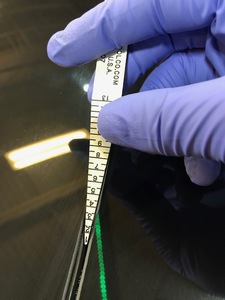
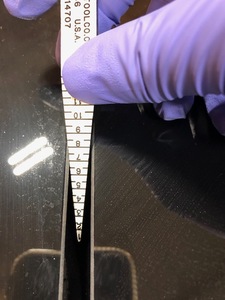
  54. 测量并记录固定车顶玻璃与挡风玻璃、车身侧面和掀背尾门玻璃之间的间隙
    Informational PurposesAn informational icon, calling your attention
    注
    测量数据将用于新玻璃的安装
  55. 打开掀背尾门
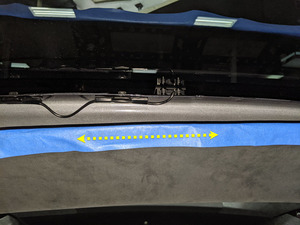
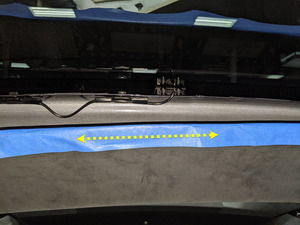
  56. 使用遮蔽胶带以保护顶篷
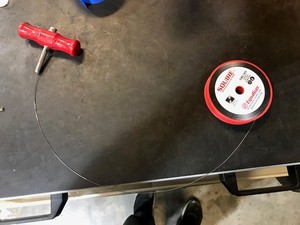
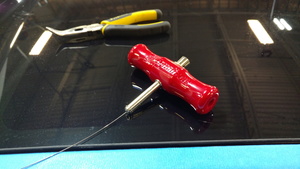
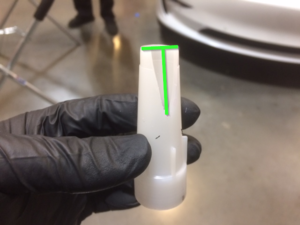
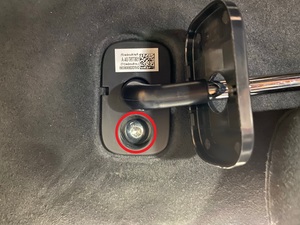
  57. 切割一段方形钢丝,以便与 T 柄扳手一同使用
    Informational PurposesAn informational icon, calling your attention
    注
    确保有足够的方形钢丝
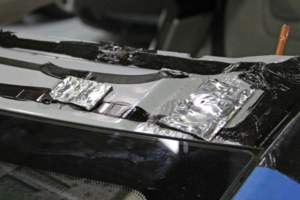
  58. 将工具插入后角处的车顶玻璃聚氨酯中
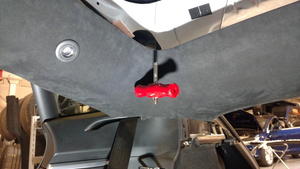
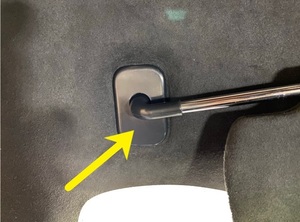
  59. 连接方形线,回拉工具,让其穿过进入车辆
  60. 将方形线插入一把 T 柄扳手
  61. 固定第二个 T 柄扳手
  62. 使用 T 柄扳手切开将车顶玻璃固定到车身的聚氨酯
    Informational PurposesAn informational icon, calling your attention
    注
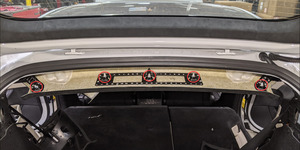
    建议请助手帮忙;在 XM 天线、车顶行李架块和 B 柱周围支架的螺栓附近操作时,需小心
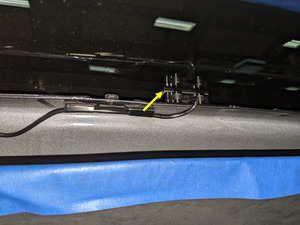
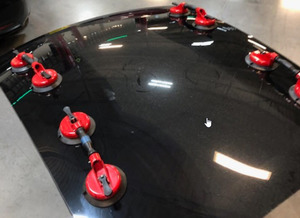
  63. 将吸盘固定到车顶玻璃的每个角
    Informational PurposesAn informational icon, calling your attention
    注
    4 个吸盘工具;建议请助手帮忙
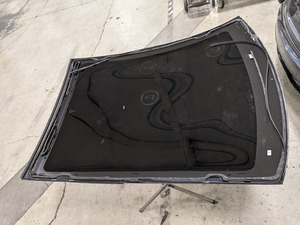
  64. 从车上拆下固定车顶玻璃
    Informational PurposesAn informational icon, calling your attention
    注
    建议请助手帮忙;按照当地法规弃用
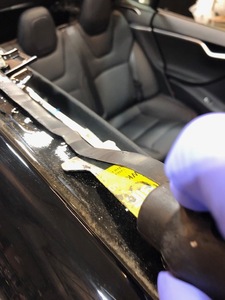
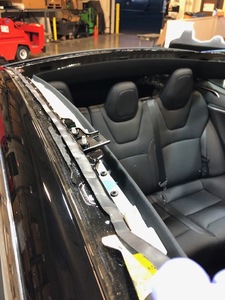
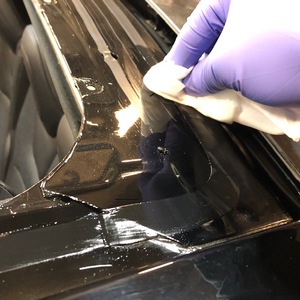
  65. 清除车身上的旧聚氨酯
    Informational PurposesAn informational icon, calling your attention
    注
    确保残留聚氨酯的厚度小于等于 1 毫米
  66. 清除车身上的基线和其他碎屑
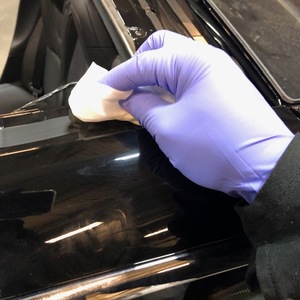
  67. 用异丙醇 (IPA) 湿巾擦拭车身以清洁表面
    Informational PurposesAn informational icon, calling your attention
    注
    等待 1 分钟让其风干
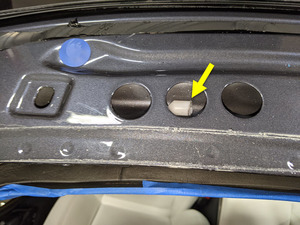
  68. 更换在拆卸或清洁过程中损坏的车身塞子或胶带
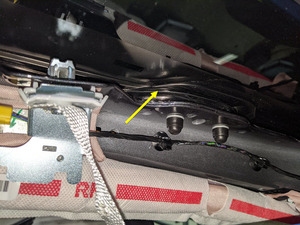
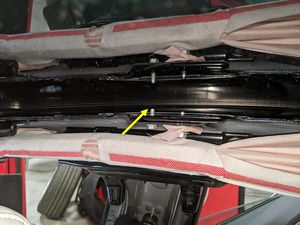
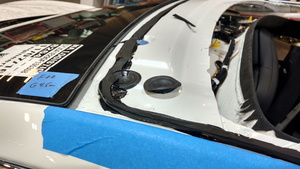
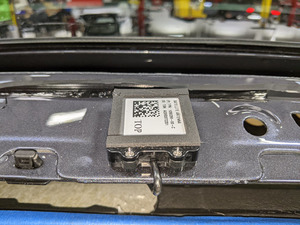
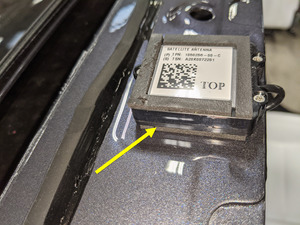
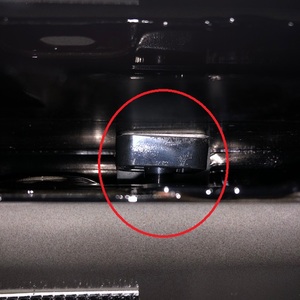
  69. 检查 XM 天线,确保其牢固且泡沫未损坏
    Informational PurposesAn informational icon, calling your attention
    注
    如有损坏,请根据需要进行更换。
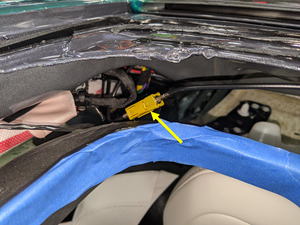
  70. 断开 XM 天线线束
    Informational PurposesAn informational icon, calling your attention
    注
    1 个连接器
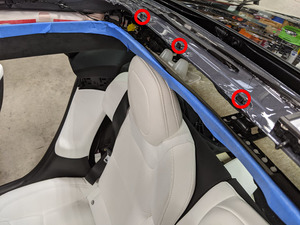
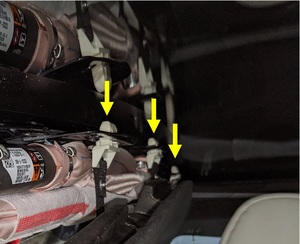
  71. 松开 XM 天线线束
    Informational PurposesAn informational icon, calling your attention
    注
    3 个线束夹
  72. 从车身上拆下 XM 天线
    Informational PurposesAn informational icon, calling your attention
    注
    4 条双面胶带
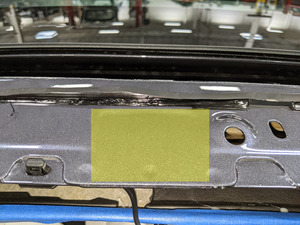
  73. 去除车身上残留的双面胶带
    Informational PurposesAn informational icon, calling your attention
    注
    等待 1 分钟让其风干
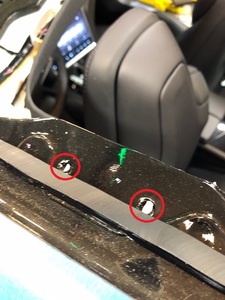
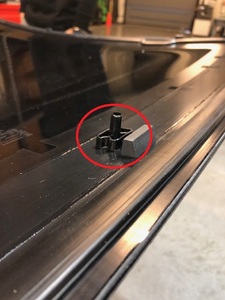
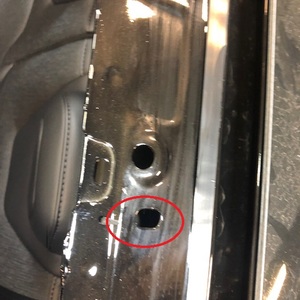
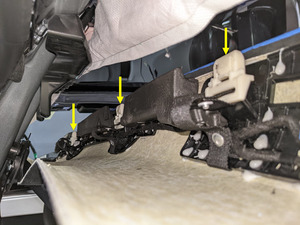
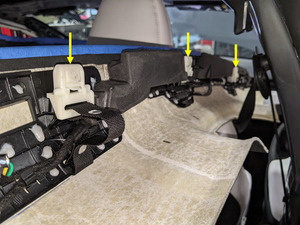
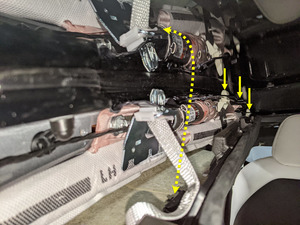
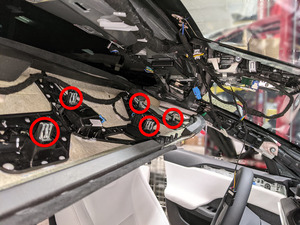
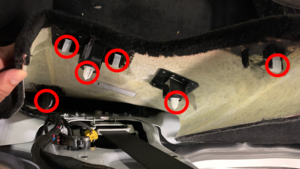
  74. 将系带夹从车身上松开
    Informational PurposesAn informational icon, calling your attention
    注
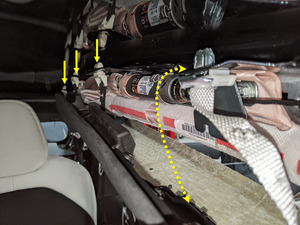
    6 个系带夹;有助于后续安装顶篷;可通过 Grainger Punchout 目录中的 eProcurment 购买用于松开这些卡子的理想工具,商品编号 2ZPP2 - GearWrench 推针钳
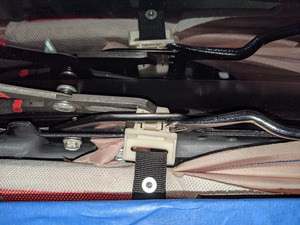
  75. 将 XM 天线安装到车身上
    Informational PurposesAn informational icon, calling your attention
    注
    4 条双面胶带
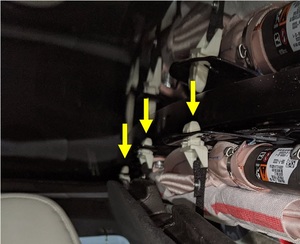
  76. 安装 XM 天线线束
    Informational PurposesAn informational icon, calling your attention
    注
    3 个线束夹
  77. 连接 XM 天线线束
    Informational PurposesAn informational icon, calling your attention
    注
    1 个连接器
  78. 将吸盘固定到新的车顶玻璃上
  79. 将新车顶玻璃放到车上,以便进行干式装配
    Informational PurposesAn informational icon, calling your attention
    注
    建议请助手帮忙
  80. 确保间隙均保持在可接受的限值范围内
    Informational PurposesAn informational icon, calling your attention
    注
    如果玻璃太高,则可能需要裁切或拆下网片
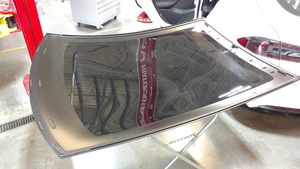
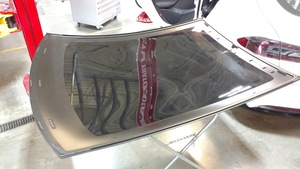
  81. 拆下车顶玻璃,倒放在台架上
    Informational PurposesAn informational icon, calling your attention
    注
    建议请助手帮忙
  82. 从车身上揭下保护胶带
  83. 使用异丙醇清洁玻璃接合面
    Informational PurposesAn informational icon, calling your attention
    注
    等待 1 分钟让其风干
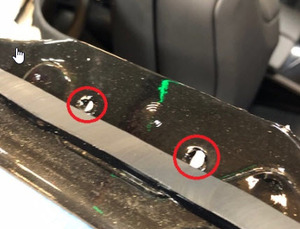
  84. 将底漆涂抹到车身的聚氨酯路径上,以及在拆卸时损坏的任何区域
    Informational PurposesAn informational icon, calling your attention
    注
    如果车辆配备有车顶行李架锚固件,则底漆应喷涂在车顶支架内侧周围。如果车辆未配备车顶行李架支架,则底漆应喷涂在车顶行李架支架安装孔外侧。底漆至少风干 1 分钟
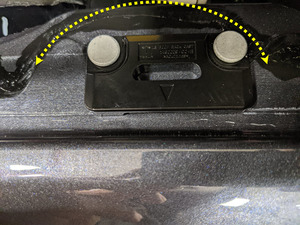
  85. 备好填缝枪和聚氨酯
    Informational PurposesAn informational icon, calling your attention
    注
    开口的宽度必须为 8 毫米,高为 14 毫米
  86. 将聚氨酯涂抹到车身
    Informational PurposesAn informational icon, calling your attention
    注
    如果配备有车顶行李架锚固件,则聚氨酯应喷涂在车顶行李架锚固件内侧周围;如果未配备车顶行李架锚固件,则聚氨酯应喷涂在锚固件安装孔外侧。
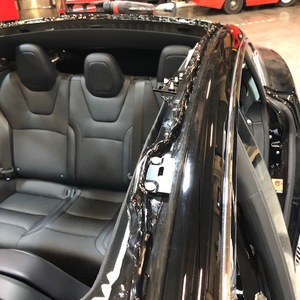
  87. 将新车顶玻璃安装到车上,但暂时不要固定
    Informational PurposesAn informational icon, calling your attention
    注
    建议请助手帮忙。将玻璃后部的基线与车身对齐
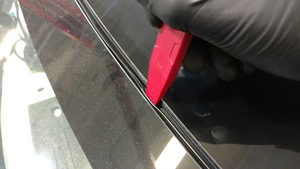
  88. 将新密封条放置在玻璃前的挡风玻璃密封条下
    Informational PurposesAn informational icon, calling your attention
    注
    可使用饰板工具将车顶玻璃密封条固定到挡风玻璃密封条下
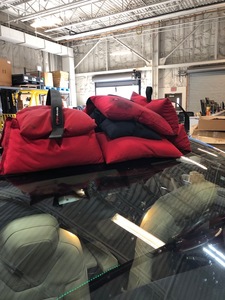
  89. 就位后,将玻璃按压到车身上
    Informational PurposesAn informational icon, calling your attention
    注
    如有需要,可在前面使用沙袋
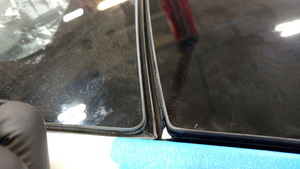
  90. 确认与掀背尾门玻璃、挡风玻璃和车身侧的间隙在 CVIS 规格范围内
    Informational PurposesAn informational icon, calling your attention
    注
    必要时进行调节
  91. 从车顶玻璃上取下吸盘
  92. 从顶篷上揭下保护胶带
  93. 将系带夹固定到顶篷
    Informational PurposesAn informational icon, calling your attention
    注
    就位后,注意是否有“咔嗒”声
  94. 将顶篷固定到车身
    Informational PurposesAn informational icon, calling your attention
    注
    18 个卡子,2 个挂钩;向上再向外推动衣帽钩,将其固定到衣帽钩总成顶部的车身法兰上
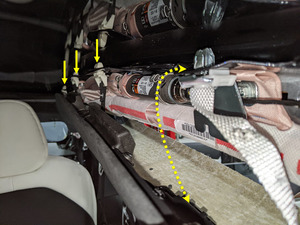
  95. 安装将顶篷后部固定到车身的螺栓
    Informational PurposesAn informational icon, calling your attention
    注
    2 个螺栓,10 毫米,3 Nm,螺栓位于顶篷的左侧及右侧
  96. 安装右侧C 柱上部饰板
    Informational PurposesAn informational icon, calling your attention
    注
    7 个卡子;更换所有已损坏的卡子
  97. 安装右侧C 柱中部饰板
    Informational PurposesAn informational icon, calling your attention
    注
    3 个卡子;更换所有已损坏的卡子
  98. 将右侧C 柱下部饰板固定至右侧C 柱中部饰板
    Informational PurposesAn informational icon, calling your attention
    注
    4 个卡子
  99. 折叠 40 百分比座椅至垂直位置
    Informational PurposesAn informational icon, calling your attention
    注
    拆卸座垫保护装置
  100. 安装右侧承梁饰板
    Informational PurposesAn informational icon, calling your attention
    注
    1 个卡子,1 个锁片;如卡子损坏,则进行更换;勾住底部,然后固定顶部
  101. 安装左侧 C 柱上部饰板
    Informational PurposesAn informational icon, calling your attention
    注
    7 个卡子;更换所有已损坏的卡子
  102. 安装左侧 C 柱中部饰板
    Informational PurposesAn informational icon, calling your attention
    注
    3 个卡子;更换所有已损坏的卡子
  103. 将左侧 C 柱下部饰板固定至左侧 C 柱中部饰板
    Informational PurposesAn informational icon, calling your attention
    注
    4 个卡子
  104. 将 60 座椅折叠至垂直位置
    Informational PurposesAn informational icon, calling your attention
    注
    拆下座垫保护装置
  105. 安装左侧承梁饰板
    Informational PurposesAn informational icon, calling your attention
    注
    1 个卡子,1 个锁片;如卡子损坏,则进行更换;勾住底部,然后固定顶部
  106. 安装行李架
  107. 关闭掀背尾门
  108. 安装右侧衣帽钩螺钉
    Informational PurposesAn informational icon, calling your attention
    注
    1 个螺钉,T25,2.5 Nm
  109. 关闭右侧衣帽钩螺钉盖板
    Informational PurposesAn informational icon, calling your attention
    注
    2 个锁片
  110. 合上右侧衣帽钩
  111. 安装左侧衣帽钩螺钉
    Informational PurposesAn informational icon, calling your attention
    注
    1 个螺钉,T25,2.5 Nm
  112. 关闭左侧衣帽钩螺钉盖板
    Informational PurposesAn informational icon, calling your attention
    注
    2 个锁片
  113. 合上左侧衣帽钩
  114. 安装右侧B 柱上部
    Informational PurposesAn informational icon, calling your attention
    注
    7 个卡子;将安全带穿过 B 柱;更换所有已损坏或丢失的卡子
  115. 重新安装右侧B 柱下部的顶部
    Informational PurposesAn informational icon, calling your attention
    注
    6 个卡子;更换所有已损坏或丢失的卡子
  116. 紧固前排右侧座椅安全带
  117. 将右侧前座椅移回原位
  118. 关闭右侧后车门
  119. 安装左侧 B 柱上部
    Informational PurposesAn informational icon, calling your attention
    注
    7 个卡子;将安全带穿过 B 柱;更换所有已损坏或丢失的卡子
  120. 重新安装左侧 B 柱下部的顶部
    Informational PurposesAn informational icon, calling your attention
    注
    6 个卡子;更换所有已损坏或丢失的卡子
  121. 紧固前排左侧座椅安全带
  122. 关闭左侧后车门
  123. 将左侧前座椅移回原位
  124. 安装后视镜上盖
    Informational PurposesAn informational icon, calling your attention
    注
    4 个卡子,3 个连接器,确保后视镜线束的布线方式是自由悬挂在外部,而不是被盖板和遮光板总成夹住
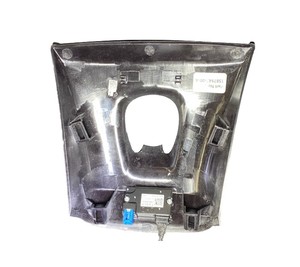
  125. 安装后视镜
    Informational PurposesAn informational icon, calling your attention
    注
    逆时针转动后视镜直至其固定
  126. 连接后视镜连接器
    Informational PurposesAn informational icon, calling your attention
    注
    1 个连接器;连接后视镜连接器,并将线束松垂部分沿后视镜臂塞入
  127. 连接右侧遮阳板连接器
    Informational PurposesAn informational icon, calling your attention
    注
    1 个连接器
  128. 将右侧遮阳板安装到顶篷区域
    Informational PurposesAn informational icon, calling your attention
    注
    折叠遮阳板到合上和打开位置,但不要锁定到位
  129. 安装右侧遮阳板紧固件
    Informational PurposesAn informational icon, calling your attention
    注
    1 个螺钉,T25,3.5 Nm
  130. 安装右侧遮阳板支架盖板
    Informational PurposesAn informational icon, calling your attention
    注
    4 个卡子
  131. 安装右侧A 柱上部饰板
    Informational PurposesAn informational icon, calling your attention
    注
    2 个系带夹,1 个卡子,1 个连接器;沿仪表板和扬声器格栅滑动饰板底部,将系带固定到车身侧;从底部开始向上放置卡子;将密封件拉过饰板
  132. 安装右侧仪表板端盖
    Informational PurposesAn informational icon, calling your attention
    注
    4 个卡子
  133. 安装RH A 柱中部饰板
    Informational PurposesAn informational icon, calling your attention
    注
    1 个卡子,2 个锁片;检查挡雨条是否正确安装
  134. 关闭右侧前车门
  135. 连接左侧遮阳板连接器
    Informational PurposesAn informational icon, calling your attention
    注
    1 个连接器
  136. 将左侧遮阳板安装到顶篷区域
  137. 安装左侧遮阳板紧固件
    Informational PurposesAn informational icon, calling your attention
    注
    1 个螺钉,T25,3.5 Nm
  138. 安装左侧遮阳板支架盖板
    Informational PurposesAn informational icon, calling your attention
    注
    4 个卡子
  139. 安装左侧 A 柱上部饰板
    Informational PurposesAn informational icon, calling your attention
    注
    2 个系带夹,1 个卡子,1 个连接器;沿仪表板和扬声器格栅滑动饰板底部,将系带固定到车身侧;从底部开始向上放置卡子;将密封件拉过饰板
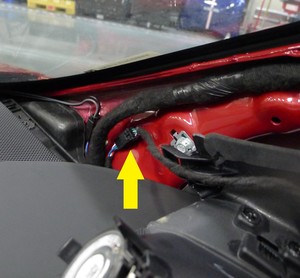
  140. 安装左侧仪表板端盖
    Informational PurposesAn informational icon, calling your attention
    注
    4 个卡子
  141. 安装左侧 A 柱中部饰板
    Informational PurposesAn informational icon, calling your attention
    注
    1 个卡子,2 个锁片;检查挡雨条是否正确安装
  142. 将系带安装到后视镜下盖上
    Informational PurposesAn informational icon, calling your attention
    注
    2 个锁片;将锁片穿过后视镜下盖上的锚固件
  143. 安装后视镜下盖
    Informational PurposesAn informational icon, calling your attention
    注
    4 个锁片;安装最靠近后视镜总成的锁片,然后向上推盖板使其固定
  144. 升起左前车窗
  145. 关闭左前车门