04/06/2024 21:12:45

超级横梁(拆卸和更换)
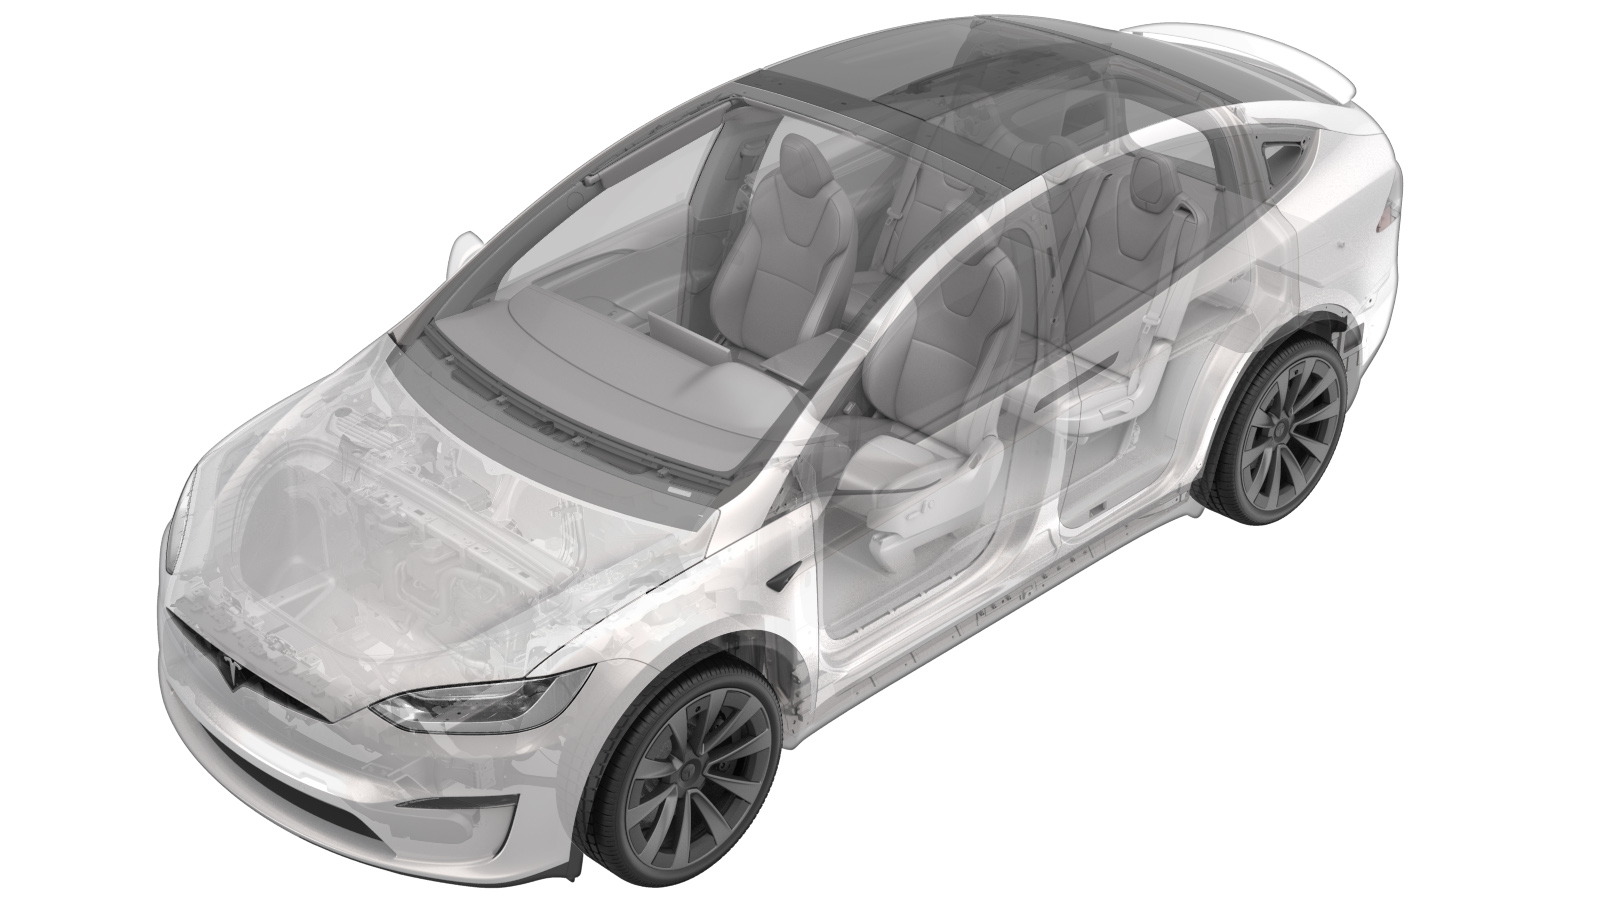
校正代码 31108302 1.38 注意:除非本程序中另有明确规定,否则上述校正代码和 FRT 反映的是执行本程序(包括关联程序)所需的所有工作。除非明确要求,否则请勿堆叠校正代码。 注意:请参阅平均维修工时,深入了解 FRT 及其创建方式。要提供有关 FRT 值的反馈,请发送电子邮件至LaborTimeFeedback@tesla.com。 注意:执行下述程序时,请参阅人员保护确认已穿戴适当的个人防护装备 (PPE)。

Warning IconA warning icon, calling your attention to a possibly risky situation
警告
尽管此程序已经过验证,但仍是一个草案。可能没有警告和注意事项。请遵守安全要求,处理或靠近高压系统和部件时,请谨慎操作。请将校正修理内容及反馈发送至ServiceDevelopment@teslamotors.com。

拆卸

  1. 将装有 Toolbox 3 的笔记本电脑与车辆相连。请参阅 Toolbox 3(连接和断开)。
  2. 使用 Toolbox 3 执行以下步骤:
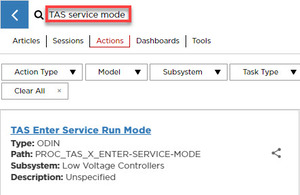
    1. 点击 Actions 选项卡,然后搜索 TAS service mode。
    2. 点击PROC_TAS_X_ENTER-SERVICE-MODEvia Toolbox: (link),然后点击Run。等待例行程序完成,然后再继续。
      Informational PurposesAn informational icon, calling your attention
      注
      完成后,点击窗口右上角的 X 关闭。
    3. 点击Actions选项卡,然后搜索Deflate。
    4. 点击PROC_TAS_X_DEFLATEvia Toolbox: (link)via Service Mode: Chassis ➜ Suspension ➜ Deflate,然后点击Run。等待例行程序完成,然后再继续。
      Informational PurposesAn informational icon, calling your attention
      注
      完成后,点击窗口右上角的 X 关闭。
  3. 断开笔记本电脑与车辆的连接。
    Informational PurposesAn informational icon, calling your attention
    注
    不要关闭 Toolbox 3,因为 Toolbox 3 之后还需重新运行。
  4. 拆下前备箱储物单元。请参阅前备箱储物单元(拆卸和安装)。
  5. 断开低压电源。请参阅 低压电源(断开和连接)。
  6. 拆卸前围篦板。请参阅面板 - 前围篦板(拆卸和更换)。
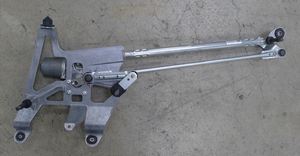
  7. 拆卸雨刮器模块。请参阅 雨刮器模块(拆卸和更换)。
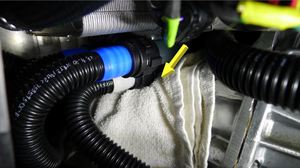
  8. 从低压电池上松开超级歧管至电池冷却液泵供应软管的软管夹。
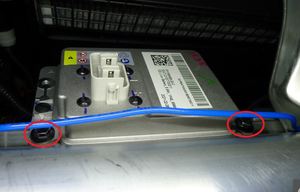
  9. 拆下连接低压电池的螺栓(3 个),然后从车辆上拆下电池。
    Informational PurposesAn informational icon, calling your attention
    注
    10 mm。扭矩为 9 Nm。
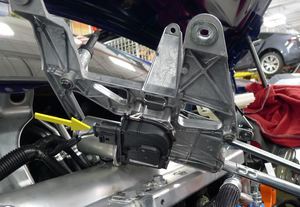
  10. 拆下连接雨刮器安装支架的螺栓(4 个)。
    Informational PurposesAn informational icon, calling your attention
    注
    13 mm。扭矩为 25 Nm。
    Informational PurposesAn informational icon, calling your attention
    注
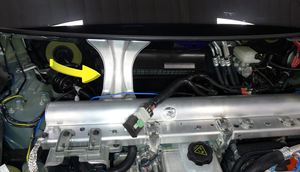
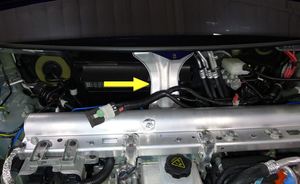
    沿支柱塔梁向右侧减震塔滑动支架,将其与高效空气过滤器 (HEPA) 过滤器外壳分离。
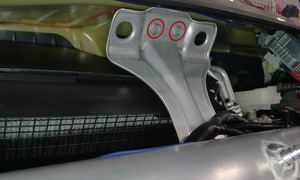
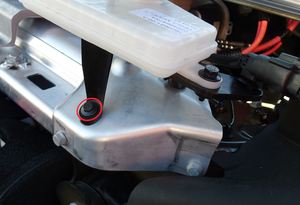
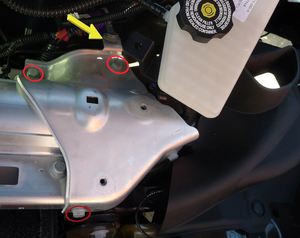
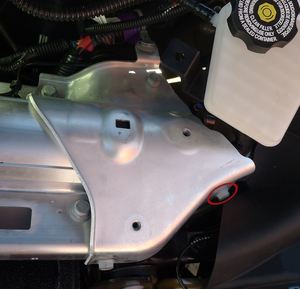
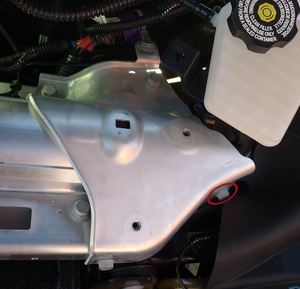
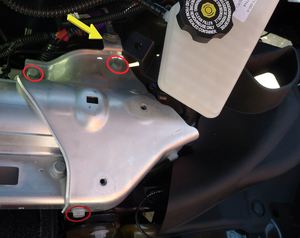
  11. 拆下将远端制动液储液罐连接到左前减震塔盖上的螺栓(3 个)。
    Informational PurposesAn informational icon, calling your attention
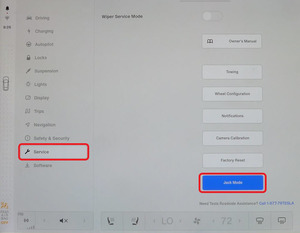
    注
    10 mm。扭矩为 8 Nm。1 个定位销。
    Informational PurposesAn informational icon, calling your attention
    注
    将储液罐及其支架旋出左前减震塔盖。
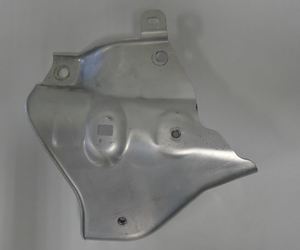
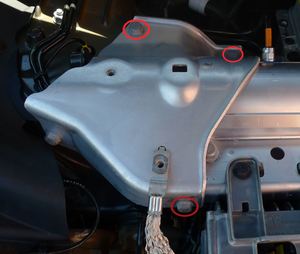
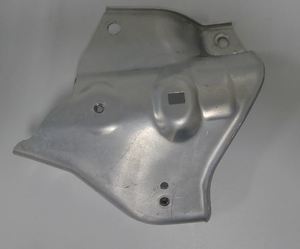
  12. 拆卸将左前减震塔盖固定到支柱塔梁的螺栓(3 个)和卡子。
    Informational PurposesAn informational icon, calling your attention
    注
    13 mm。扭矩为 22 Nm。
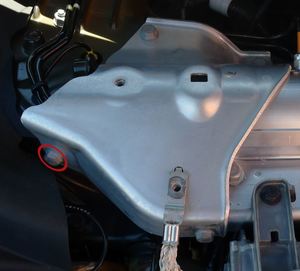
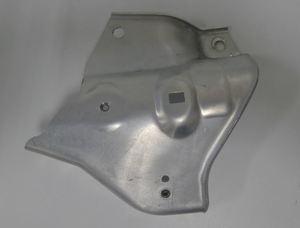
  13. 拆卸将左前减震塔盖固定到减震塔的螺栓,然后将盖子从车辆上拆下。
    Informational PurposesAn informational icon, calling your attention
    注
    13 mm。扭矩为 14 Nm。
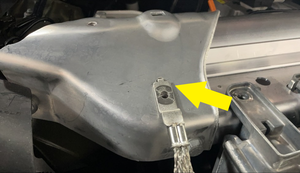
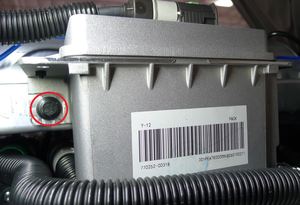
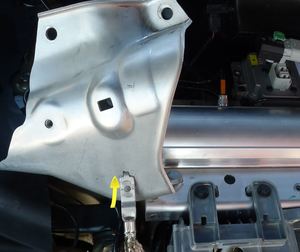
  14. 拆下连接前控制器接地电缆的螺栓。
    Informational PurposesAn informational icon, calling your attention
    注
    10 mm。扭矩为 10 Nm。
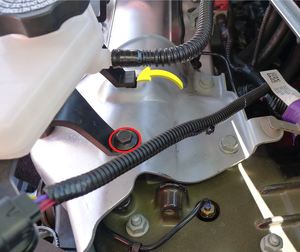
  15. 拆卸将右前减震塔盖固定到支柱塔梁的螺栓(3 个)。
    Informational PurposesAn informational icon, calling your attention
    注
    13 mm。扭矩为 22 Nm。
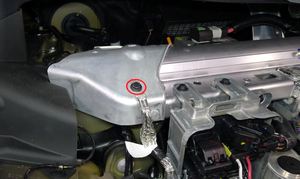
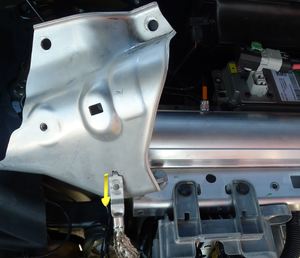
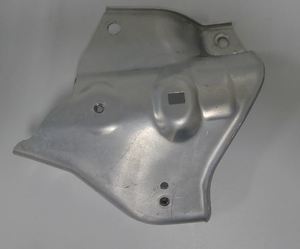
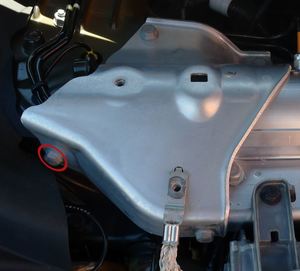
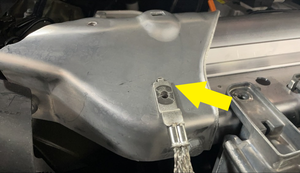
  16. 从减震塔架上拆下连接右前减震塔盖的螺栓,然后从车辆上拆下该盖。
    Informational PurposesAn informational icon, calling your attention
    注
    13 mm。扭矩为 14 Nm。
    Informational PurposesAn informational icon, calling your attention
    注
    拆下后,从右前减震塔盖上松开键接接地线。
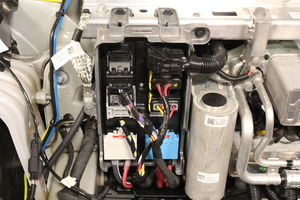
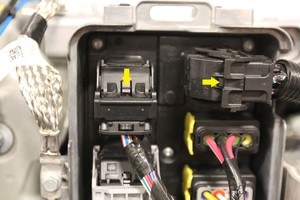
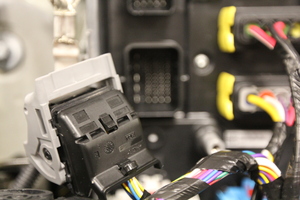
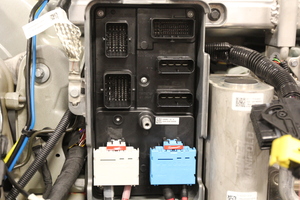
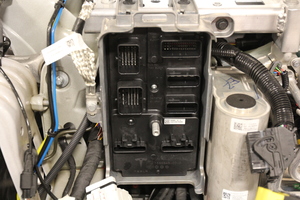
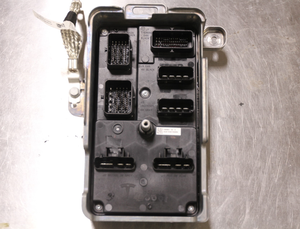
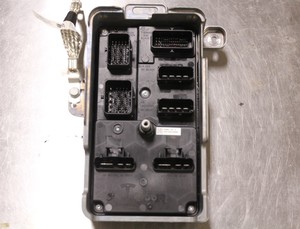
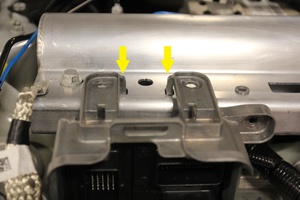
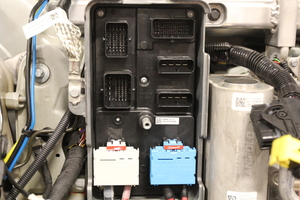
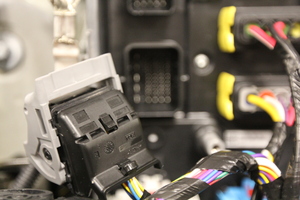
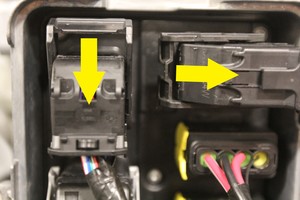
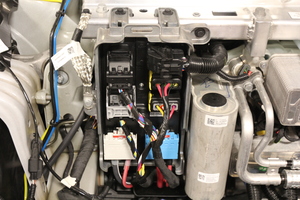
  17. 松开前控制器上的上部连接器(2 个)。
    Informational PurposesAn informational icon, calling your attention
    注
    锁止连接器(2 个)。推入锁片,提起解锁杆即可松开。
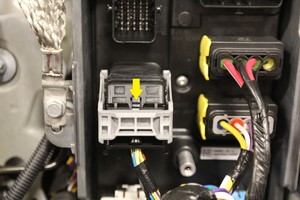
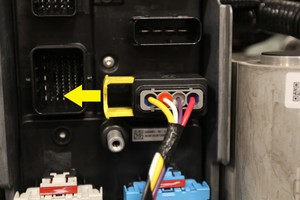
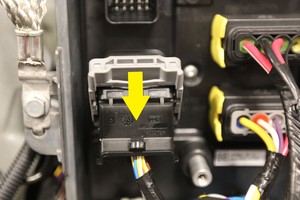
  18. 断开前控制器上的左侧中间电气连接器。
    Informational PurposesAn informational icon, calling your attention
    注
    锁止连接器(1 个)。
    Informational PurposesAn informational icon, calling your attention
    注
    推入锁片,提起解锁杆即可松开。
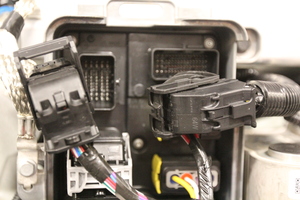
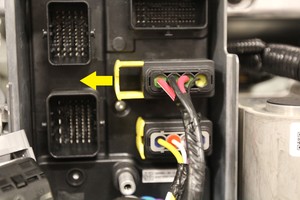
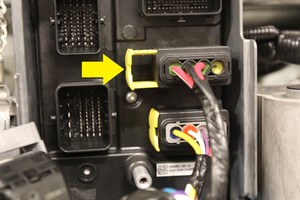
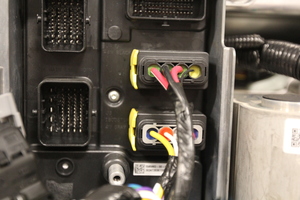
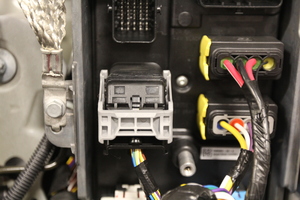
  19. 断开前控制器上的右侧中间电气连接器。
    Informational PurposesAn informational icon, calling your attention
    注
    锁止连接器(2 个)。
    Informational PurposesAn informational icon, calling your attention
    注
    向外滑动锁止机构即可松开。
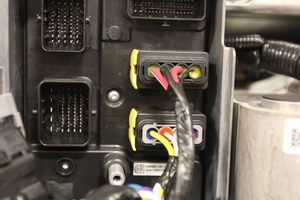
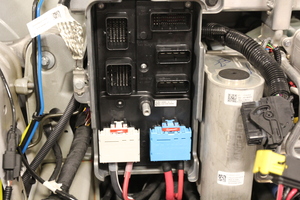
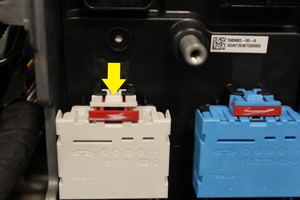
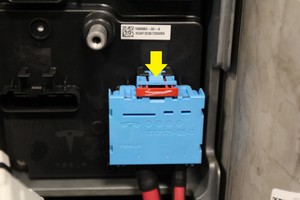
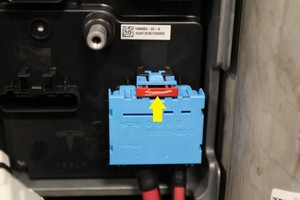
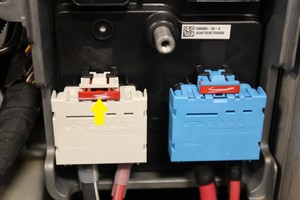
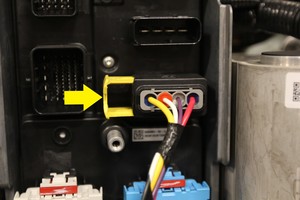
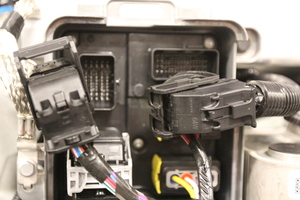
  20. 断开前控制器上的下部电气连接器(2 个)。
    Informational PurposesAn informational icon, calling your attention
    注
    锁止连接器(2 个)。
    Informational PurposesAn informational icon, calling your attention
    注
    向外滑动红色锁片即可松开。
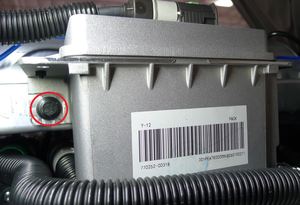
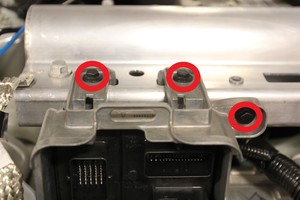
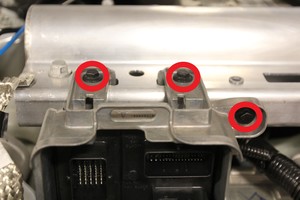
  21. 拆下将前控制器连接到支柱塔梁的螺栓(3 个)。
    Informational PurposesAn informational icon, calling your attention
    注
    10 mm。扭矩为 10 Nm。
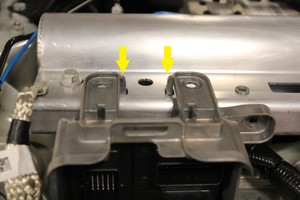
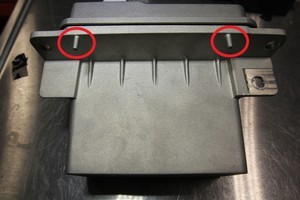
  22. 从车辆上拆下前控制器。
    Informational PurposesAn informational icon, calling your attention
    注
    定位锁片(2 个)。接地电缆(1 个)。
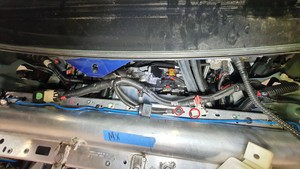
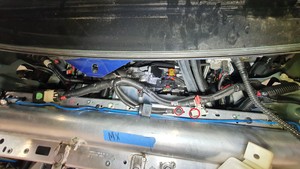
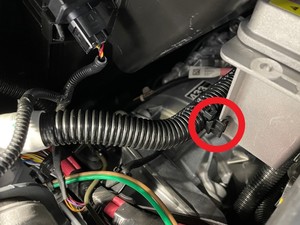
  23. 松开将空气悬架管路前束固定到整个支柱塔梁总成的卡子(3 个)。
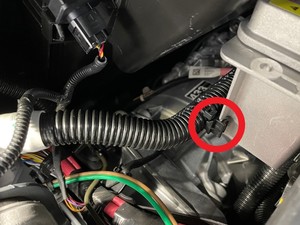
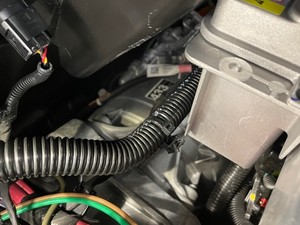
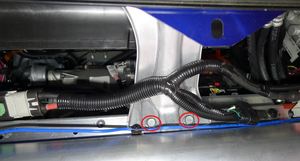
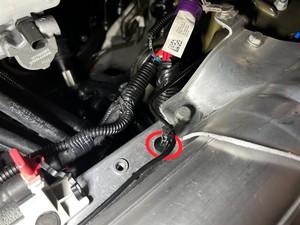
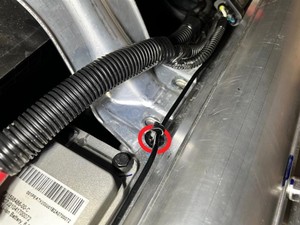
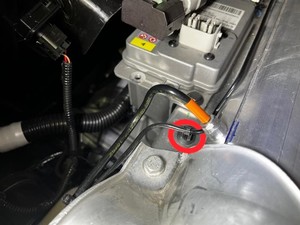
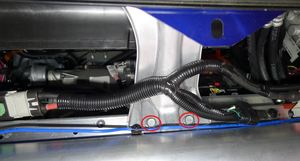
  24. 松开将线束连接到支柱塔梁的卡子和螺栓。
    Informational PurposesAn informational icon, calling your attention
    注
    10 mm 或 E10 5 角套筒扳手。扭矩为 9 Nm。
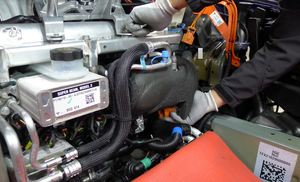
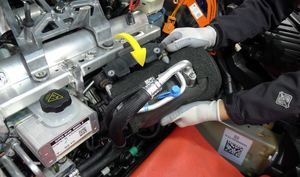
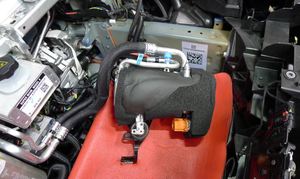
  25. 拆下将空调压缩机连接到支柱塔梁的螺栓(2 个),然后从支柱塔梁上松开压缩机支架。
    Informational PurposesAn informational icon, calling your attention
    注
    15 mm。扭矩为 31 Nm。
    Informational PurposesAn informational icon, calling your attention
    注
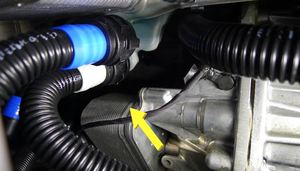
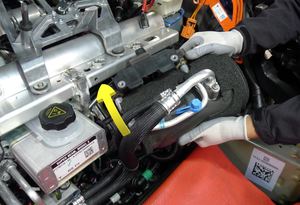
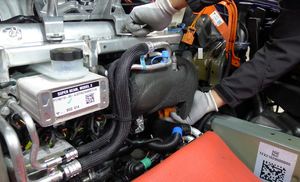
    建议请助手帮忙。拆下紧固件时,支撑好空调压缩机。朝向车头和支柱塔梁下方,小心地将空调压缩机和空调压缩机支架拆下。在冷却液软管和超级歧管线束周围操作时应小心。将翼子板盖放在风扇壳体上,然后轻轻放下空调压缩机总成。
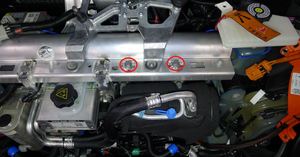
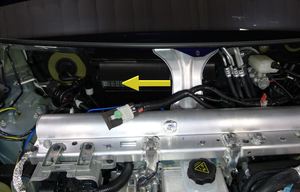
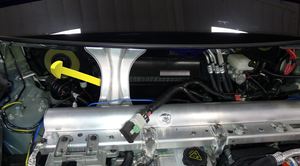
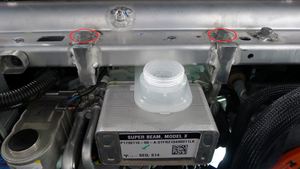
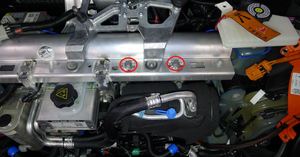
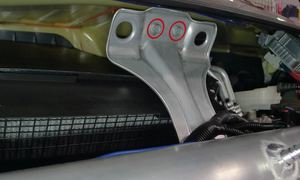
  26. 拆下将超级歧管连接到支柱塔梁的螺栓(2 个),然后在助手的帮助下将支柱塔梁慢慢放到前驱动单元上。
    Informational PurposesAn informational icon, calling your attention
    注
    15 mm,扭矩 31 Nm。
    Informational PurposesAn informational icon, calling your attention
    注
    从下面进行支撑,然后放在热交换器顶部的抹布上。
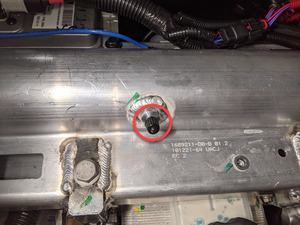
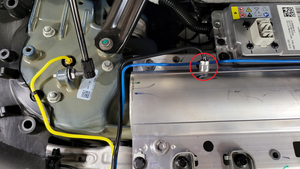
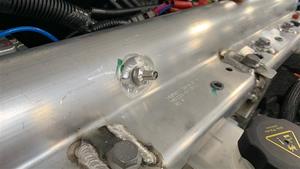
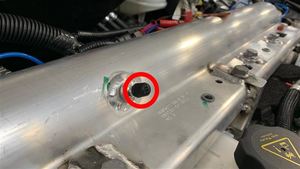
  27. 将 Schrader 阀盖从储气罐上拆下。
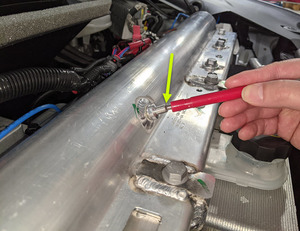
  28. 按下 Schrader 阀,排尽储气罐中的残留气体。
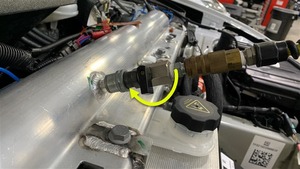
  29. 拆下将阀块管线连接到储气罐的螺母。
    Informational PurposesAn informational icon, calling your attention
    注
    13 mm。扭矩为 5 Nm。
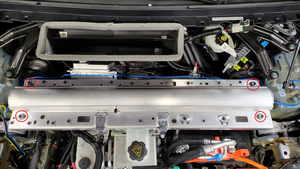
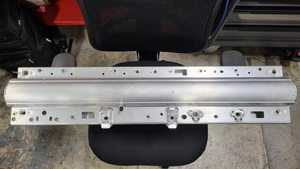
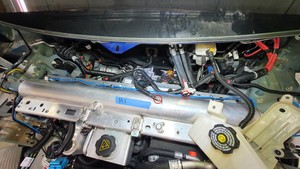
  30. 拆下将支柱塔梁连接到车辆的螺栓(4 个),然后从车辆上拆下支柱塔梁。
    Informational PurposesAn informational icon, calling your attention
    注
    15 mm。扭矩为 60 Nm。

安装

  1. 安装将支柱塔梁连接到车辆的螺栓(4 个)。
    Informational PurposesAn informational icon, calling your attention
    注
    15 mm。扭矩为 60 Nm。
  2. 安装将阀块管线连接到储气罐的螺母。
    Informational PurposesAn informational icon, calling your attention
    注
    13 mm。扭矩为 5 Nm。
  3. 在助手协助下,安装将超级歧管连接到支柱塔梁的螺栓(2 个)。
    Informational PurposesAn informational icon, calling your attention
    注
    15 mm,扭矩 31 Nm。
    Informational PurposesAn informational icon, calling your attention
    注
    从下面进行支撑。手动将螺栓拧到超级歧管上。
    Informational PurposesAn informational icon, calling your attention
    注
    从热交换器上取下车间毛巾。
  4. 在助手协助下,将空调压缩机支架总成放到车辆中,然后用手预紧将空调压缩机总成连接到支柱塔梁的螺栓(2 个),然后按规定扭矩紧固。
    Informational PurposesAn informational icon, calling your attention
    注
    15 mm。扭矩为 31 Nm。
    Informational PurposesAn informational icon, calling your attention
    注
    安装螺栓时,支撑好空调压缩机。
    Informational PurposesAn informational icon, calling your attention
    注
    朝向车尾和支柱塔梁下方,小心地安装空调压缩机和空调压缩机支架。将支架避开冷却液软管和超级歧管线束。
  5. 将空调压缩机支架螺栓(2 个)拧紧到支柱塔梁。
    Informational PurposesAn informational icon, calling your attention
    注
    15 mm。扭矩为 31 Nm。
  6. 安装将前备箱线束连接到支柱塔梁的螺栓和卡子。
    Informational PurposesAn informational icon, calling your attention
    注
    10 mm 或 E10 5 角套筒扳手。扭矩为 9 Nm。
  7. 安装连接雨刮器安装支架的螺栓(4 个)。
    Informational PurposesAn informational icon, calling your attention
    注
    13 mm。扭矩为 25 Nm。
    Informational PurposesAn informational icon, calling your attention
    注
    沿支柱塔梁从右侧减震塔滑动支架,将其与高效空气过滤器 (HEPA) 外壳。
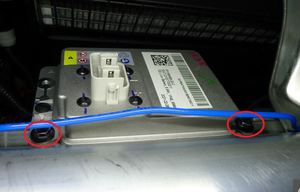
  8. 安装将低压电池连接到支柱塔梁的螺栓(3 个)。
    Informational PurposesAn informational icon, calling your attention
    注
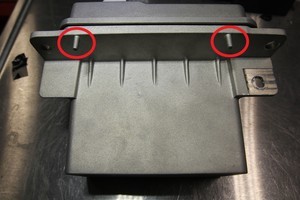
    3 个螺栓,10 mm,9 Nm2 个定位器
  9. 安装将超级歧管至电池冷却液泵供给软管固定到低压电池的软管夹。
  10. 安装将空气悬架管路前束固定到支柱塔梁总成的卡子(3 个)。
  11. 安装将前备箱线束连接到支柱塔梁的螺栓和卡子。
    Informational PurposesAn informational icon, calling your attention
    注
    10 mm 或 E10 5 角套筒扳手。扭矩为 9 Nm。
  12. 连接雨刮器模块电气连接器,然后安装连接雨刮器模块的螺栓(3 个)。
    Informational PurposesAn informational icon, calling your attention
    注
    10 mm。扭矩为 9 Nm。
    Informational PurposesAn informational icon, calling your attention
    注
    安装前固定电气连接器。
    Informational PurposesAn informational icon, calling your attention
    注
    将雨刮器模块向后、向上旋转到位。
  13. 安装将左前减震塔盖固定到减震塔的螺栓。
    Informational PurposesAn informational icon, calling your attention
    注
    13 mm。扭矩为 14 Nm。
  14. 安装将左前减震塔盖固定到支柱塔梁的螺栓(3 个)和卡子。
    Informational PurposesAn informational icon, calling your attention
    注
    13 mm。扭矩为 22 Nm。
  15. 安装将远端制动液储液罐连接到左前减震塔盖上的螺栓(2 个)。
    Informational PurposesAn informational icon, calling your attention
    注
    10 mm。扭矩为 8 Nm。1 个定位销。
    Informational PurposesAn informational icon, calling your attention
    注
    将储液罐连同支架旋到左前减震塔盖上。
  16. 安装将右前减震塔盖固定到减震塔的螺栓。
    Informational PurposesAn informational icon, calling your attention
    注
    13 mm。扭矩为 14 Nm。
    Informational PurposesAn informational icon, calling your attention
    注
    安装前,将键接接地线插入右前减震塔盖。
  17. 放置好前控制器,以便安装,然后放置好接地线。
    Informational PurposesAn informational icon, calling your attention
    注
    定位锁片(2 个)。
  18. 安装连接前控制器的螺栓(3 个)。
    Informational PurposesAn informational icon, calling your attention
    注
    10 mm。扭矩为 10 Nm。
    Informational PurposesAn informational icon, calling your attention
    注
    首先从两侧螺栓开始。
  19. 安装用于固定前控制器接地线的螺栓。
    Informational PurposesAn informational icon, calling your attention
    注
    10 mm。扭矩为 10 Nm。
  20. 连接前控制器上的下部电气连接器(2 个)。
    Informational PurposesAn informational icon, calling your attention
    注
    锁止连接器(2 个)。锁紧红色锁片。
  21. 连接前控制器上的右侧中间电气连接器(2 个)。
    Informational PurposesAn informational icon, calling your attention
    注
    锁止连接器(2 个)。
    Informational PurposesAn informational icon, calling your attention
    注
    确认黄色锁片已完全打开。将连接器放置到位,机构将开始接合。
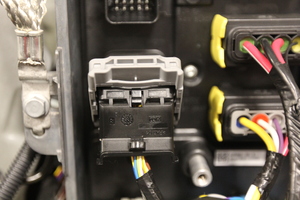
  22. 连接前控制器的左侧中间连接器。
    Informational PurposesAn informational icon, calling your attention
    注
    锁止连接器(1 个)。
    Informational PurposesAn informational icon, calling your attention
    注
    确认解锁杆已完全打开。座椅连接器和解锁杆将接合。
  23. 连接前部控制器的上部连接器(2 个)。
    Informational PurposesAn informational icon, calling your attention
    注
    锁止连接器(2 个)。
    Informational PurposesAn informational icon, calling your attention
    注
    确认解锁杆是否完全打开。座椅连接器和解锁杆将开始接合。
  24. 安装前围篦板。请参阅 面板 - 前围篦板(拆卸和更换)。
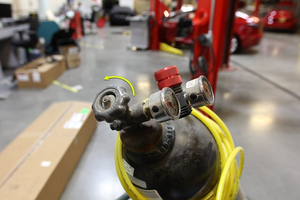
  25. 将 Schrader 阀盖从储气罐上拆下。
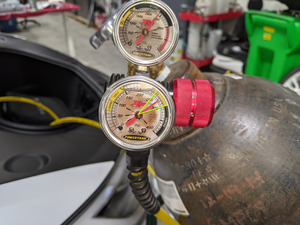
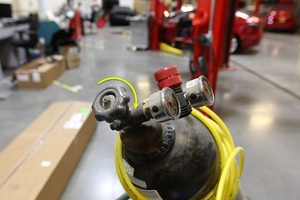
  26. 设置氮罐对储气罐进行充气。
    Informational PurposesAn informational icon, calling your attention
    注
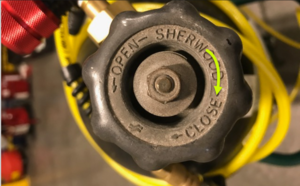
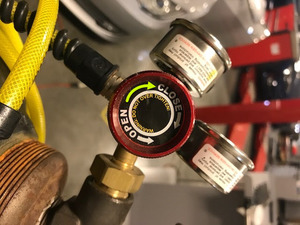
    确认氮罐、调节器和空气管线上的阀门都设置在关闭位置。
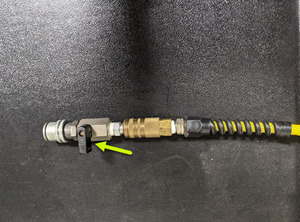
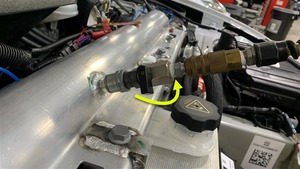
  27. 将氮罐软管连接到储气罐。
    Informational PurposesAn informational icon, calling your attention
    注
    早期生产的车辆(根据 VIN 确认)配备空调阀接头,需使用一个转接头适配 Schrader 充注型端口。
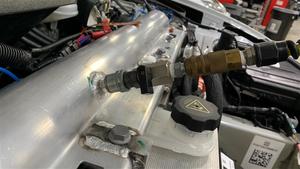
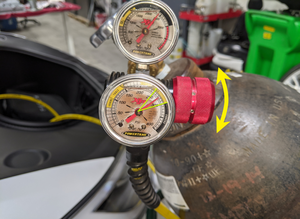
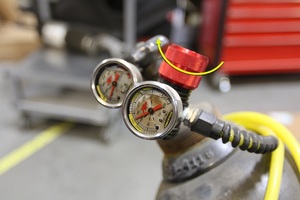
  28. 打开氮罐上的阀门,并使用调节器调节压力。
    Informational PurposesAn informational icon, calling your attention
    注
    缓慢打开阀门并调节调节器。确认压力设置为 18 Bar。
  29. 打开氮罐软管上的阀门。
  30. 确认调节阀表上的压力稳定在 18 Bar。
    Informational PurposesAn informational icon, calling your attention
    注
    如果压力变化,则可能存在泄漏。
  31. 关闭氮罐软管上的阀门。
  32. 关闭氮罐上的阀门。
  33. 关闭氮罐上的压力调节阀,释放管路中的压力。
  34. 将氮罐软管从储气罐上拆下。
  35. 将阀盖安装到储气罐阀门上。
  36. 重新连接低压电源。请参阅 低压电源(断开和连接)。
  37. 安装前备箱储物单元。请参阅 前备箱储物单元(拆卸和安装)。
  38. 再次将装有 Toolbox 3 的笔记本电脑与车辆相连。请参阅 Toolbox 3(连接和断开)。
  39. 使用 Toolbox 3 执行以下步骤:
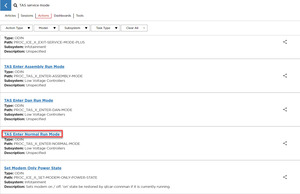
    1. 点击 Actions 选项卡,搜索 "TAS service mode"。
    2. 点击PROC_TAS_X_ENTER-NORMAL-MODEvia Toolbox: (link),然后点击Run。等待例行程序完成,然后再继续。
      Informational PurposesAn informational icon, calling your attention
      注
      完成后,点击窗口右上角的 X 关闭。
  40. 断开笔记本电脑与车辆的连接。请参阅 Toolbox 3(连接和断开)。
  41. 在车辆触摸屏上,将空气悬架从“千斤顶模式”切换为“标准”。