14/11/2024 15:02:29

八通阀(拆卸和更换)
校正代码 18209302 注意:除非本程序中另有明确规定,否则上述校正代码和 FRT 反映的是执行本程序(包括关联程序)所需的所有工作。除非明确要求,否则请勿堆叠校正代码。 注意:请参阅平均维修工时,深入了解 FRT 及其创建方式。要提供有关 FRT 值的反馈,请发送电子邮件至LaborTimeFeedback@tesla.com。 注意:执行下述程序时,请参阅人员保护确认已穿戴适当的个人防护装备 (PPE)。

Warning IconA warning icon, calling your attention to a possibly risky situation
警告
尽管此程序已经过验证,但仍是一个草案。可能没有警告和注意事项。请遵守安全要求,处理或靠近高压系统和部件时,请谨慎操作。请将校正修理内容及反馈发送至ServiceDevelopment@teslamotors.com。
  1. 举升并支撑车辆
    Informational PurposesAn informational icon, calling your attention
    注
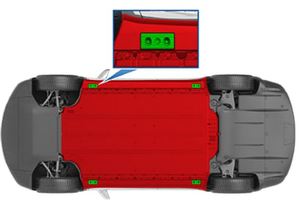
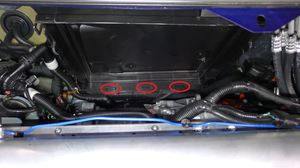
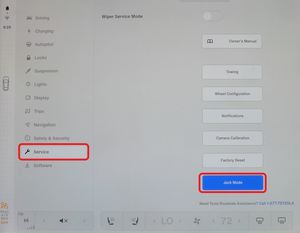
    将空气悬架设置为“千斤顶模式”;将举升臂垫置于车辆的千斤顶垫上;请勿将举升臂垫置于电池或纵梁下,如红色所示
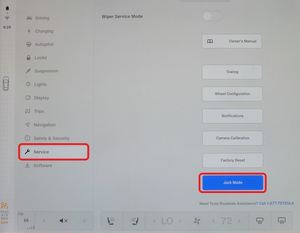
  2. 打开左前车门
  3. 降下左右前车窗
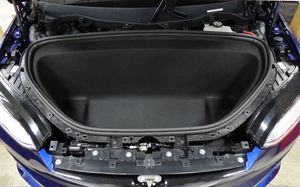
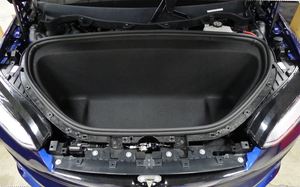
  4. 打开前备箱盖
    Informational PurposesAn informational icon, calling your attention
    注
    操作如下:center display > Quick Controls > Frunk Open
  5. 通过中央显示器关闭车辆电源
    Informational PurposesAn informational icon, calling your attention
    注
    操作如下:Controls > Safety & Security > Power Off
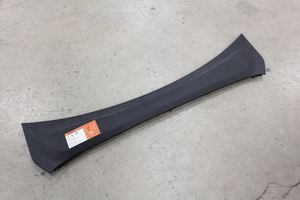
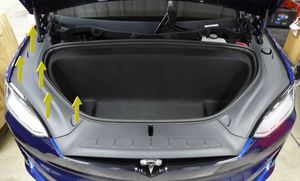
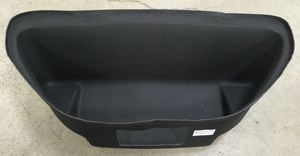
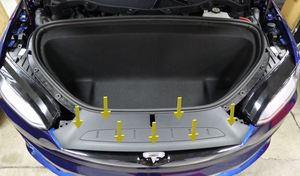
  6. 拆下前备箱后部挡板
    Informational PurposesAn informational icon, calling your attention
    注
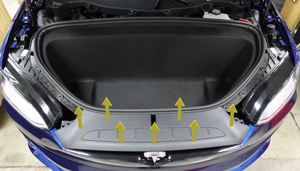
    11 个卡子
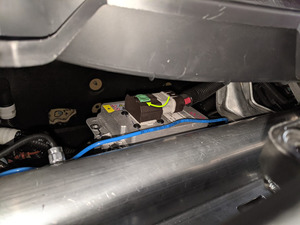
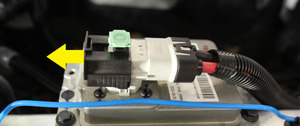
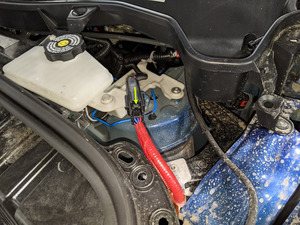
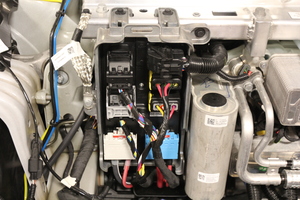
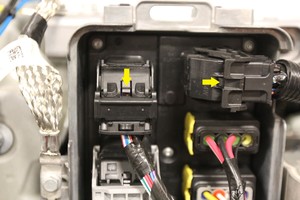
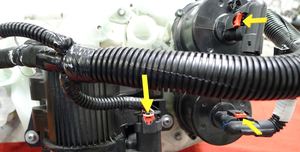
  7. 断开低压电池连接器和紧急响应回路
    Informational PurposesAn informational icon, calling your attention
    注
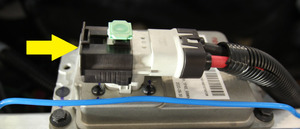
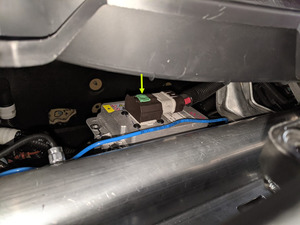
    2 个连接器;提起并松开绿色锁片,向外拉动黑色连接器锁以断开连接
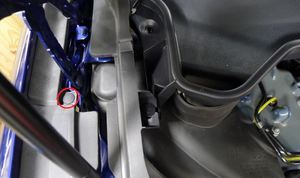
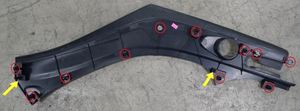
  8. 拆下前备箱右侧挡板
    Informational PurposesAn informational icon, calling your attention
    注
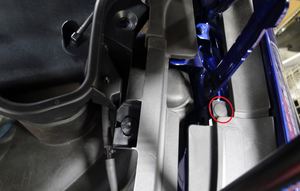
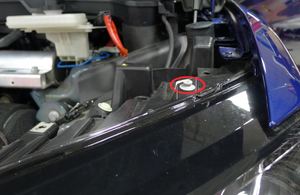
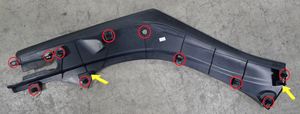
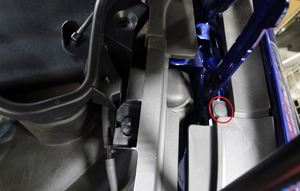
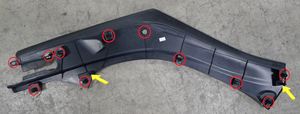
    11 个卡子,2 个固定销;先拆下铰链盖板上的雨刷夹;注意前照灯处的卡子。
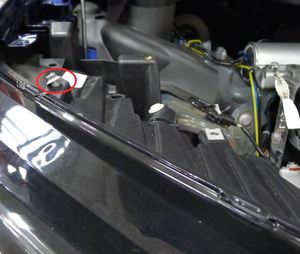
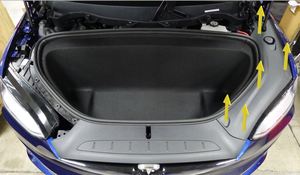
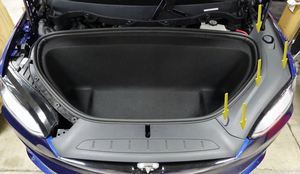
  9. 拆下前备箱左侧挡板
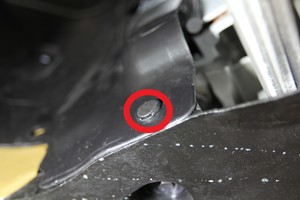
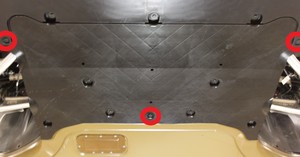
    Informational PurposesAn informational icon, calling your attention
    注
    11 个卡子,2 个固定销;先拆下铰链盖板上的雨刷夹;注意前照灯处的卡子。
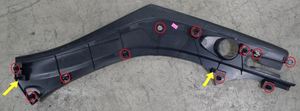
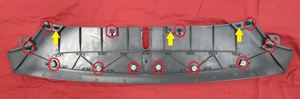
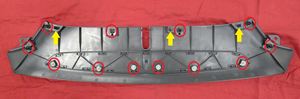
  10. 拆下前备箱前挡板
    Informational PurposesAn informational icon, calling your attention
    注
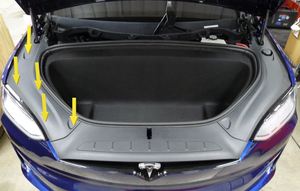
    12 个卡子,3 个固定销
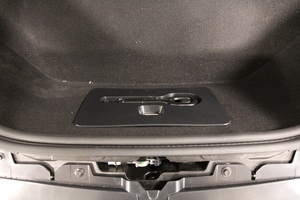
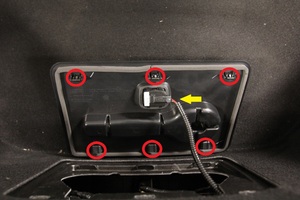
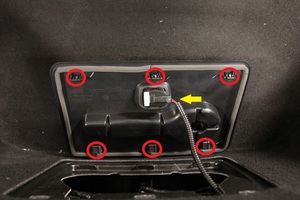
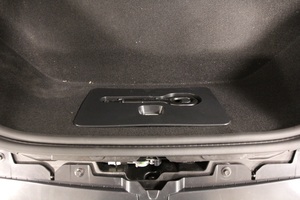
  11. 拆下前备箱检修板
    Informational PurposesAn informational icon, calling your attention
    注
    3 个卡子,3 个挂钩,1 个连接器
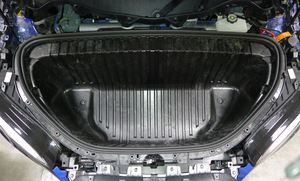
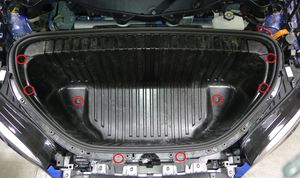
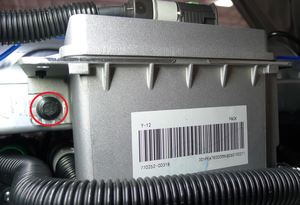
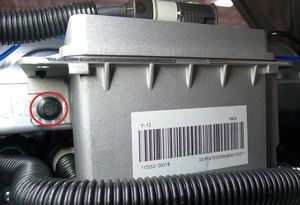
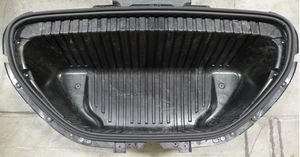
  12. 拆下前备箱地毯
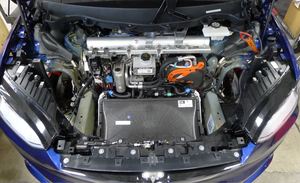
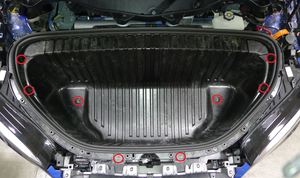
  13. 拆下前备箱总成
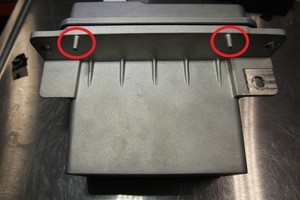
    Informational PurposesAn informational icon, calling your attention
    注
    8 个螺栓,10 毫米,5 Nm
  14. 松开右侧雨刮器臂软管喷嘴
    Informational PurposesAn informational icon, calling your attention
    注
    1 个软管
  15. 松开左侧雨刮器臂软管喷嘴
    Informational PurposesAn informational icon, calling your attention
    注
    1 个软管
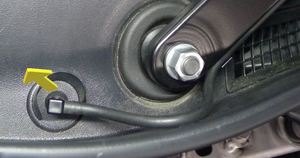
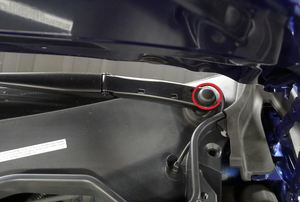
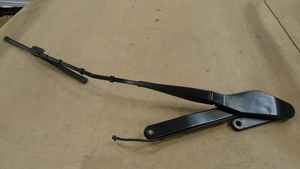
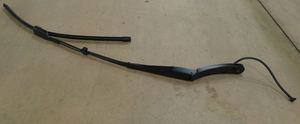
  16. 拆下左侧雨刮器臂螺母盖
    Informational PurposesAn informational icon, calling your attention
    注
    1 个盖子
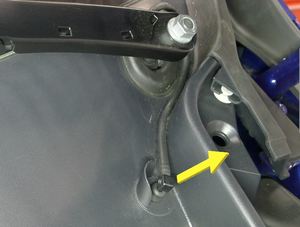
  17. 拆下右侧雨刮器臂螺母盖
    Informational PurposesAn informational icon, calling your attention
    注
    2 个盖子
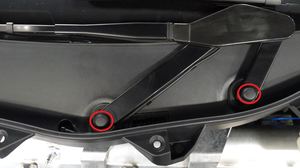
  18. 拆下右侧雨刮器臂螺母并松开总成
    Informational PurposesAn informational icon, calling your attention
    注
    2 个螺母,15 毫米,32 Nm;请勿弯曲雨刮器臂以将其拆下
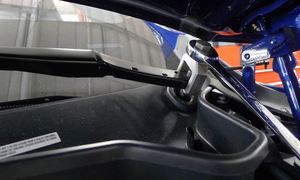
  19. 拆下左侧雨刮器臂螺母并松开总成
    Informational PurposesAn informational icon, calling your attention
    注
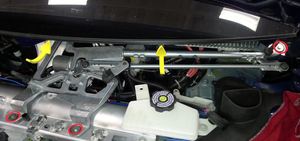
    1 个螺母,15 毫米,32 Nm;请勿弯曲雨刮臂以将其拆下;略微放下前备箱盖,以便使用雨刮器臂拆卸工具
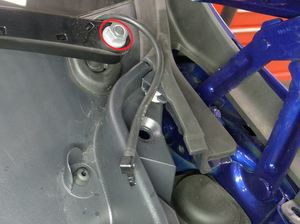
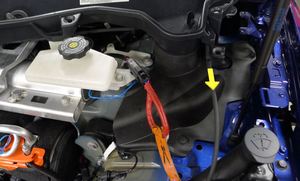
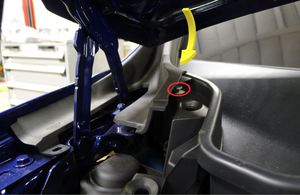
  20. 松开左侧减震塔盖板上方的前围篦板清洗剂供给软管。
    Informational PurposesAn informational icon, calling your attention
    注
    1 个软管
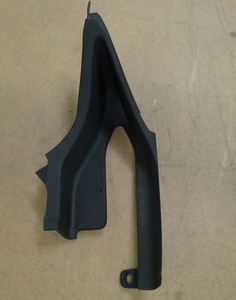
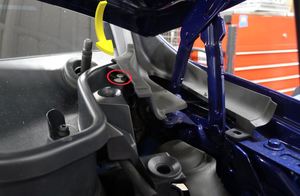
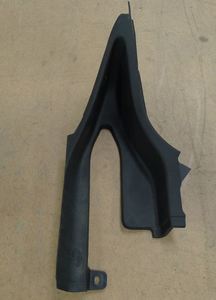
  21. 拆下前备箱盖左侧外部铰链盖板
    Informational PurposesAn informational icon, calling your attention
    注
    1 个卡子
  22. 拆下前备箱盖右侧外部铰链盖板
    Informational PurposesAn informational icon, calling your attention
    注
    1 个卡子
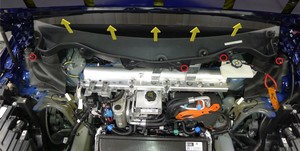
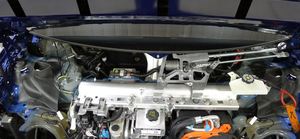
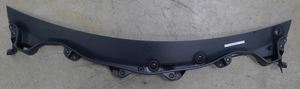
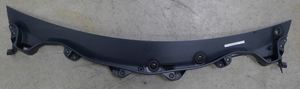
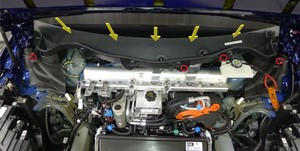
  23. 拆下雨刮器前围篦板面板
    Informational PurposesAn informational icon, calling your attention
    注
    4 个推拉式卡子;将前围板从下挡风玻璃槽中拉出
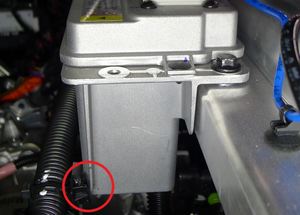
  24. 将冷却液软管从低压电池上松开
    Informational PurposesAn informational icon, calling your attention
    注
    1 个卡子
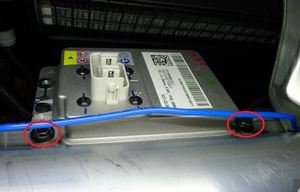
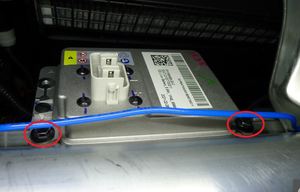
  25. 拆下用于紧固低压电池的紧固件,然后拆下总成
    Informational PurposesAn informational icon, calling your attention
    注
    3 个螺栓,10 毫米,9 Nm,2 个定位器
  26. 拆下雨刮器模块
    Informational PurposesAn informational icon, calling your attention
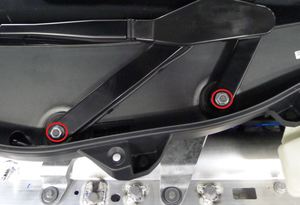
    注
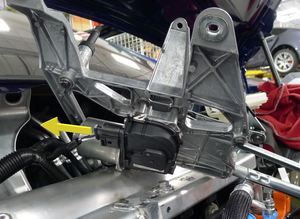
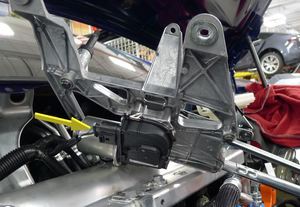
    3 个螺栓,10 毫米,9 Nm,1 个连接器。将模块向前向上旋转,以接触连接器
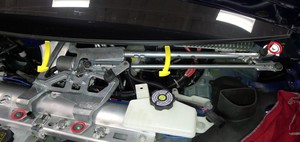
  27. 拆下雨刮器安装支架
    Informational PurposesAn informational icon, calling your attention
    注
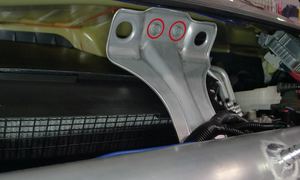
    4 个螺栓,13 毫米,25 Nm。沿着支柱塔梁向右侧减震塔滑动支架,分离高效分子空气 (HEPA) 过滤器外壳,以便拆卸
  28. 断开空气质量传感器线束
    Informational PurposesAn informational icon, calling your attention
    注
    1 个连接器
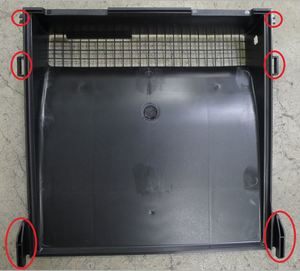
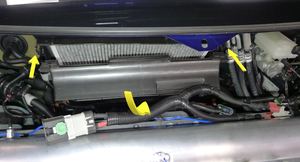
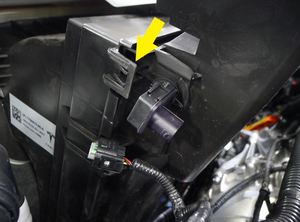
  29. 拆下高效分子空气 (HEPA) 过滤器总成盖板
    Informational PurposesAn informational icon, calling your attention
    注
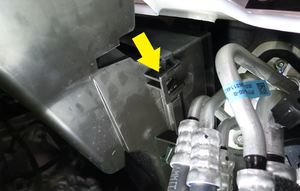
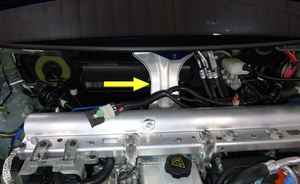
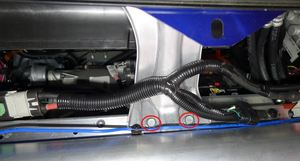
    2 个锁片
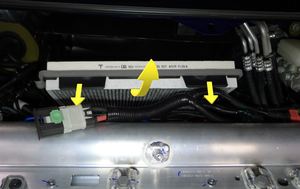
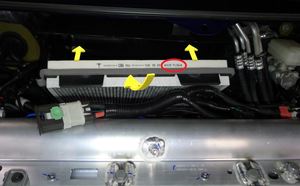
  30. 拆下高效分子空气 (HEPA) 过滤器
    Informational PurposesAn informational icon, calling your attention
    注
    2 个卡子;松开卡子;将过滤器往前推动着从外壳中取出
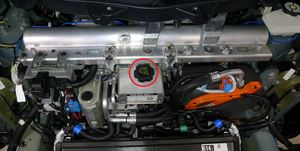
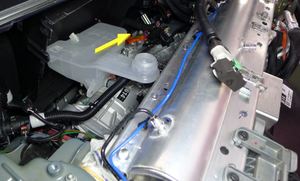
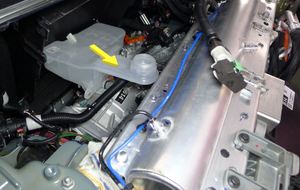
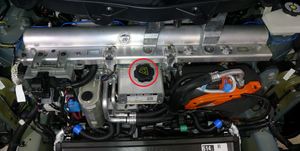
  31. 拆下冷却液罐罐盖
  32. 完全升起车辆,然后将举升机降低至锁止位
    Informational PurposesAn informational icon, calling your attention
    注
    将车辆设置到适宜的作业高度;务必在听到两侧的锁发出清晰的锁止声后再降下,否则车辆可能会发生侧倾
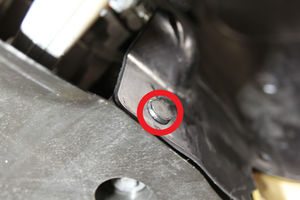
  33. 拆下用于固定前流线型护板的卡子
    Informational PurposesAn informational icon, calling your attention
    注
    5 个推拉式卡子
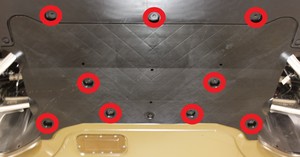
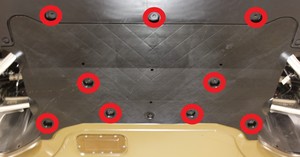
  34. 拆下用于固定前流线型护板的螺栓,并将前流线型护板从车辆上拆下
    Informational PurposesAn informational icon, calling your attention
    注
    9 个螺栓,10 毫米,6 Nm
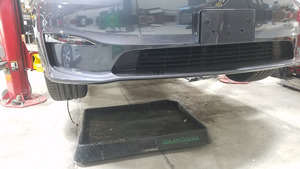
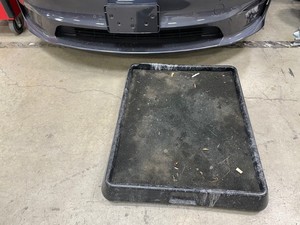
  35. 在车辆右前部下方放置冷却液收集器
  36. 降下车辆,直至轮胎接触到地面
    Informational PurposesAn informational icon, calling your attention
    注
    将举升机升离锁止位,然后固定住释放杆,使锁具在降下车辆时保持活动自如
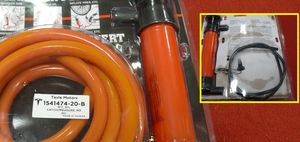
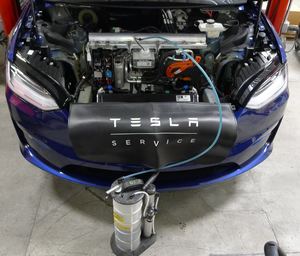
  37. 在车辆前部放置液体提取器
    Informational PurposesAn informational icon, calling your attention
    注
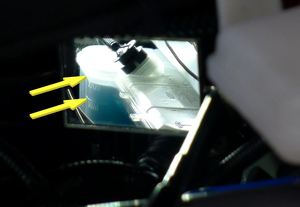
    将 Mityvac 设置为排空,确保抽取管上没有油污污染,将油尺管适配器从液体传输套件中固定到 Mityvac 上,引导管子穿过储液罐颈部并向下进入罐中
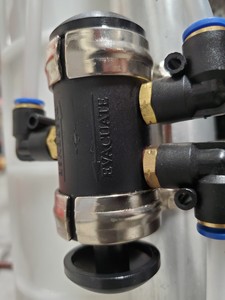
  38. 排空冷却液罐中的冷却液
    Informational PurposesAn informational icon, calling your attention
    注
    将液体泵入 Mityvac 排空器,在排空过程中移动罐中的管子以尽可能多地清出液体
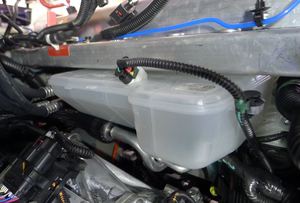
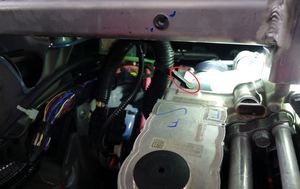
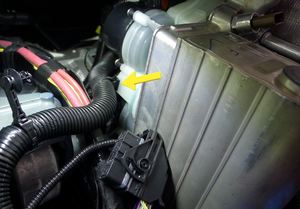
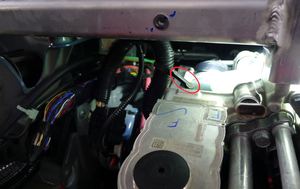
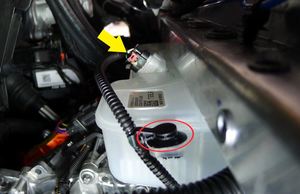
  39. 断开冷却液罐液位传感器连接器
    Informational PurposesAn informational icon, calling your attention
    注
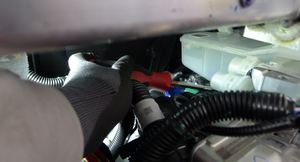
    1 个锁止电气连接器,1 个卡子;切勿向下按红色锁片;拉动红色锁片使锁脱离;再次拉动松开连接器
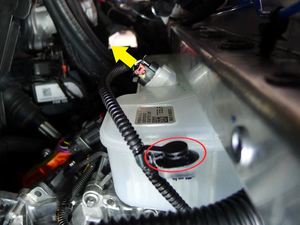
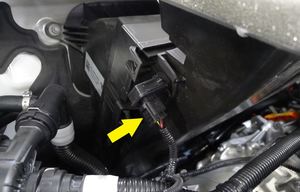
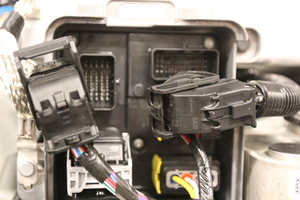
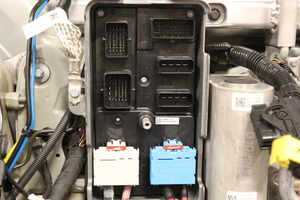
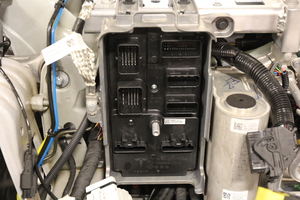
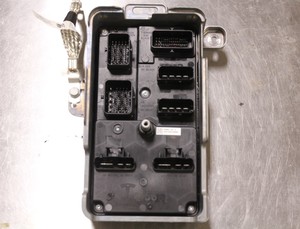
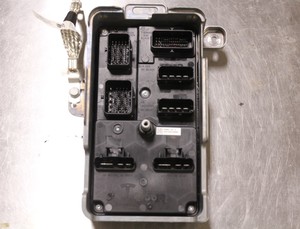
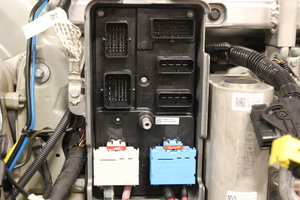
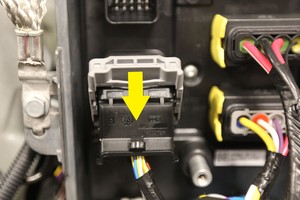
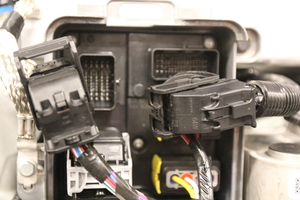
  40. 松开前控制器的上部连接
    Informational PurposesAn informational icon, calling your attention
    注
    2 个锁止连接器;推入锁片,抬起控制杆即可松开
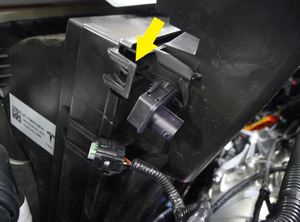
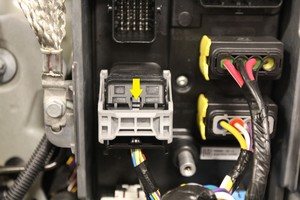
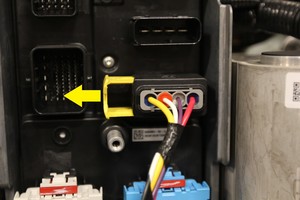
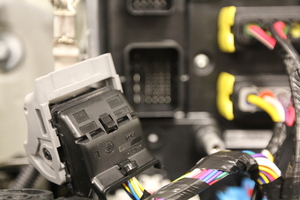
  41. 松开前控制器的左侧中间连接
    Informational PurposesAn informational icon, calling your attention
    注
    1 个锁止连接器;推入锁片,抬起控制杆即可松开
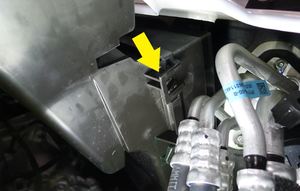
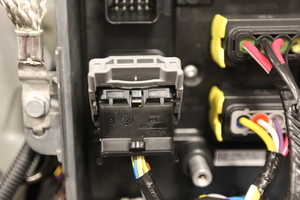
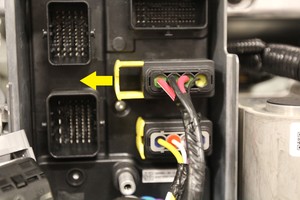
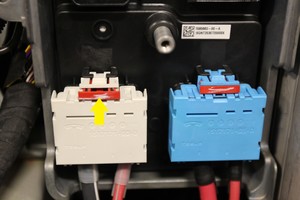
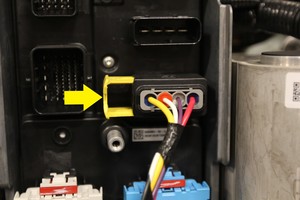
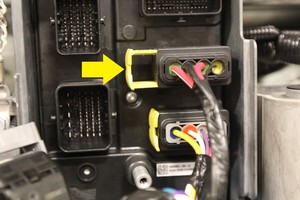
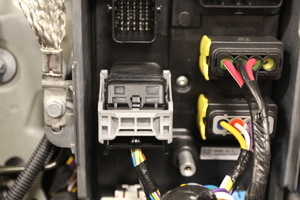
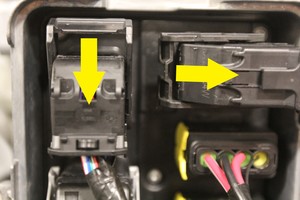
  42. 松开前控制器的右侧中间连接
    Informational PurposesAn informational icon, calling your attention
    注
    2 个锁止连接器;向外滑动锁止机构即可松开
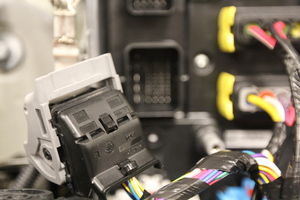
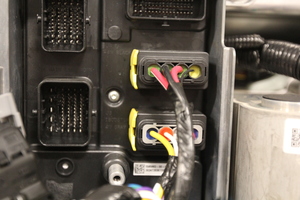
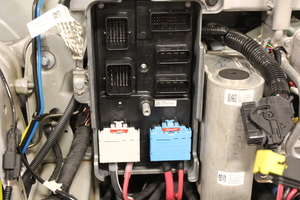
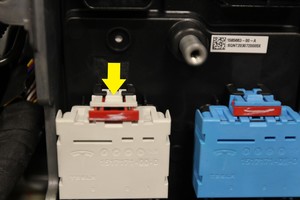
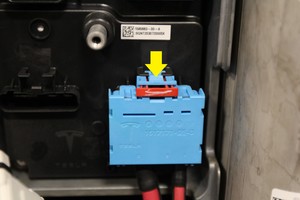
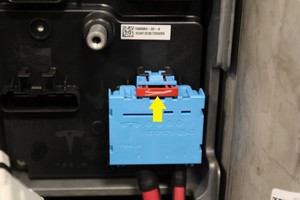
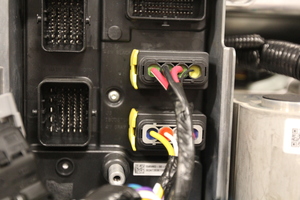
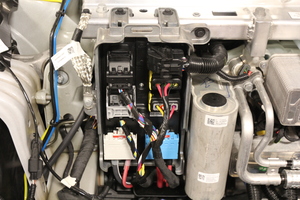
  43. 松开前控制器的下部连接
    Informational PurposesAn informational icon, calling your attention
    注
    2 个锁止连接器;向外滑动红色锁片即可松开
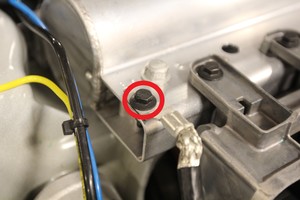
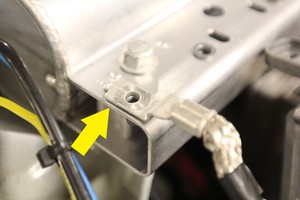
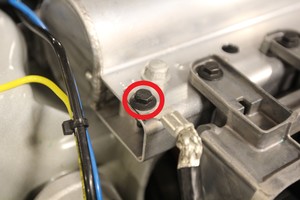
  44. 拆下固定前控制器接地线的螺栓
    Informational PurposesAn informational icon, calling your attention
    注
    1 个螺栓,10 毫米,10 Nm
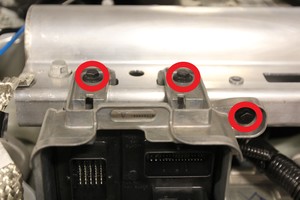
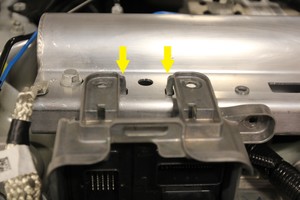
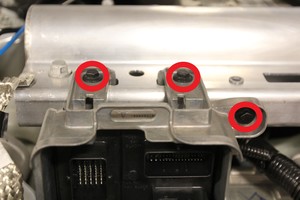
  45. 拆下用于固定前控制器的螺栓
    Informational PurposesAn informational icon, calling your attention
    注
    3 个螺栓,10 毫米,10 Nm
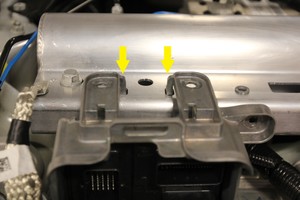
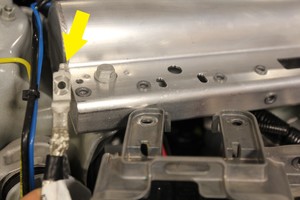
  46. 将前控制器从车辆上拆下,并将接地线从支柱塔梁上松开
    Informational PurposesAn informational icon, calling your attention
    注
    2 个定位锁片,1 条接地线
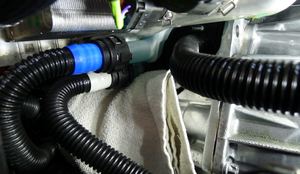
  47. 将毛巾放在塑料冷却液歧管下方的前驱动单元热交换器顶部
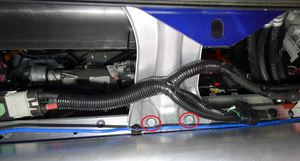
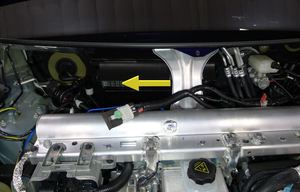
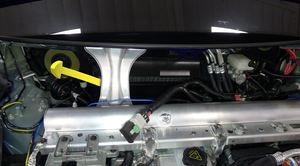
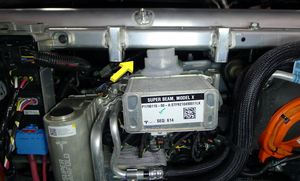
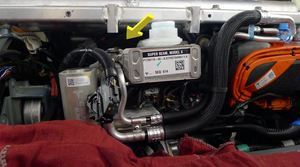
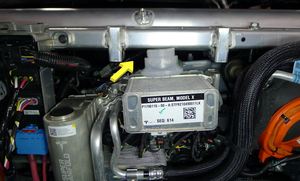
  48. 拆下将超级歧管固定到支柱塔梁的螺栓,慢慢地放在前驱动单元上
    Informational PurposesAn informational icon, calling your attention
    注
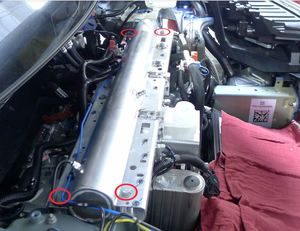
    2 个螺栓,15 毫米,31 Nm;建议请他人协助,从下方支撑,放在热交换器顶部的毛巾上
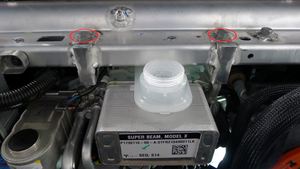
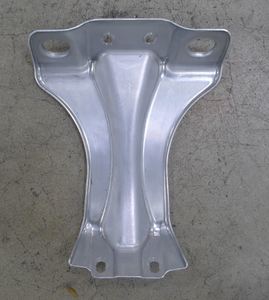
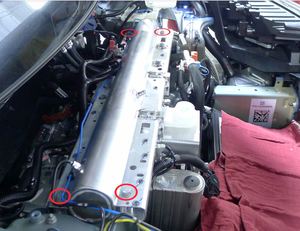
  49. 松开支柱塔梁
    Informational PurposesAn informational icon, calling your attention
    注
    4 个螺栓,15 毫米,31 Nm
  50. 在支柱塔梁的左右侧下方各放置一块折叠的毛巾
    Informational PurposesAn informational icon, calling your attention
    注
    将支柱塔梁抬起,以便清洁超级歧管顶部和横梁底部之间的储液罐加注口;如有需要,建议寻求他人协助
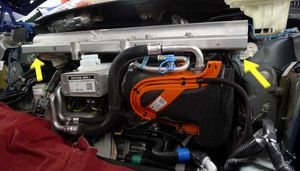
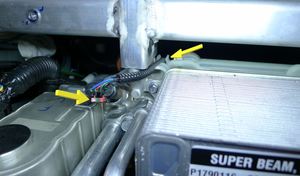
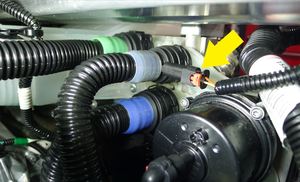
  51. 断开动力总成供给软管的传感器
    Informational PurposesAn informational icon, calling your attention
    注
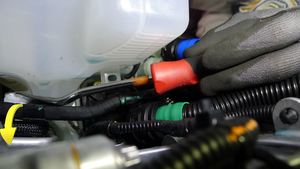
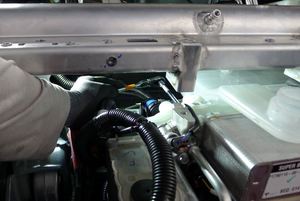
    1 个锁止电气连接器;请勿向下按压红色锁片;拉动红色锁片以解锁;再次拉动以松开连接器
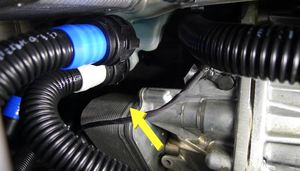
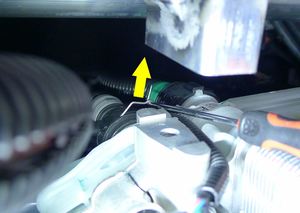
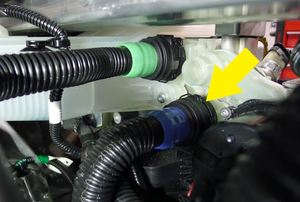
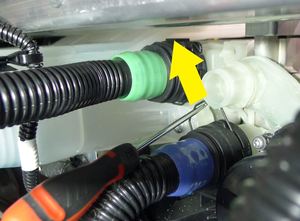
  52. 将动力总成供给软管从超级歧管上断开
    Informational PurposesAn informational icon, calling your attention
    注
    1 个弹簧夹;可以从超级歧管的前部接触到弹簧
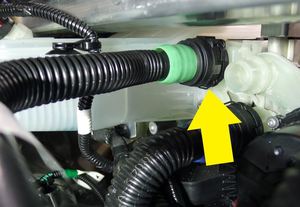
  53. 断开高压电池回流软管与超级歧管的连接
    Informational PurposesAn informational icon, calling your attention
    注
    1 个弹簧夹
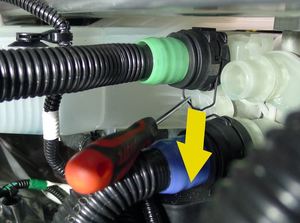
  54. 将冷却器至电池软管从超级歧管上断开
    Informational PurposesAn informational icon, calling your attention
    注
    1 个弹簧夹
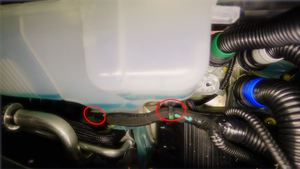
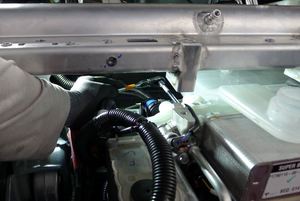
  55. 拆下冷却液罐底部固定加热泵线束的卡子
    Informational PurposesAn informational icon, calling your attention
    注
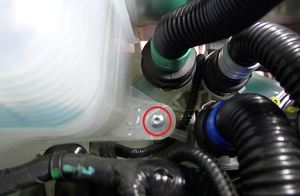
    2 个树形头卡子;从超级歧管的右侧接近
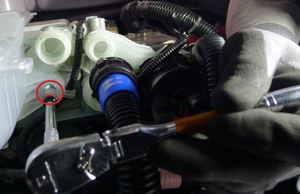
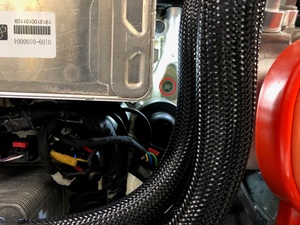
  56. 拆下位于冷却液罐后部,用于将冷却液罐固定到超级歧管的螺钉
    Informational PurposesAn informational icon, calling your attention
    注
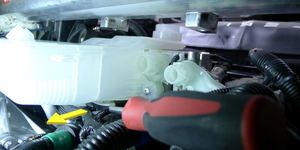
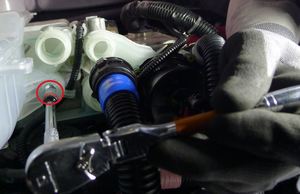
    1 个螺钉,T25,5 Nm,从超级歧管的右侧接近,松开螺钉,用磁铁取出
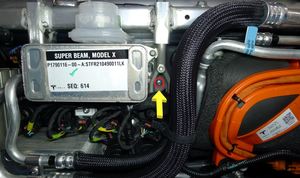
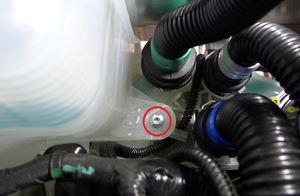
  57. 拆下位于冷却液罐前部,用于将冷却液罐固定到超级歧管的螺钉
    Informational PurposesAn informational icon, calling your attention
    注
    1 个螺钉,T25,5 Nm
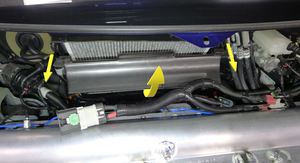
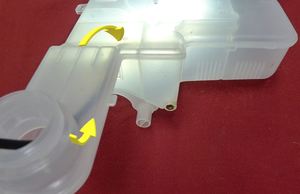
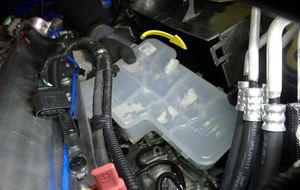
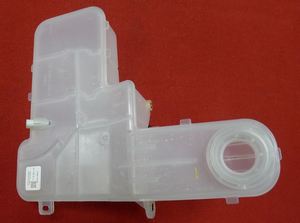
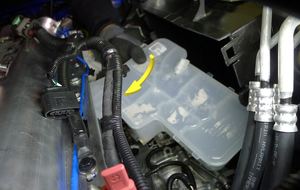
  58. 将冷却液罐从超级歧管上拆下
    Informational PurposesAn informational icon, calling your attention
    注
    将冷却液罐滑离超级歧管(向车尾方向滑动),从而将其拆下,然后旋出顶部
  59. 将超级歧管重新固定在支柱塔梁上
    Informational PurposesAn informational icon, calling your attention
    注
    2 个螺栓,15 毫米,31 Nm,建议请他人协助,从下方支撑,手动将螺栓预拧到超级歧管上,螺栓将在后续步骤中紧固
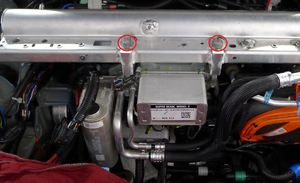
  60. 断开低压压力和温度 (PT) 传感器连接器
    Informational PurposesAn informational icon, calling your attention
    注
    1 个锁止电气连接器;切勿向下按红色锁片;拉动红色锁片使锁脱离;再次拉动松开连接器;从超级歧管处松开线束
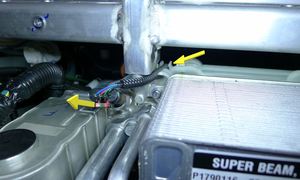
  61. 将温度系统线束从超级歧管上松开
    Informational PurposesAn informational icon, calling your attention
    注
    1 个树形头卡子,1 个夹子
  62. 将温度系统线束从 PT 冷却液泵、冷却器泵和八通阀上松开
    Informational PurposesAn informational icon, calling your attention
    注
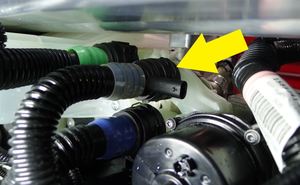
    3 个锁止电气连接器;切勿向下按红色锁片;拉动红色锁片使锁脱离;再次拉动松开连接器;将线束从超级歧管后部移开
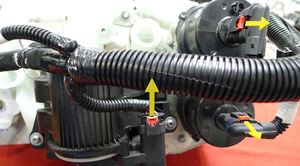
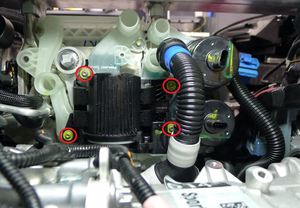
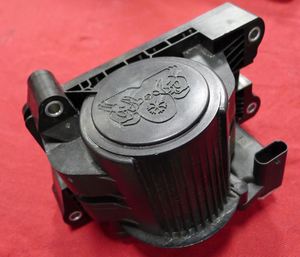
  63. 拆下将八通阀固定到超级歧管的紧固件,然后将八通阀从车上拆下
    Informational PurposesAn informational icon, calling your attention
    注
    4 个螺钉,T25,5 Nm
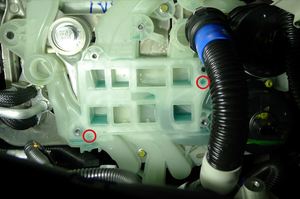
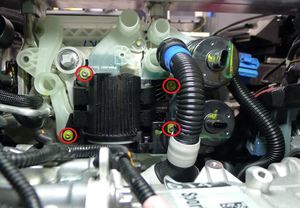
  64. 将八通阀放置到超级歧管上,然后安装将八通阀固定到超级歧管的紧固件
    Informational PurposesAn informational icon, calling your attention
    注
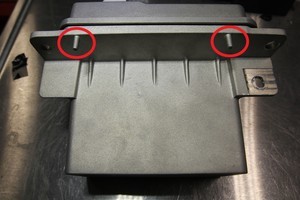
    4 个螺钉,T25,5 Nm,安装紧固件前,确保八通阀上的暗销与超级歧管接合,八通阀必须与超级歧管齐平才能正确密封
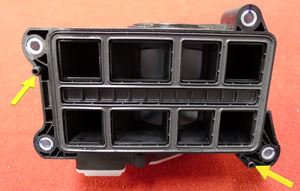
  65. 将温度系统线束安装到 PT 冷却液泵、冷却器泵和八通阀上
    Informational PurposesAn informational icon, calling your attention
    注
    3 个锁止电气连接器;接合锁片
  66. 将温度系统线束固定至超级歧管
    Informational PurposesAn informational icon, calling your attention
    注
    1 个树形头卡子,1 个夹子
  67. 连接低压压力和温度 (PT) 传感器连接器
    Informational PurposesAn informational icon, calling your attention
    注
    1 个锁止电气连接器;将线束固定在超级歧管上;接合锁片
  68. 将超级歧管从支柱塔梁上松开
    Informational PurposesAn informational icon, calling your attention
    注
    2 个螺栓,15 毫米,31 Nm,建议请他人协助,从下方支撑
  69. 将冷却液罐放置在超级歧管上
    Informational PurposesAn informational icon, calling your attention
    注
    确保垫片和 O 型环均未缺失并已就位,将冷却液罐滑入支柱塔梁和超级歧管顶部之间,将罐子完全插入冷却液歧管
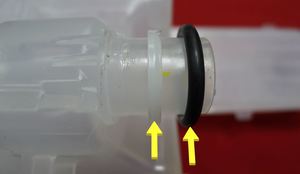
  70. 安装位于冷却液罐前部,用于将冷却液罐固定到超级歧管的螺钉
    Informational PurposesAn informational icon, calling your attention
    注
    1 个螺钉,T25,5 Nm
  71. 安装位于冷却液罐后部,用于将冷却液罐固定到超级歧管的螺钉
    Informational PurposesAn informational icon, calling your attention
    注
    1 个螺钉,T25,5 Nm
  72. 紧固冷却液罐底部固定加热泵线束的卡子
    Informational PurposesAn informational icon, calling your attention
    注
    2 个树形头卡子
  73. 紧固支柱塔梁
    Informational PurposesAn informational icon, calling your attention
    注
    4 个螺栓,15 毫米,31 Nm。取走折叠的毛巾,安装支柱塔梁,然后手动预拧螺栓
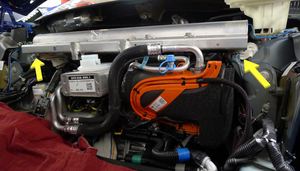
  74. 将超级歧管固定在支柱塔梁上
    Informational PurposesAn informational icon, calling your attention
    注
    2 个螺栓,15 毫米,31 Nm;建议请他人协助,从下方支撑,手动将螺栓预拧到超级歧管上,取走从热交换器上的毛巾
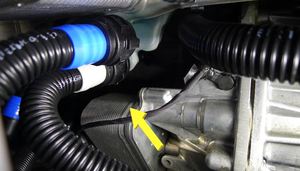
  75. 将冷却器至电池软管连接到超级歧管
    Informational PurposesAn informational icon, calling your attention
    注
    1 个弹簧夹;执行推拉推测试以确保软管完全就位
  76. 将高压电池回流软管连接到超级歧管
    Informational PurposesAn informational icon, calling your attention
    注
    1 个弹簧夹;执行推拉推测试以确保软管完全就位
  77. 将动力总成供给软管连接到超级歧管
    Informational PurposesAn informational icon, calling your attention
    注
    1 个弹簧夹;执行推拉推测试以确保软管完全就位
  78. 连接动力总成供给软管传感器
    Informational PurposesAn informational icon, calling your attention
    注
    1 个锁止电气连接器;接合锁片
  79. 连接冷却液罐液位传感器并紧固线束
    Informational PurposesAn informational icon, calling your attention
    注
    1 个锁止电气连接器,1 个卡子;接合锁片
  80. 加注冷却液至正确液位
    Informational PurposesAn informational icon, calling your attention
    注
    确保液位加注至 Max 线处
  81. 放置前控制器,以便安装,并将接地线固定在支柱塔梁上
    Informational PurposesAn informational icon, calling your attention
    注
    2 个定位锁片,1 条接地线
  82. 安装用于固定前控制器的螺栓
    Informational PurposesAn informational icon, calling your attention
    注
    3 个螺栓,10 毫米,10 Nm。从侧面螺栓开始安装
  83. 安装用于固定前控制器接地线的螺栓
    Informational PurposesAn informational icon, calling your attention
    注
    1 个螺栓,10 毫米,10 Nm
  84. 固定前控制器的下部连接
    Informational PurposesAn informational icon, calling your attention
    注
    2 个锁止连接器;接合红色锁片
  85. 固定前控制器的右侧中间连接
    Informational PurposesAn informational icon, calling your attention
    注
    2 个锁止连接器;确认黄色锁片已完全打开;固定连接器,锁止机构将开始接合
  86. 固定前控制器的左侧中间连接
    Informational PurposesAn informational icon, calling your attention
    注
    1 个锁止连接器;确认控制杆已完全打开;固定连接器,控制杆将开始接合
  87. 固定前控制器的上部连接
    Informational PurposesAn informational icon, calling your attention
    注
    2 个锁止连接器;确认控制杆已完全打开;固定连接器,控制杆将开始接合
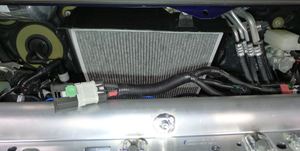
  88. 安装高效分子空气 (HEPA) 过滤器
    Informational PurposesAn informational icon, calling your attention
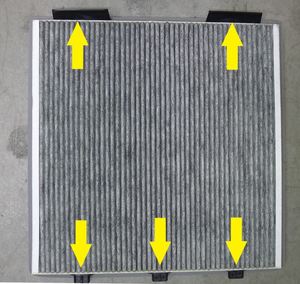
    注
    3 个固定销,2 个卡子;将 3 个固定销对准外壳的底部;确认气流方向;确保卡子锁定并将过滤器固定在外壳中
  89. 安装高效分子空气 (HEPA) 过滤器总成盖板
    Informational PurposesAn informational icon, calling your attention
    注
    2 个锁片,2 个固定销,2 个槽。完全接合密封件和锁片
  90. 连接空气质量传感器线束
    Informational PurposesAn informational icon, calling your attention
    注
    1 个连接器
  91. 安装雨刮器安装支架
    Informational PurposesAn informational icon, calling your attention
    注
    4 个螺栓,13 毫米,25 Nm。沿着支柱塔梁向右侧减震塔滑动支架,分离高效分子空气 (HEPA) 过滤器外壳,以便安装。
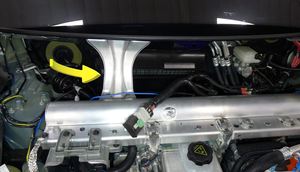
  92. 安装雨刮器模块
    Informational PurposesAn informational icon, calling your attention
    注
    3 个螺栓,10 毫米,9 Nm,1 个连接器。安装前请先紧固连接器。将模块向后向上旋转到位
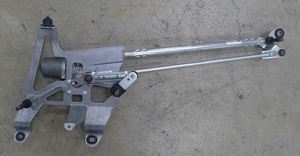
  93. 将低压电池安装到支柱塔梁上
    Informational PurposesAn informational icon, calling your attention
    注
    3 个螺栓,10 毫米,9 Nm。2 个定位器
  94. 将冷却液软管固定在低压电池上
    Informational PurposesAn informational icon, calling your attention
    注
    1 个卡子
  95. 安装雨刮器前围篦板面板
    Informational PurposesAn informational icon, calling your attention
    注
    4 个推拉式卡子。将前围板固定在下挡风玻璃槽内
  96. 紧固位于左侧减震塔盖板上方的前围篦板清洗剂供给软管
    Informational PurposesAn informational icon, calling your attention
    注
    1 个软管
  97. 安装前备箱盖左侧外部铰链盖板
    Informational PurposesAn informational icon, calling your attention
    注
    1 个卡子
  98. 拆下前备箱盖右侧外部铰链盖板
    Informational PurposesAn informational icon, calling your attention
    注
    1 个卡子
  99. 安装右侧雨刮器臂总成并紧固螺母
    Informational PurposesAn informational icon, calling your attention
    注
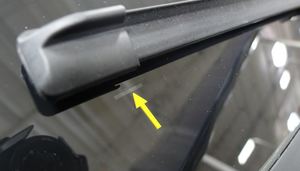
    2 个螺母,15 毫米,32 Nm。将雨刮器与挡风玻璃上的参考标记对齐
  100. 安装左侧雨刮器臂总成并紧固螺母
    Informational PurposesAn informational icon, calling your attention
    注
    1 个螺母,15 毫米,32 Nm
  101. 紧固左侧雨刮器臂软管喷嘴
    Informational PurposesAn informational icon, calling your attention
    注
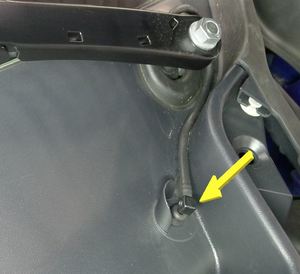
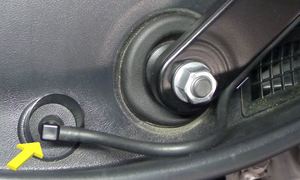
    1 个软管。软管安装在雨刮器臂枢轴上方
  102. 紧固右侧雨刮器臂软管喷嘴
    Informational PurposesAn informational icon, calling your attention
    注
    1 个软管。软管安装在雨刮器臂枢轴下方
  103. 安装右侧雨刮器臂螺母盖
    Informational PurposesAn informational icon, calling your attention
    注
    2 个盖子
  104. 安装左侧雨刮器臂螺母盖
    Informational PurposesAn informational icon, calling your attention
    注
    1 个盖子
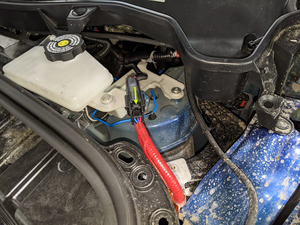
  105. 连接紧急响应回路和低压电池连接器
    Informational PurposesAn informational icon, calling your attention
    注
    2 个连接器;先固定好紧急响应回路;将低压电池放置好,再向内推动黑色连接器锁以进行固定;低压电池完全就位后,固定上部锁片
  106. 通过“维护模式”或 Toolbox 执行以下例行程序(请参阅 面板执行器0005 - 维修模式): TEST-SELF_VCFRONT_X_FIVE-WAY-VALVEvia Toolbox: (link)via Service Mode: Thermal ➜ Coolant System ➜ Coolant Valve Test
  107. 通过“维护模式”或 Toolbox 执行以下例行程序(请参阅 面板执行器0005 - 维修模式): TEST_VCFRONT_X_THERMAL-COOLANT-AIR-PURGEvia Toolbox: (link)via Service Mode:
    • Thermal ➜ Actions ➜ Coolant Purge Stop or Coolant Purge Start
    • Thermal ➜ Coolant System ➜ Coolant Purge Start
    via Service Mode Plus:
    • Drive Inverter ➜ Front Drive Inverter Replacement ➜ Coolant Air Purge
    • Drive Inverter ➜ Rear Drive Inverter Replacement ➜ Coolant Air Purge
    • Drive Inverter ➜ Rear Left Drive Inverter Replacement ➜ Coolant Air Purge
    • Drive Inverter ➜ Rear Right Drive Inverter Replacement ➜ Coolant Air Purge
    • Drive Unit ➜ Front Drive Unit Replacement ➜ Coolant Air Purge
    • Drive Unit ➜ Rear Drive Unit Replacement ➜ Coolant Air Purge
    ,点击 "Run",然后等待例行程序完成
    Informational PurposesAn informational icon, calling your attention
    注
    确保车辆未处于行驶状态;尽管出现停止消息,但例行程序仍在运行;冷却液泵将发出声音;测试持续大约 10 分钟;将车辆转入行驶状态可停止此例行程序;按要求监测液位
  108. 检查冷却液液位,必要时加满
    Informational PurposesAn informational icon, calling your attention
    注
    确保液位位于 Max 线处;按需求加满
  109. 安装冷却液罐罐盖
  110. 通过“维护模式”或 Toolbox 执行以下例行程序(请参阅 面板执行器0005 - 维修模式): TEST-SELF_VCFRONT_X_THERMAL-PERFORMANCEvia Toolbox: (link)via Service Mode: Thermal ➜ Actions ➜ Test Thermal Performancevia Service Mode Plus:
    • Drive Inverter ➜ Front Drive Inverter Replacement ➜ Thermal System Test
    • Drive Inverter ➜ Rear Drive Inverter Replacement ➜ Thermal System Test
    • Drive Inverter ➜ Rear Left Drive Inverter Replacement ➜ Thermal System Test
    • Drive Inverter ➜ Rear Right Drive Inverter Replacement ➜ Thermal System Test
    • Drive Unit ➜ Front Drive Unit Replacement ➜ Thermal System Test
    • Drive Unit ➜ Rear Drive Unit Replacement ➜ Thermal System Test
    Informational PurposesAn informational icon, calling your attention
    注
    完成后,点击右上角的 "X" 关闭窗口,如果温度测试失败,请按照 https://toolbox.teslamotors.com/articles/206000 上的说明操作
  111. 安装前备箱总成
    Informational PurposesAn informational icon, calling your attention
    注
    8 个螺栓,10 毫米,5 Nm
  112. 安装前备箱地毯
    Informational PurposesAn informational icon, calling your attention
    注
    确认地毯妥善固定到密封下方
  113. 安装前备箱检修板
    Informational PurposesAn informational icon, calling your attention
    注
    3 个卡子,3 个挂钩,1 个连接器
  114. 安装前备箱前挡板
    Informational PurposesAn informational icon, calling your attention
    注
    12 个卡子,3 个固定销
  115. 安装前备箱左侧挡板
    Informational PurposesAn informational icon, calling your attention
    注
    11 个卡子,2 个固定销
  116. 安装前备箱右侧挡板
    Informational PurposesAn informational icon, calling your attention
    注
    11 个卡子,2 个固定销
  117. 安装前备箱后部挡板
    Informational PurposesAn informational icon, calling your attention
    注
    11 个卡子
  118. 关闭前备箱盖
  119. 完全升起车辆,然后将举升机降低至锁止位
    Informational PurposesAn informational icon, calling your attention
    注
    将车辆设置到适宜的作业高度;务必在听到两侧的锁发出清晰的锁止声后再降下,否则车辆可能会发生侧倾
  120. 取走车辆下方的冷却液收集器
  121. 向前流线型护板螺栓上涂抹 Loctite 222,然后安装将前流线型护板固定到车辆的紧固件
    Informational PurposesAn informational icon, calling your attention
    注
    9 个螺栓,10 毫米,6 Nm
  122. 安装用于固定前流线型护板的卡子
    Informational PurposesAn informational icon, calling your attention
    注
    5 个推拉式卡子
  123. 完全降下车辆
    Informational PurposesAn informational icon, calling your attention
    注
    将举升机升离锁止位,然后固定住释放杆,使锁具在降下车辆时保持活动自如
  124. 将车辆驶离举升机
    Informational PurposesAn informational icon, calling your attention
    注
    完全降下举升架臂并将其从车底移走;将空气悬架退出“千斤顶模式”
  125. 校准后车门。
    Informational PurposesAn informational icon, calling your attention
    注
    若车辆触摸屏上弹出“需要校准”消息,请长按Calibrate,以校准后车门。
  126. 升起左前和右前车窗
  127. 关闭左前车门